• 10Sep
    Categories: Everything! Comments: 1

    It all started when our summer neighbor in Sweden, Karin, brought us a bottle of homemade rhubarb saft (pronounced “soft”).

    Saft1

    Saft is a fruit concentrate that you add to still or sparkling water for a refreshing summer drink.  It’s so delicious, I just had to try making some myself.  And Karin was nice enough to share the recipe.

    You will need:

    4 – 5 pounds rhubarb

    2 lemons

    Boiling water

    5 cups sugar

    2 pinches sodium benzoate

    2 pinches citric acid

    Wash the rhubarb and cut into 1/2″ slices. Place half in a heatproof pan or bowl.

    Saft3

    Wash the lemons and slice thinly.  Spread over the rhubarb in the pan.

    Saft4

    Add the rest of the rhubarb.

    Saft5

    Cover with boiling water.

    Saft6

    Cover with plastic or a lid and put in a cool place (our cellar worked great) for four days.

    Saft7

    Strain the fruit through a jelly bag or two layers of cheesecloth.  Let it run about 60 minutes.

    Saft2

    Add the sugar and boil for 20 minutes.  Let stand for five minutes and skim.

    Add preservatives.  Pour into warm bottles and seal.

    Saft8

    Pour about 2″ in the bottom of a glass.  Add flat or sparkling water.

    osd1

    Perfect on a hot day!


  • 22Jul
    Categories: Everything! Comments: 1

    pie1

    Much to my delight, I discovered we have several rhubarb plants in our yard here at our Swedish house. My grandmother was the best pie maker, and one of my favorites was her rhubarb custard pie. I couldn’t wait to make one!

    When I posted a photo of this on my Facebook page, several people asked for the recipe, so here it is. I didn’t have a pie plate here, so I used this 10” square pan. And, I didn’t have a rolling pin, so had to adapt a no-roll pie crust recipe I found online. I liked this one because it used both butter and oil.

    Rhubarb Custard Pie

    Crust

    1-1/2 cups flour

    1 tsp salt

    2 tbl sugar

    ¼ cup cold butter, grated

    ¼ cup oil

    2 tbl milk

    Mix dry ingredients. Stir in grated butter to distribute evenly. Add milk and oil. Stir. Dough will be crumbly. Press into bottom and up the sides of a 10” square pan (a 10” pie pan or 9” x 13” pan would work, too). Chill while preparing filling.

    Rhubarb Filling

    3-1/3 cups rhubarb

    1-1/3 cups sugar

    2-1/2 tlb flour

    ½ tsp salt

    4 egg yolks

    1-1/3 cup heavy cream

    Cut rhubarb into small pieces and spread over crust. Whisk remaining ingredients. Pour over rhubarb. Bake at 350 degrees 50 – 60 minutes, until custard is set. About 5 minutes before pie is done baking, prepare meringue.

    Meringue

    4 egg whites

    ¼ tsp cream of tartar

    ¼ cup sugar

    Beat egg whites and cream of tartar until foamy. Gradually add sugar and continue beating until stiff peaks form. Spread meringue over top of pie, all the way to the edges. Make peaks with the back of a spoon or edge of a spatula. Return to oven for 10 minutes, or until meringue is golden brown.

    You can serve this warm or cold. Refrigerate after a few hours.

    Tags:
  • 31May
    Categories: Everything! Comments: 2

    Really!

    I actually made this pillow in nine minutes—and, I was taking photos along the way!

    plo1

    It only required sewing two seams–TWO SEAMS!  This is for an 18″ pillow form.

    First, cut a half yard piece of your chosen fabric, 18″.  I got to thinking if you bought a half yard of fabric, you could skip this step!  And, no, I didn’t add anything for seam allowances, because I like my pillow to fit snugly.

    pwo01

    Take it to the ironing board and press it, getting rid of that fold mark in the middle.

    pwo02

    Now, back to the cutting board.  Lay the fabric facedown, lengthwise, with about 11″ hanging off to the left of your first mark.  Fold that hanging down part over so that the fold is along the first mark on your cutting board.  We’re taking advantage of the selvedges here, so this should be the selvedge without the printing on it.

    pwo03

    Now fold the other half over, making that fold along the 18″ mark.

    pwo04

    Stick some pins in along the top and bottom edges.

    pwo05

    Take it to your machine and sew the two seams!  I went back and forth where the fabrics overlapped.

    pwo06

    Reach in and turn it right side out!

    pwo07

    I use this little wooden gizmo to poke out the corners.

    pwo08

    Press again.

    pwo09

    Stuff in your pillow form and, voila!

    pwo10

    A quick pillow in just 10 minutes—or less!  It even looks good on the back!

    pwo13


    Tags:
  • 08May
    Categories: Everything! Comments: 8

    In Sweden, everyone takes their shoes off when they enter your house. Since floors can be cold, I thought it would be fun to have a basket of slippers for my guests.

    slp2

    So I went to the local thrift store and bought a wool coat.

    slt01

    It was 100% wool and very nicely made.

    slt02

    It took me about a half hour to take it all apart.  I tossed the lining and any interfacing, and was left with a nice stack of wool.  I wanted to felt it so I tossed into the washer with a little soap and set the machine for the longest, hottest cycle to felt the wool.  Then I tossed it into a hot dryer.  Voila!  Felted wool!  Now the slippers will be washable!

    slt03

    I looked around the web for tutorials on how to make slippers and found quite a few.  I found the one I liked best here and adapted it.

    Instead of tracing around my foot to make a pattern, I started by tracing around my shoe.

    slt07

    I figured if I used the outside of my shoe, I’d be just right for seam allowances.

    slt08c

    I stacked up two pieces of wool and cut two soles.

    msl1

    I also cut two long pieces 4″ x 31″.

    slt06

    I bought some non-skid slipper stuff for the bottom and cut out two of those, slightly larger than the soles, planning to cut them down later.  I used some spray baste to stick them to the bottom of the soles.

    slt05

    Then I made some bias binding.  I used scraps, but you can cut what you need out of 1/3 yard of fabric.  I cut six strips on a 45 degree angle and sewed them together.  Then I pressed the strip in half, opened it up and pressed the edges to the middle.

    slt10

    I pinned the binding along one long edge of the strip.

    slt11

    I used a triple zigzag stitch to attach it.

    slt09

    I folded the long strip in half to find the middle, then started pinning at the heel and about half way along each side.

    slt12

    Then I stuck my foot in there!

    slt14c

    I lapped one side over…

    slt15

    …then the other.

    slt16

    Then I continued pinning, feeling the sole underneath, and pinning around the toe.

    slt17

    Here’s what it looked like from the bottom.

    msl2

    I trimmed away the excess, took it to the machine and stitched around the perimeter.

    slt19

    When you make the second one, be sure you lap the strip in the opposite direction.

    slp1

    Then I borrowed Robin’s serger and went around the edges again.

    slt20

    I made two small, two medium and two large!  I used Bob’s shoe for the large and just reduced mine for the small.

    slt21

    Hopefully, everyone will have toasty toes when they visit!


  • 22Apr
    Categories: Everything! Comments: 6

    I love the glass doored cabinets in our Swedish kitchen.  The trouble is, I had nothing to put in them!  On a trip to Anthropology, I saw some cute cut-out letters and thought that would be a simple solution, but what letters?  Our initials seemed kind of weird.

    kit1

    Then it hit me–why not write “kitchen,” but in Swedish.  The word is kök–just three letters.  And there were seven cupboards–three above window.  I went to the craft store and had to get creative to get the two dots above the “o”.

    kok1

    I bought some red paint and gave everything a couple of coats.

    kok2

    I found this scrapbook paper and decided to do some decoupage.

    ppr1

    The cutting out was a bit tricky.

    kok3

    But the decoupage was fun!

    kok4

    Bob made some great bases for me–and eventually figured out how to mount the dots above the “o”!

    kok5

    Of course, when I got back to Sweden, I found I could have bought letters there–with the appropriate characters.

    kok7

    The letters worked out great!

    kok8

    It was tricky getting a photo without glare on the glass.

    kok9

    But, the letters served the purpose–filling up some space!

    kok6


  • 20Apr

    I found an inexpensive airfare to Sweden in March and decided to take a quick trip over there to look for some furniture for our Swedish house, primarily a bed so we’d have someplace to sleep this summer.  Instead, with Torsten’s help and encouragement, we remodeled the dining room!

    Here’s what it looked like in the real estate listing photos.

    drm01

    The ceiling was natural knotty pine, the walls had plywood panelling….

    drm02

    …and there was a wall of built-ins along one side of the room.

    drm03

    It isn’t a very big room, so we removed the built-ins.  Since you can never have enough storage, we’ll find someplace else in the house to use them.

    drm04

    Then I pulled the moldings and plywood paneling off the walls.  The old glue was quite dry, so they came off easily, but it took a lot of sanding to get rid of the glue that was left on the particle board.

    drm05

    Now we had a bare wall where the cabinets used to be.

    drm06

    And we just happened to have an extra window that we took out of the kitchen when we put a smaller one in there.  So, Torsten cut a hole in the wall and, voila! A new view!

    drm08

    It even makes the outside of the house look better.

    drm13

    I put a coat of paint over the particle board to seal it and mudded the seams–all in preparation for wallpaper above the wainscoting.

    drm09

    Torsten nailed up the wainscoting…

    drm10

    …and I painted it the same gray as we used in the kitchen.

    drm11

    All of the moldings were painted white.

    drm17

    The ceiling got four coats of white paint.  This is my “three-ladder-method” for ceiling painting.  Luckily the room wasn’t any bigger, or we would have needed more ladders!

    drm12

    The old flooring was a yellowish brown sheet vinyl.  It didn’t look so great up against the gray Marmoleum in the kitchen.

    drm15

    The solution?  Winter Oak Pergo!  Here it is, laid out in the bedroom acclimating to the house.

    drm14

    I loved it from the minute we started putting it down.

    drm18

    What do you think?

    drm19

    Then my favorite part–wallpaper!

    drm20

    Torsten is a saint.  Not because he can do everything, but because picking a geometric wallpaper for an old house would make most people swear like a sailor!

    drm20

    He didn’t utter one cross word, and it looks terrific!

    drm21

    The previous owners left us the dining room table, so of course we had to have fika in the newly finished room.

    drm22

    There are still some things to do–like paint the table and the corner cabinet, and put up window coverings, but I think it looks pretty darned good for two weeks work!

    drm23

    And, oh, I did buy some furniture.  On the last day before I left, we went to Ikea and bought a bed and nightstands–and this cute rug for under the table!

    drm24

    I’ll be ready to host a dinner party before long!


  • 13Apr
    Categories: Everything! Comments: 6

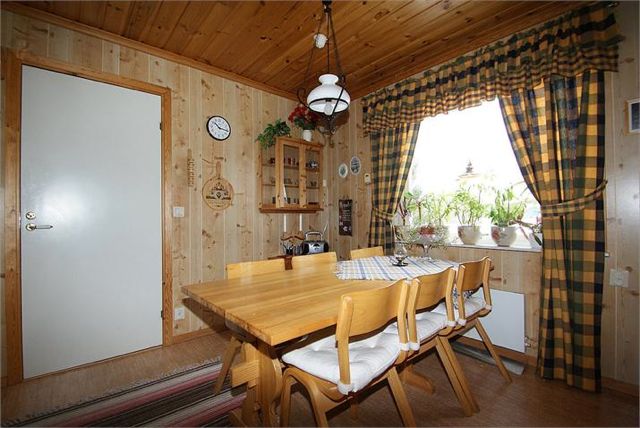
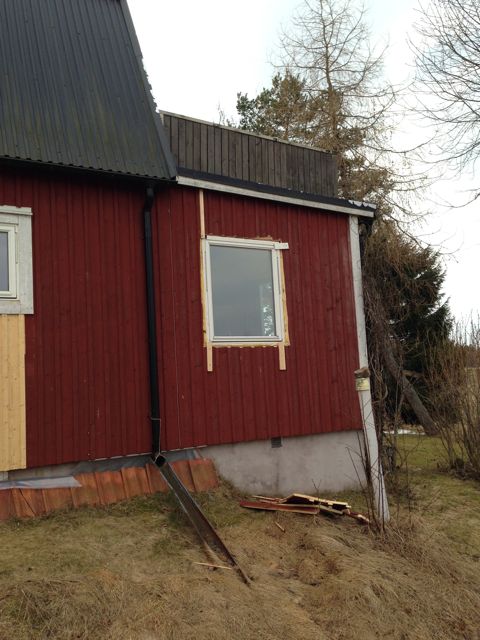
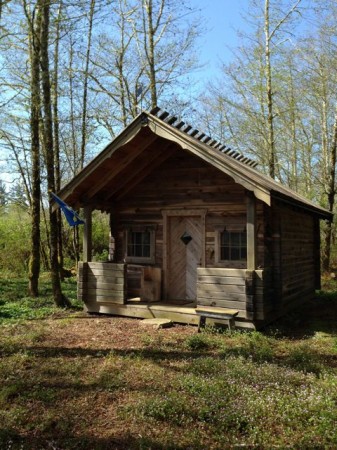
    With beautiful weather predicted for this weekend, the time seemed right to open the Swedish cabin for the season.  The cabin is my little piece of Sweden in the woods behind my house.  A perfect retreat when I can’t be in  Sweden.

    buf06

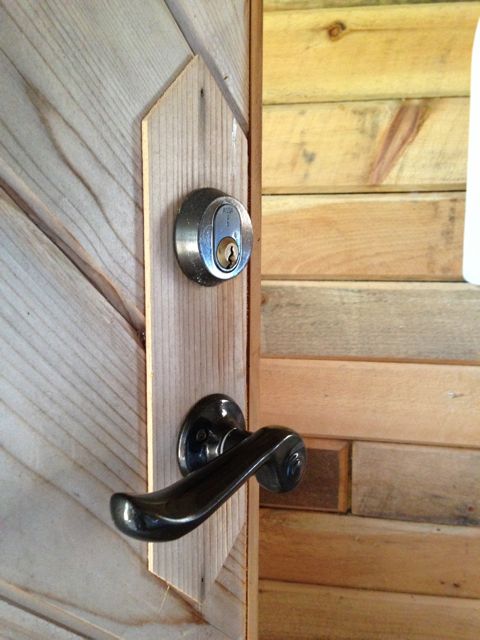
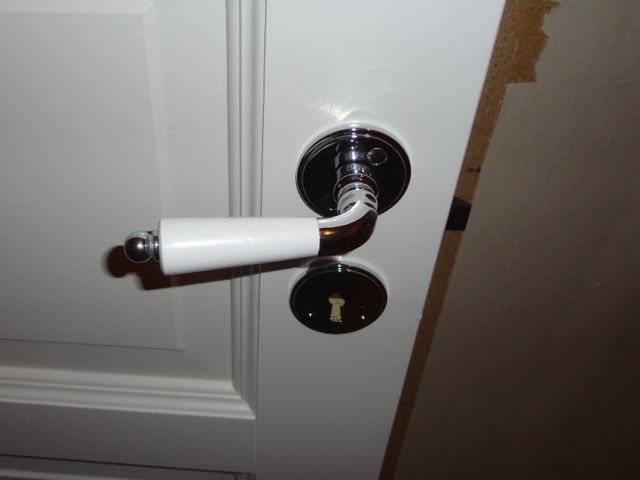
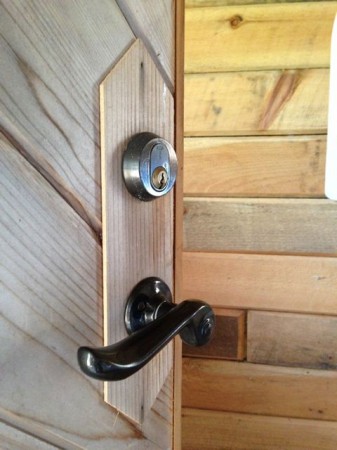
    There’s the typical herringbone door…

    dr1

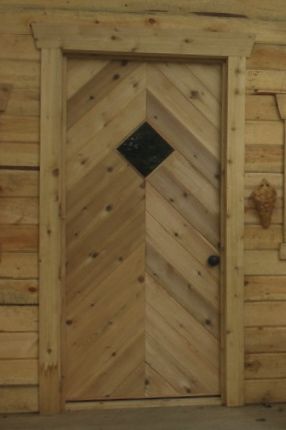
    …with hardware I brought home from Sweden.

    buf30

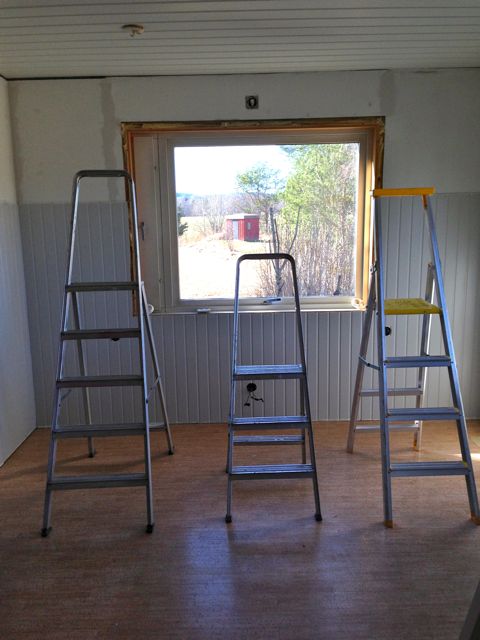
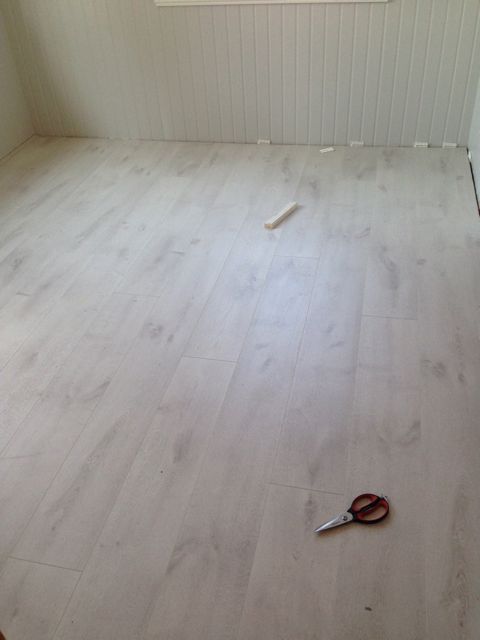
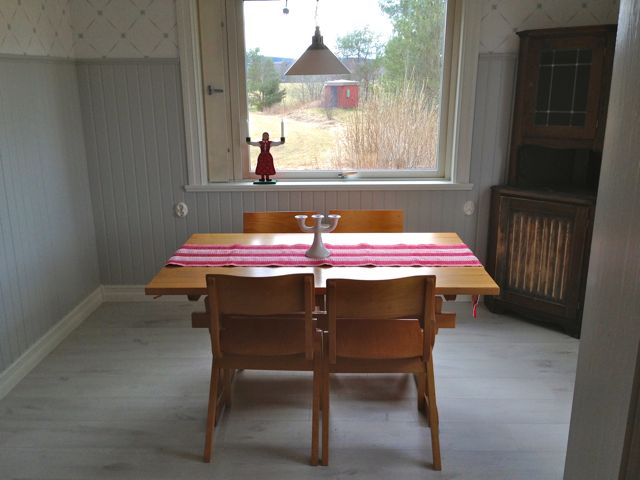
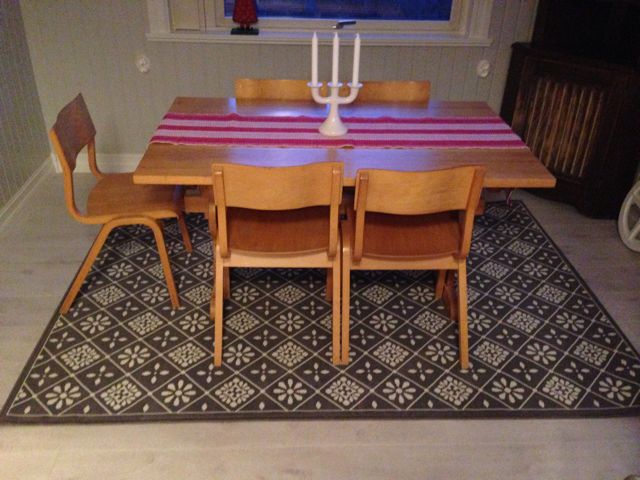
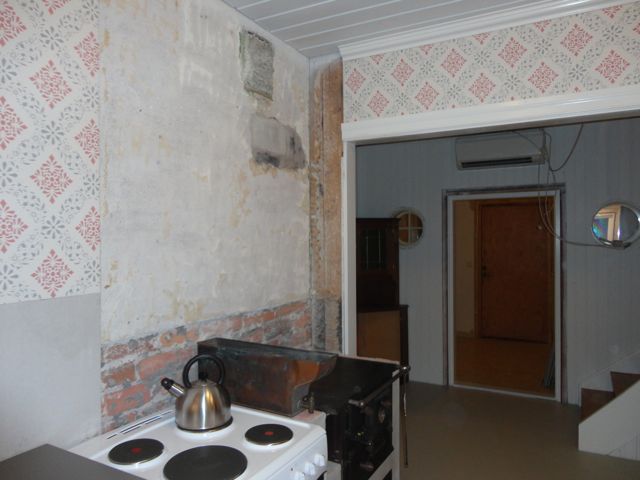
    Everything was in the middle of the room, where we’d stacked it last fall.

    buf03

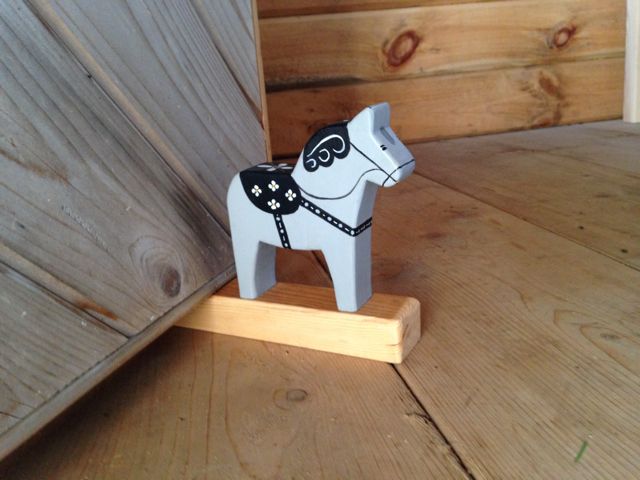
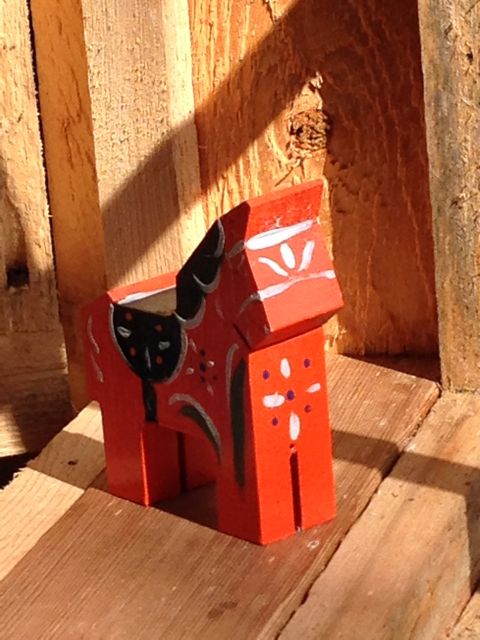
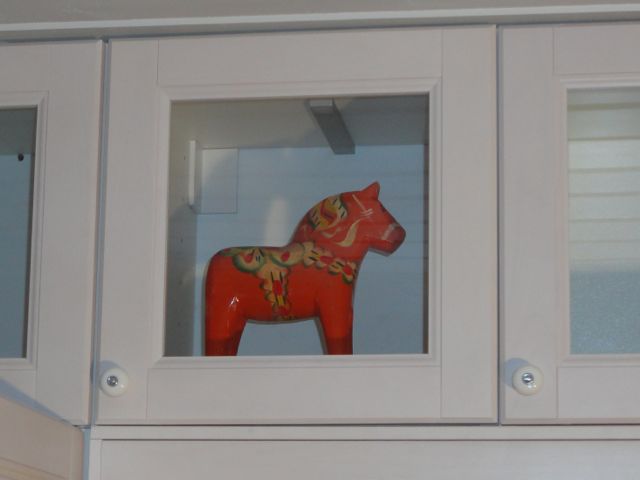
    I bought this sweet doorstop at the hemslöjd (handicraft store) in Dala-Järna.

    buf25

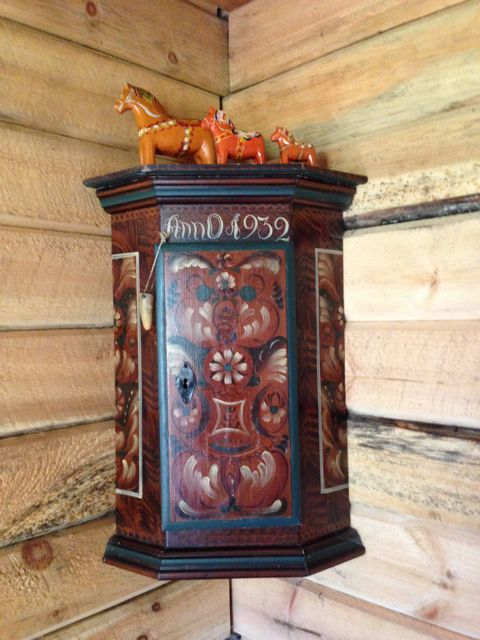
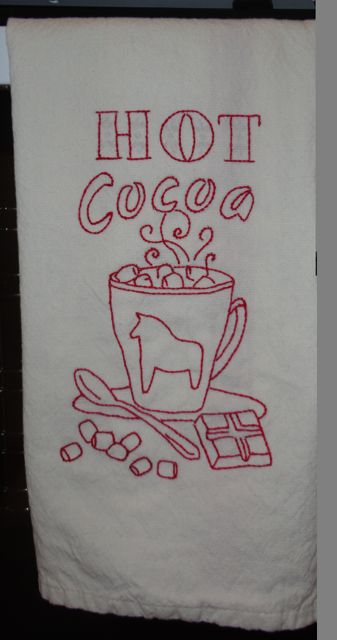
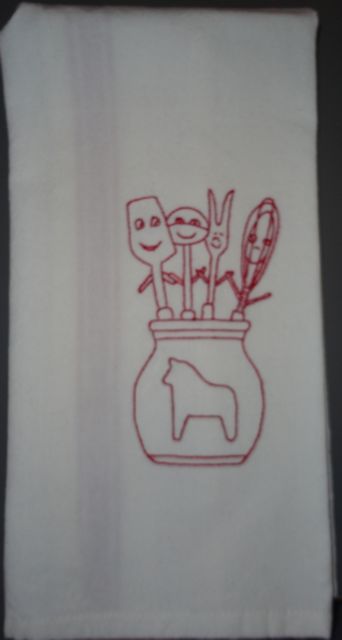
    This horse is a Nås horse, from the village where our house is.

    buf16

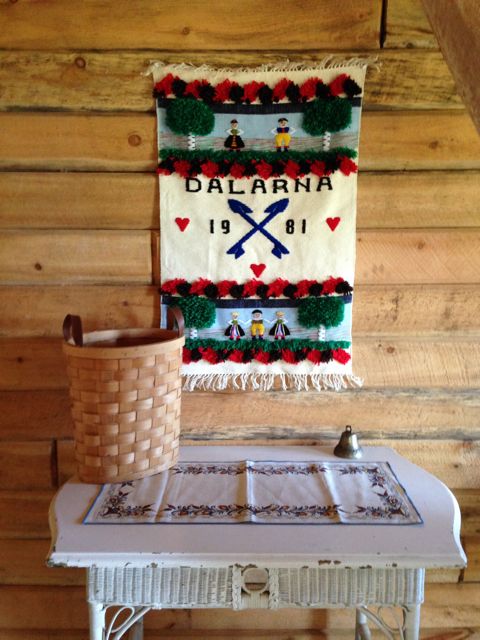
    This wallhanging, made by Berit, commemorates my first visit to Sweden in 1981.

    buf35

    Lots of mementos from different trips to Sweden.

    buf38

    buf34

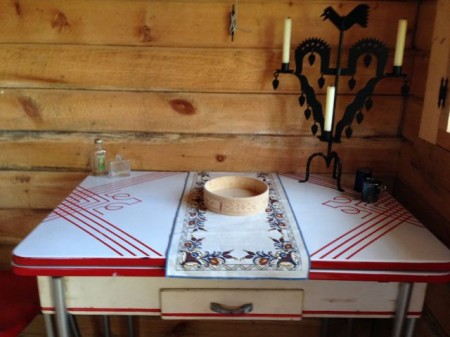
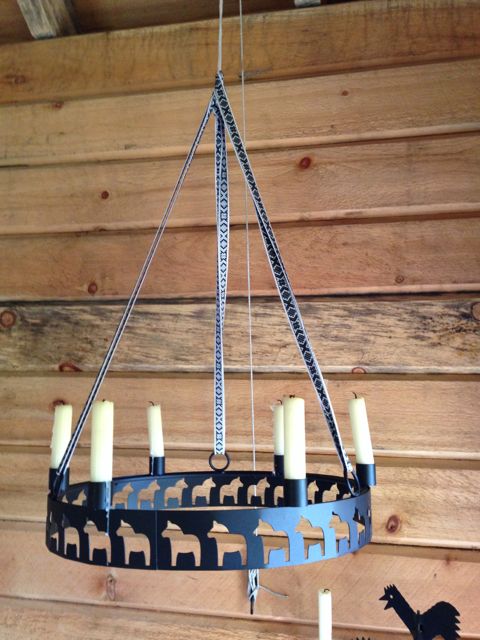
    This iron candlestick is based on a very, very old design and has lots of religious symbolism.

    buf33

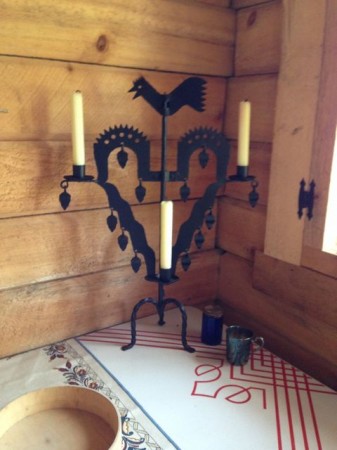
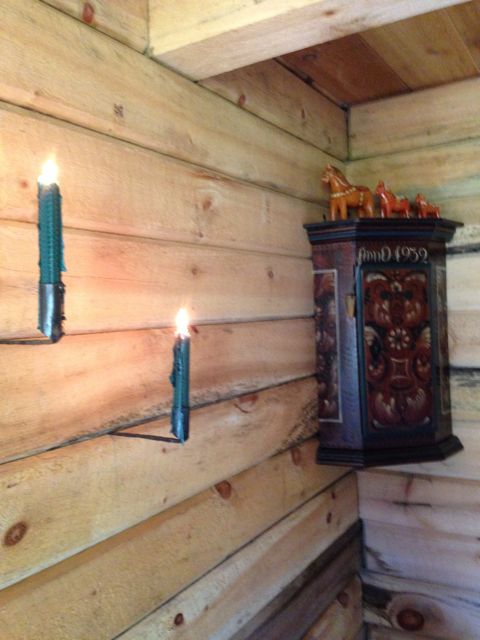
    There’s no power in the cabin, so I have lots of candle holders!

    buf21

    The sofa bed sports a special vintage quilt.

    buf39

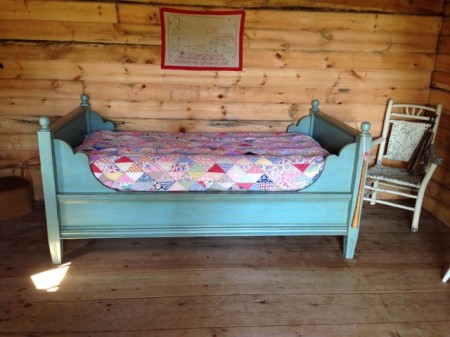
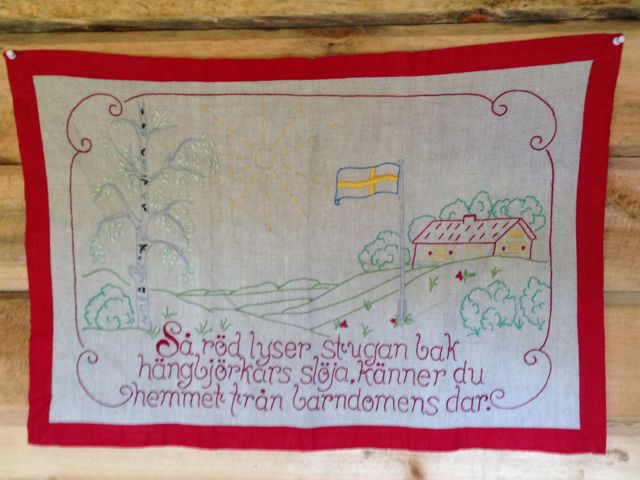
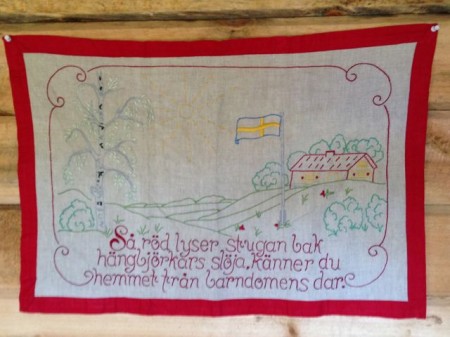
    Above it is this stitchery I brought home from a Swedish trip.  The text talks about the childhood cottage.

    buf36

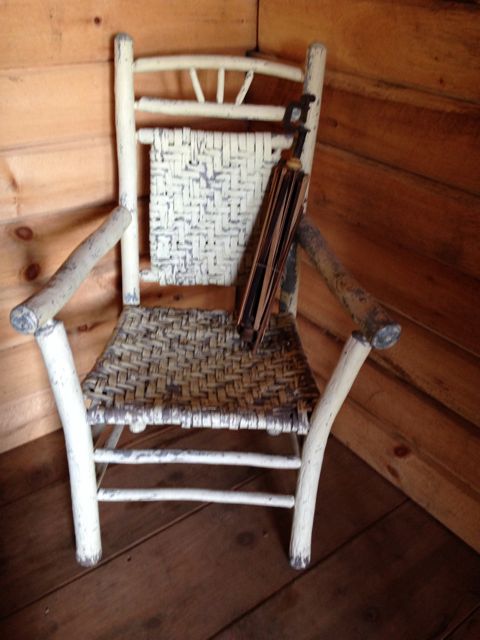
    This fabulous chair, with it’s original paint, was in the beach house my parents bought in 1963.

    buf31

    I have wonderful relatives in Sweden.  Gunnar packed and shipped this corner cabinet to me after I bought it in an antique shop in Gagnef!

    buf18

    These iron candlesticks are sharp and stick right into logs of the cabin.  They were made by a local blacksmith.

    buf55

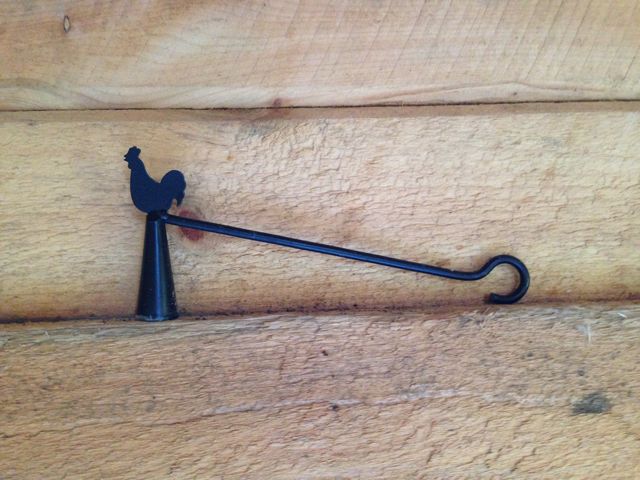
    A little rooster candle snuffer.

    buf32

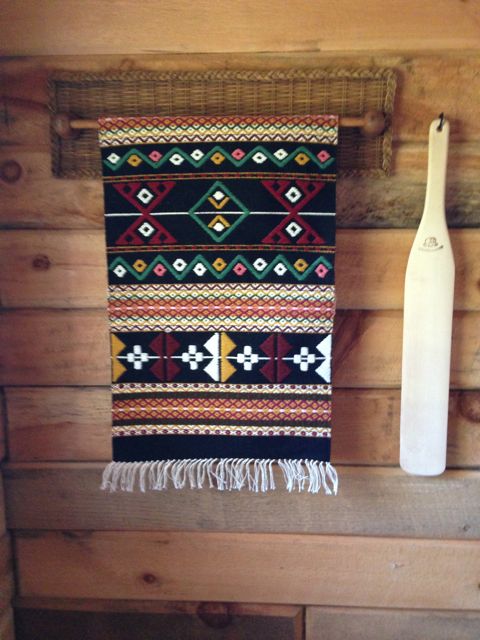
    Another wonderful wallhanging woven by Berit.

    buf43

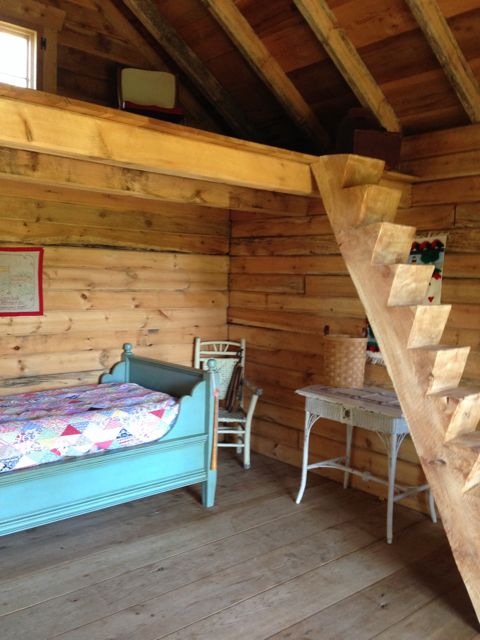
    The stairs to the loft are cut from a single log.

    buf47

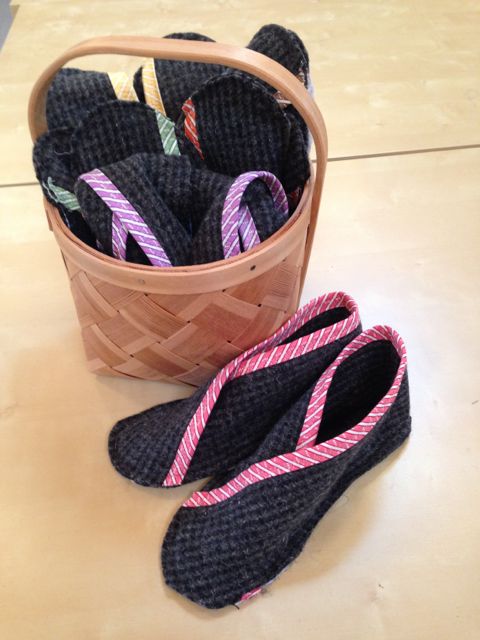
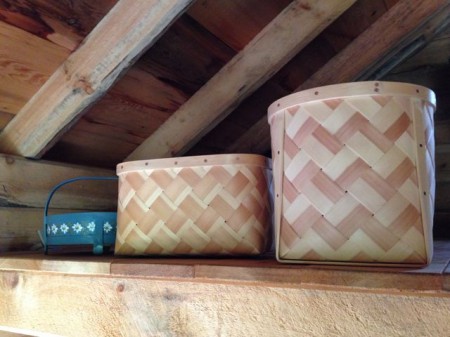
    These were bought from the basket maker in Tällberg.

    buf22

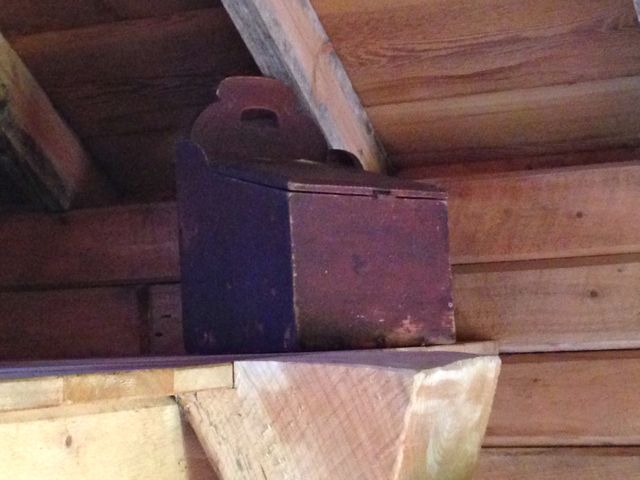
    This flour box is very special to me.  It was given to me by Skräddar Anna, who, along with my Aunt Evelyn, kept the contact between Sweden and America after Anna Lena’s death.

    buf23

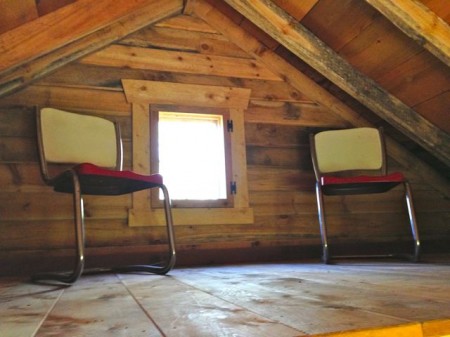
    The loft is a perfect place to get away from it all.

    lft1

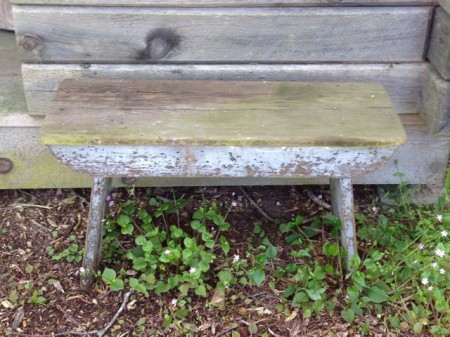
    This little bench is also from my mom and dad’s house.

    buf59

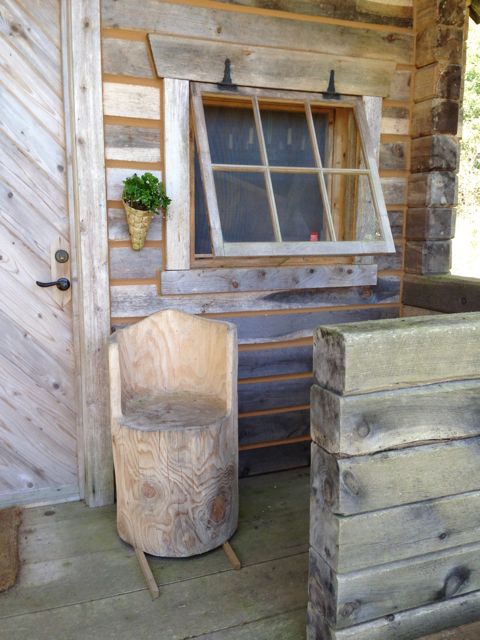
    The kubbstols on the porch came from the same log as the stairs.

    buf62

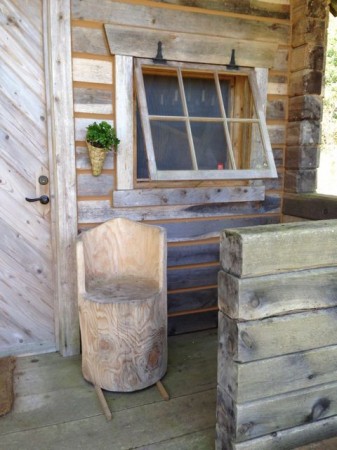
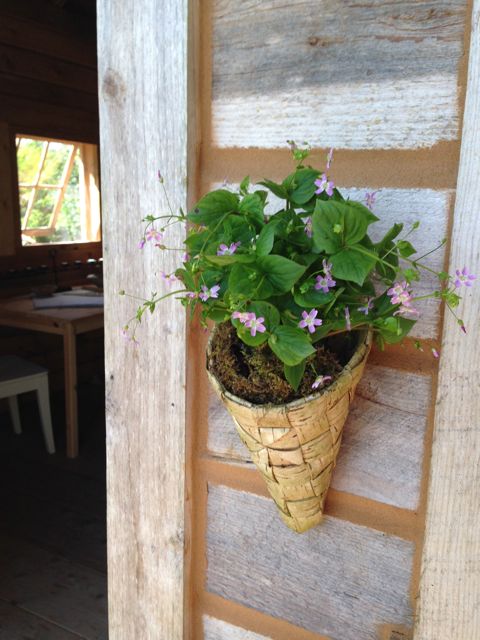
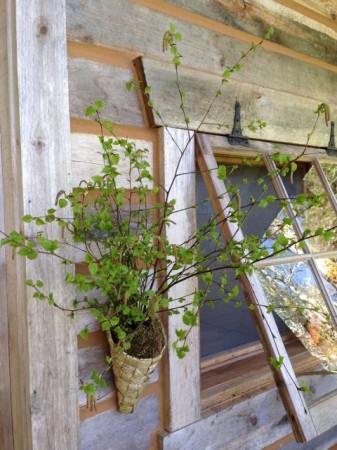
    There aren’t many flowers blooming right now, but miner’s lettuce made a sweet bouquet.

    buf48

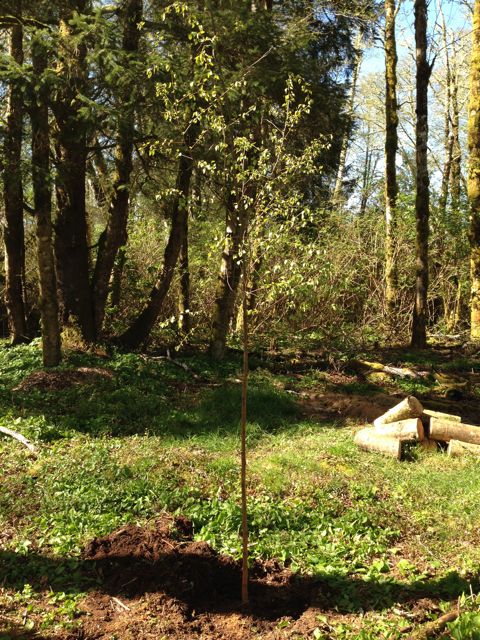
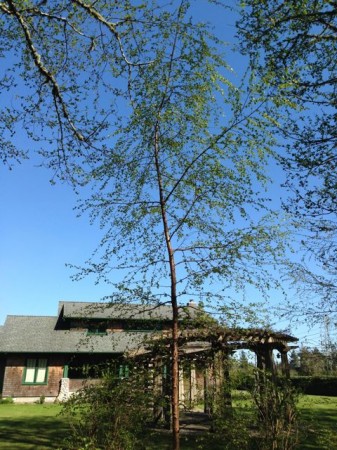
    Every year I plant two more birch trees.

    buf66

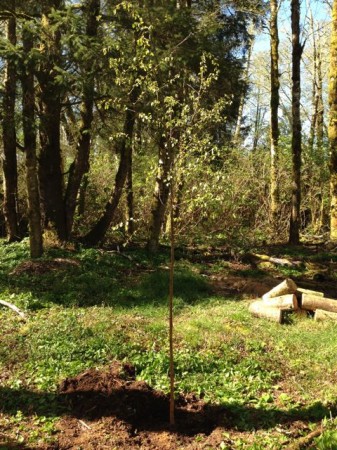
    I baby them along.  Someday I’ll have a whole birch forest–when I’m about 120!

    buf65

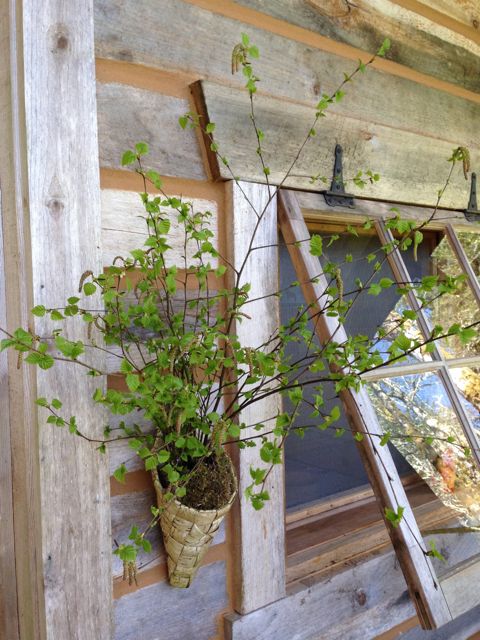
    After Bob accidentally cut off a birch branch,  I was able to decorate with it!

    buf63

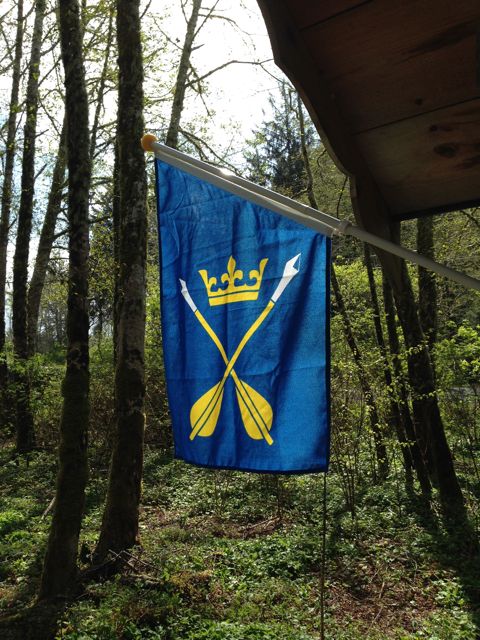
    Last fall Berit and Gunnar gave us this flag for the cabin.  It’s the symbol of Dalarna.

    buf01

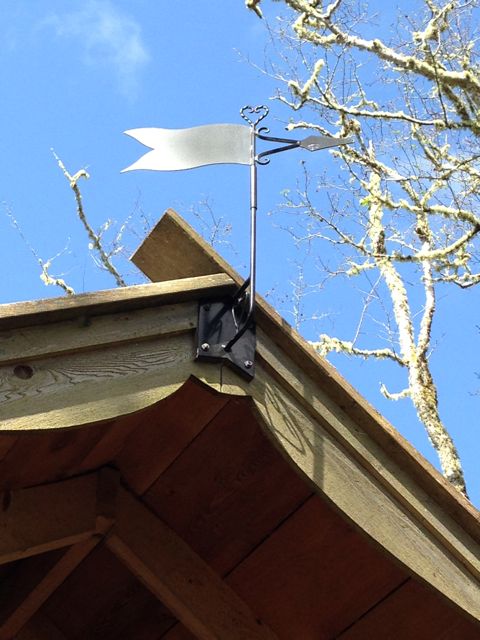
    Bob put up the wind vane, too.

    buf05

    It was a great day!

  • 11Apr
    Categories: Everything! Comments: 2

    Recently I wanted to make a quilt for one of my Swedish relatives, Torsten.  He has been so wonderful to Bob and me, helping us with our new house there.  I fell in love with a quilt I saw at the Wild Rose Quilt Shop and bought the pattern and fabric.

    ise1

    Of course, when I got home, I thought, “Gee, I have some fabrics that would look good in here,” and started digging in my stash!  Before you know it, instead of using two reds and two neutrals, I had six or eight of each.  I couldn’t wait to get started–and whipped up a sample block.

    q3101

    Notice those four little light triangles at the base of the diamonds.  Those were made by sewing and flipping a white square on, then trimming the excess.  Well, that “excess” was too big to throw away!  I discovered if I put four of them together, I could make an adorable pinwheel block!

    q3102

    I was barely started on the first quilt and already thinking how I could  make another quilt from the leftovers!  Perhaps it would be fun to make a quilt for Emmy, Torsten’s daughter, too!

    So I kept on, making the regular blocks and the “bonus” blocks.  I was really pleased with the way Torsten’s quilt turned out.

    q3108

    I was a little surprised when I put it up on the design wall, though. The look totally changed.  Instead of seeing stars, like this….

    q3107

    When it was all put together they looked like wheels!

    q3106

    Funny the tricks your eyes can play!

    So, the pinwheel blocks were pretty small.  In order to get a decent sized quilt, I put them together with a pretty print to make nine-patches.

    q3104

    Then I added some more of the print as setting squares.   On to the quilt machine and before you know it…

    q3103

    …I had two quilts!

    q3110

    But then, you see, there were these strips left over.

    This is Nora.

    nor1

    Those strips were just perfect to make a quilt for her, too!

    q3109

    Everything got wrapped up and sent off to Sweden for Christmas!

    q3111

    I hope you noticed the paw print ribbon on Nora’s package!


    Tags:
  • 09Mar

    One of my mom’s health care providers, Sayonara, thought it would be fun to give me a housewarming party for the new house in Sweden!

    shw34

    She enlisted Mom and Sally’s help and they put together a wonderful party at Mom’s house.

    aaw4

    Sy decorated the entry with the Swedish colors.

    aaw2

    And the Swedish theme continued with the table settings, of course!

    shw07

    Sally has the perfect blue and yellow dishes for just such an occassion!

    shw04

    And she has table linens to match.

    shw01

    I was able to provide something Swedish for the center of the tables, like fold out Dala horses and…

    shw03

    …these charming little candle holders.

    shw25

    This is our dear, dear friend Peggy.

    shw32

    She sent a bouquet of flowers in the perfect colors!

    shw05

    Luckily, there are enough Scandinavians in the Northwest that it’s easy to find special Swedish foods…

    shw09

    …like this Leksands Knäckebröd, which is produced not far from our house in Sweden!

    shw10

    Mmm. Hard bread!

    shw18

    Sally did a perfect Swedish meal–meatballs, cream sauce, lingonberries, boiled potatoes with dill and Swedish cucumber salad.

    shw28

    Melissa made the trip from Bend, which was very special.

    shw22

    The gifts were beautifully wrapped.  How perfect is this for a Swedish party?

    aaw3 

    There was lots of red and white to reflect the theme of the kitchen in Sweden.

    shw17

    shw16

    shw15

    Everyone was sooooo generous.  I’ll have the best stocked kitchen in the neighborhood.

    shw30

    And I’ll be able to entertain with the traditional seven kinds of cookies!

    shw20

    I made traditional Swedish “cooked” coffee to go with dessert.  That’s boiled coffee for the uninitiated.

    shw21

    There’s a bakery in Kirkland that specializes in Princess Cakes!

    shw26

    And Karen Rollman made this adorable (and delicious) Dala horse cake.

    ck1

    Everyone went home with a goodie bag filled with Swedish candies.

    shw11

    It was such a fun afternoon, and so sweet of my friends to honor me in this way.  Thank you, all.


  • 19Feb

    Once the cabinets were in, it was time to put up the wainscoting, which was painted a pale gray.

    kth02

    I had hoped to find a wallpaper that looked like stenciling, and I did!

    kth03

    Lucky for us, Torsten is a jack-of-all trades.

    kth04

    I couldn’t be happier with the way the wallpaper looks.

    kth07

    You can see how the wallpaper wraps around the room.

    kth15

    Corner and ceiling moldings complete the look nicely.

    kth06

    Our refrigerator didn’t arrive before we left, but Torsten sent a picture.  I love the shape and the color!  Now to find the perfect skinny cabinet to go next to it!

    fr1

    The window still needs molding, but I had to play with placing a Dala horse on the sill.

    kth05

    Or perhaps he looked better in one of the high cupboards?

    kth01

    I even had a few things to put inside the cupboards.

    kth08

    It’s really looking great, but there are a few things to do, like the hood and tile black splash.

    kth14

    I love the little details, like the porcelain knobs on the kitchen cabinets,

    kth12

    We used similar hardware on the door.

    22

    We chose a vintage style for the light switches and…

    kth09

    …outlets.

    kth10

    The faucet, too, has a vintage feel.

    kth11

    After weeks of construction, it was fun to put out the towels I’d made.

    twls1

    I had fun adapting some Aunt Martha patterns.

    twls2

    I added a Dala horse to each one.

    twls3

    Even though they are a bit corny!

    twls4