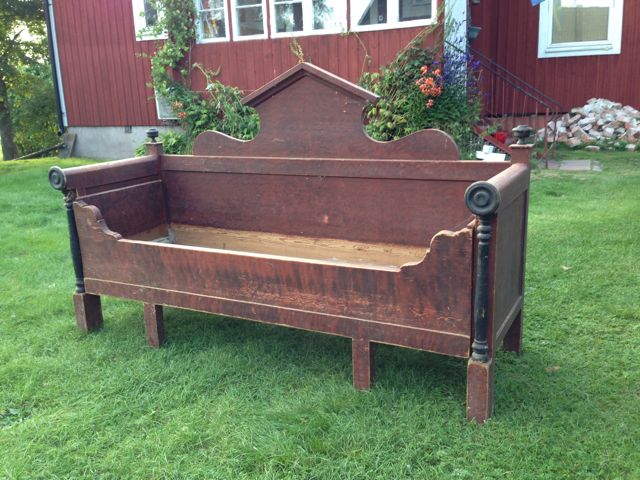
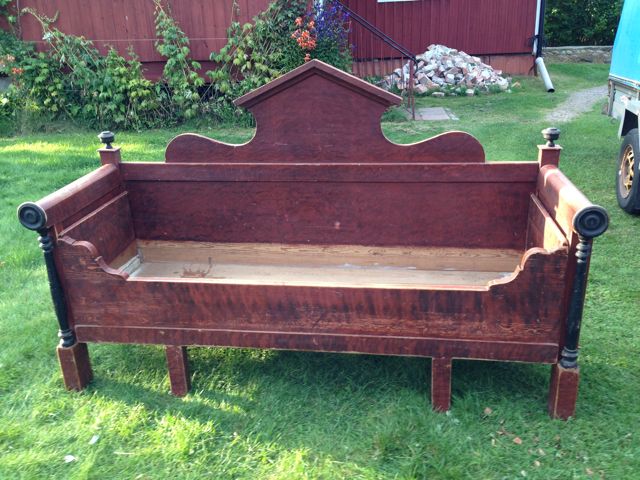
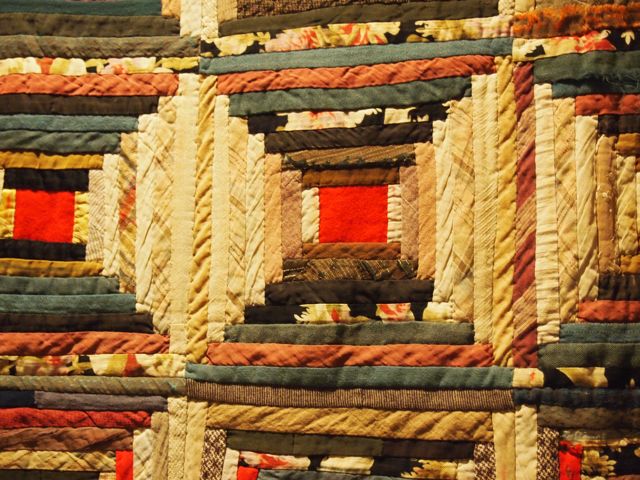
I’ve known for a long time that I wanted a “kitchen sofa” for the Swedish house, and I’ve been looking for one every time I’m in Sweden. I’ve seen a lot of these wooden sofas, but I had a very specific style in mind. Shortly before we left last summer, Torsten called one afternoon to say he was on a service call and the customer had a sofa for sale–a sofa he was sure I would like. And he was right!
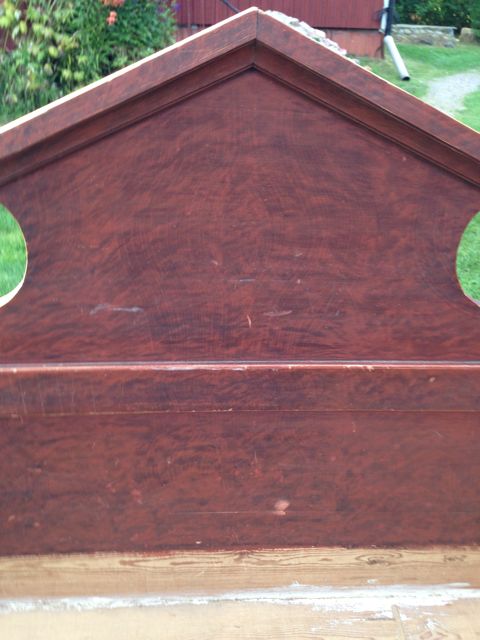
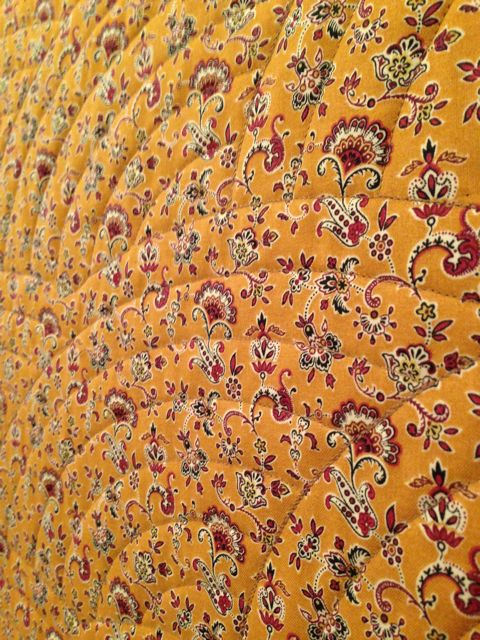
It was in an out building at an old farmstead, and Bob and I took the trailer over and picked it up. I love the shape of the back, the rolled arms and, best of all, the faux finish. A lot of antique Swedish furniture is painted with a style meant to imitate a more expensive wood.
Oh, and the front pulls out so it can be used as a bed! This sofa is missing it’s seat, but that will be an easy fix. A wooden seat and a nice cushion and it will be good to go!
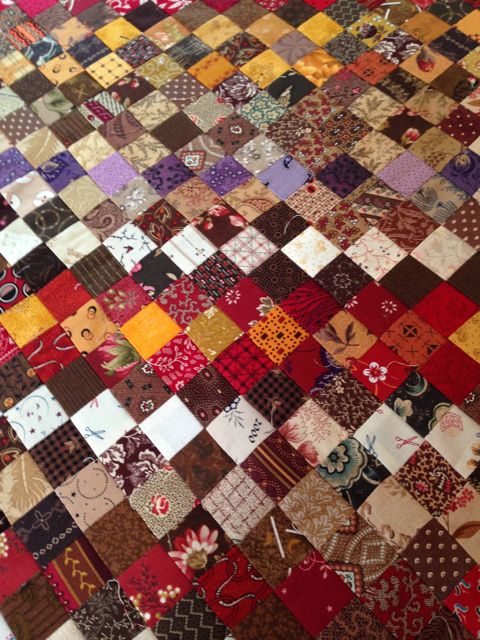
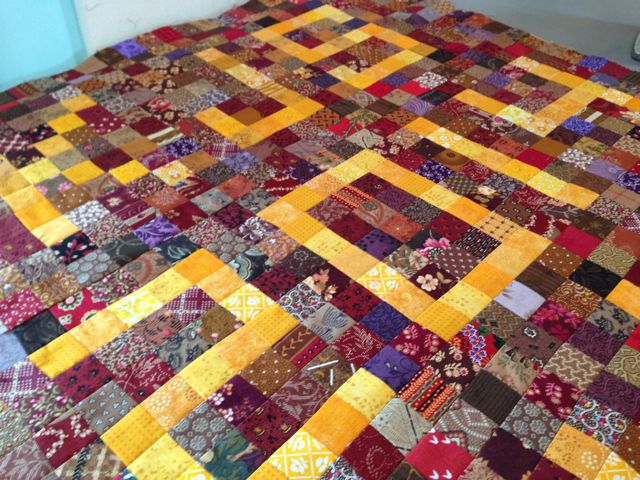
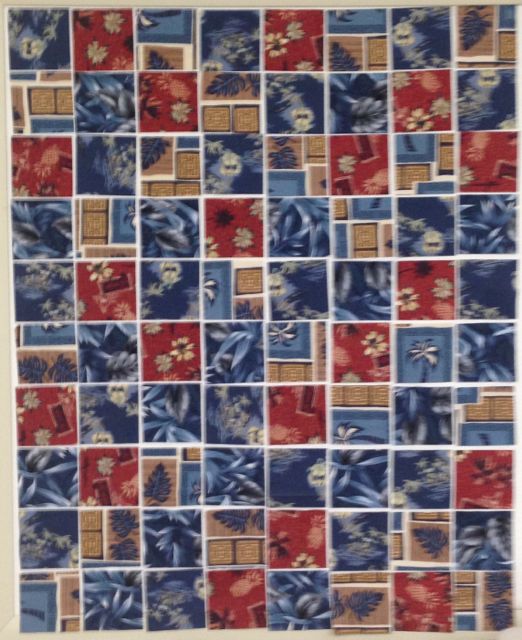
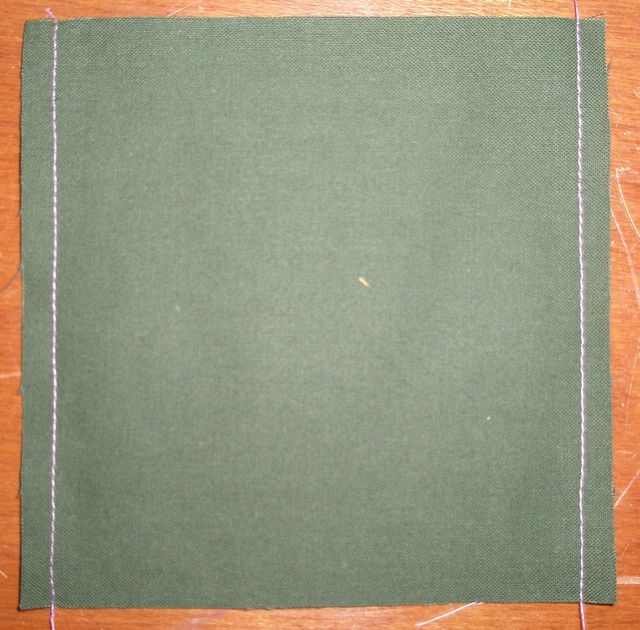
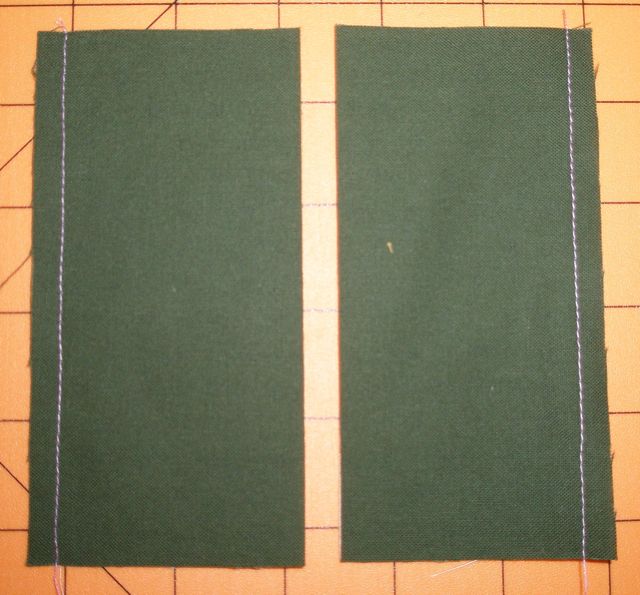
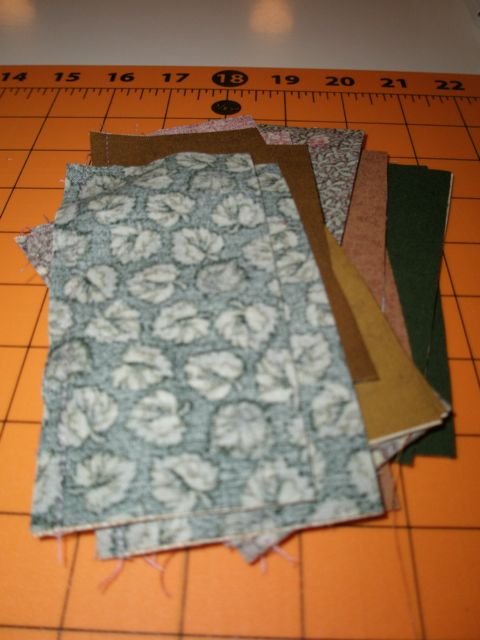
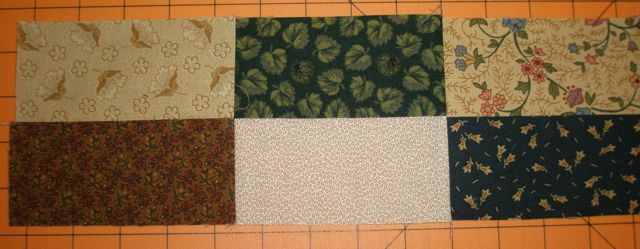
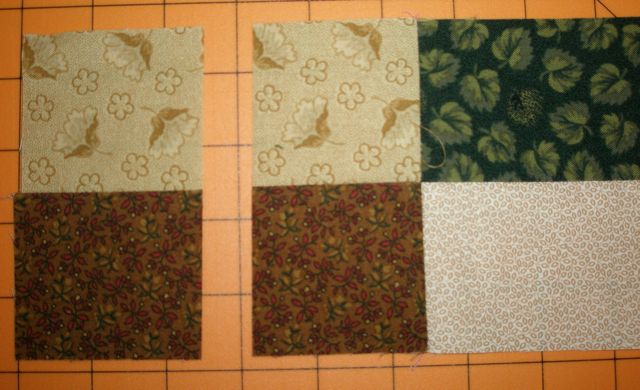
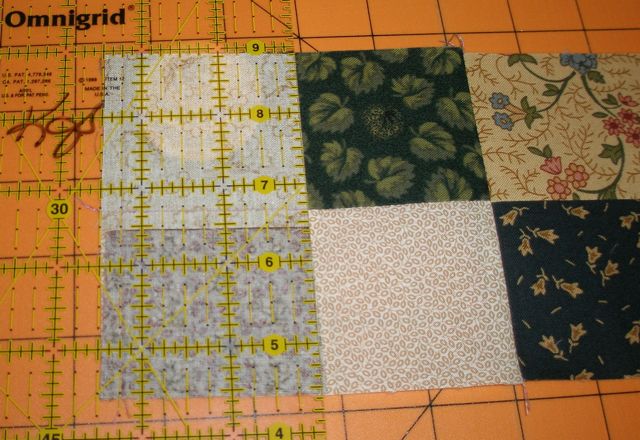
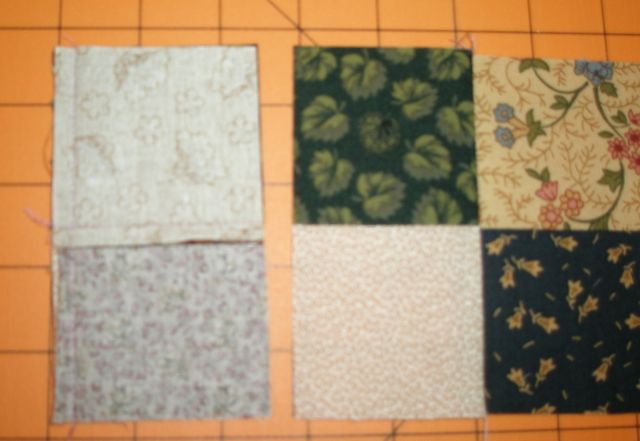
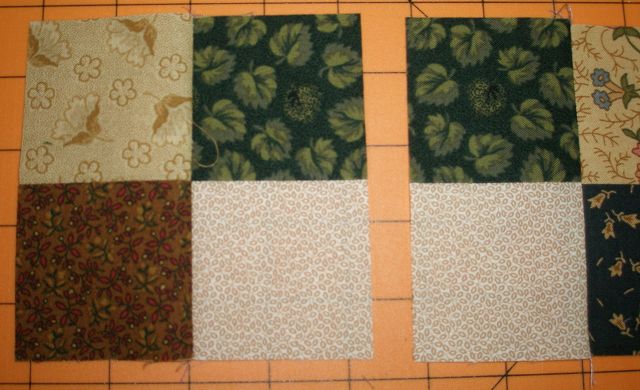
I had the bright idea that I might make a quilt that could be used to cover the cushion. I don’t do a lot of quilting with turn-of-the-century fabrics, but their earth colors seemed perfect for this sofa. Then I decided a postage stamp quilt would be “fun.” So, I set about cutting a lot of little squares and sewing them together.
I wanted the design to be on-point…
…so I had to construct the quilt diagonally.
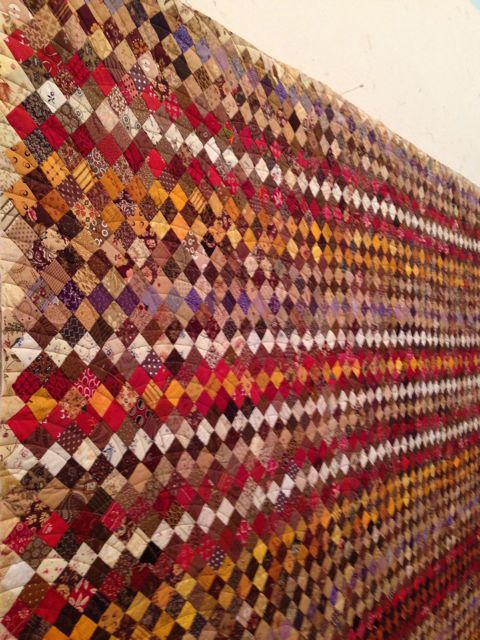
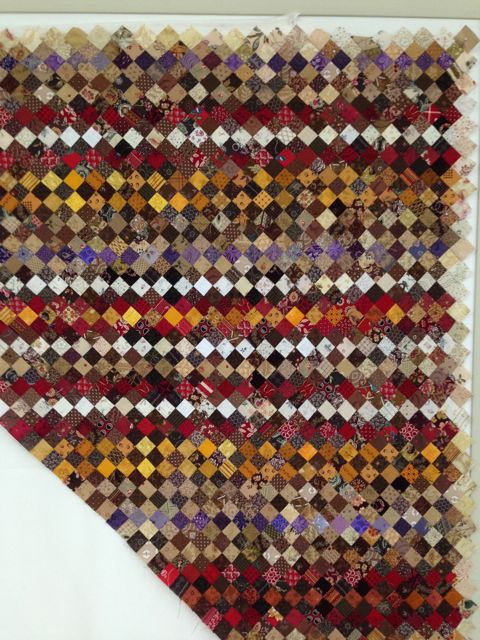
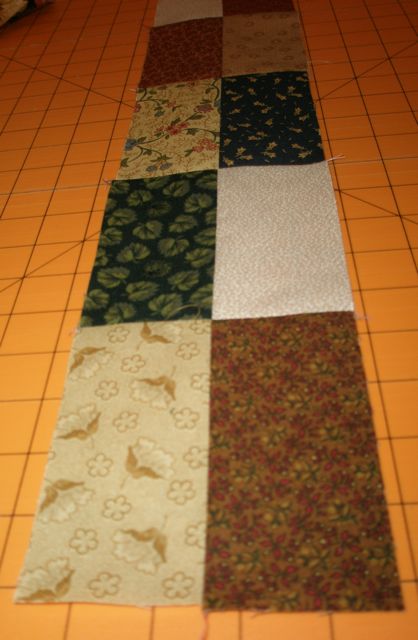
That requires a lot of thinking! Finally, I had the top pieced. 4224 pieces, but who’s counting!
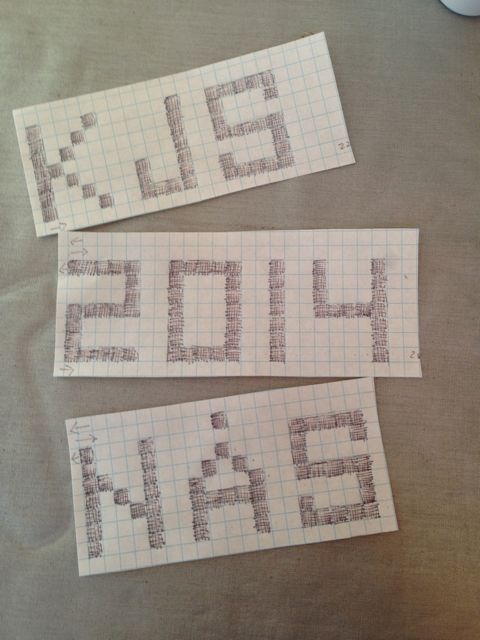
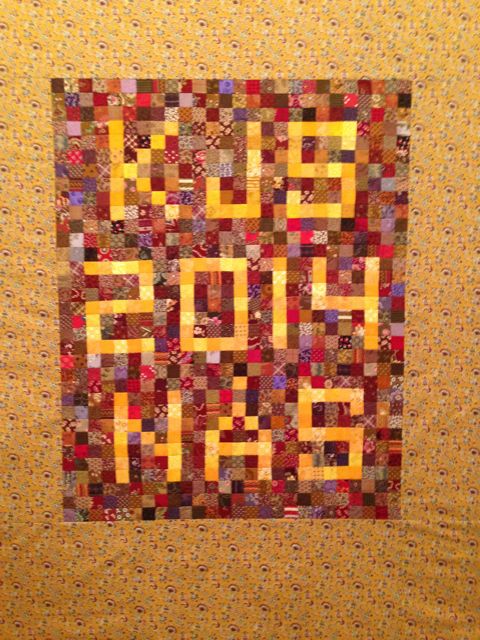
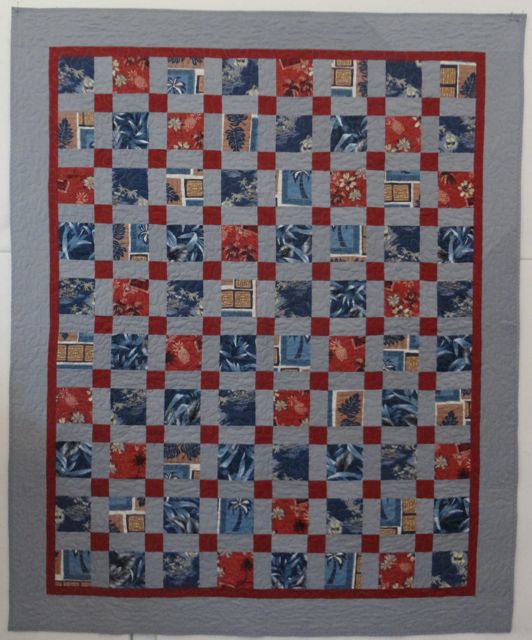
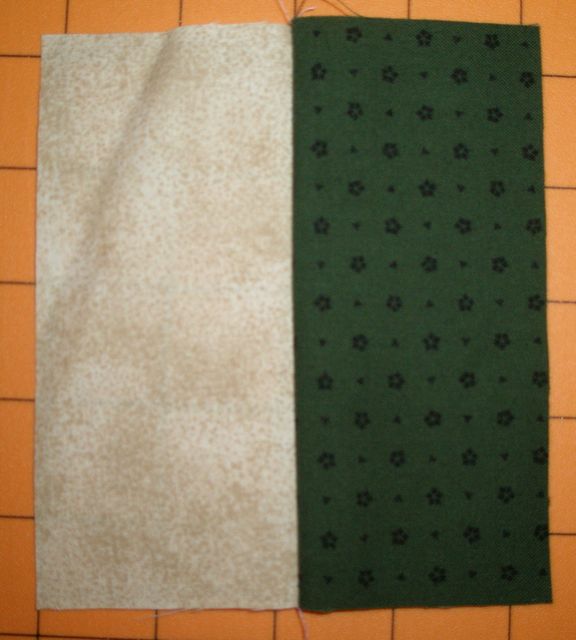
But I had a lot of squares left, so I decided I could use some of them for the “label.”
So, just five hundred and some more squares and I had a label.
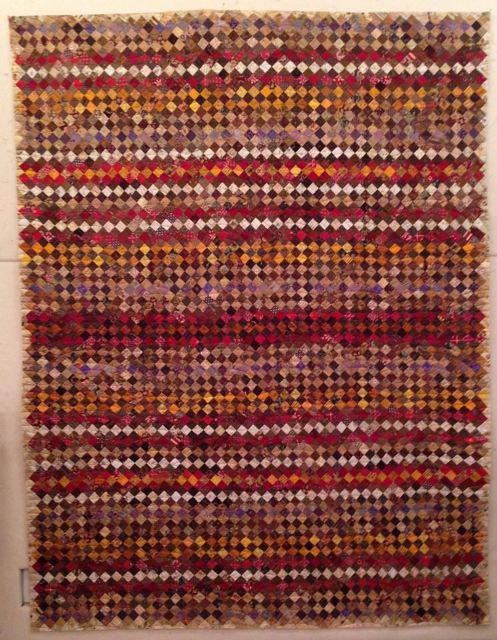
I sewed it into the back of the quilt.
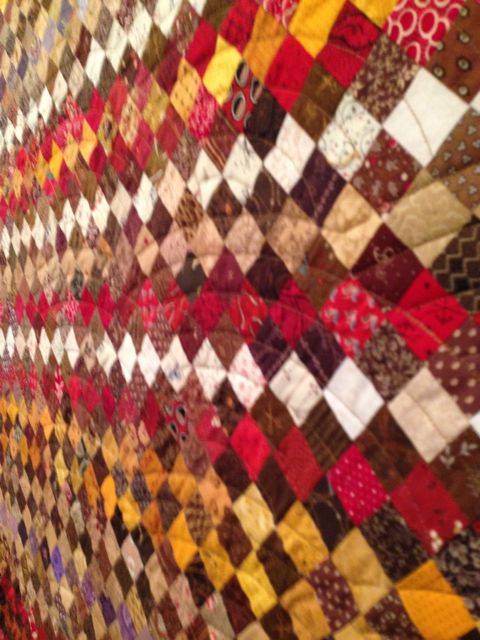
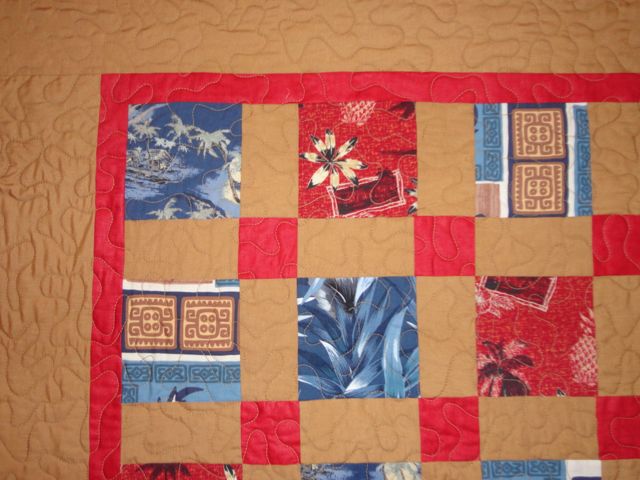
I wasn’t sure how to quilt it. In the end, I chose a Baptist fan design.
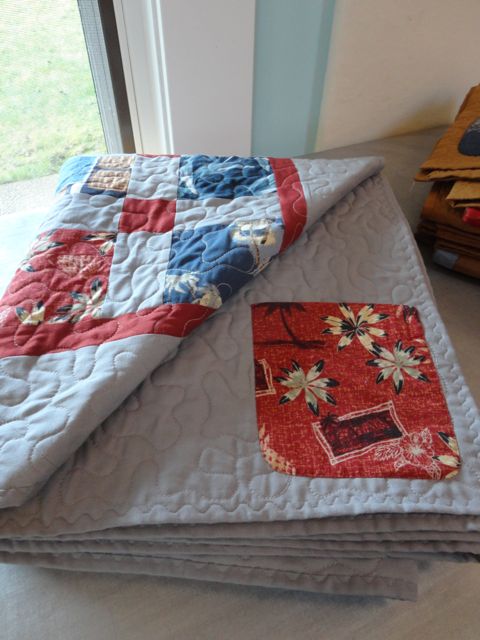
You can see it a little better from the back.
I’ve decided it will just be a sofa quilt, not a cushion over. I have something else in mind for that!
A little footnote. Last week, the farmhouse and the outbuilding where we got the kitchen sofa burned to the ground in a horrible fire. I’m so glad the sofa is with us.
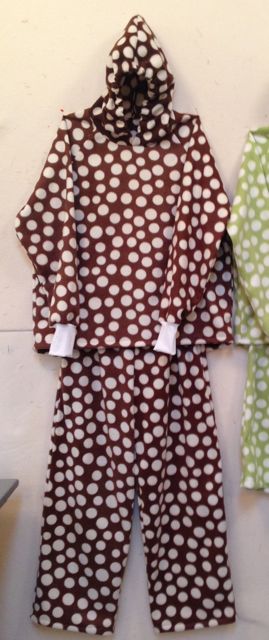
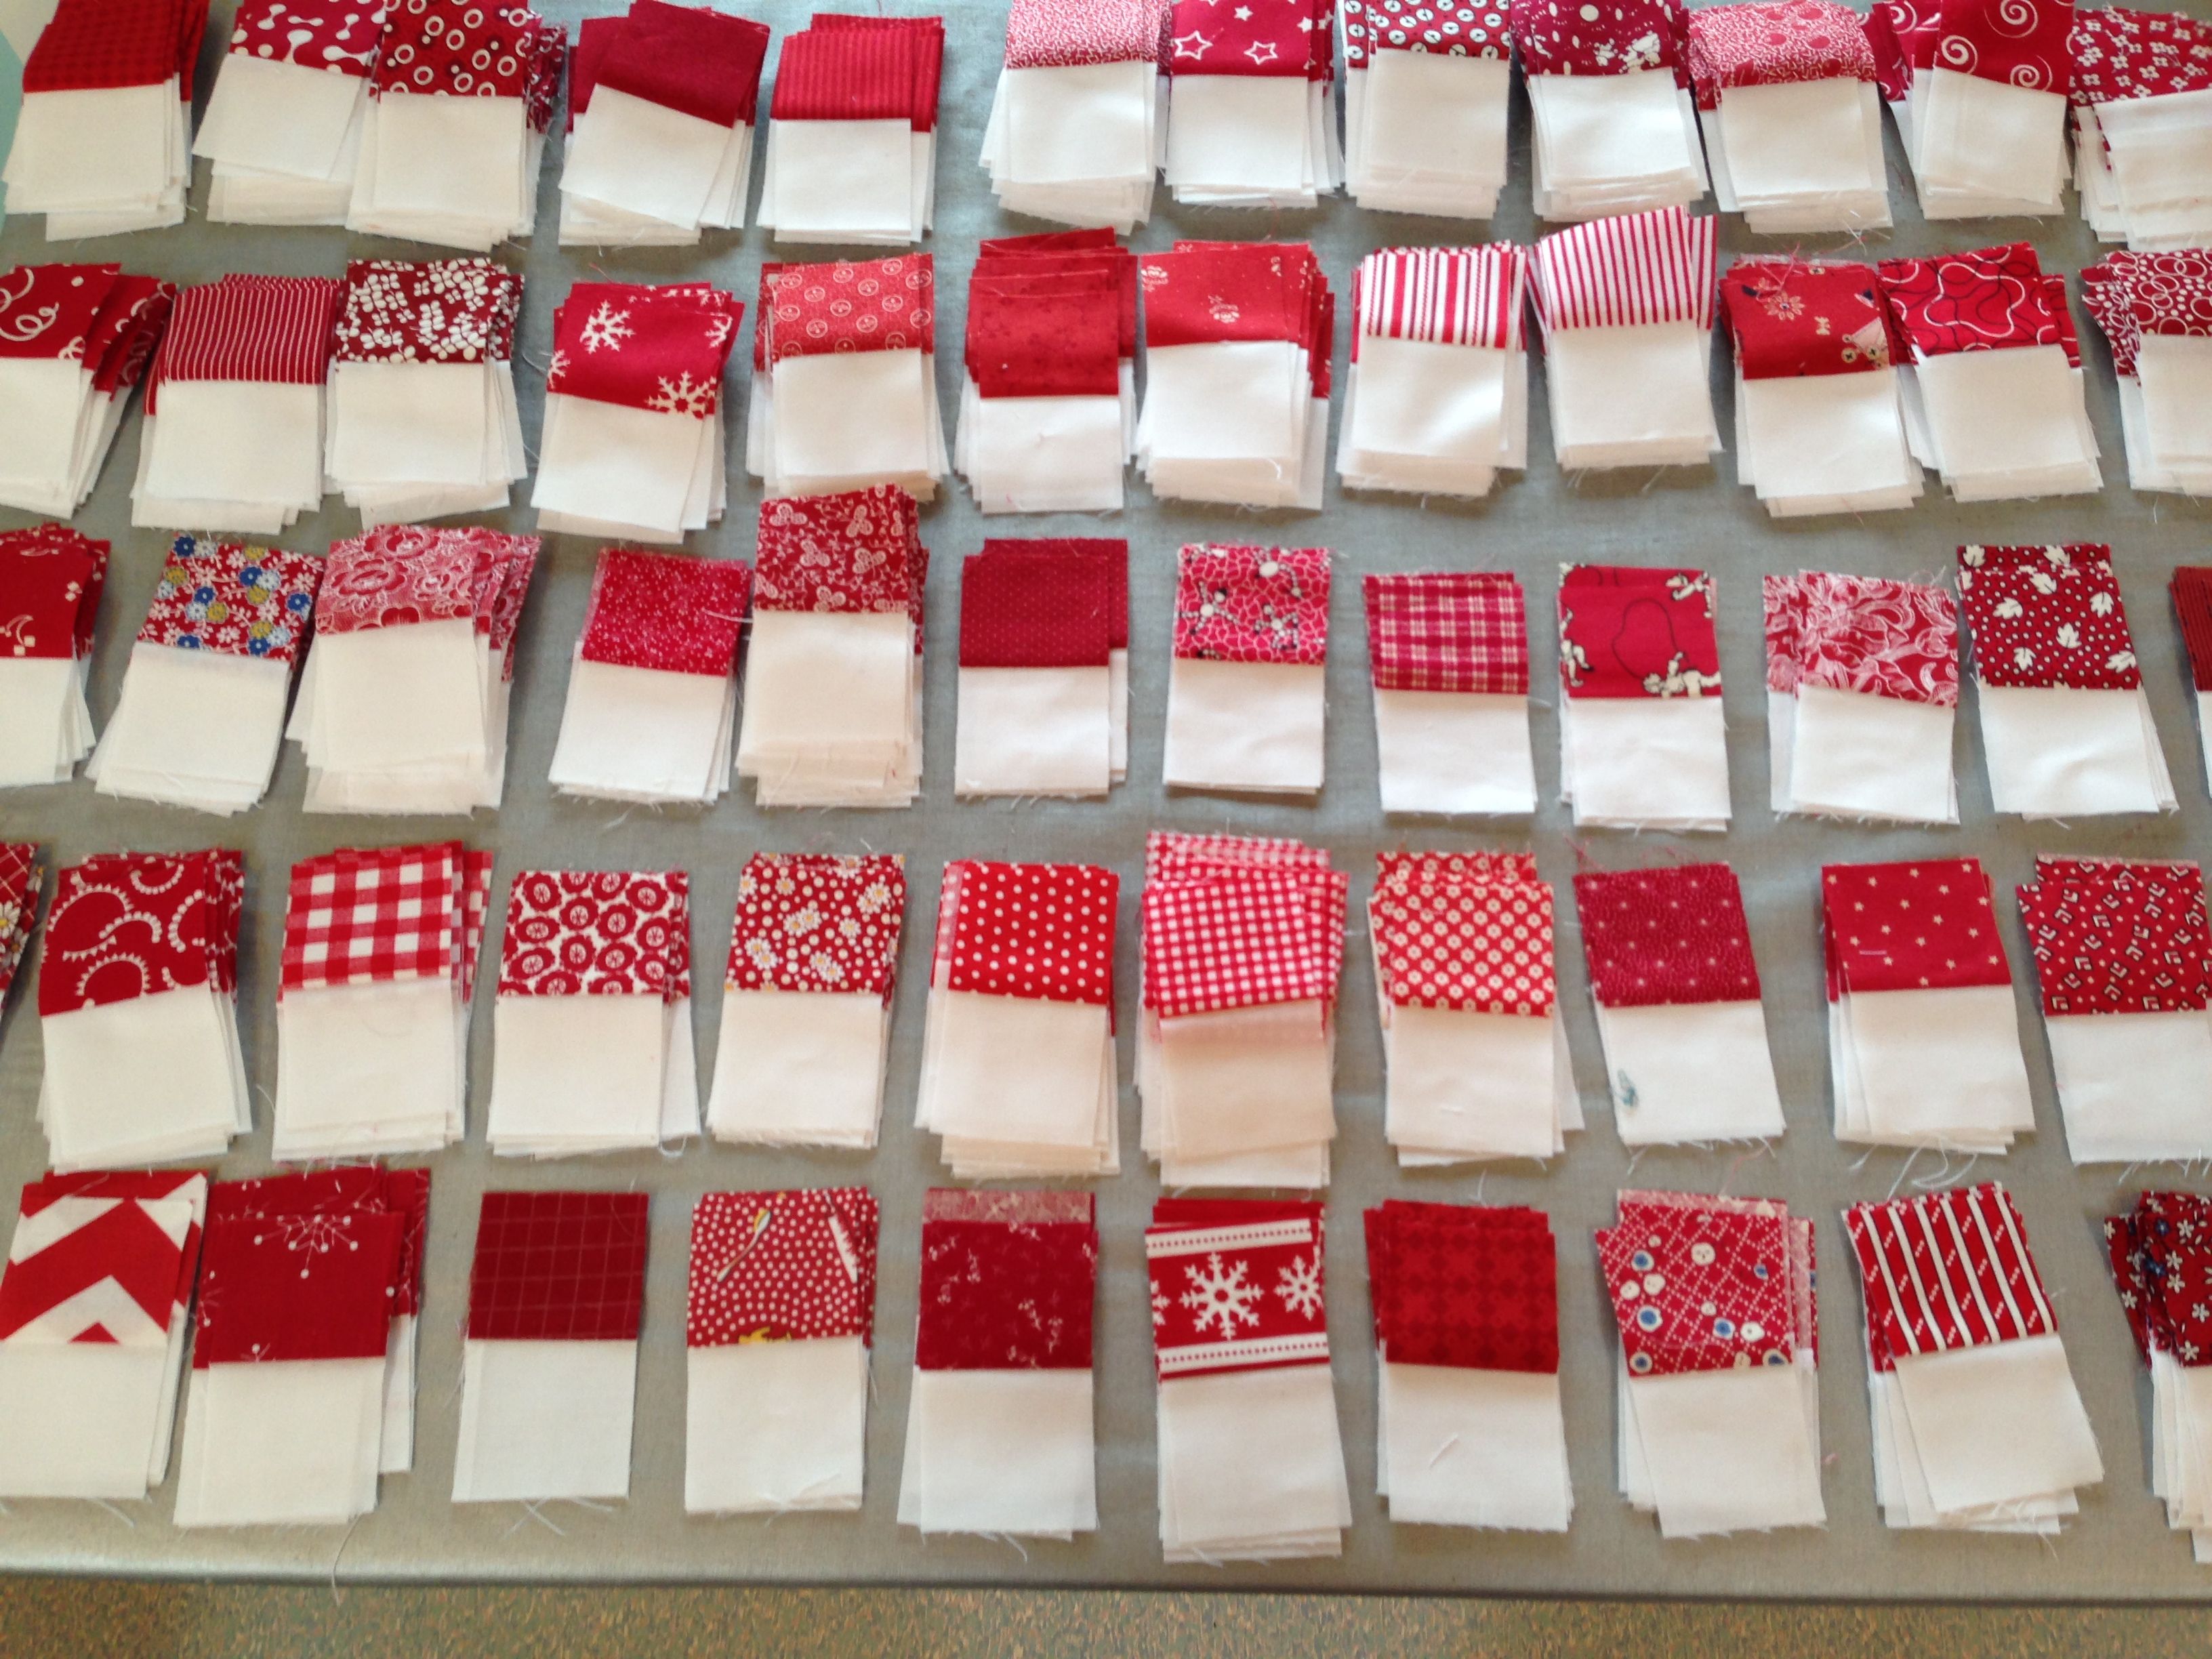
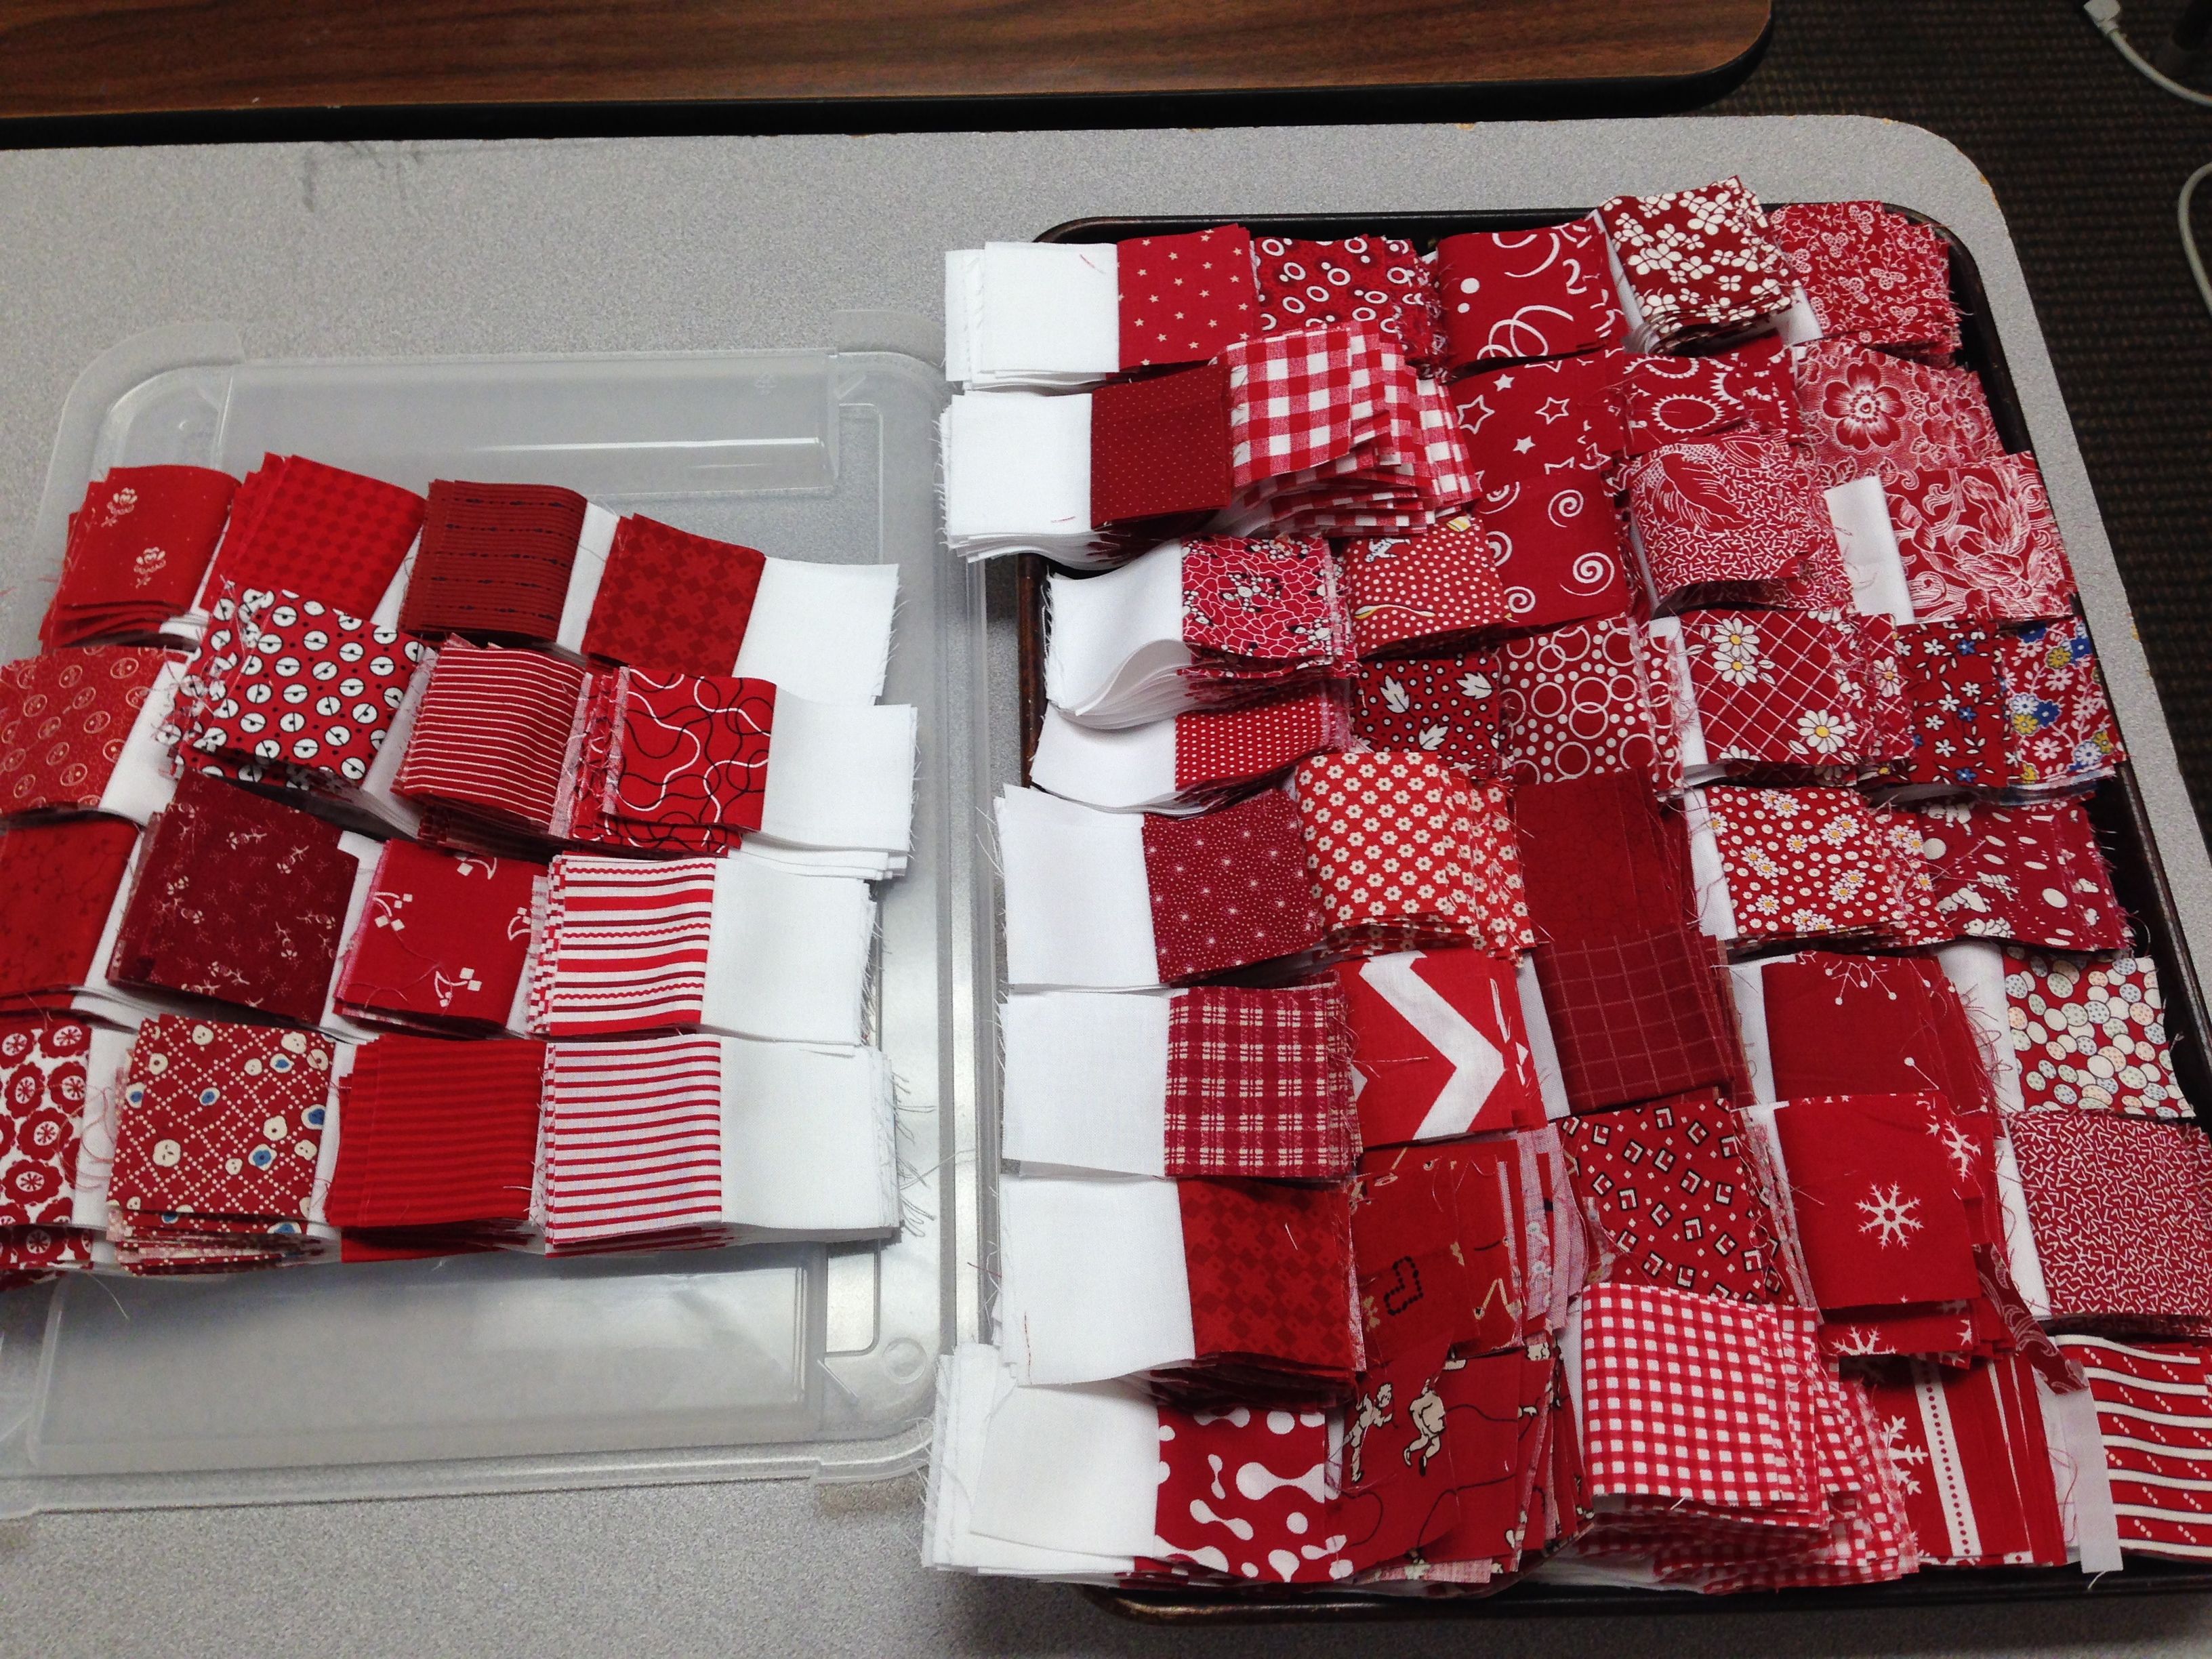
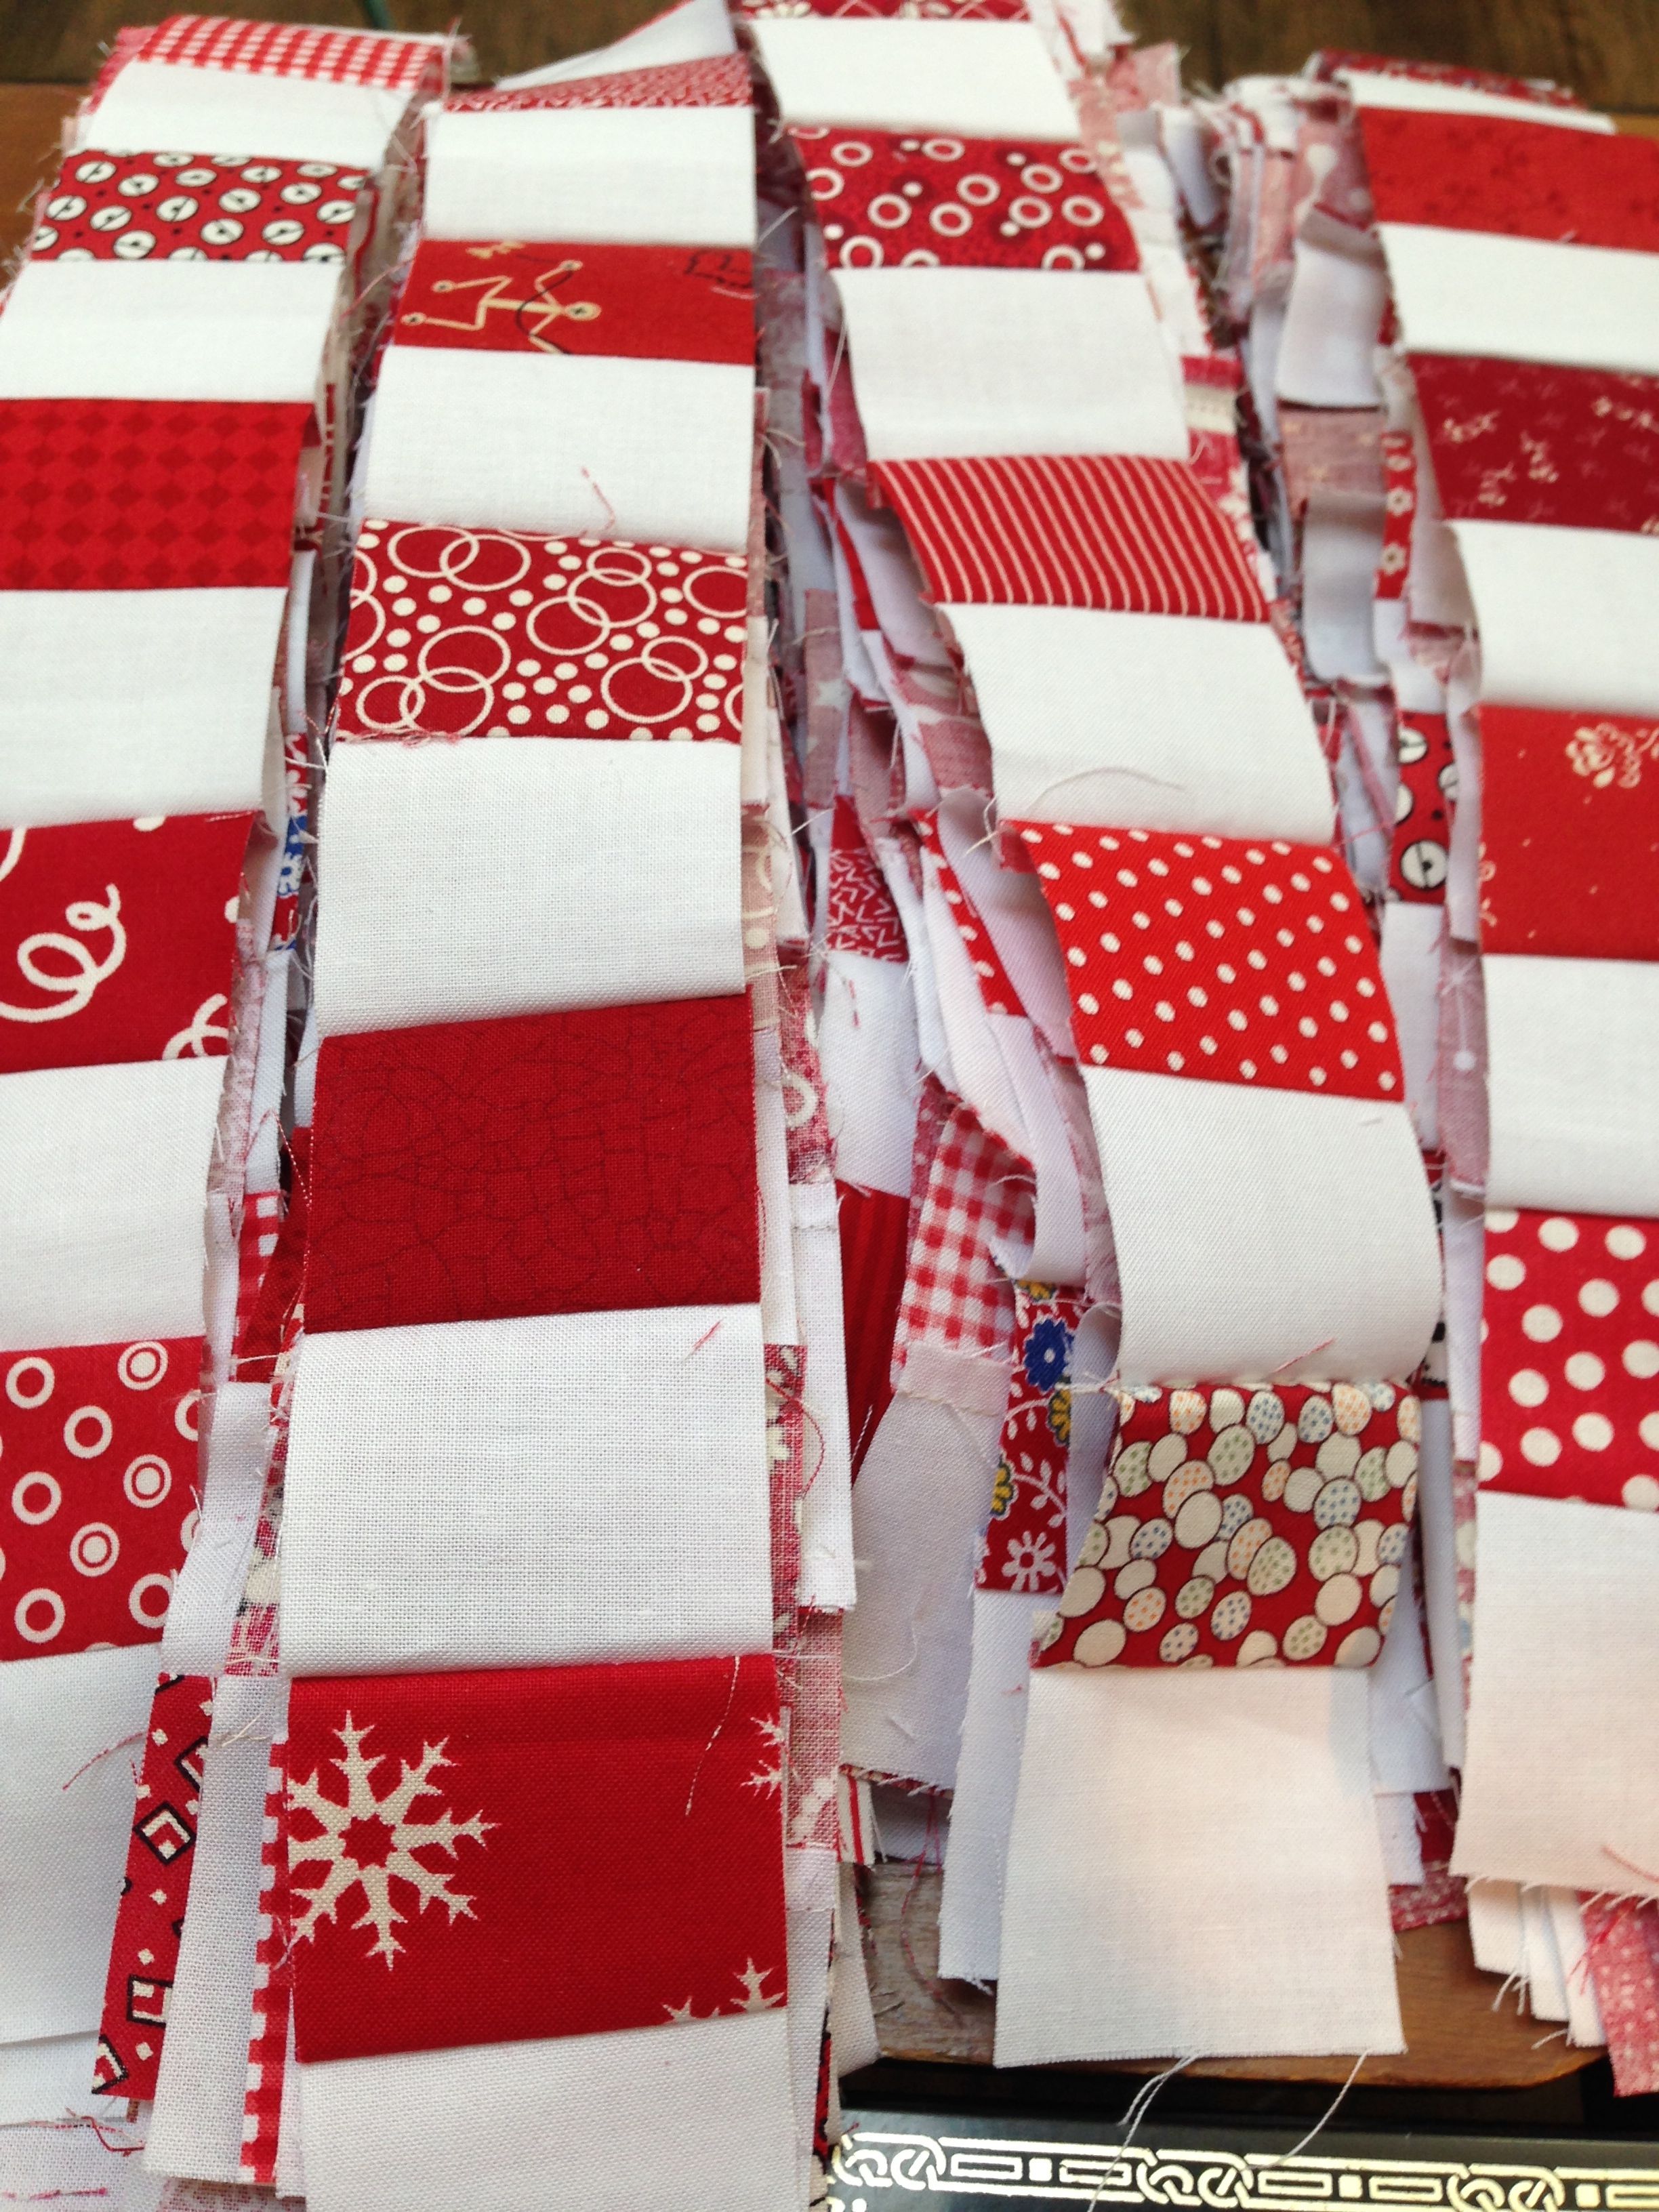
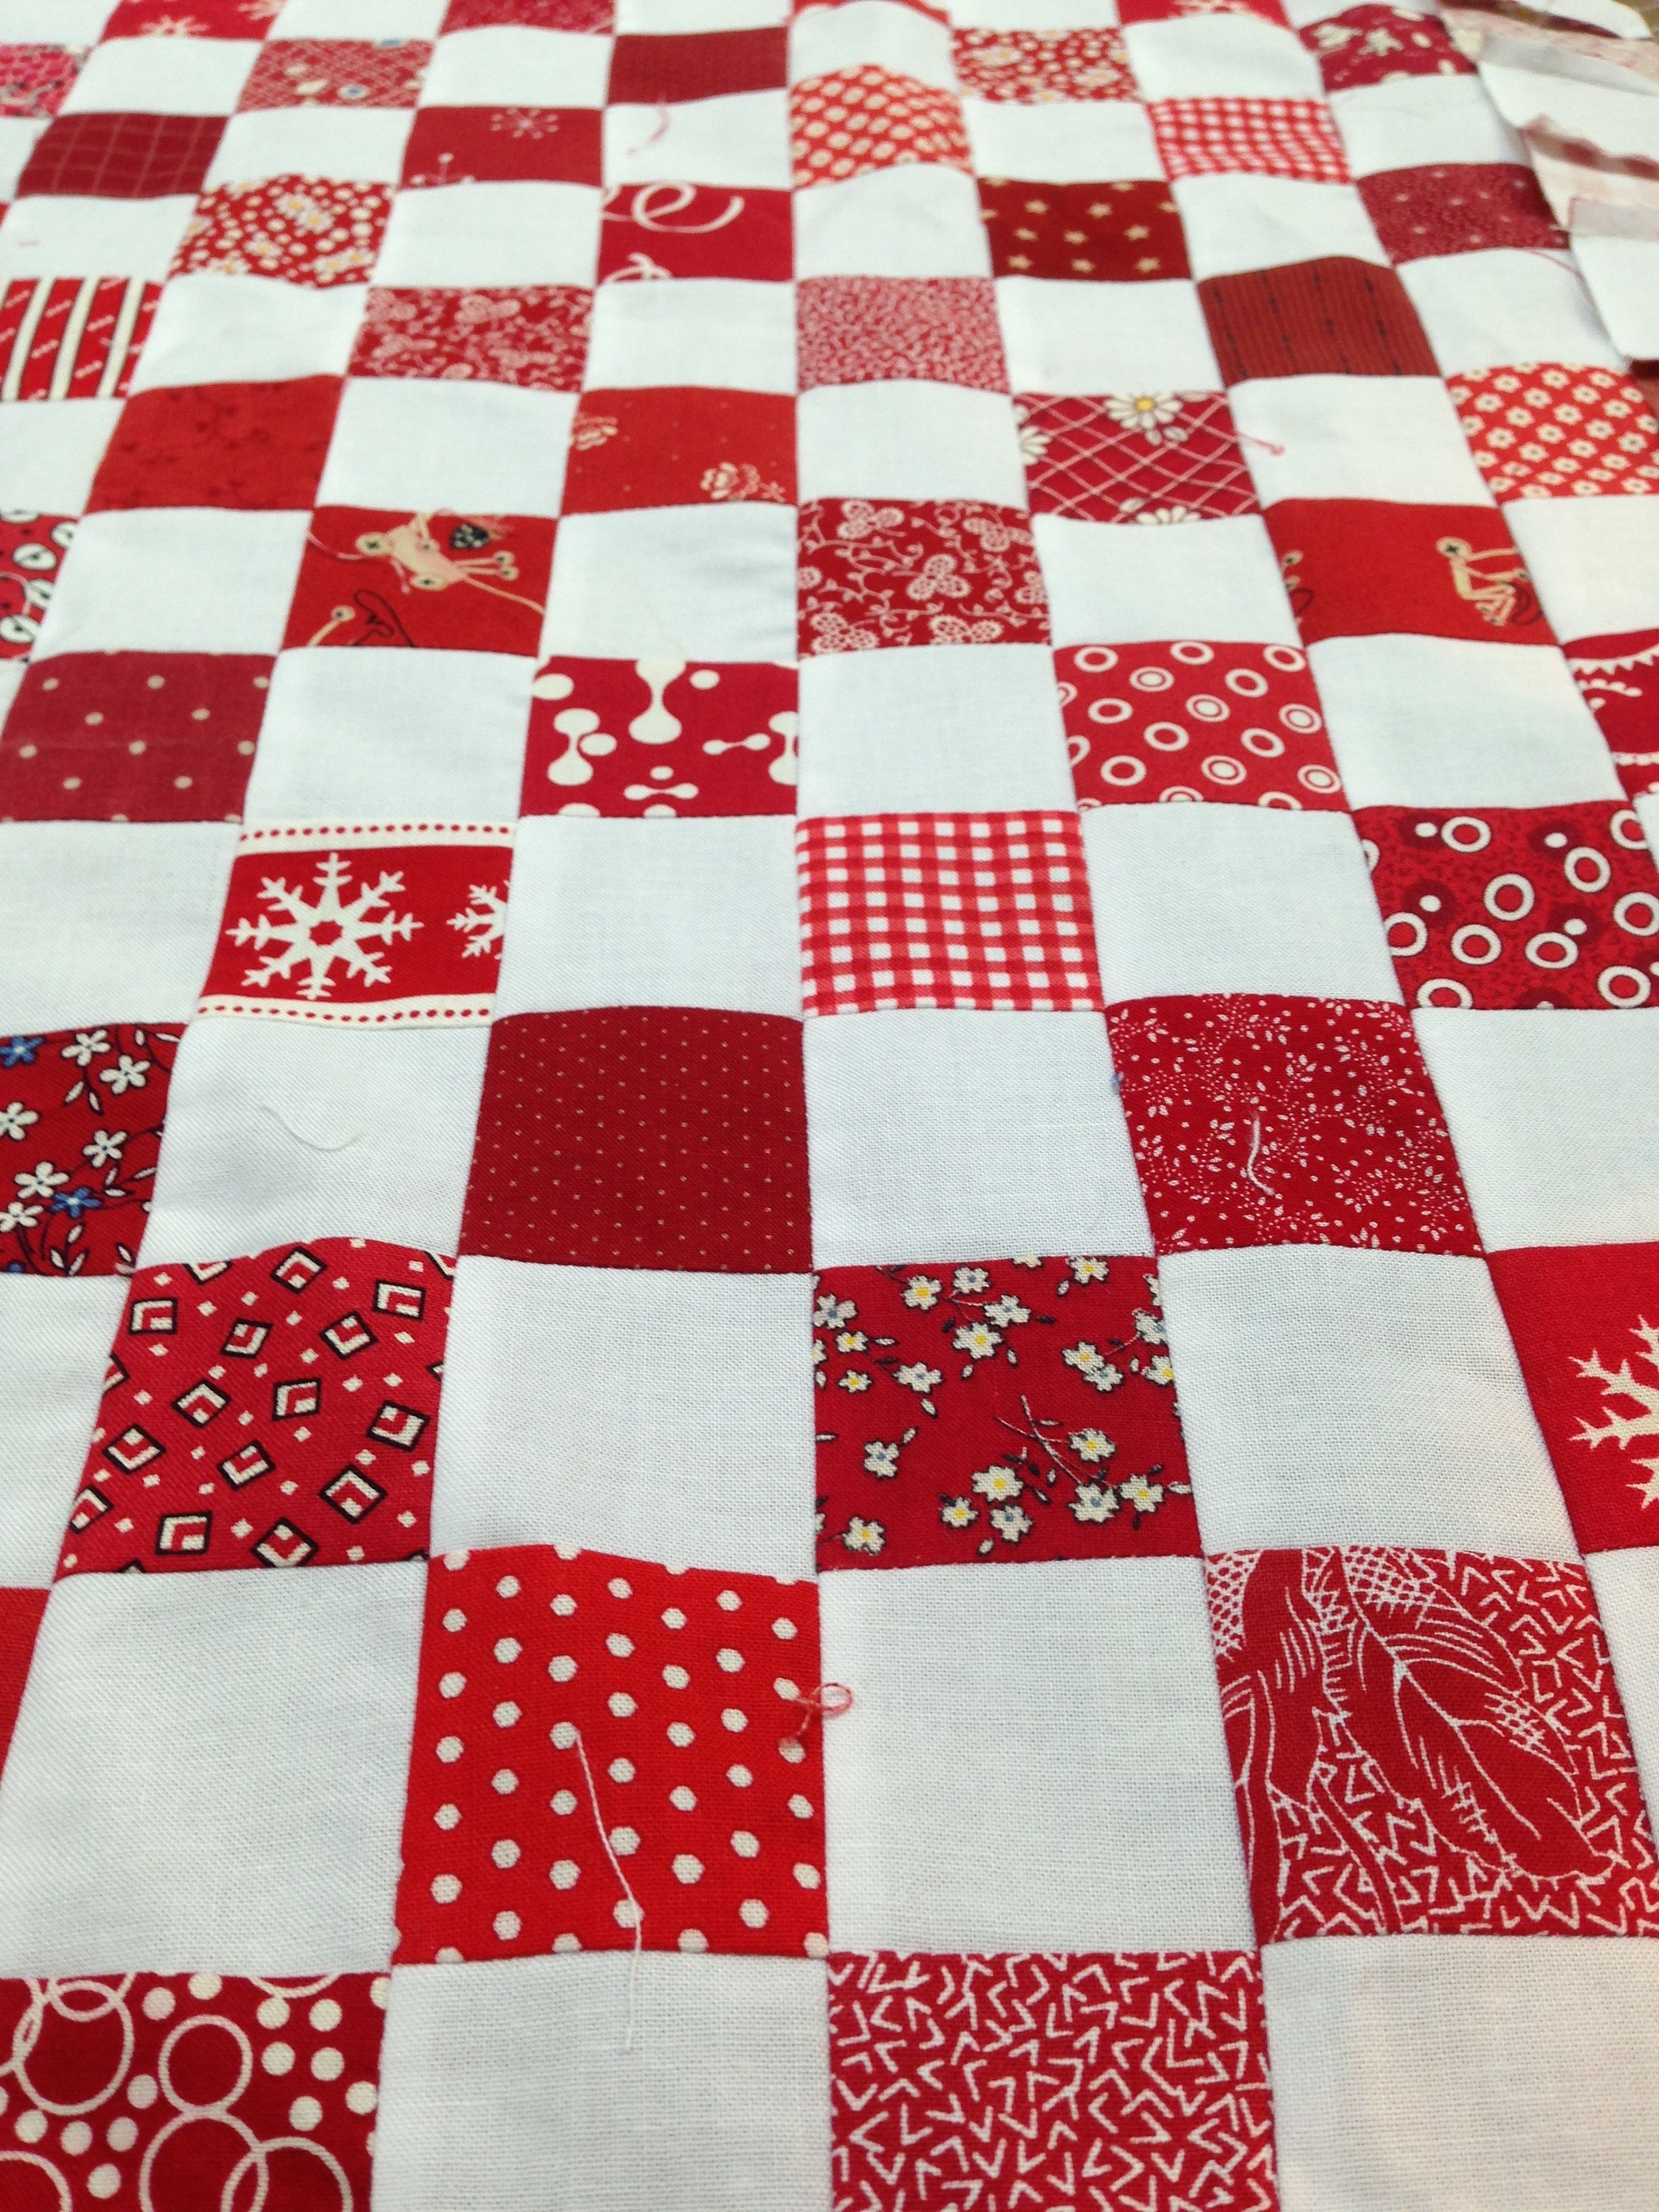
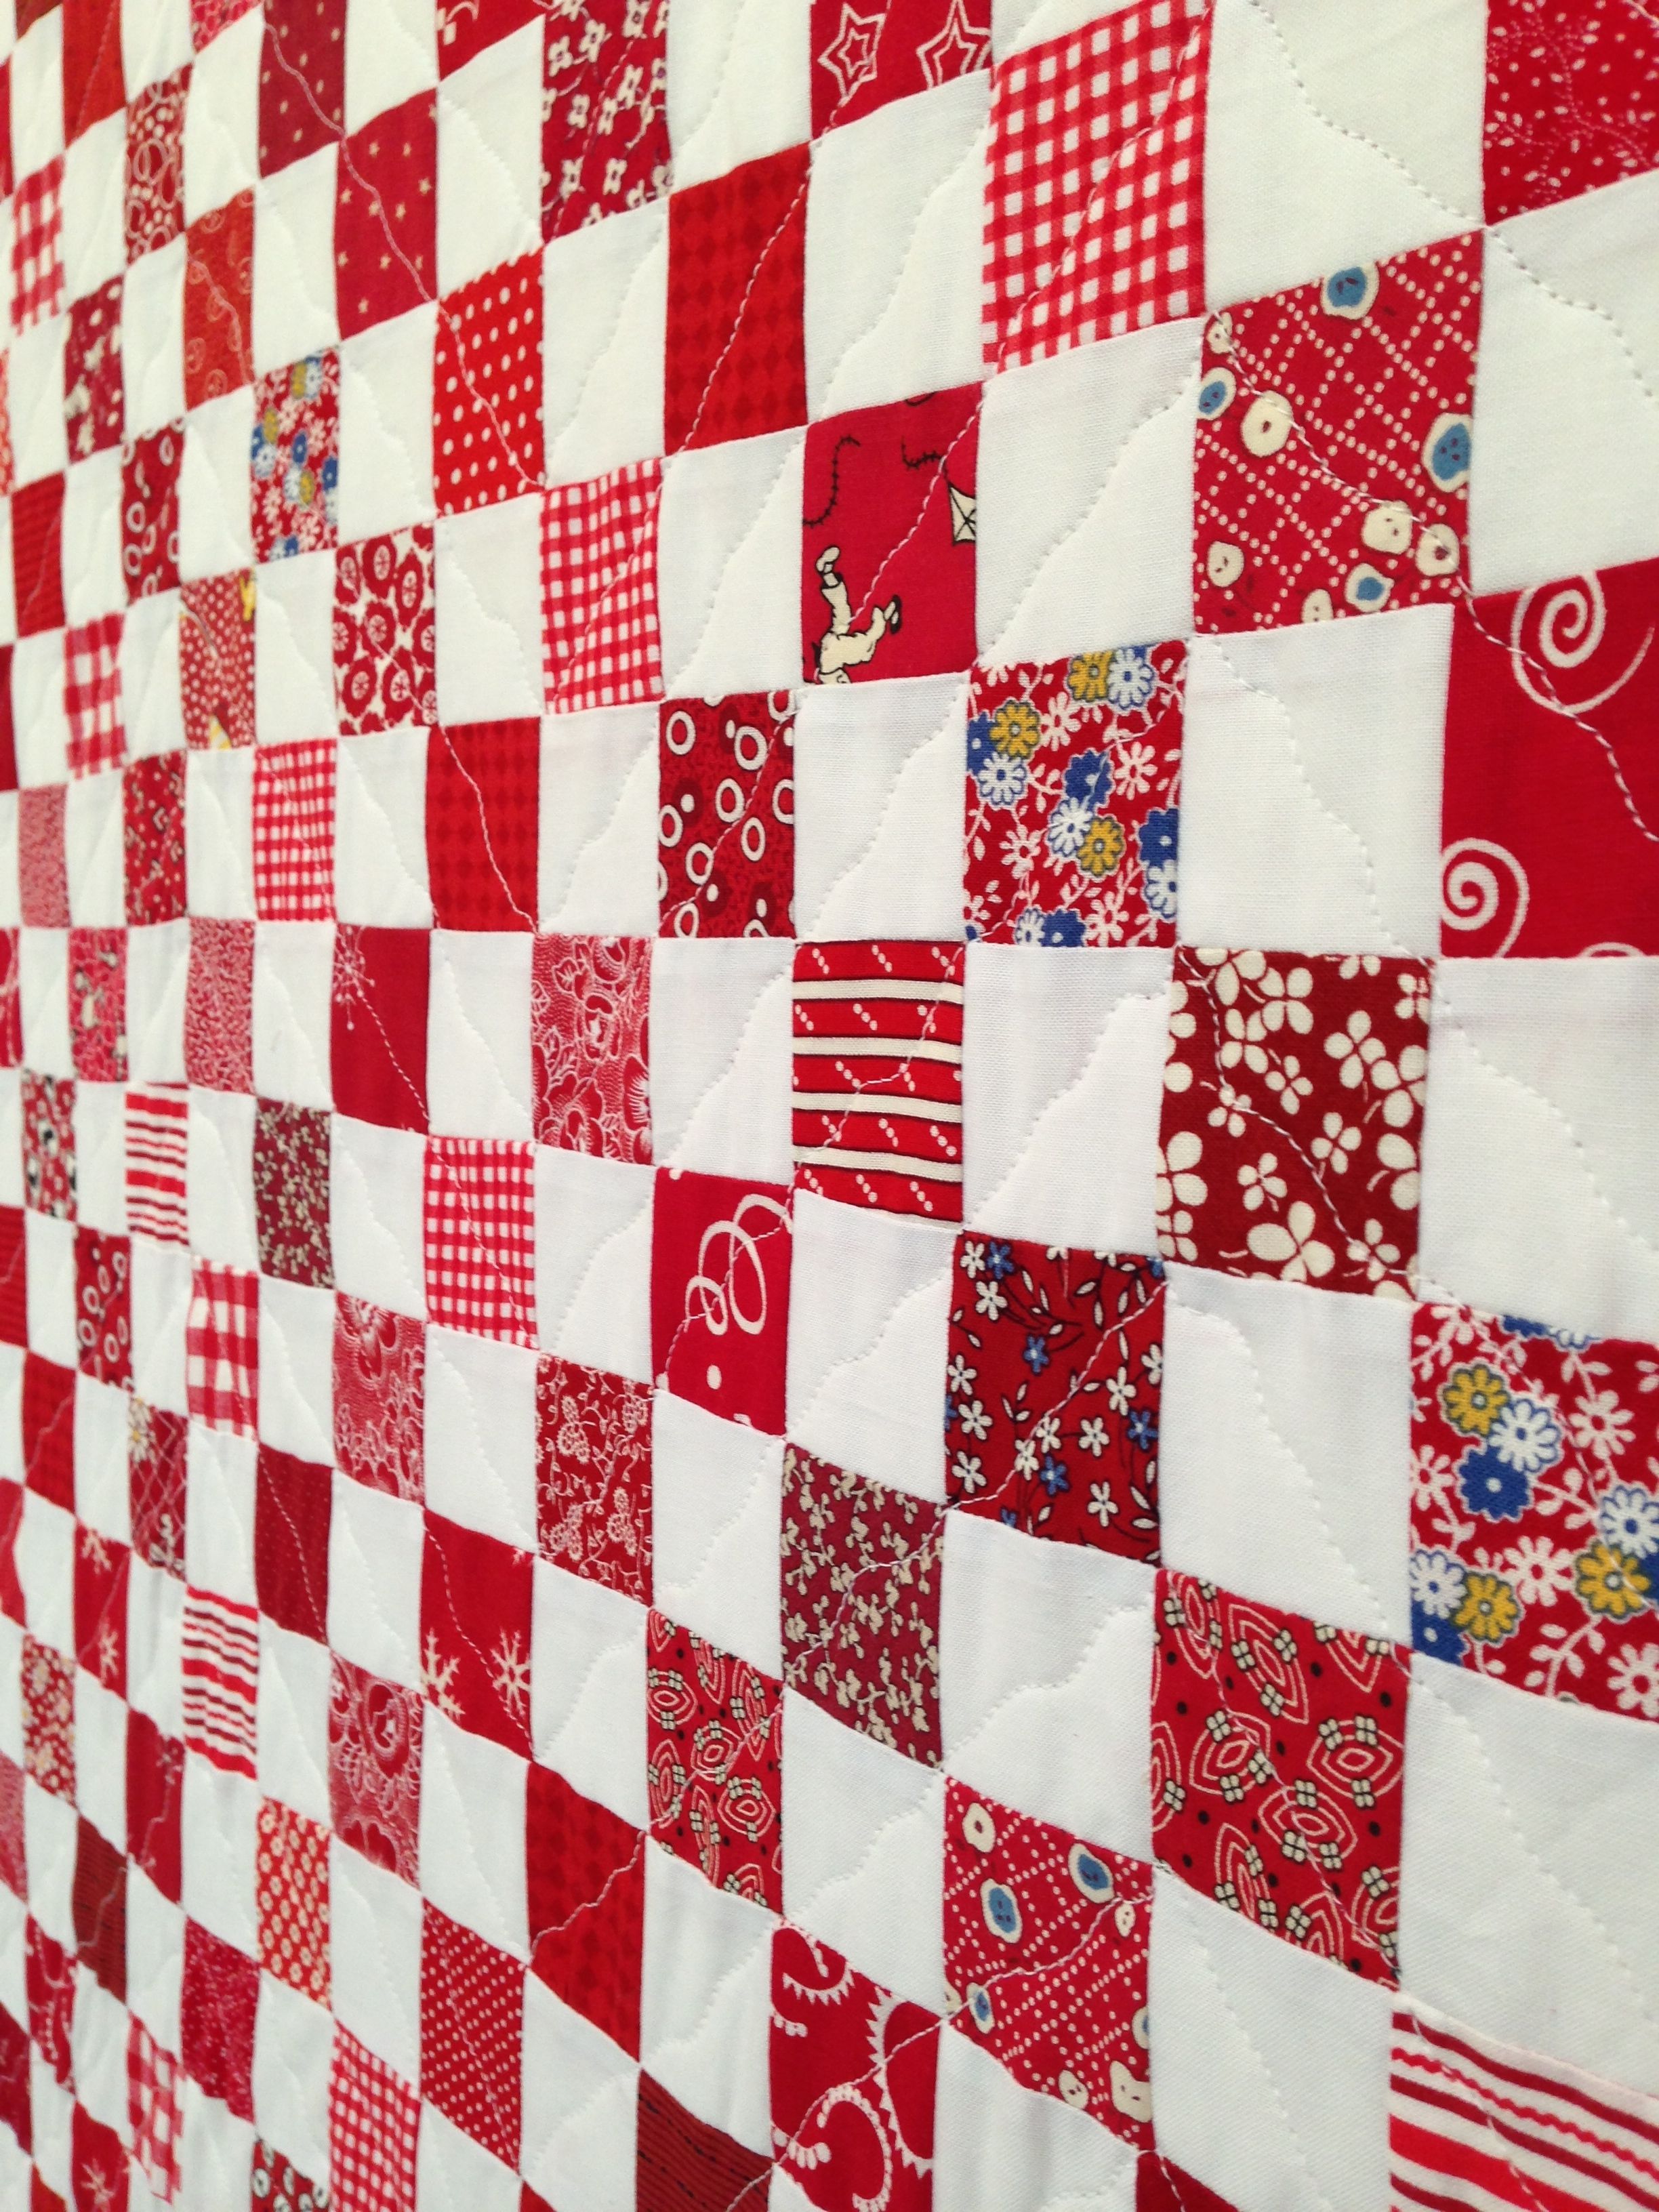
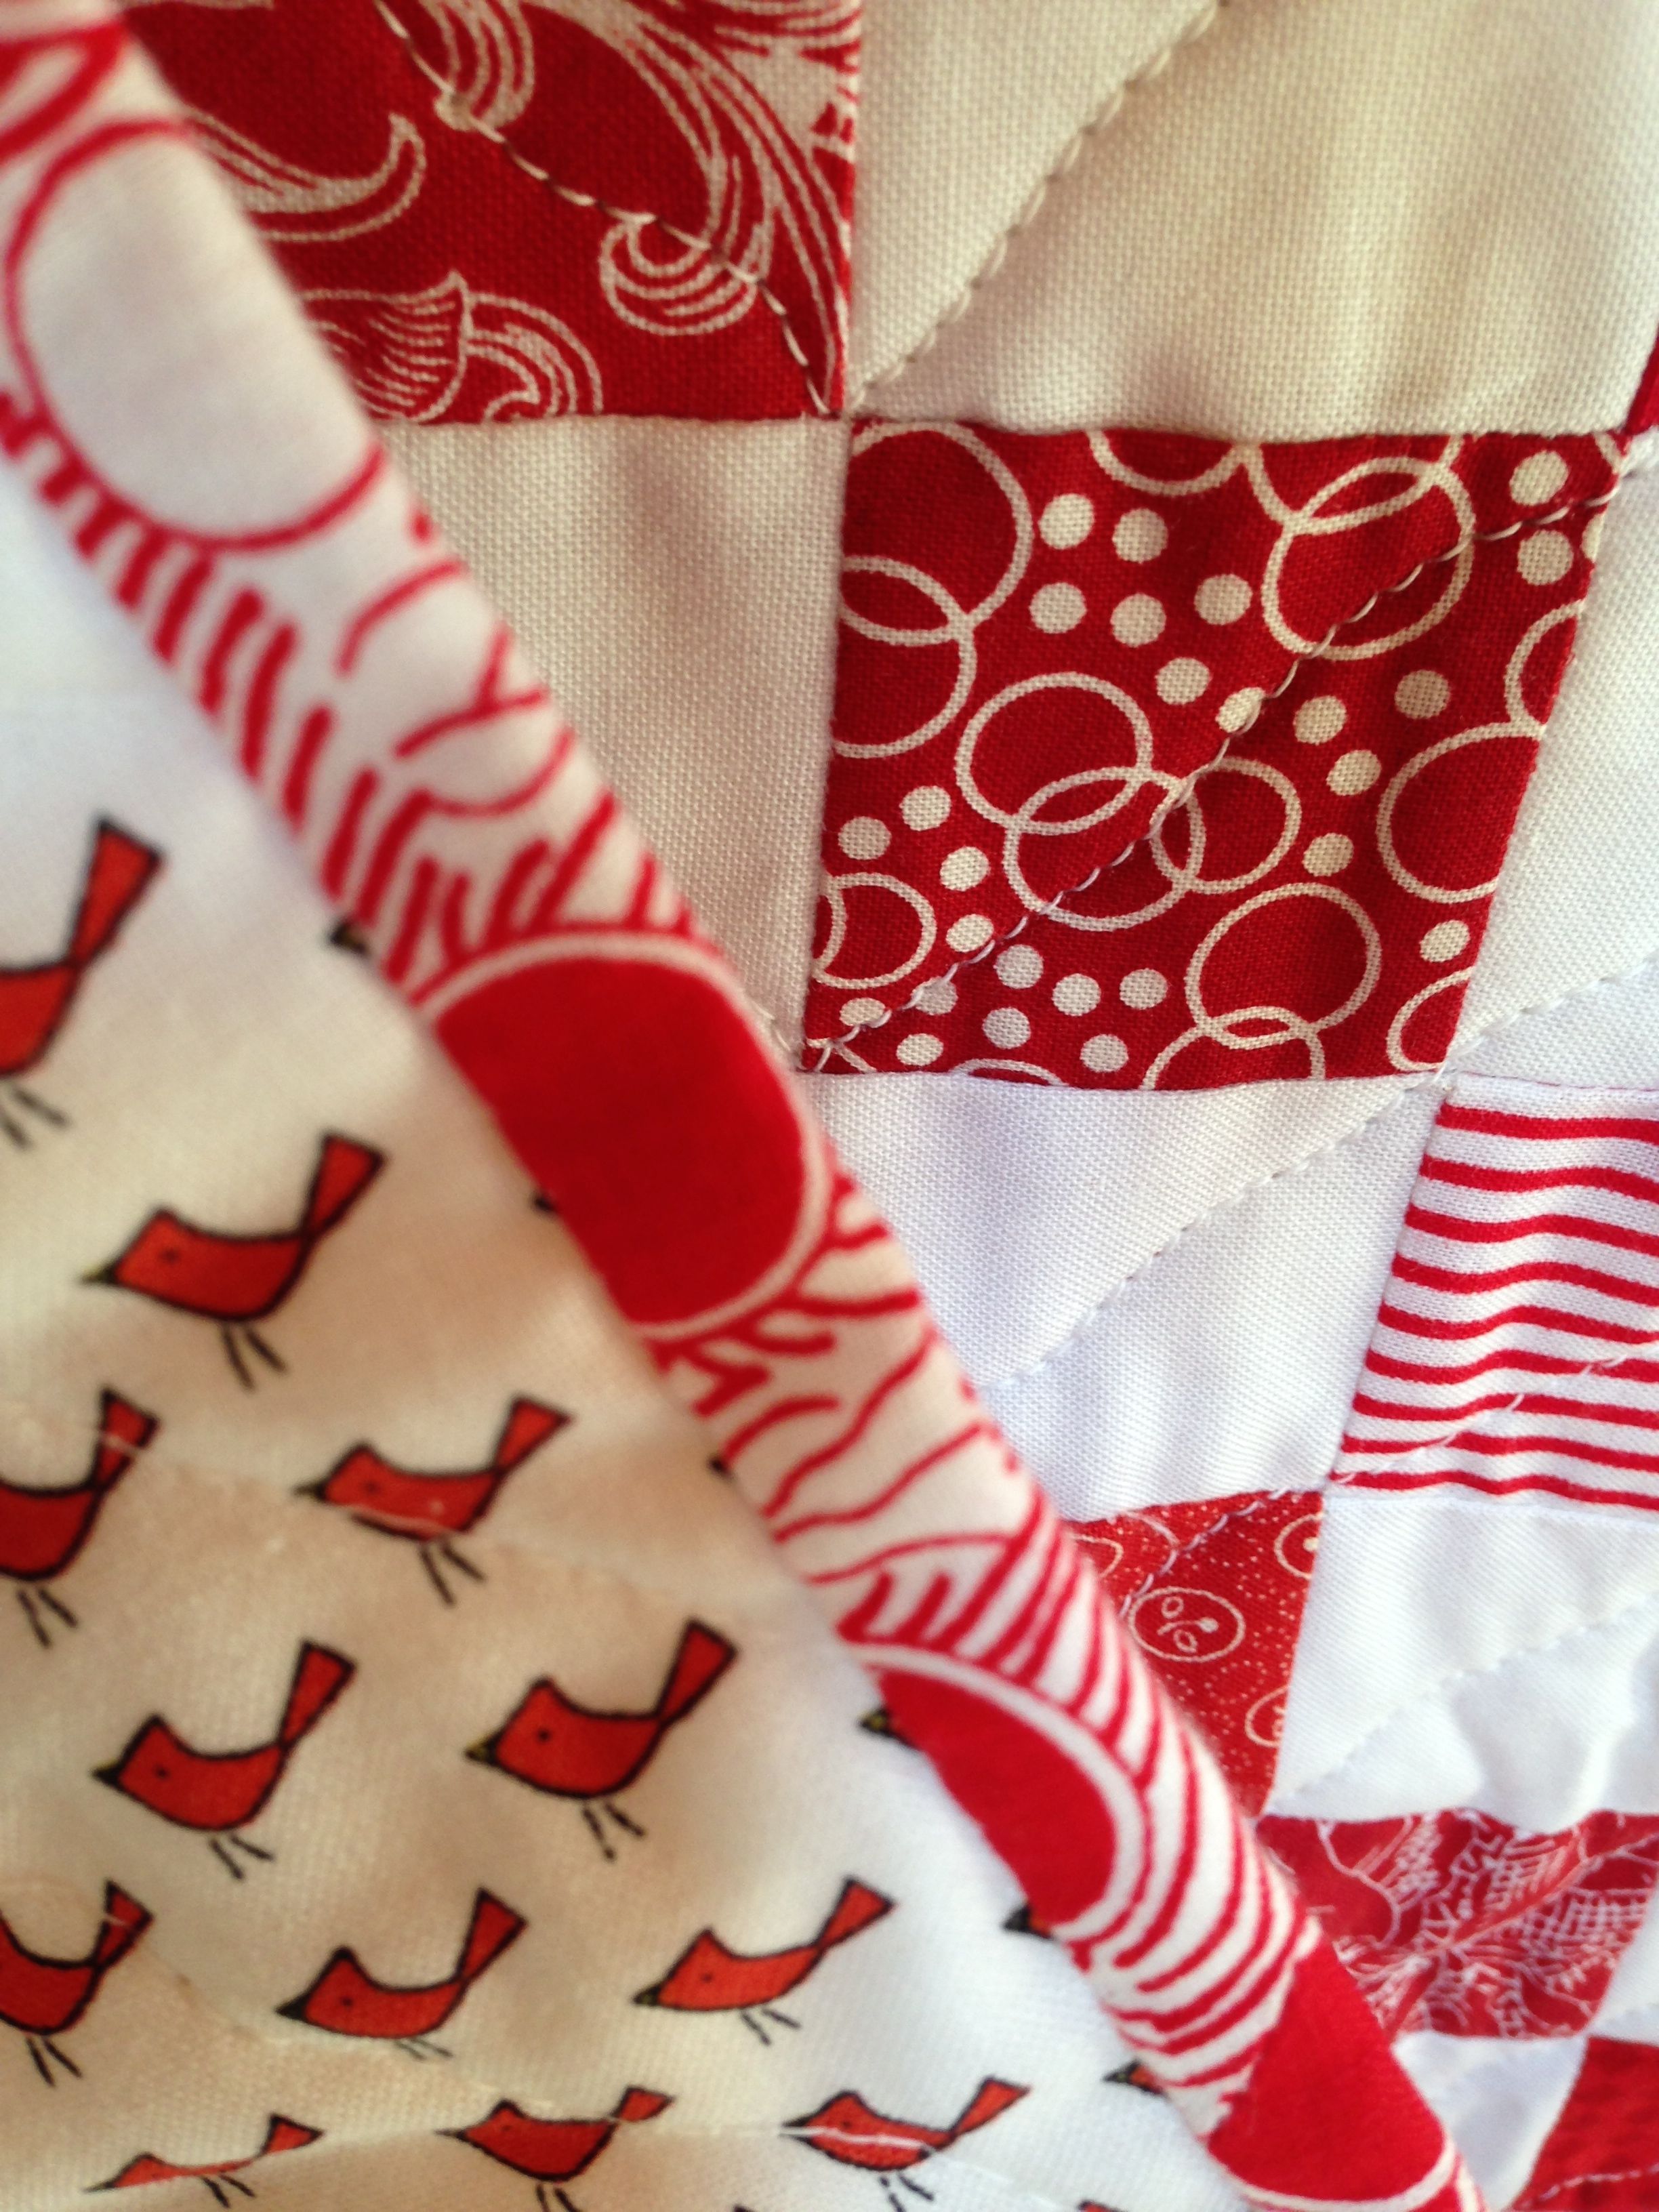
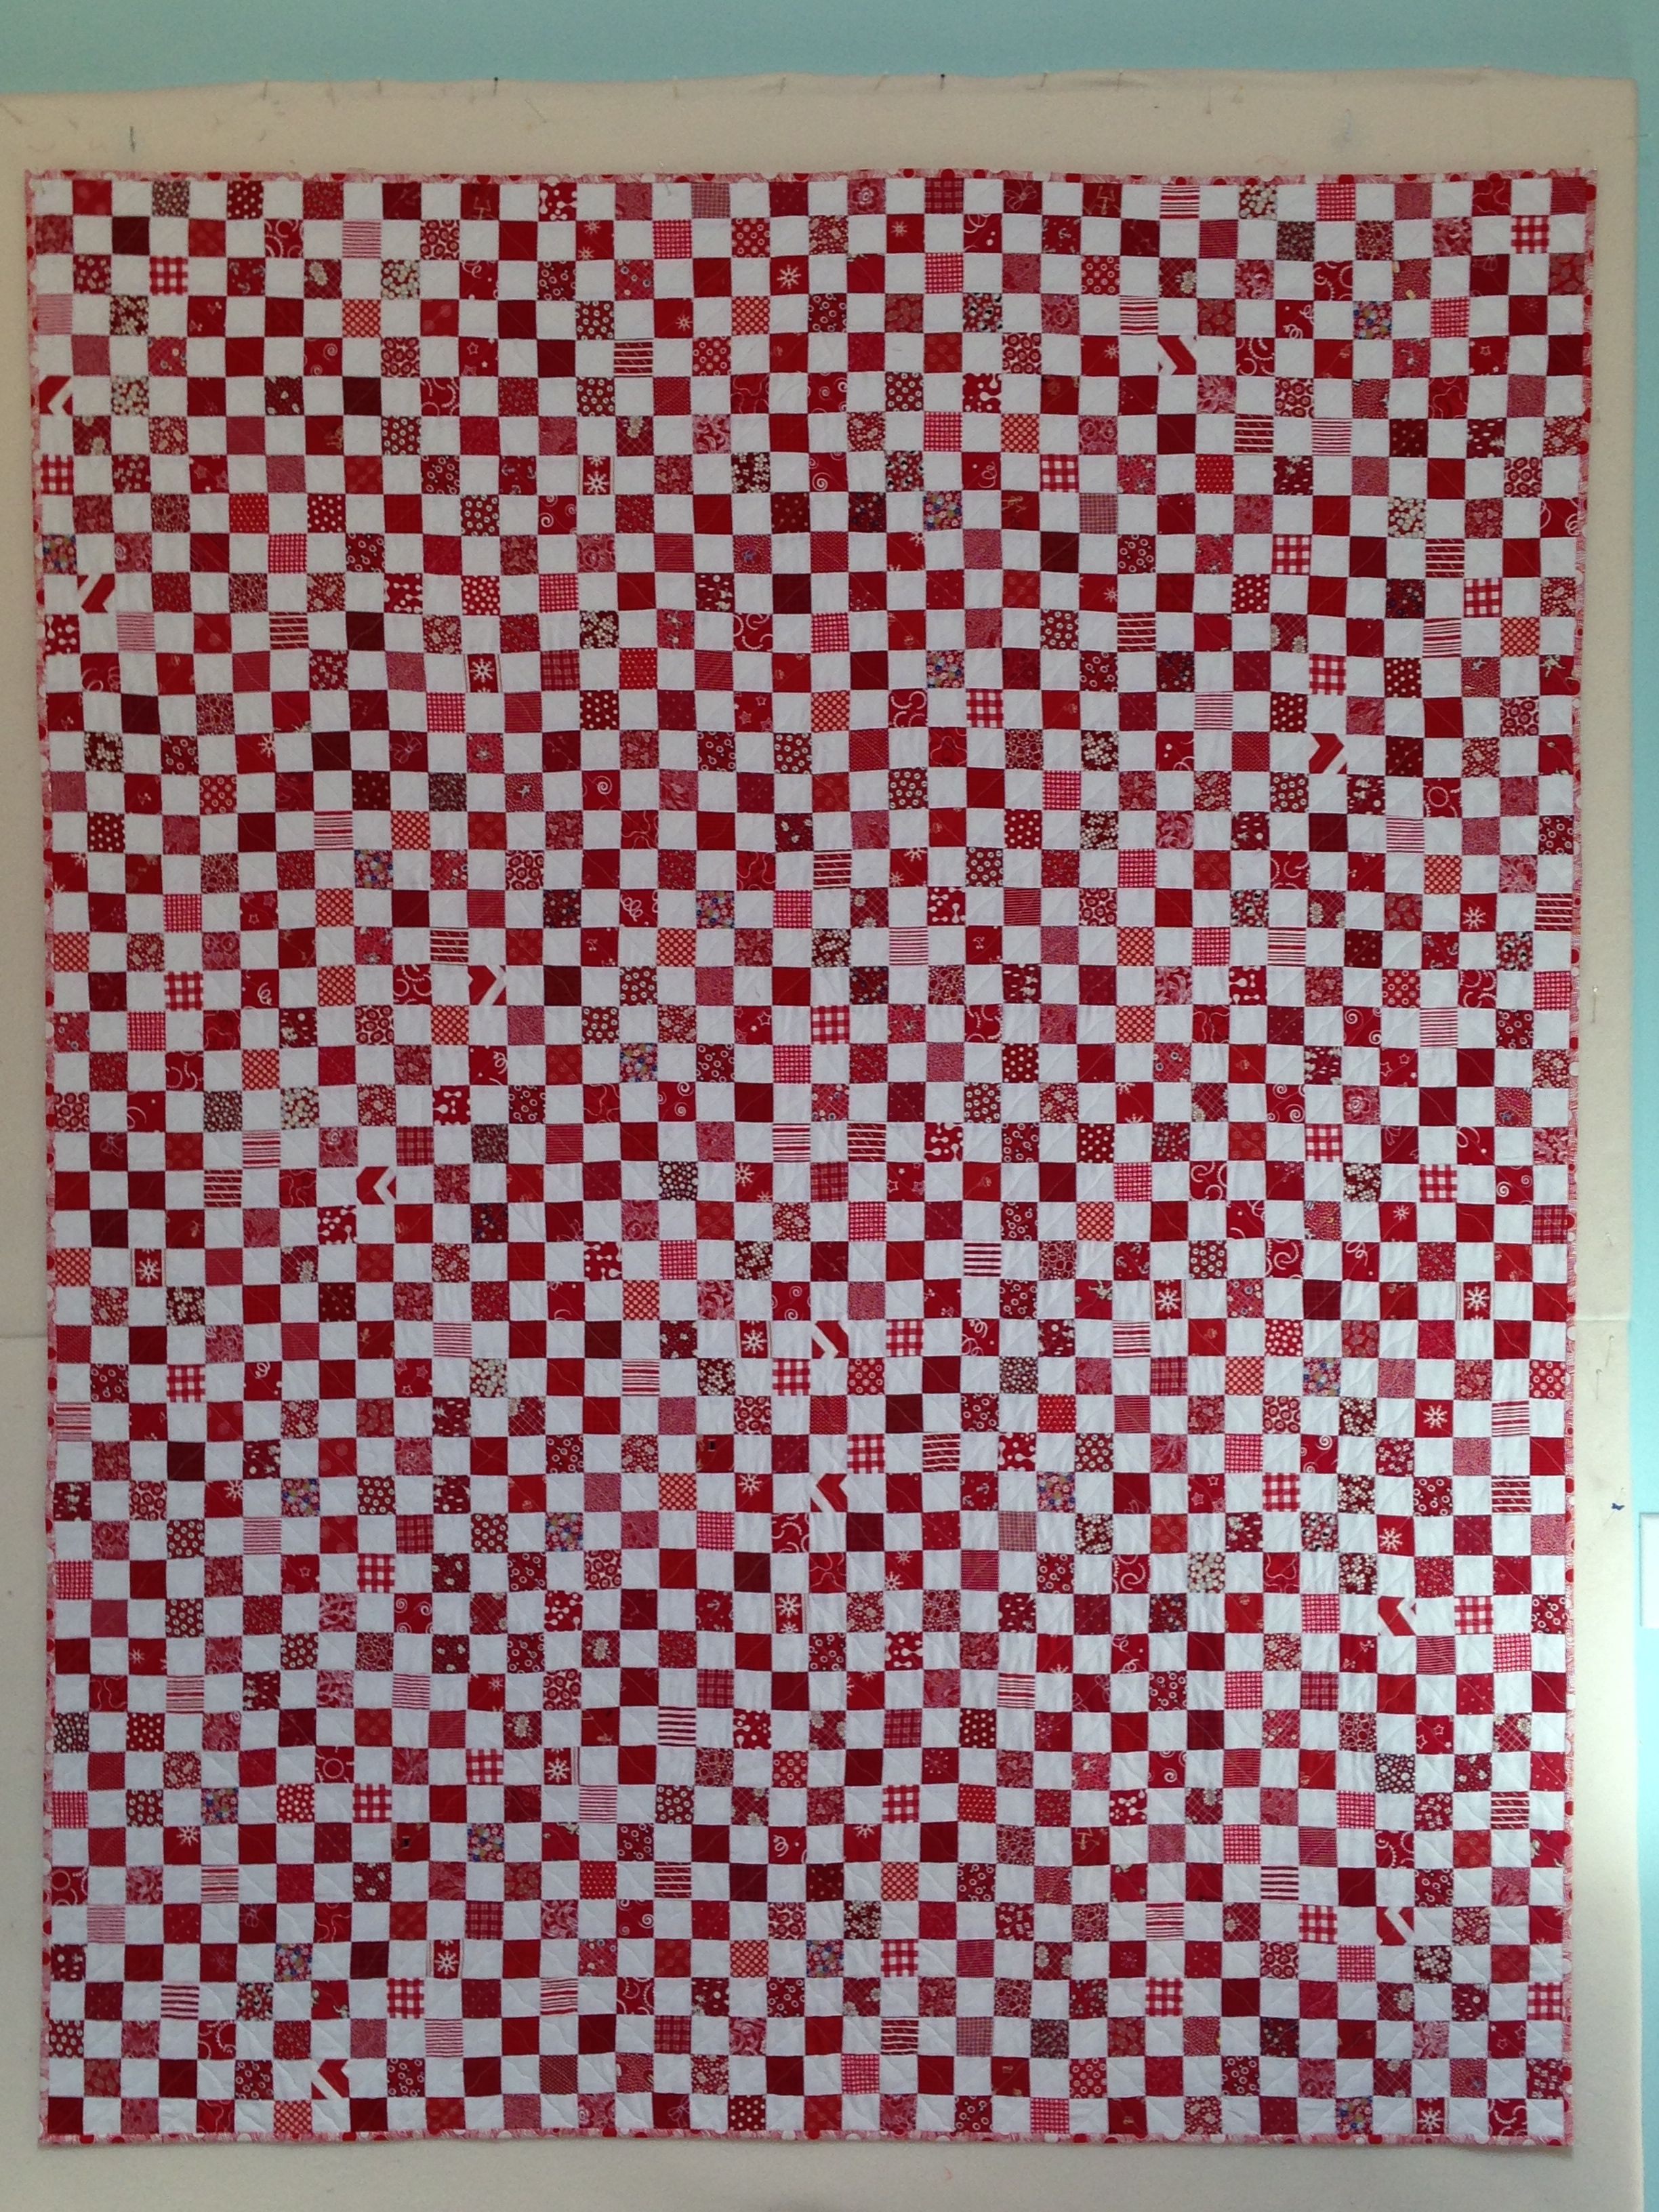
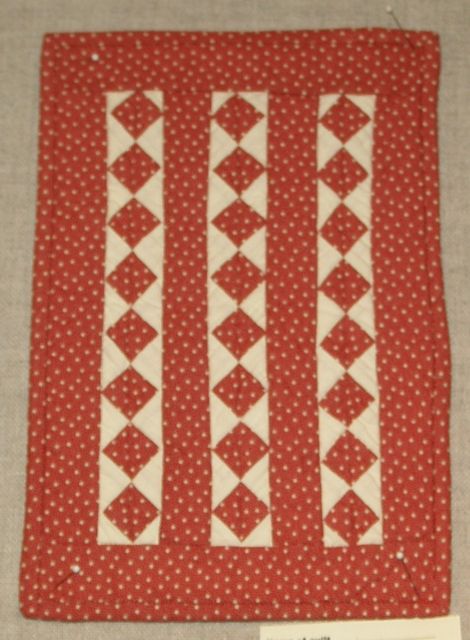
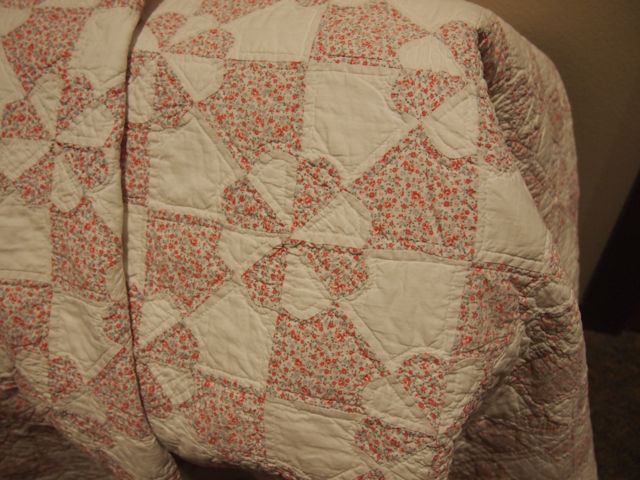
I decided I wanted something red and white and simple for the beds in Sweden. A checkerboard quilt seemed perfect, so I cut a bunch of 2″ strips from my red and white fabrics and sewed them together. Then I cut them in 2″ segments.
I hauled them to a retreat with me!
Then it was just a matter of sewing them together into longer and longer strips.
You know the drill. Once the strips were long enough it was time to sew them together.
Here’s the first one when I finished it at the retreat and spread it on my bed.
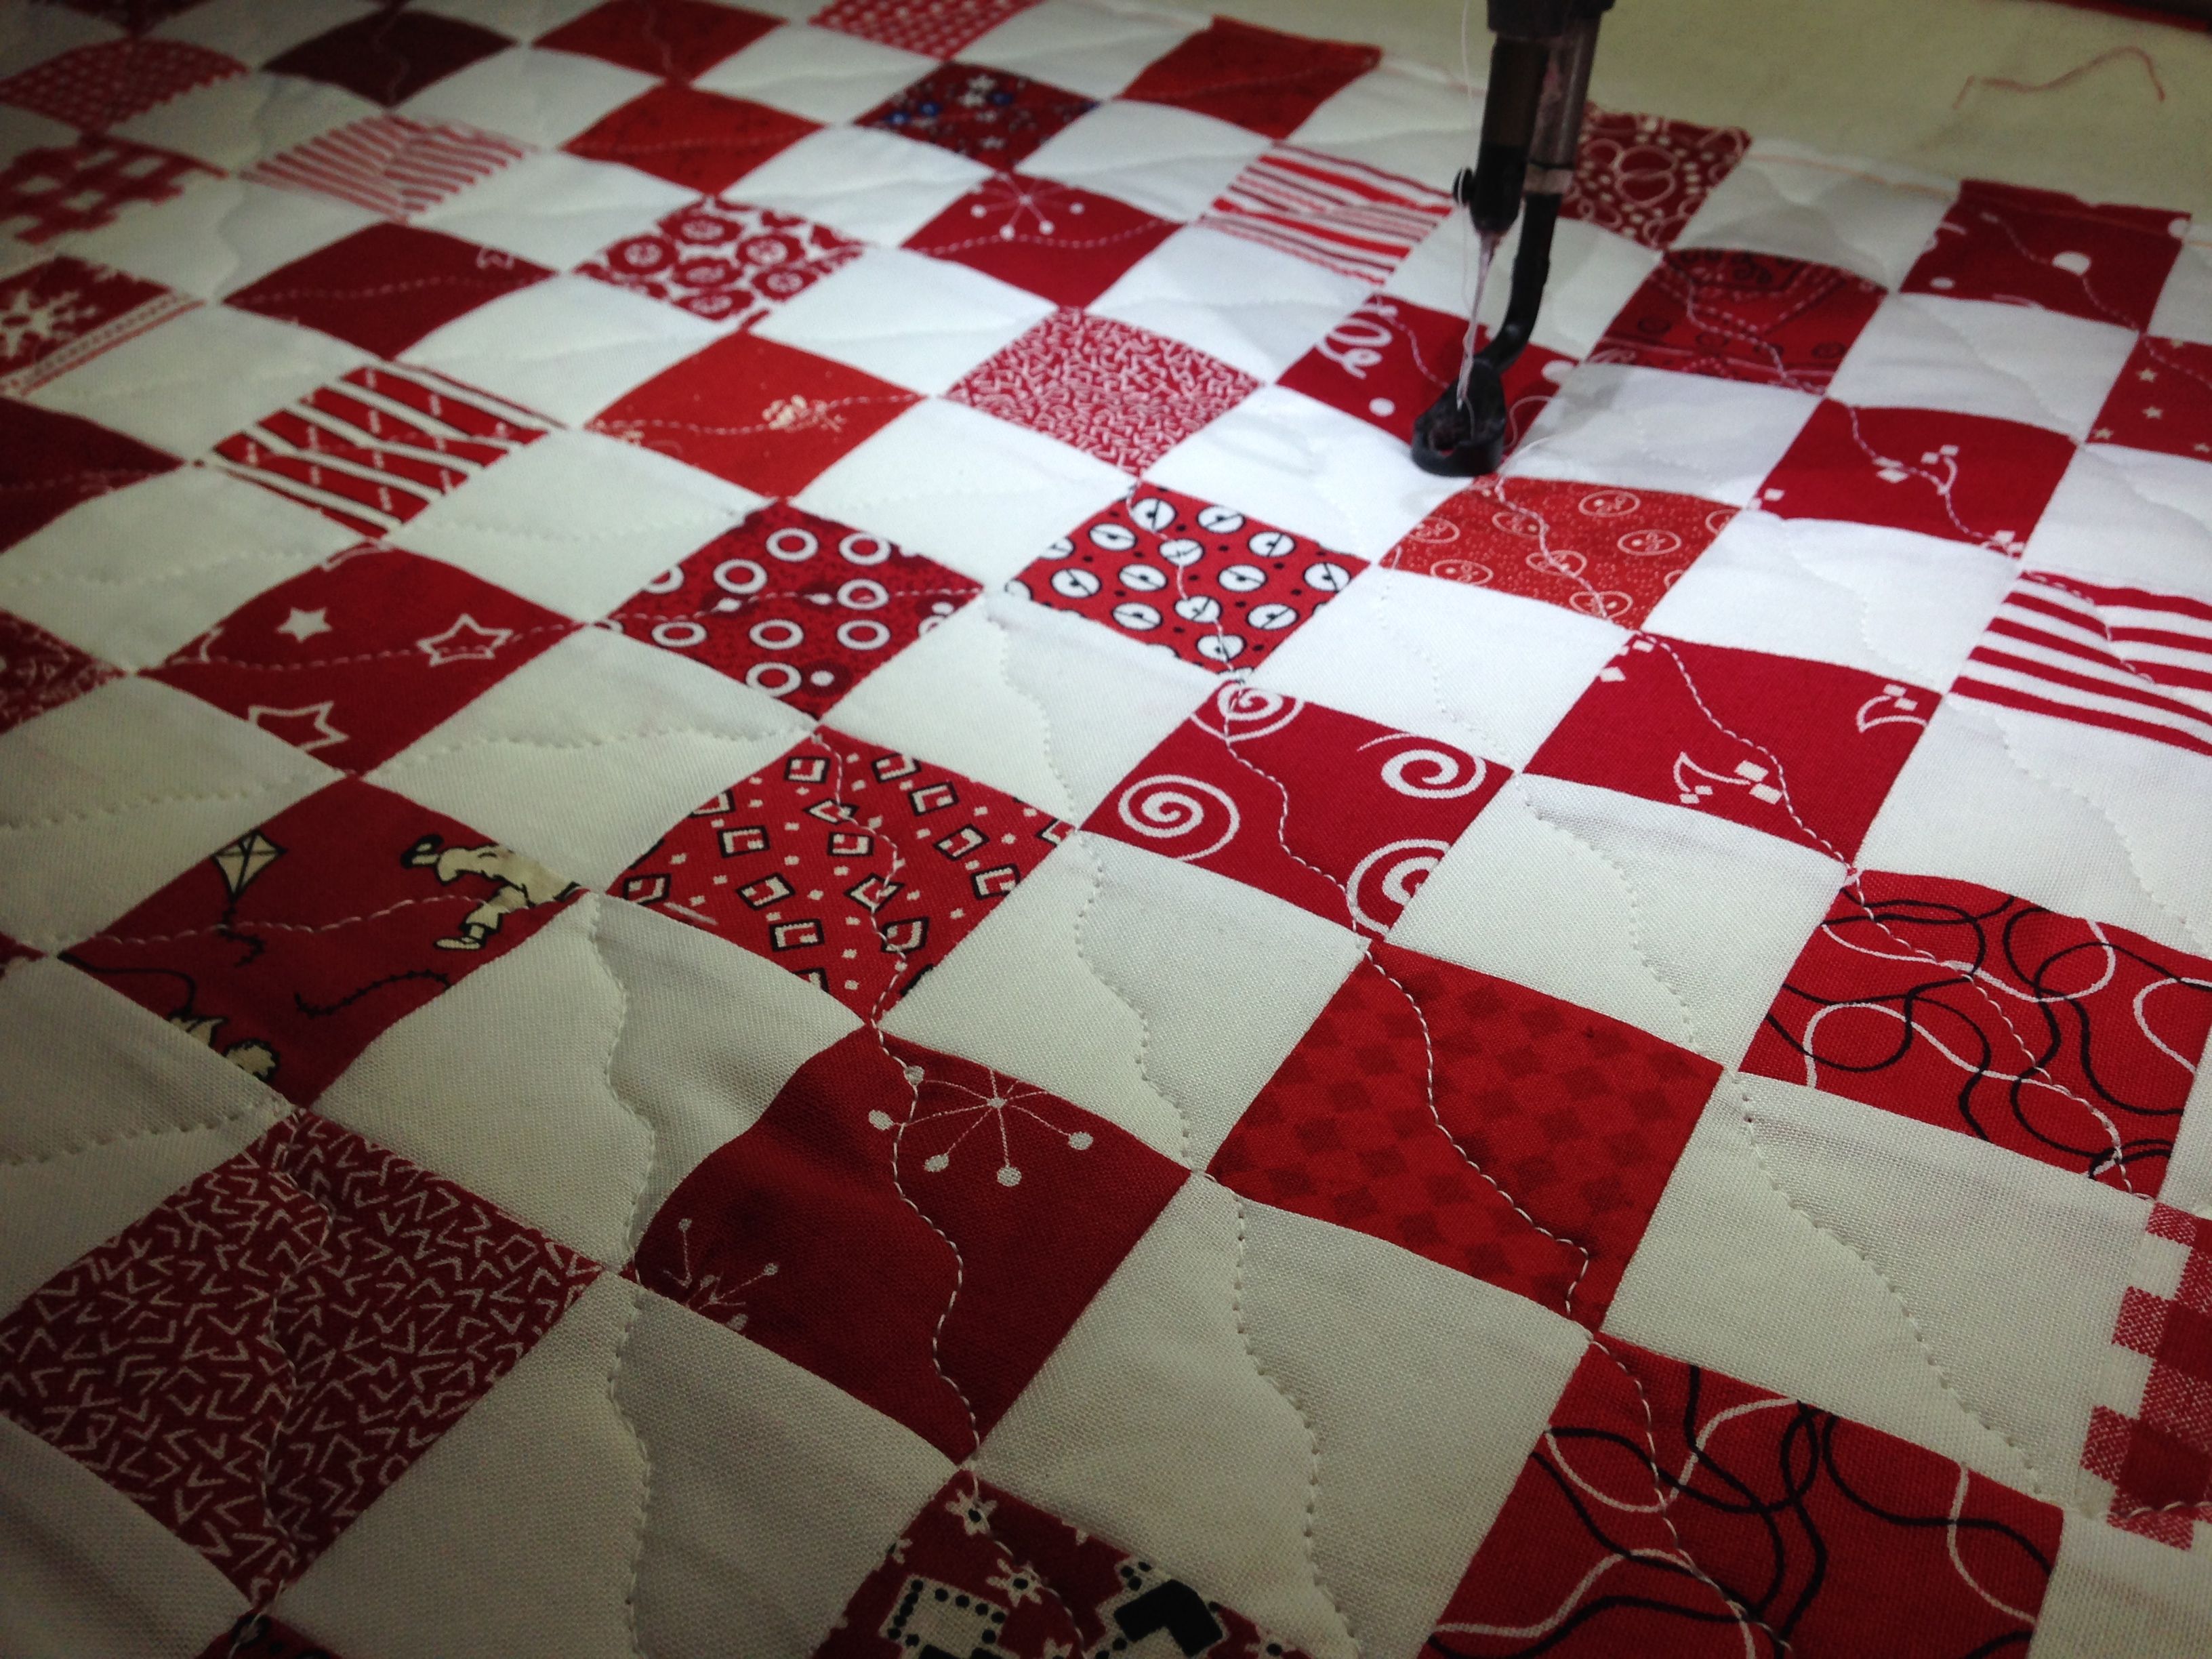
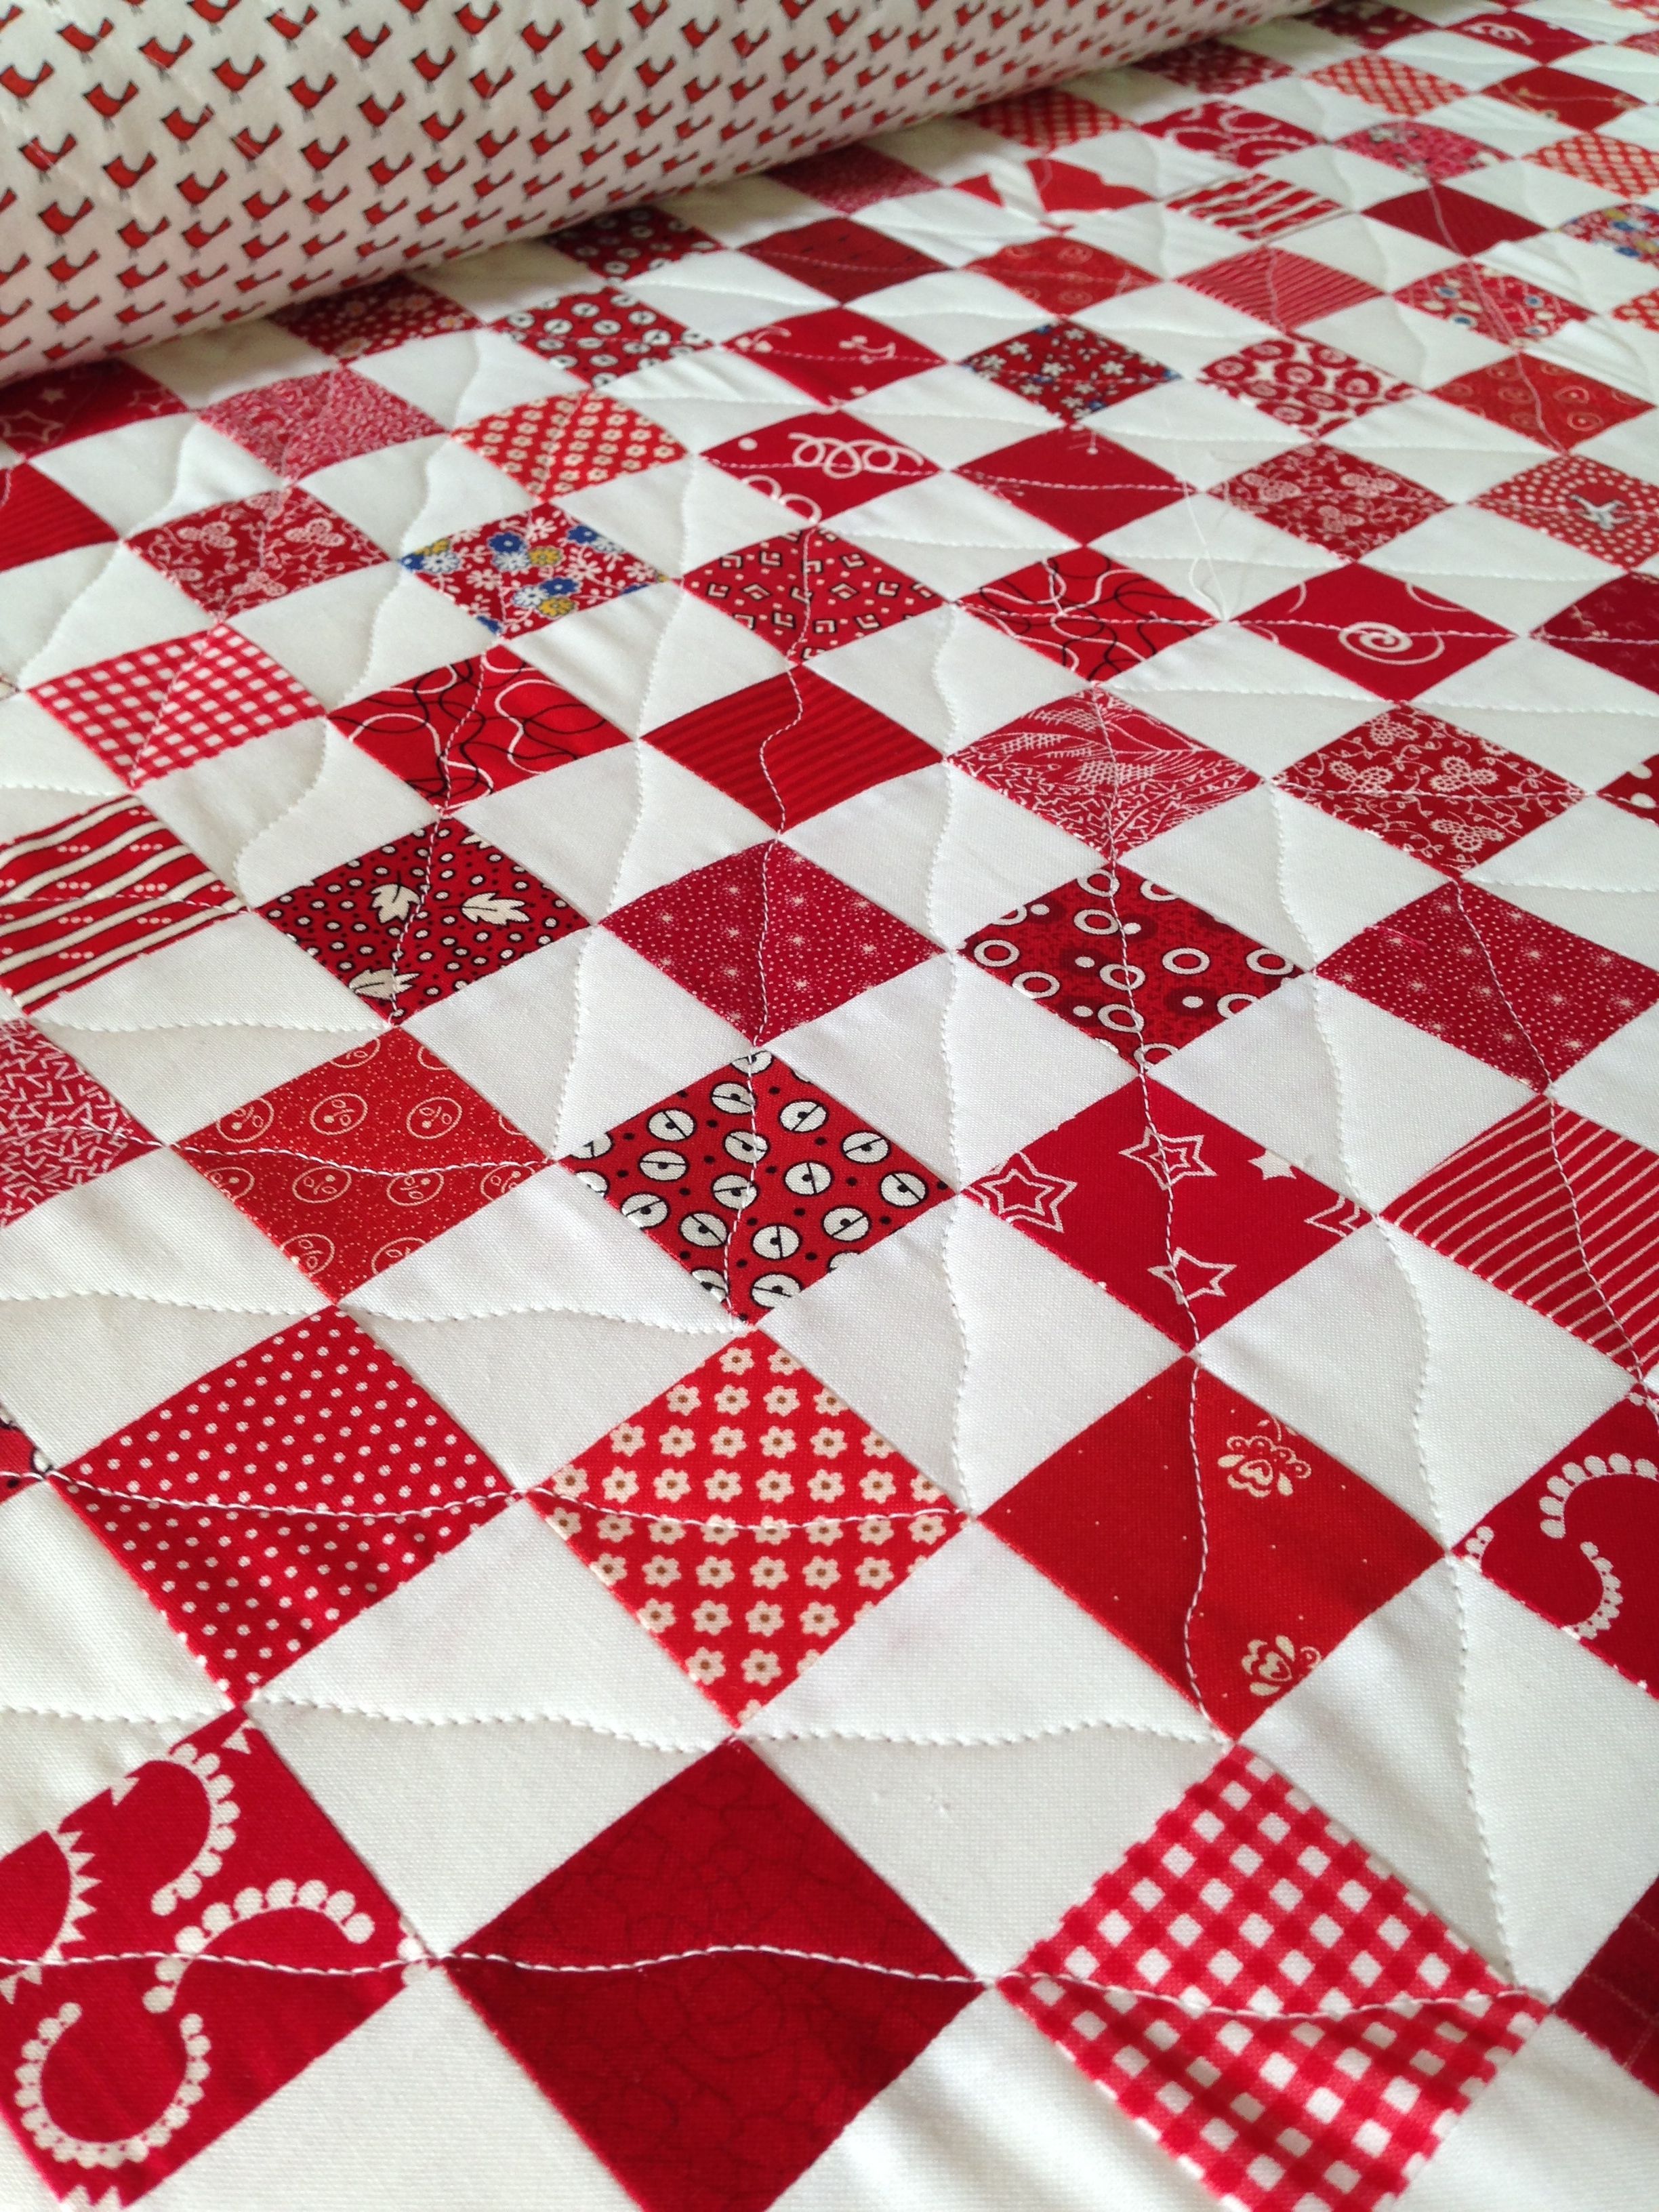
In keeping with the “simple” theme, I just quilted diagonally with wavy lines.
But I didn’t go all the way in one direction, I did more of a chevron pattern.
I was really pleased with the way it turned out.
I found this cute bird print for the back.
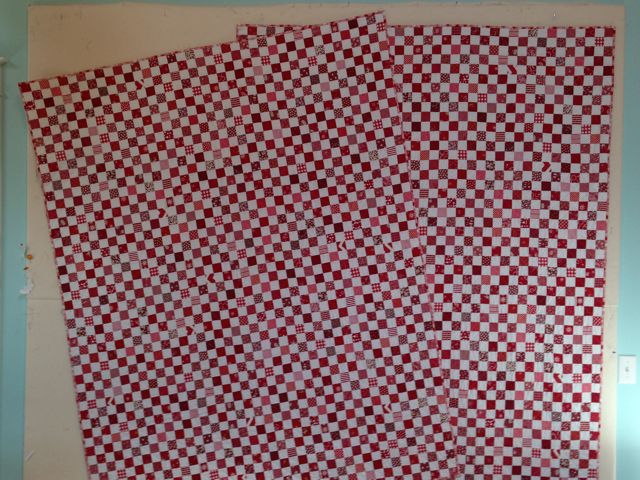
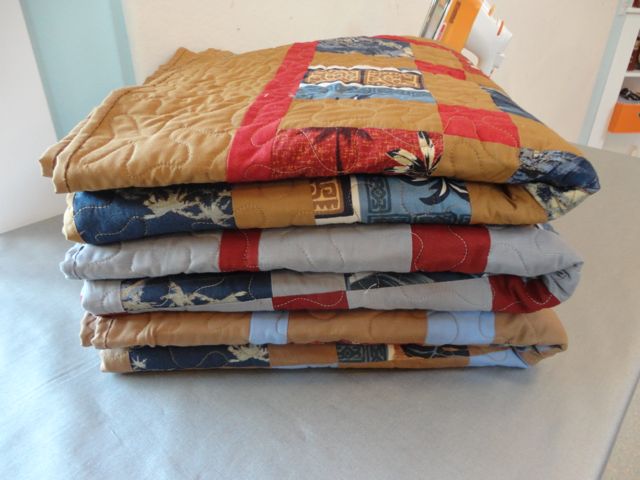
Each quilt was 40 squares by 50 squares, or 2000 squares! (Scary when you say it that way!)
Yes, I said “each quilt” because I made two of them!
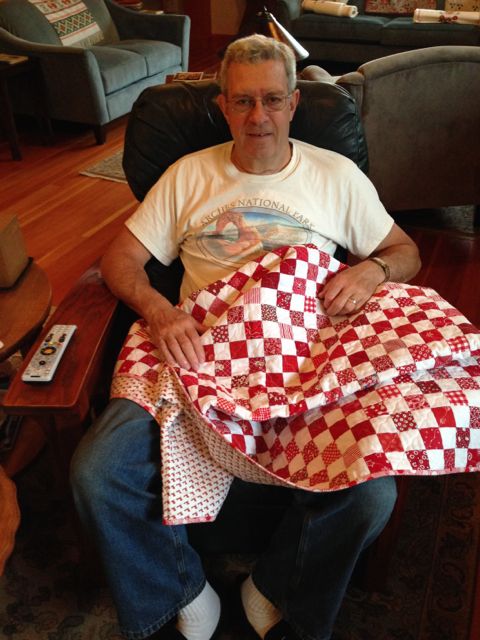
Here’s Bob getting his. I gave it to him before we left home so he could put it in his suitcase!
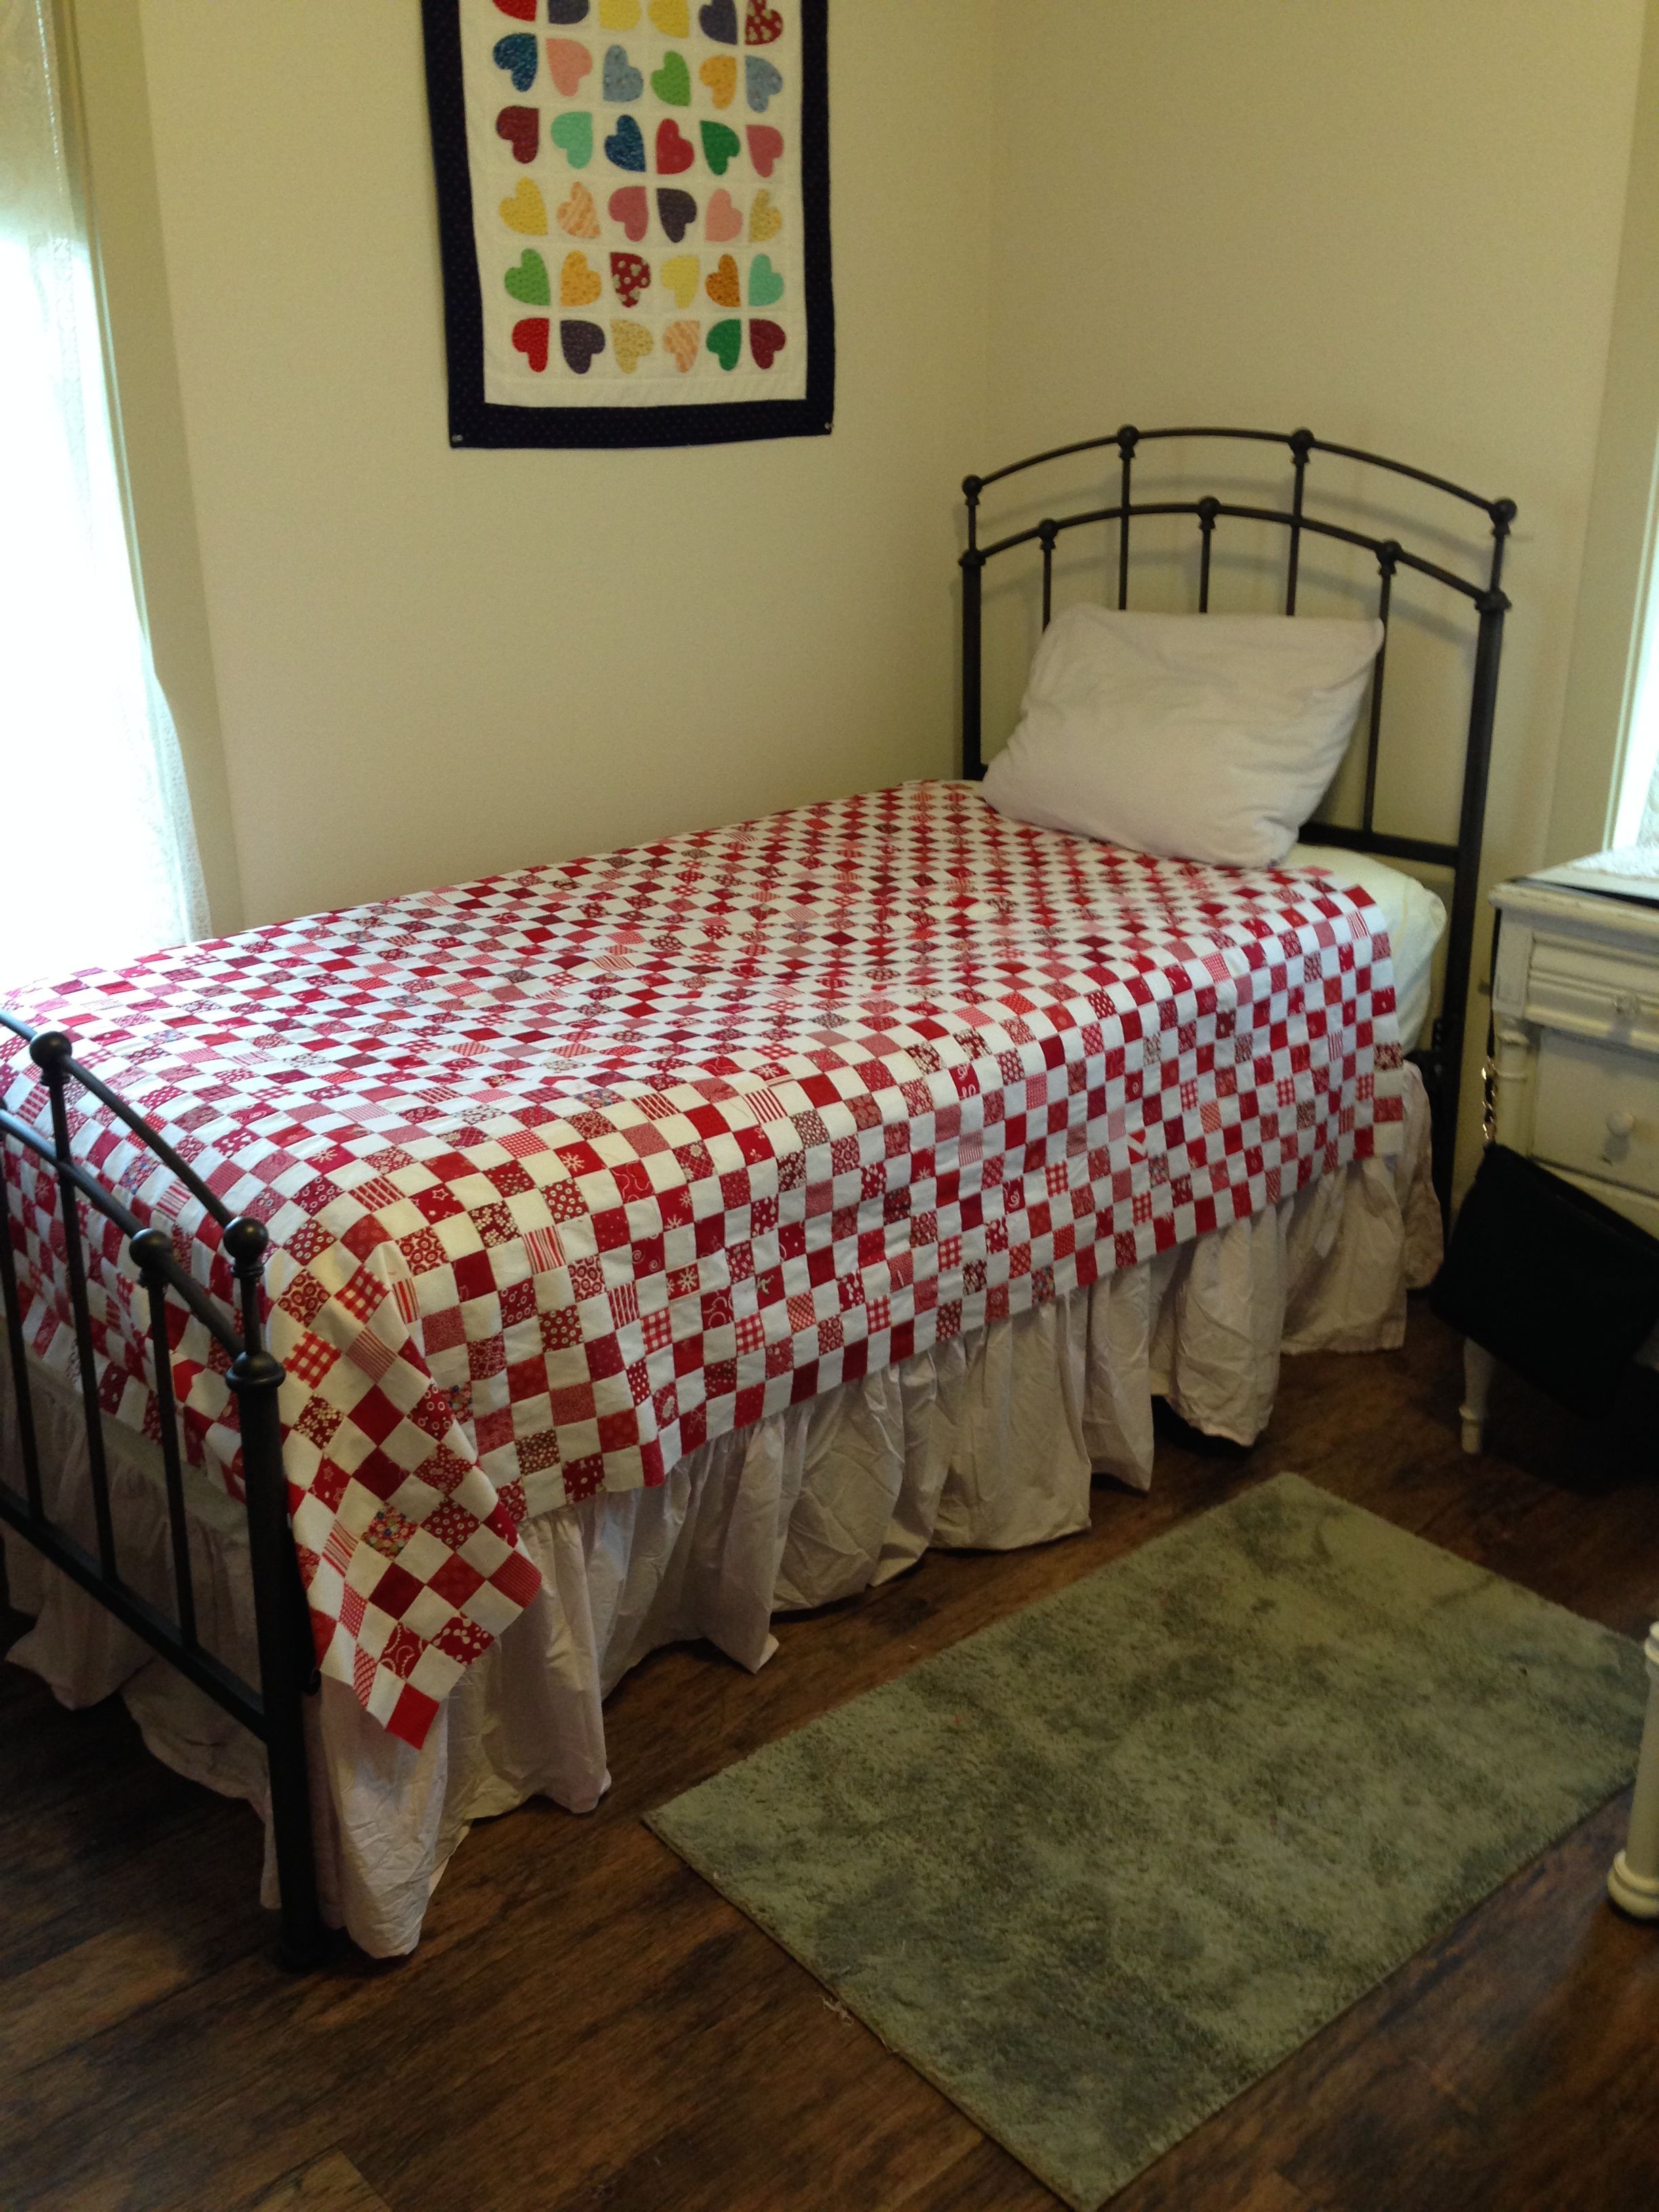
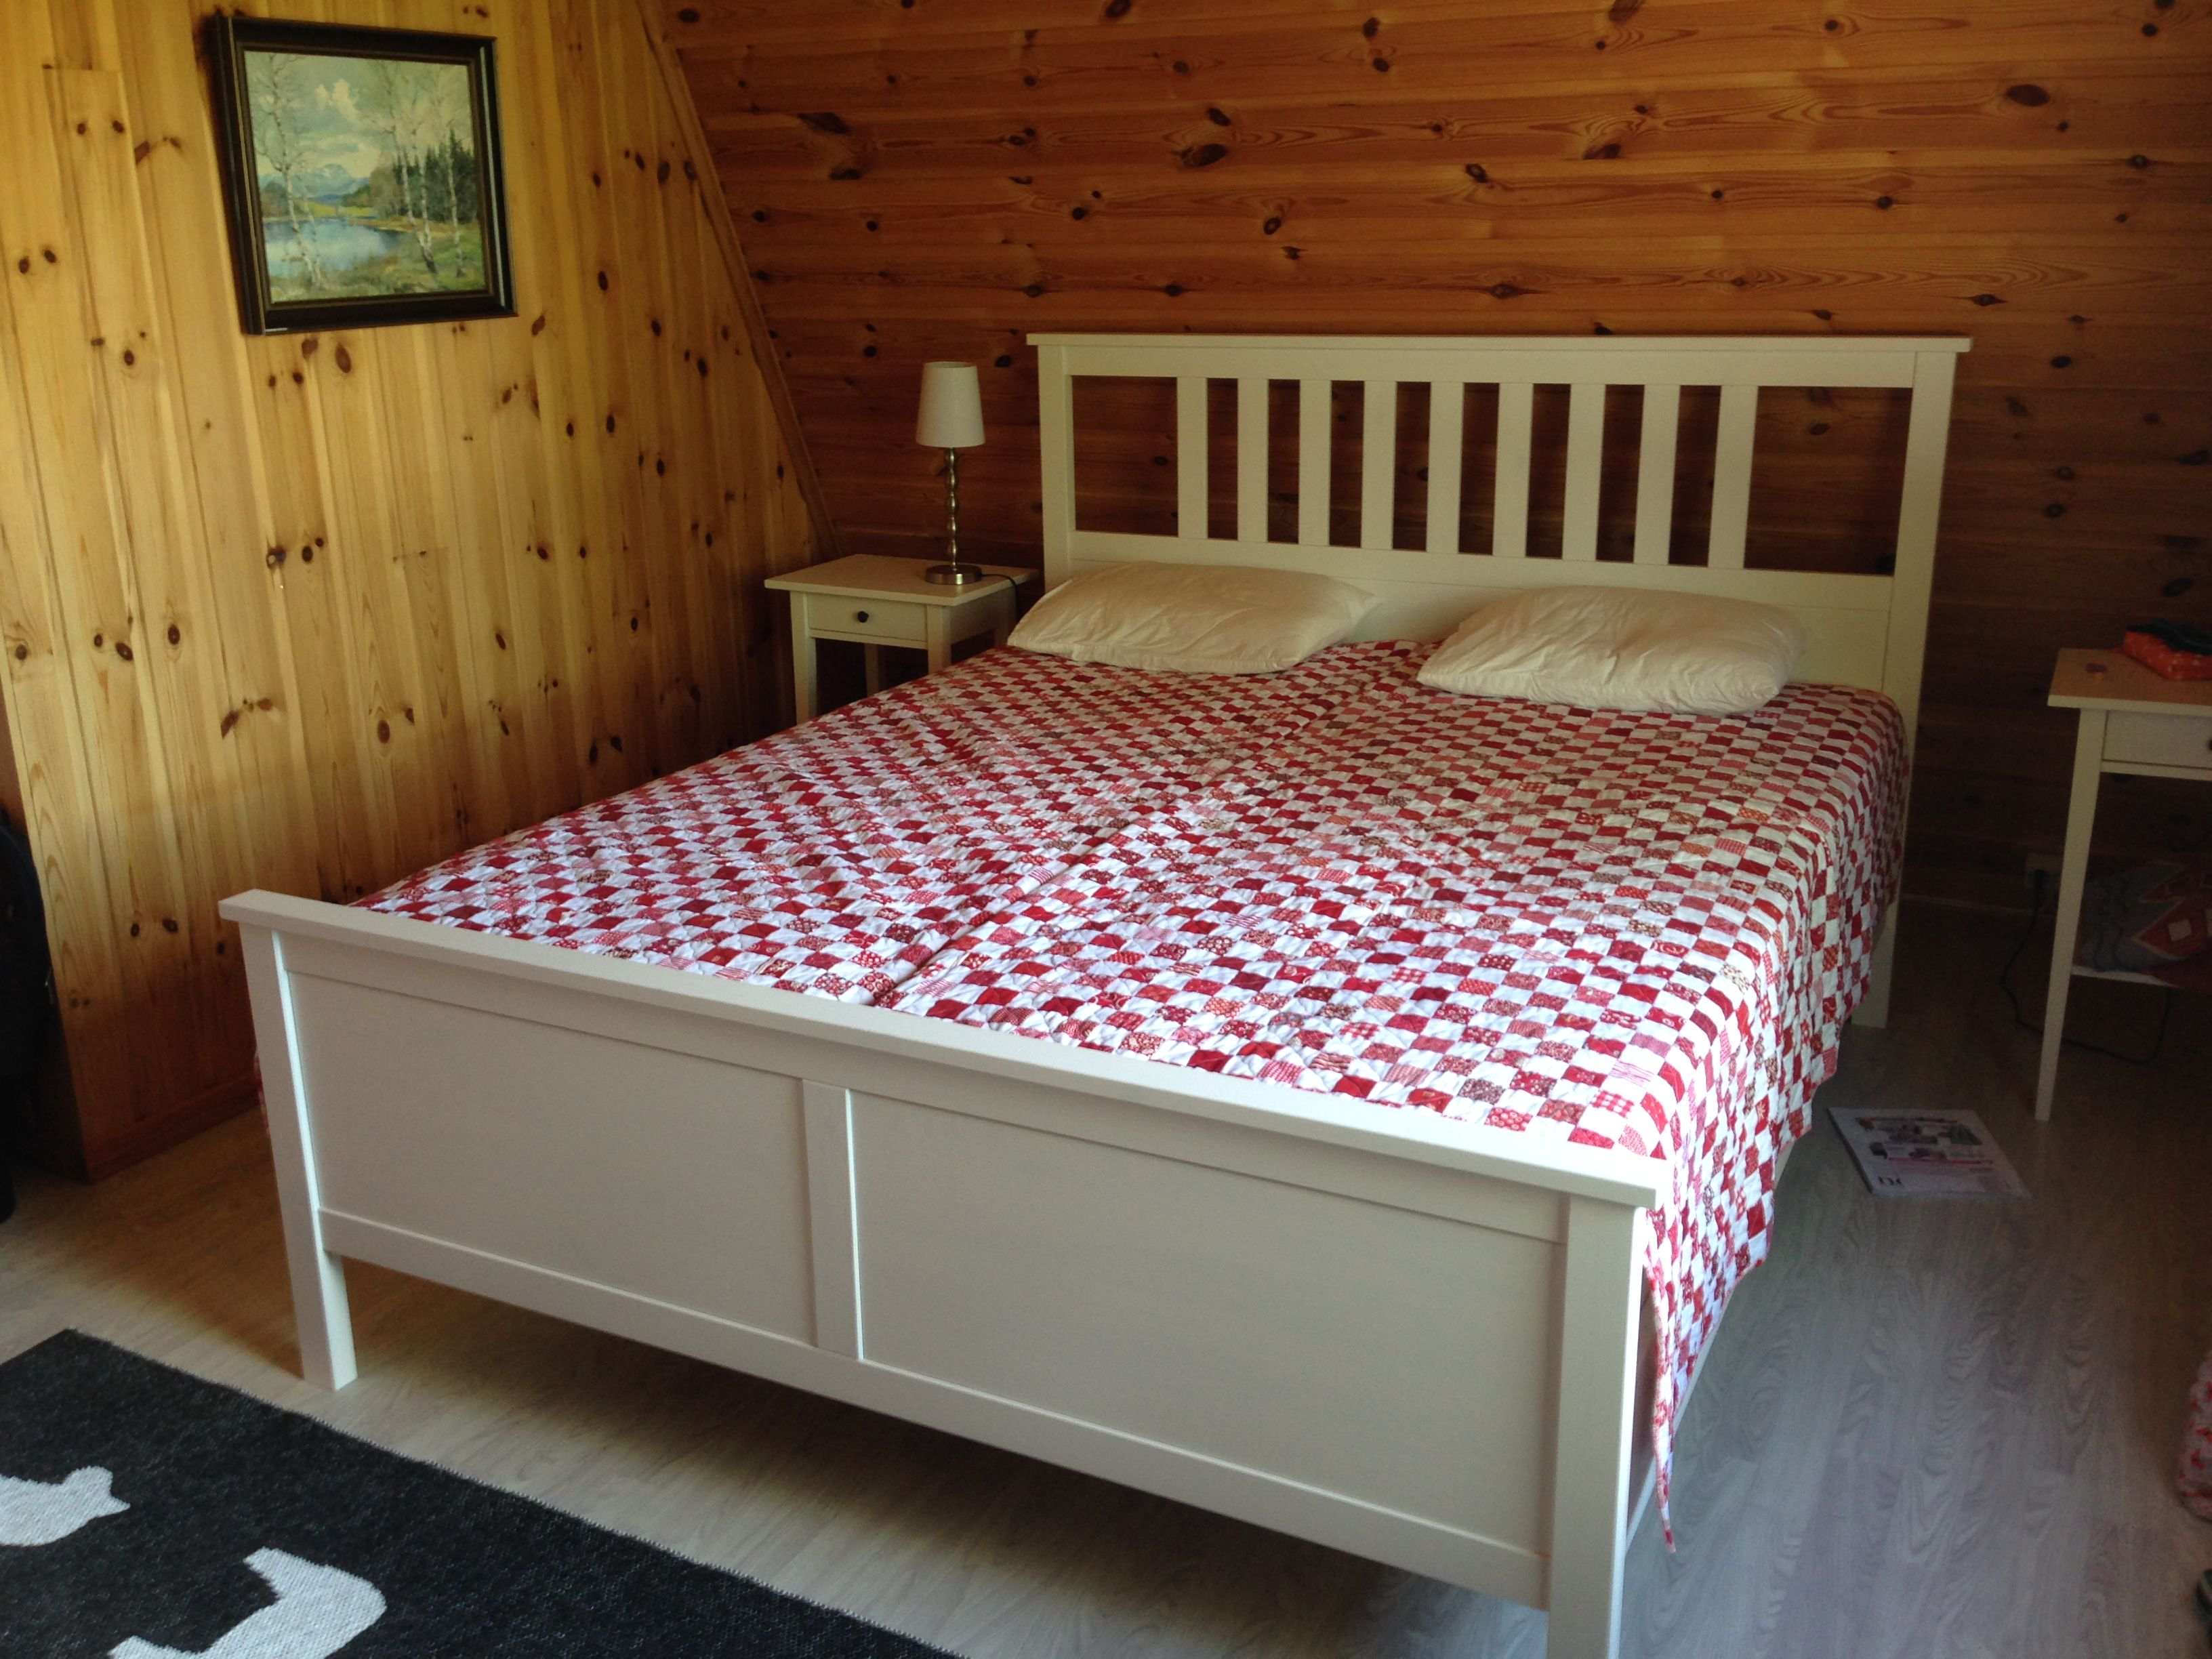
When we first got to Sweden, we had to sleep upstairs because our bedroom wasn’t remodeled yet.
But once the remodel was finished, we brought the bed—and the quilts—downstairs to their new home.
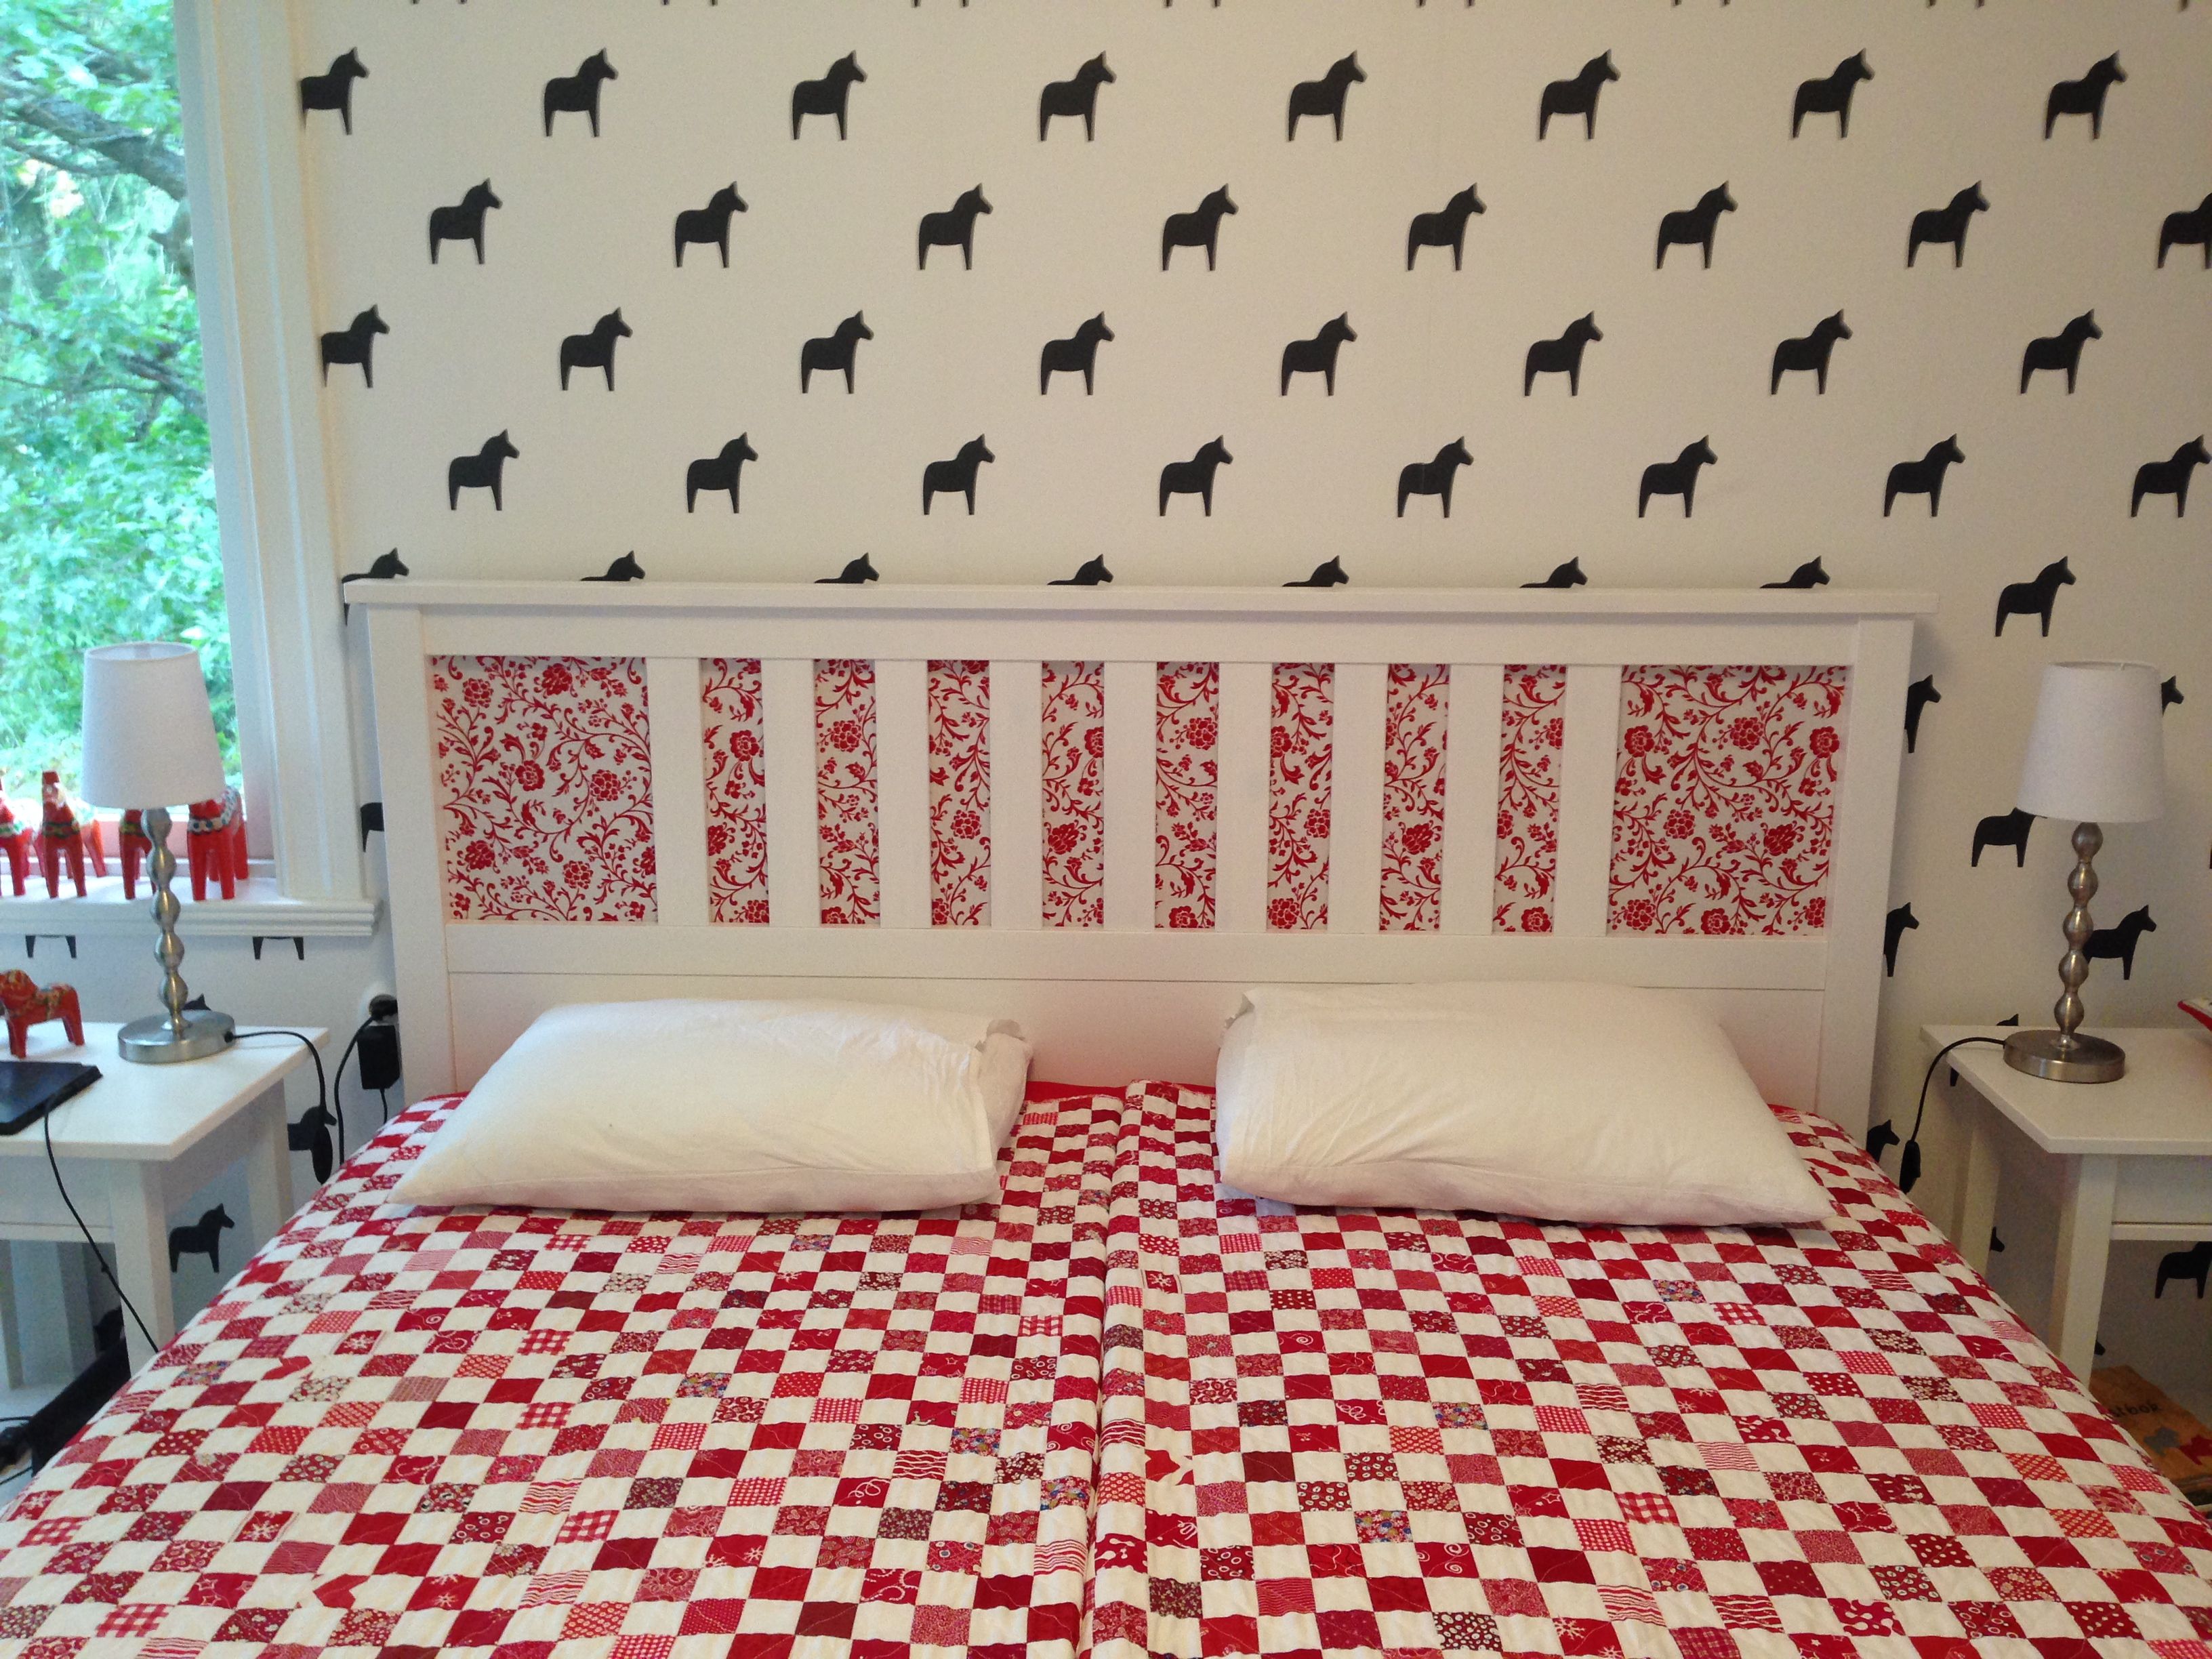
I didn’t like the way the Dala horses showed through the wallpaper. It looked like they were in jail! So, I added some fabric to the back of the headboard.
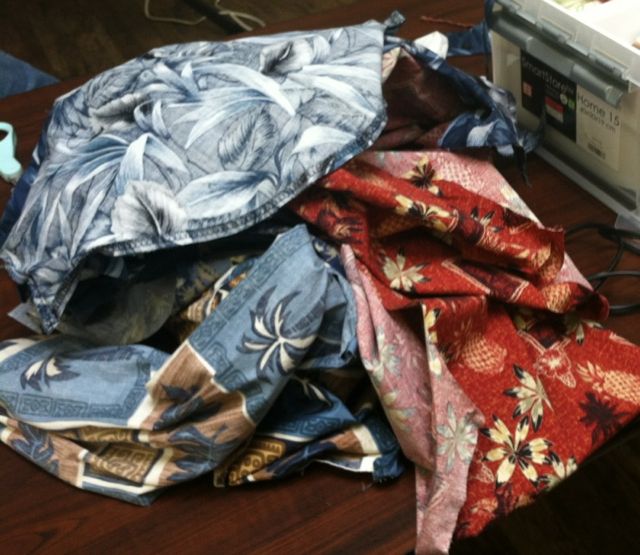
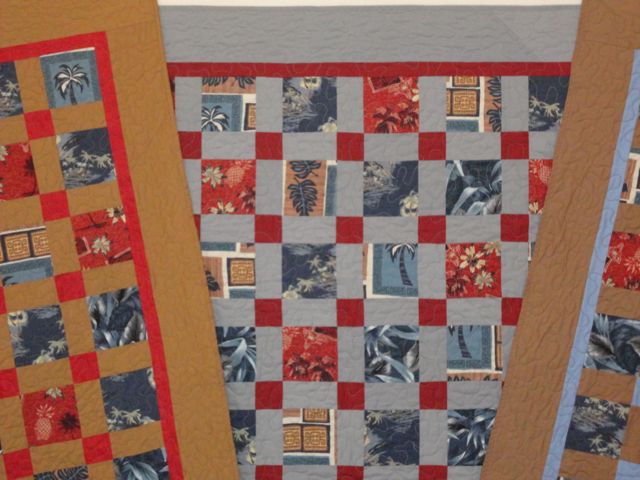
A good friend of my sister’s lost her husband a few years ago. She still had three of his Hawaiian shirts in her closet, and when she saw a quilt made out of old shirts, she knew she wanted to use the Hawaiian shirts for quilts for her three children. Since she’s not a quilter, Sally put the SOS out to me. The timing was perfect, as we were going to a retreat at The Wild Rose.
Sally brought along the shirts and I started unstitching them.
It was really a bigger job than I thought, but I wanted to make the most of the fabric. I ended up cutting the shirts into 4-1/2″ squares. I divided them in thirds and put one stack up on the design wall to balance out the colors.
I wanted the quilts to be similar, but still different, and I wanted the prints to be the “stars” of the show. So I decided I would use solids and set the blocks together with sashing and cornerstones.
It’s a very simple setting, but I think it served its purpose.
I finished them off with a simple stipple.
Each shirt had a pocket, so I stitched one to the back of each quilt.
I was pleased with the way they turned out.
I’m sure the kids will treasure them.
If you want the fabric requirements to make one of your own, they’re below. This is also a great way to show off fussy cut, novelty prints or even photo transfer blocks.
Hawaiian Shirt Quilt
Materials
1 Hawaiian shirt (I got enough squares from each shirt to do one quilt, but I mixed them up for interest)
7/8 yard cornerstones and inner border fabric
2-1/4 yards sashing and outer border
4 yards backing
From the Hawaiian shirts cut 80) 4-1/2″ squares
From the cornerstone/inner border fabric, cut 10) 2-1/2″ strips. Cut four strips into 2-1/2″ squares for cornerstones. Use remaining squares for inner border.
From the sashing/outer border fabric cut 18) 2-1/2″ strips; crosscut into 142) 4-1/2″ x 2-1/2″ rectangles for the sashing. Then cut 7) 4-1/2″ strips for the border
Cut the backing into two equal pieces.
I pulled the backing around to the front of the quilts and machine stitched for the binding.
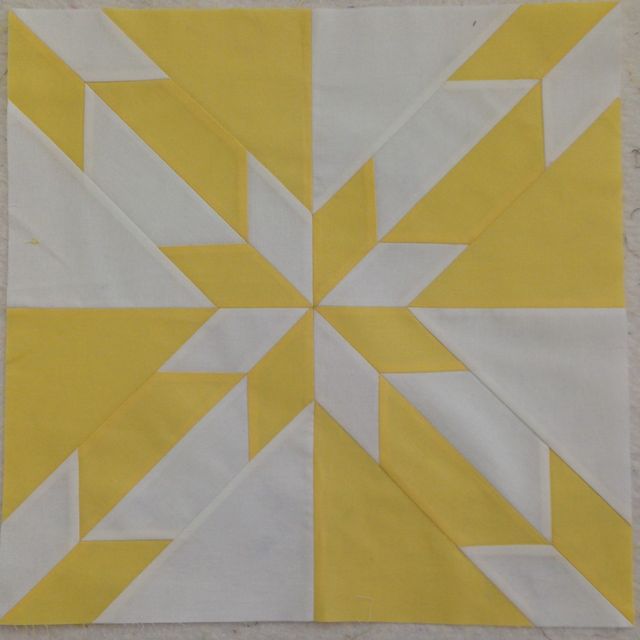
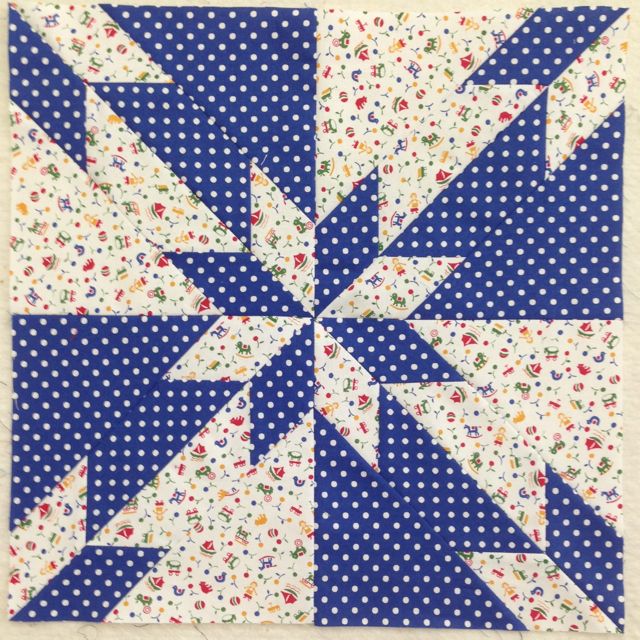
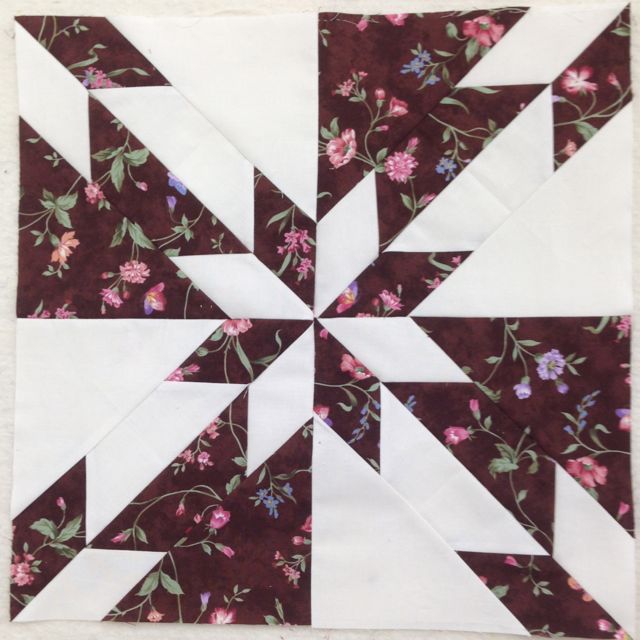
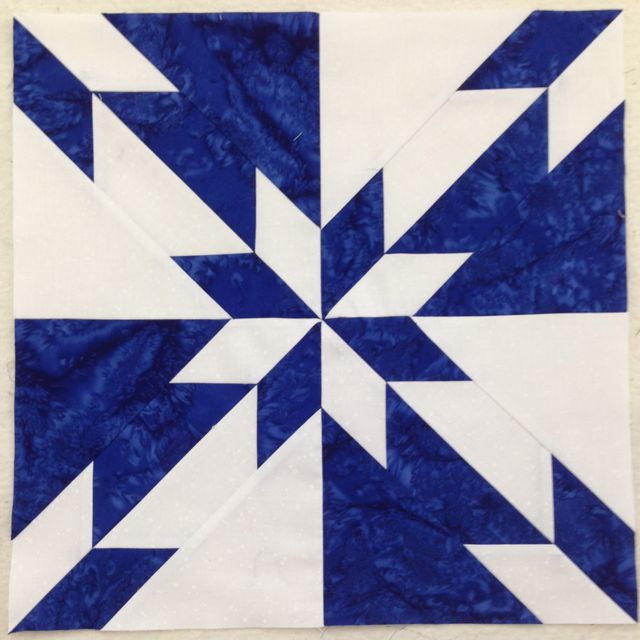
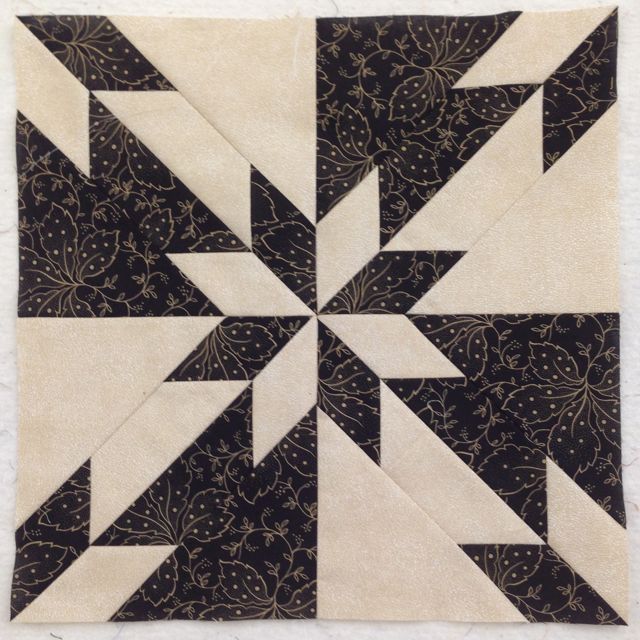
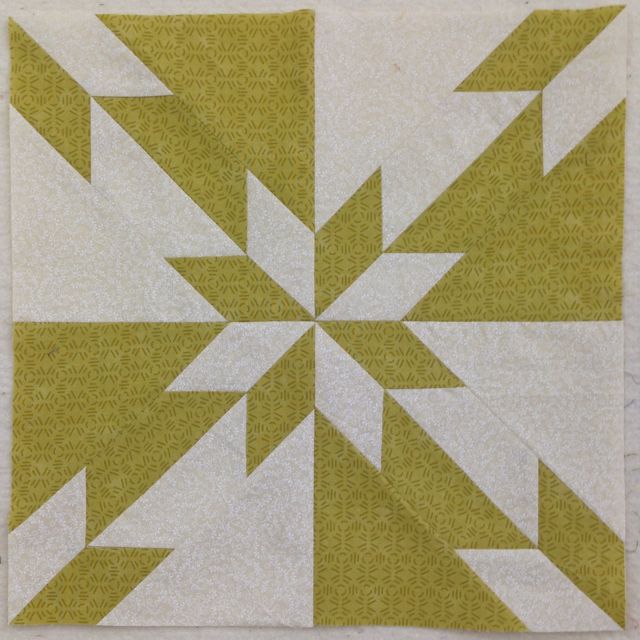
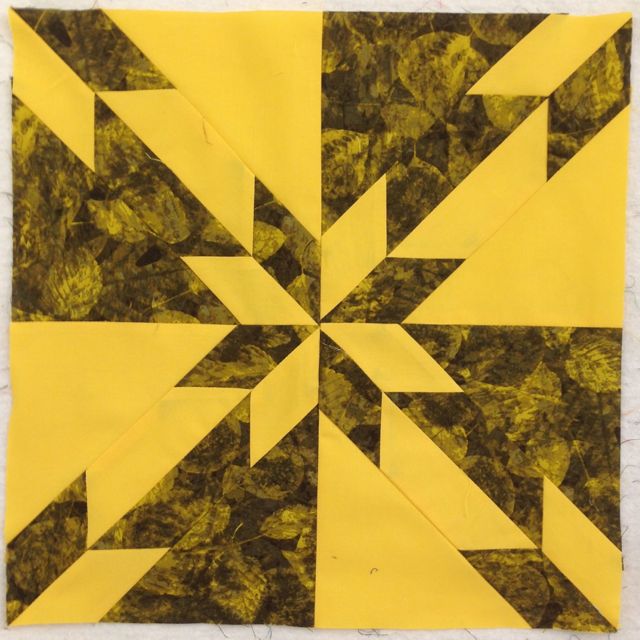
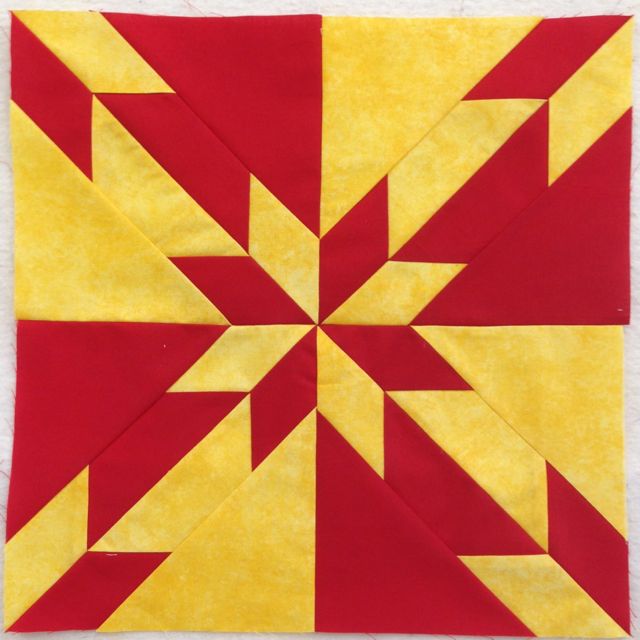
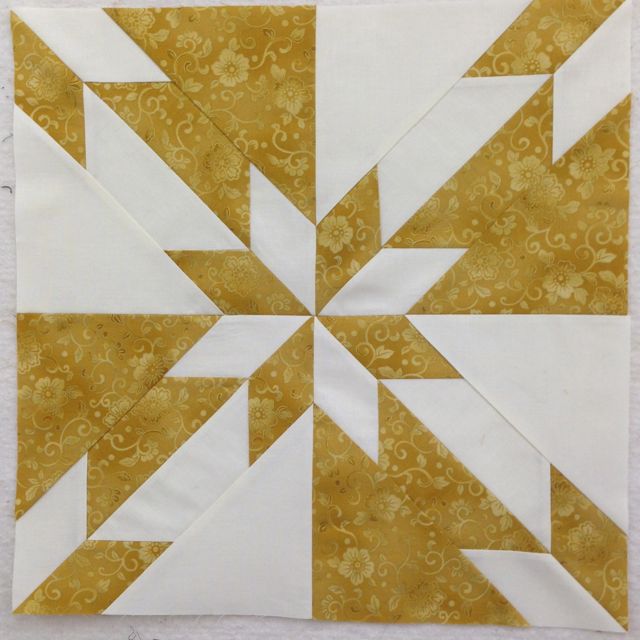
Yesterday I taught a class on the Hunter’s Star at Boardwalk Quilts.
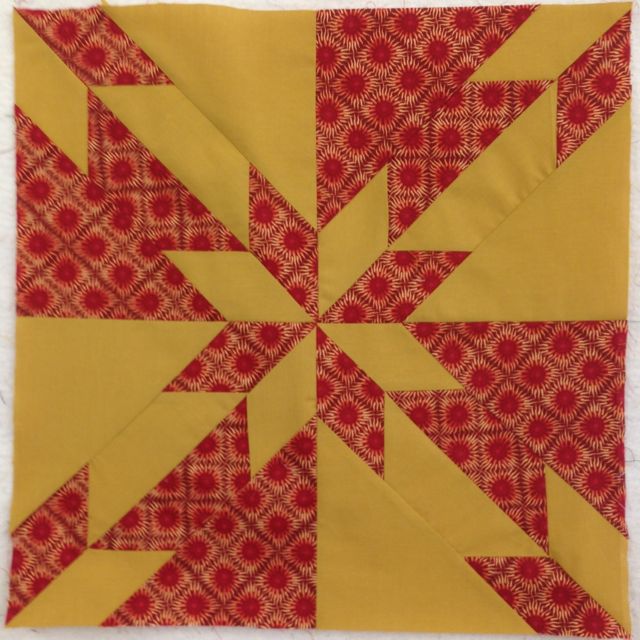
I love the ruler from Deb Tucker, that makes this pattern so easy and precise. I made step-by-step samples for class from solid yellow and vintage white.
My goal was to have each student complete at least four units to make one star–and they did!
Joe Ann was the first. She used fabrics she’d bought at my store before it closed five years ago! Who says it isn’t important to have a stash?!
Right behind her was Earlene, who was outside her comfort zone, using browns.
This dark blue batik on a stark white that Suzy made was really striking.
Sandy’s black and gold on cream looked great.
Susan had success with the green and white tone-on-tone fabrics she used.
Barbara told me she hadn’t taken a class in years, but you’d never know it when you look at her block.
Isn’t Joyce’s red and yellow version stunning?
I wish you could see Susan’t fabric in person as it was really beautiful and her blocks turned out great.
Judy’a gold and red combination was a winner.
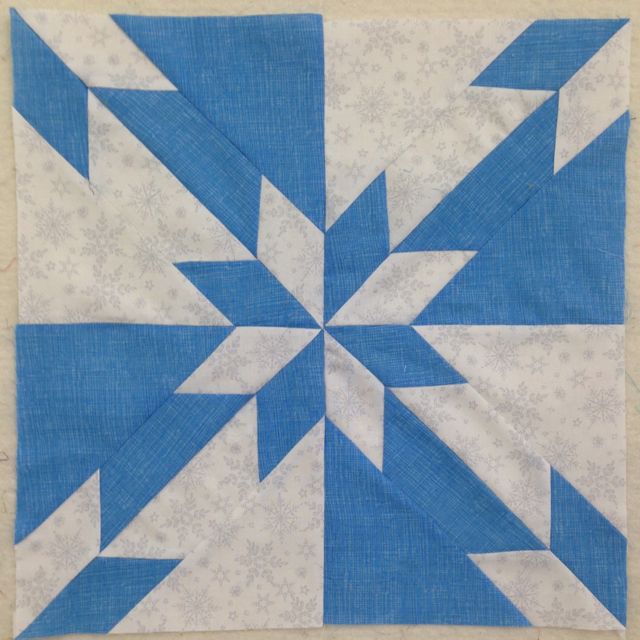
Elena had never taken a quilt class before! The icy blue and silver snowflakes worked together great.
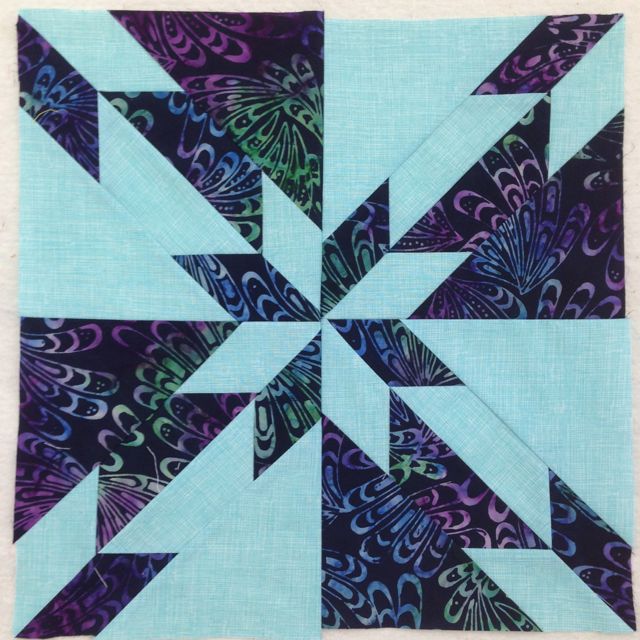
And Lonna’s choice of a rich batik and pale aqua looked amazing.
Joe managed to get all 16 units finished and sewn together. You can see how the secondary star forms in the middle where the blocks come together.
I was so proud of all of them and have confidence they’ll all get their tops finished at home.
I’m so excited! I just discovered an amazing way to make scrappy Four-Patch blocks lickety-split! All of the blocks end up different, and you really only have to measure once!
You start with squares of any size. That’s right, it doesn’t matter what size your squares are! For this tutorial I used 5″ squares, because I had a little packet of them.
Place two squares, right sides together. I tried to match a dark with a light, but some were medium, so I just let them pair up randomly.
Sew down BOTH sides. I fed a lot of pairs through my machine at one time, doing first one side, then doing the other side of the stack.
Now slice them in half through the middle. Since my squares were 5″, I sliced at 2-1/2″ but, remember, any size square will work, just find half, and slice!
Open the pieces up and press toward the dark–if you have a dark!
Do this will all your squares.
Now sew them together as shown below…
…all of them!
Once you have them all sewn together, slice a 2-1/2″ piece off one end. Set this two-patch aside. You only have to measure this first one. After this, the magic begins!
Flip the short piece over…
…and use it as a guide for your next cut!
There’s your first Four-Patch!
See! Now just keep going, flipping and cutting, until you get to the end. At the end, you’ll have a two-patch, which you can sew together with your first cut piece.
From my charm pack, I was able to make this little quilt. I thought the brown in there added a little interest.
Finally, I’ve finished 100 blocks. Now I just have to decide how to put them together!
My first thought was to set them in a Chevron pattern.
It didn’t look as good on the design wall as it did in my mind, so I went more traditional, with X’s and O’s.
Hmmm……I’m liking that, but I just had to try one more setting. I call this Exploding Diamonds.
Oh, wait! Just one more……. How about if I do Offset Diamonds!?!
Oh, too many decisions. What do you think? Leave me a comment and let me know your favorite setting. I’ll enter your name in a drawing to be held November 28. The winner will win 100 fabric strips to get you started on your own string pieced quilt!
Categories: quiltingComments Off on Fort Walla Walla Quilt Show
My friend, Melinda, was just over in Walla Walla and went to the quilt show at the museum there. Today she shared slides from the show, and I just had to post them.
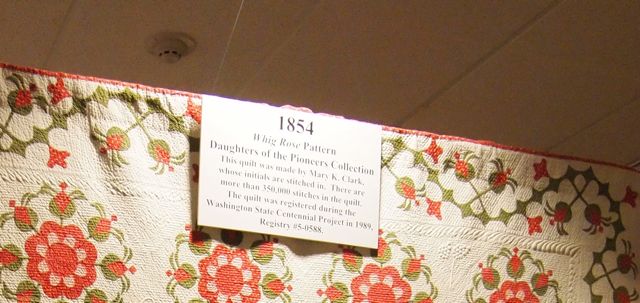
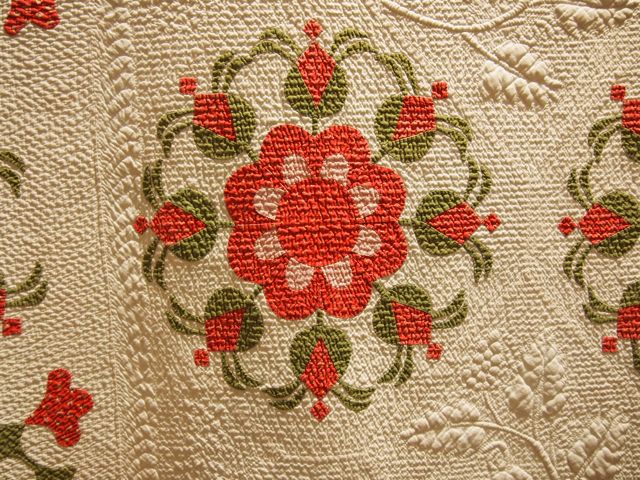
This Whig Rose was definitely the star of the show. Amazingly, they have the provenance of the quilt. It was made in 1854 by Mary K. Clark.
The quilting is incredible. There are over 350,000 stitches in it!
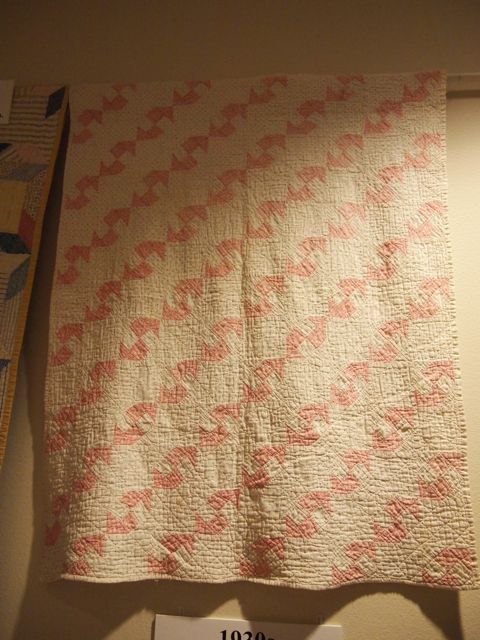
This Enhanced Four Patch is a sweet quilt. It’s not a design you see very often. From the 1930′s.
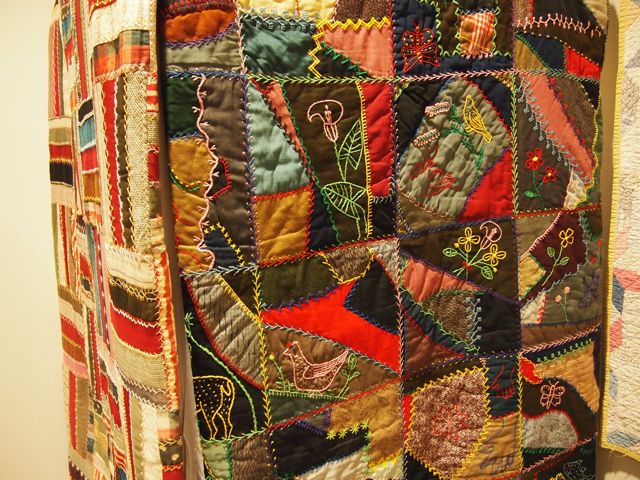
This is a really fine example of a Victorian era Crazy Quilt. It has an amazing variety of stitches!
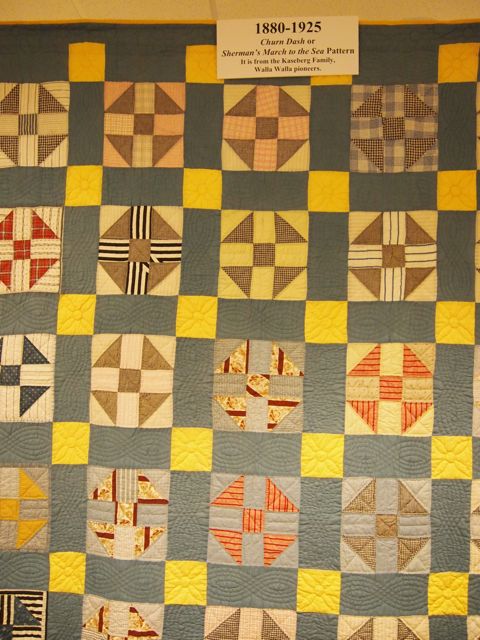
Here’s a Churn Dash. I see the label also refers to this pattern as Sherman’s March To The Sea. I hadn’t heard that reference before, but I love it! Quilt names say a lot about the what was happening in people’s lives.
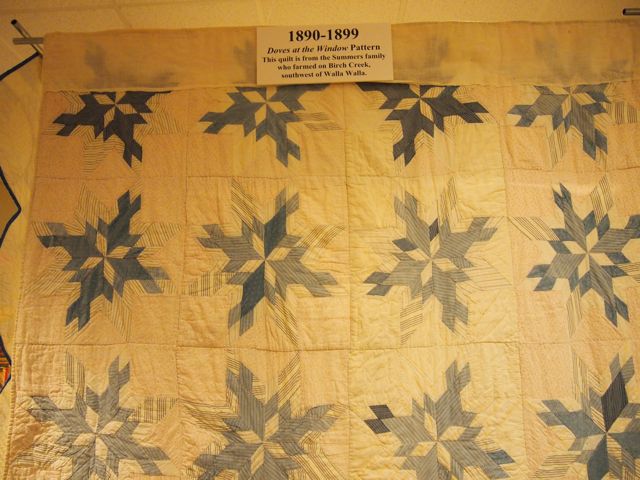
Doves at the Window is a very difficult pattern to piece. Do you see the four doves in each block? Isn’t it interesting that quilters were doing “abstract” designs over 150 years ago?
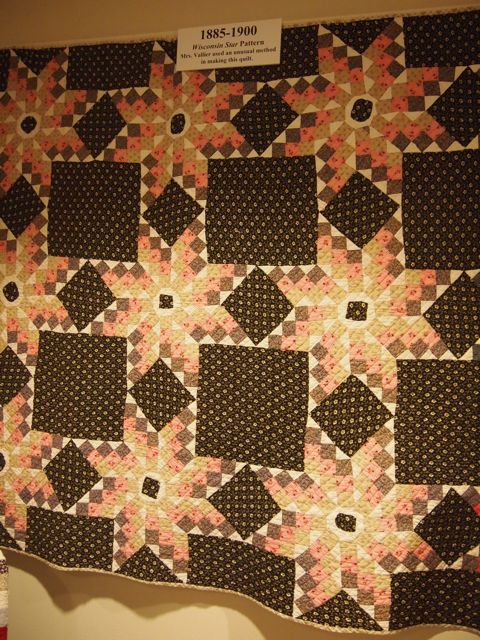
I’m not at all familiar with this pattern, called Wisconsin Star. It’s quite interesting the way it is pieced.
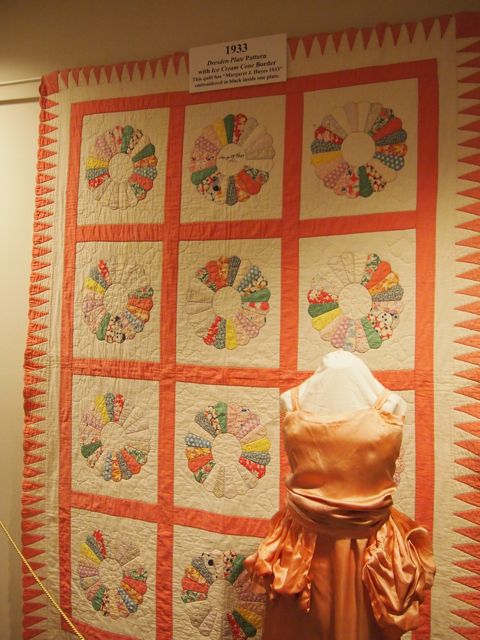
Here’s a very traditional Dresden Plate. Melinda thinks it may be from a Ruby McKim pattern entitled Friendship Ring–and I agree. It has 20 petals in the plates and the ice cream cone border.
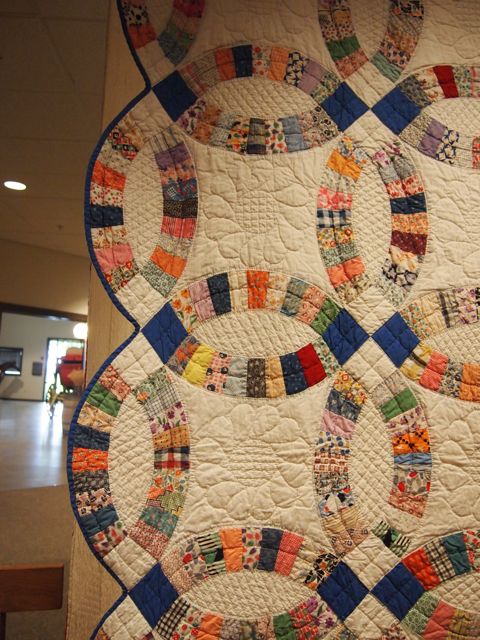
The Double Wedding Ring pattern is probably one of the most recognizable quilt patterns—even among non-quilters. The quilting on this one is lovely.
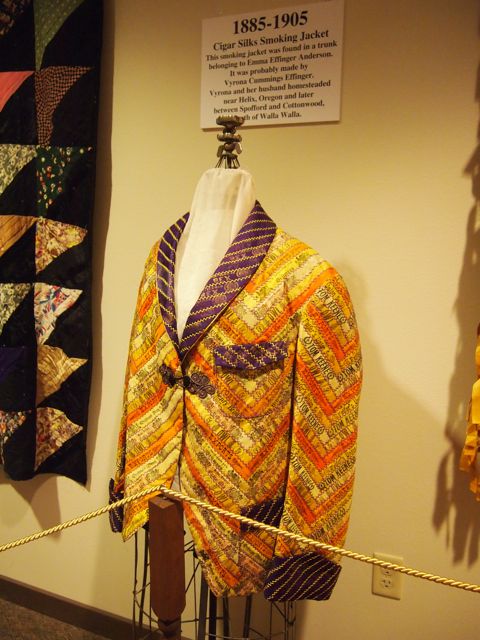
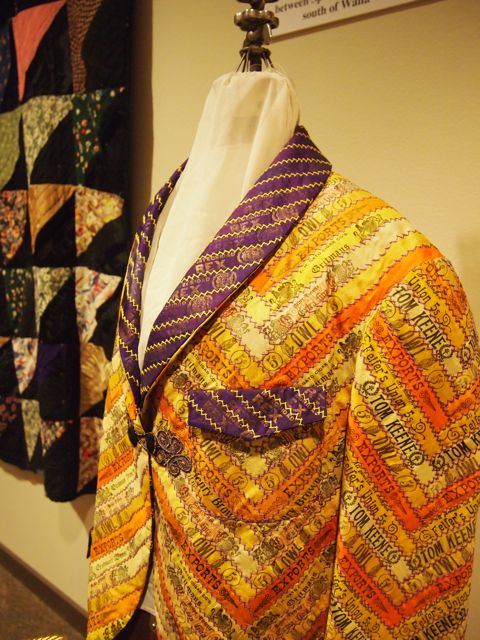
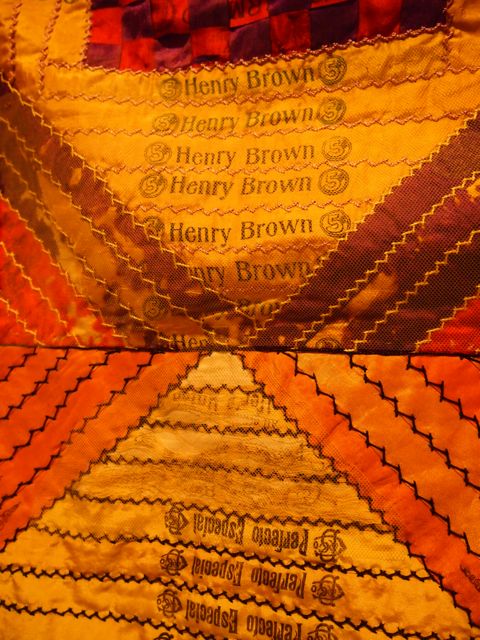
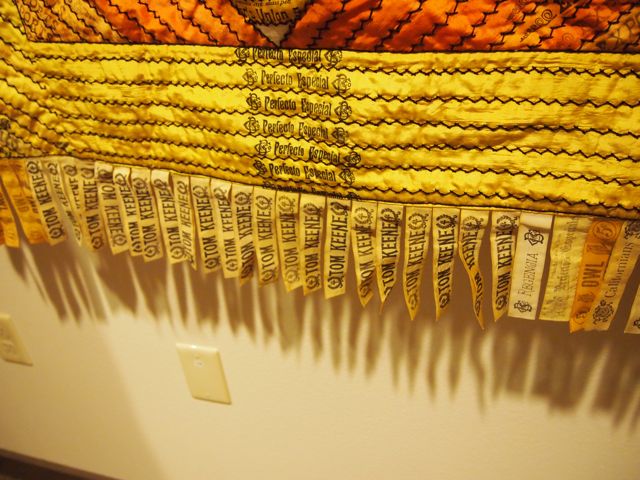
Now this is incredible! Small silk bands were wrapped around cigars to identify the manufacturer. Never ones to waste bits of fabric (and undoubtedly attracted by their bright colors), women began to collect and save cigar silks. They were most often yellow. The maker of this jacket certainly had a huge collection of silks, and the purple ones are the perfect choice for the collar and cuffs.
Her chevron design is perfectly pieced. And once the piecing was done, she did a feather stitch—by hand, of course—along the edge of each band!
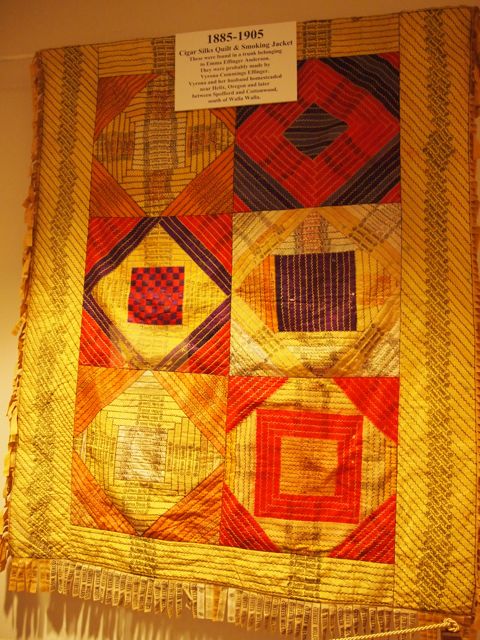
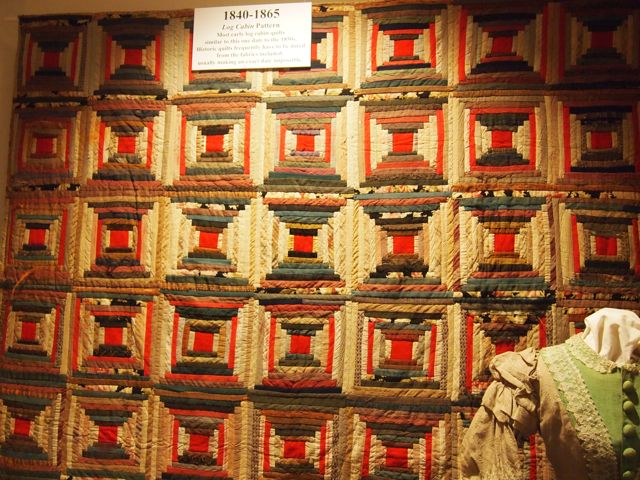
This cigar silk quilt was found in the same trunk as the jacket.
Again, beautifully sewn and feather stitched.
And don’t you love the “fringed” border?
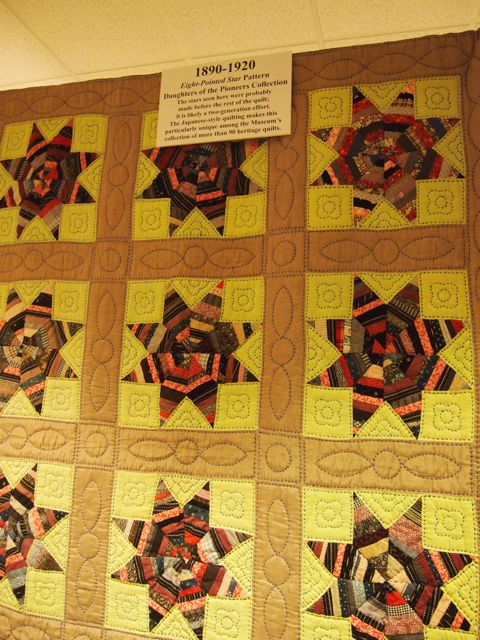
An Eight Pointed Star. The label refers to “Japanese” quilting. Perhaps it’s reminiscent of Sashiko.
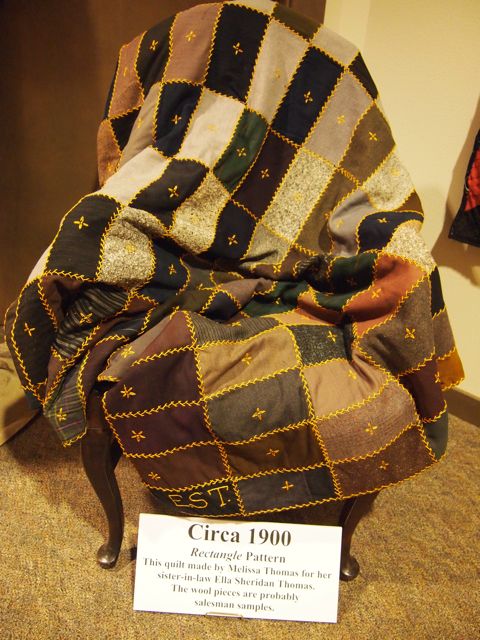
This wool quilt was probably made from suiting samples from a tailor’s sample book. My husband’s grandfather and great-grandfather were both tailors and we have some quilts similar to this.
The winning suggestion was Pretty Maids All In A Row. It was suggested several times, but Linda was the first—so she wins a kit to make her own Pretty Maids quilt.
I also used a random number generator to pick a second winner. There were 138 entries. The number generator chose #86, so a second quilt kit will go to Emilee in England! Congratulations to both winners and thanks to all of you who left comments. To order a kit of your own, CLICK HERE!