• 19Mar
    Categories: brilliant ideas, fabric design Comments Off on Chatty’s Tea Party

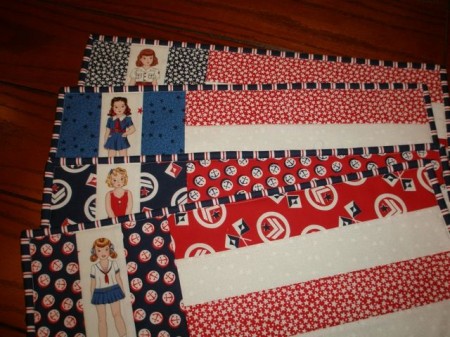
    I got to be Guest Blogger at SewTimeless this week! I was asked to create a project from my new Red, White and True Blue fabric collection and came up with these quilt-as-you-go placemats.  There’s a complete step-by-step photo tutorial.

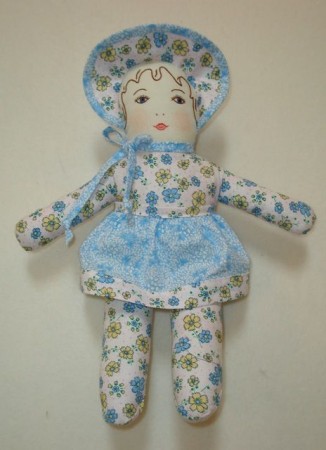
    Once I finished them, I knew I had to invite my sister’s Charmin’ Chatty over for a tea party!

  • 10Jan
    Categories: Everything! Comments Off on Paint Chip Challenge

    Our Quilt Guild just held a Paint Chip Challenge!  What’s that, you may ask?  Each participant got a paint chip and some simple rules—use three of the colors on your paint chip plus black or white.  Okay, I’m up for that.

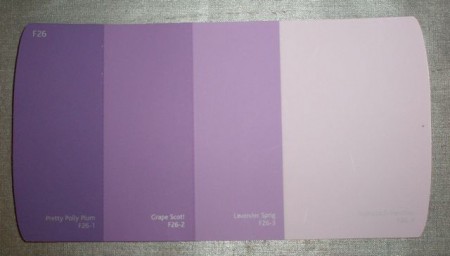
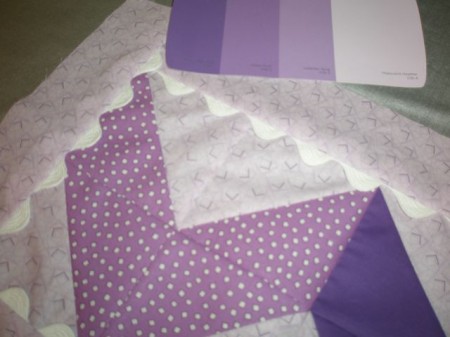
    Here’s the paint chip I got.

    I chose to use the two on the left and the lightest one on the right.  Imagine, I had fabrics in my stash that worked great!

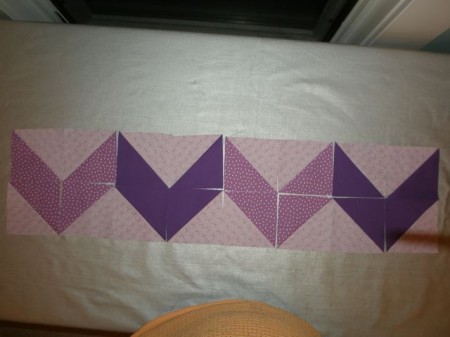
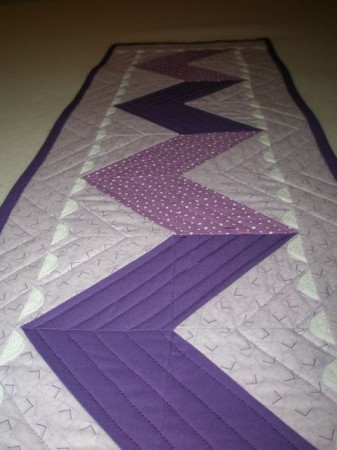
    I had seen a tutorial for a cute table runner on the Knitty Bitties blog, so decided to make one.  It starts with half-square-triangles.

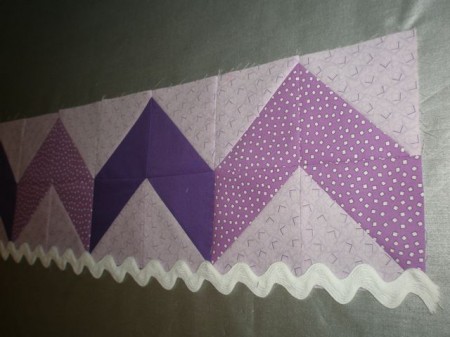
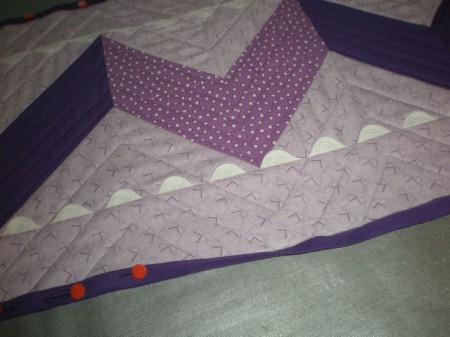
    Once they were sewn together, I added wide rickrack.

    I think the colors are pretty true to the paint chip.

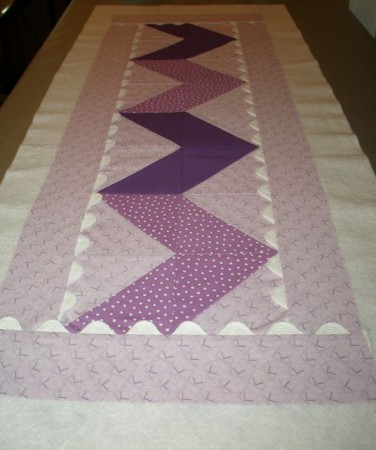
    Once the rickrack and borders were on, I layered everything, using the dark purple solid on the back and a scrap of cotton batting that I had left over from another project.

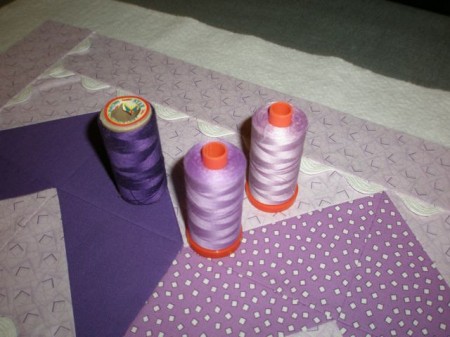
    I knew I’d need three threads to quilt with.  I just don’t like light thread on dark fabrics and dark thread on light fabrics!  Once again, my stash—thread stash, that is—came through!

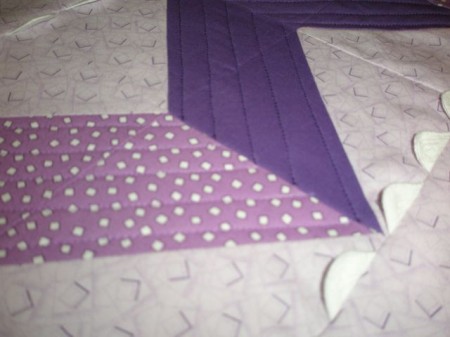
    I just did some straight line quilting on my Featherweight.  I used my foot as a guide to quilt a 1/4″ from the edge of the triangles.  For the other rows of quilting, I used the Frixon pen to mark the lines and loved it!

    I trimmed away the batting, cut the backing 1″ larger than the top and just did a double fold, bringing the back to the front for the binding.

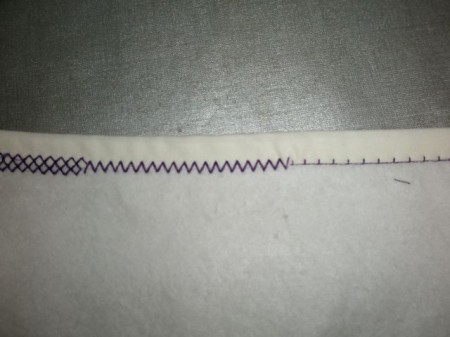
    I wasn’t sure how I wanted to stitch the binding in place so I experimented with a couple of stitches on my Elna.  I decided on the middle stitch, a triple zigzag,but once I started on the actual runner, I had trouble with consistency of size.  So, after about 12″, I decided to tear it out.  Ugh!

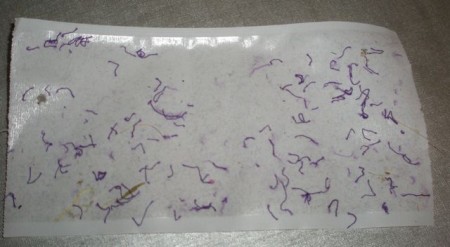
    Do you know this little trick?  After you’ve cut your stitches with your seam ripper, you can use a lint roller to pick up all the tiny treads!  As you can see, I had a lot!

    In the end, I used the buttonhole stitch, and it worked great.

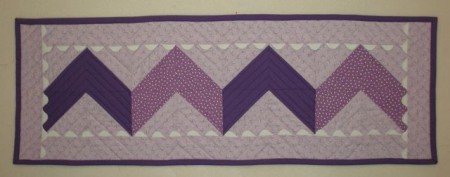
    The finished product!

  • 09Jan

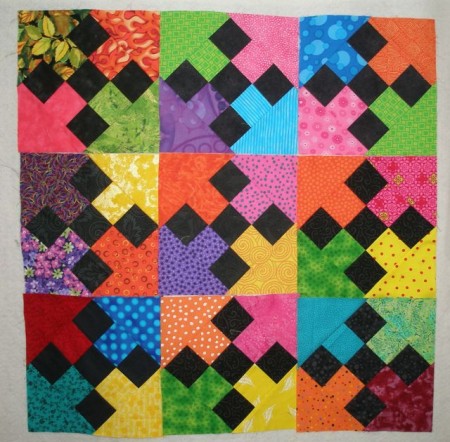
    Last fall at the Anna Lena retreat, Mary and Robin had a stack of really fun blocks that they had gotten in a block swap.

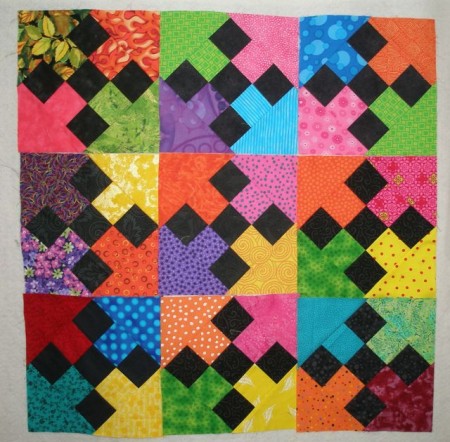
    Once the blocks started going up on the wall, they drew a lot of attention.  That led to a conversation about block swaps, and before you could say “Crossroads to Jericho” we decided we would do a block swap at our next retreat!

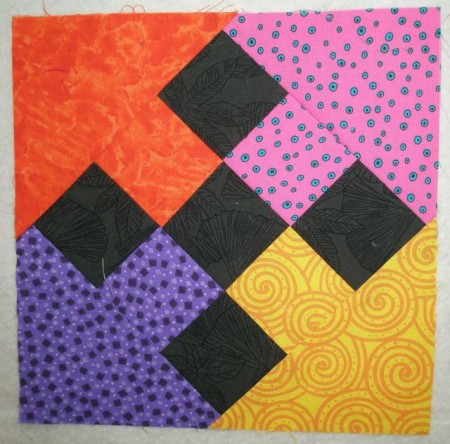
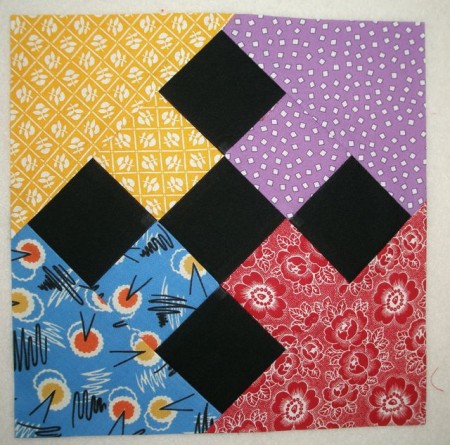
    Robin and Mary’s blocks were so striking yet so simple that we decided to do this block for our first swap.  You might want to organize a swap with your friends, too!

    Blocks finish at 8-1/2″. Here are the fabric requirements for each block.

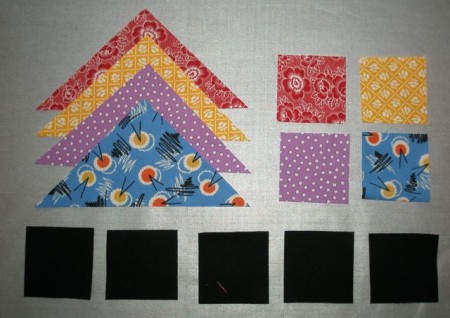
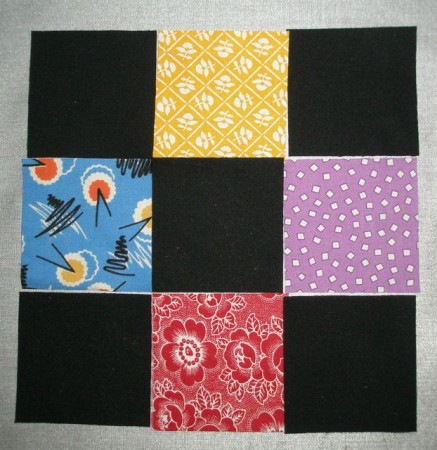
    Black: 5) 2-1/2” squares

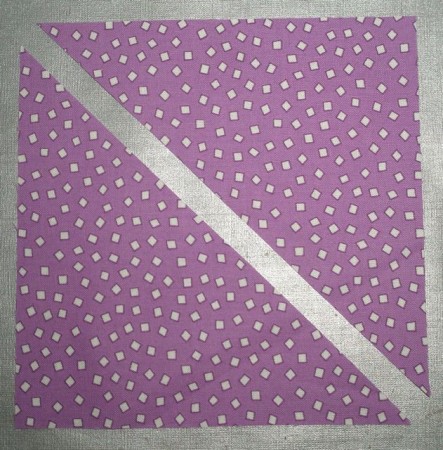
    Four different bright prints: 1) 2-1/2” squares of each and 1) 5-1/2” squares of each cut once diagonally.

    When you cut your large square diagonally, you will end up with two triangles.  You only need one per color per block, so set half aside for another block.

    L
    Lay out your squares to form a nine-patch with the black in the middle and on the corners.

    Match the triangles to their companion prints.  I love how this forms an arrow.

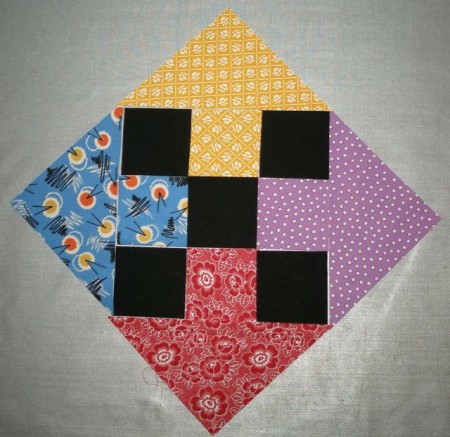
    Once you have the nine-patch sewn together, line it up with one of the triangles as shown below.  Make sure an equal amount of fabric is visible on each side then stitch.  I like to do opposite sides first, press, then do the remaining sides.  On the nine-patches, I press toward the dark.  On the triangles, I press toward the triangle.

    Voila!  Your finished block.

    If you set the blocks straight, the black forms a chain through the bright arrows.

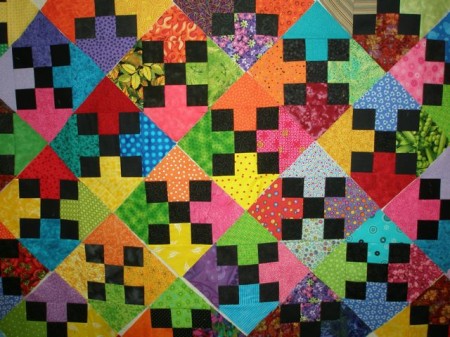
    If you set the blocks on point, the nine-patch is more visible.

    Every swap needs a few rules.  Below are ours.  The last one is the most important!

    Your pieced block should measure slightly more than 9”.  There’s a little wiggle room here, so blocks can be trimmed to 9”.  If your block is smaller than 9”, it isn’t acceptable.  Either restitch with slightly smaller seams or make another one to swap.

    Don’t trim your blocks.  Let the person receiving them do the trimming.

    The black can be a solid black, or a black-on-black print, but be sure it “reads” black from a distance.

    Bright means bright, clear colors.  Nothing muddy!

    You may make all your blocks the same, or use lots of different blacks and brights.

    Have fun!


  • 28Dec
    Categories: Everything! Comments Off on Flying Geese Tutorial

    It’s time to start another A-Quilt-Block-A-Day project.  This time, it’s the versatile Flying Geese block!
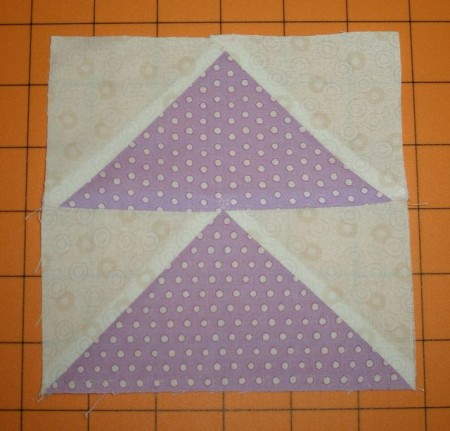
    Oh, did I just hear groaning?  At one time, I might have groaned right along with you.  I used to use a couple of different methods to make flying geese–the Sew-and-Flip and the traditional cutting of two sizes of triangles.  No matter how I tried, my goose always looked like he had one shoulder hunched up in the air.

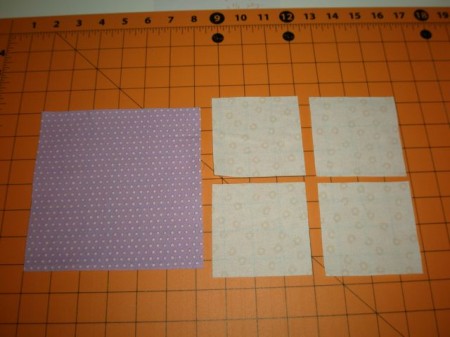
    Then I discovered a method where you use one large square and four small ones, do some stitching and slicing, and end up with four perfect geese every time!  Now you can make perfect flying geese, too!  These geese are going to finish 2-1/2″ x 5″, but I’ll give you a formula at the end so you can make them any size you want.

    Here’s what you do:

    Cut one 6-1/4″ square of “goose” fabric and four 3-3/8″ squares of sky fabric.
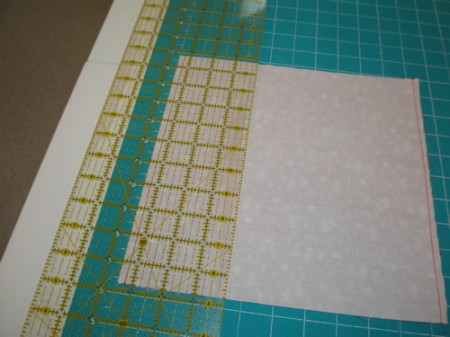
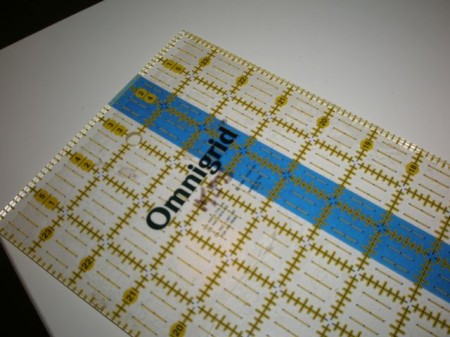
    Did I hear more groaning about having to cut something that ends in 3/8″?  Here’s a little trick.  Get a role of blue masking tape, also known as painter’s tape.  Roll off a chunk and put it on your ruler at the 3-3/8″ mark.
    Pile up some “sky” fabrics and trim the left edge.  Now, just align the tape on your ruler with the freshly cut edge.  In fact, because of the thickness of the tape, you can “feel” when the tape is against the edge of your fabric.  This is so slick anytime you have a lot of strips to cut.
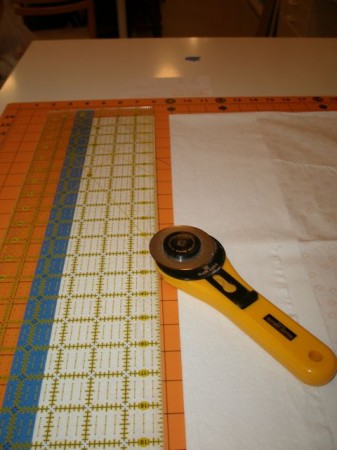
    Once you’ve cut your strips, just rotate them and cut again, letting the tape be your guide.
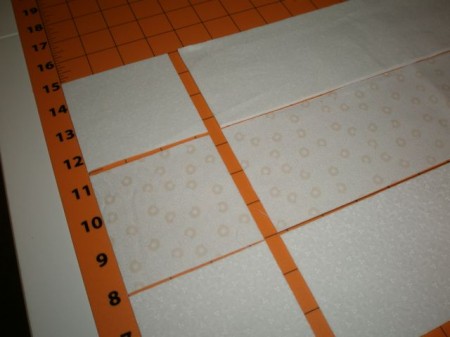
    Take a minute and draw diagonal lines on your “sky” fabric.  Yes, I have an orange pen AND an orange cutting mat!!
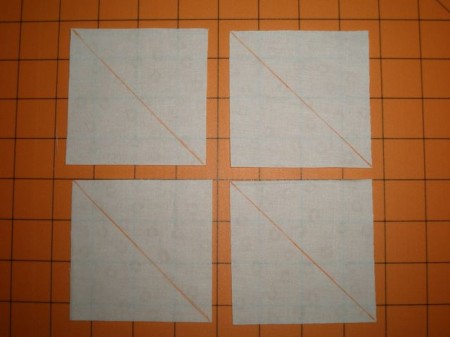
    Place two of your “sky” squares on opposite corners of the “goose” square.  Make sure the drawn lines make one continuous line across the diagonal.  Your small squares will overlap a bit at the middle.
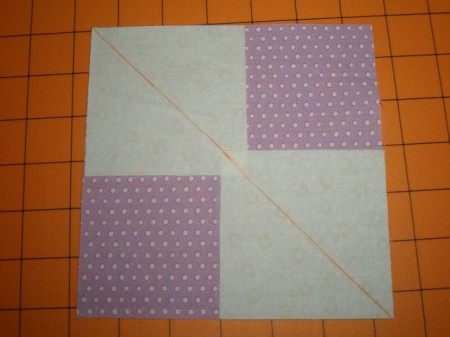
    Now, take this to your sewing machine and sew a scant 1/4″ on both sides of the drawn lines.
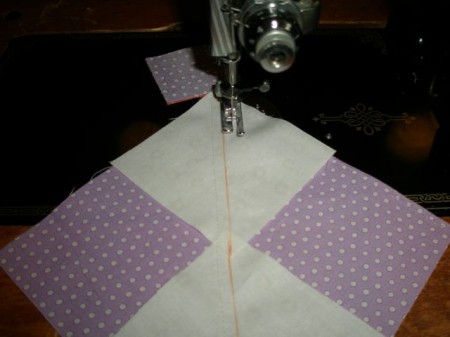
    Before cutting, I like to touch the iron to the fabric to set the stitches.  Once that’s done, slice along the diagonal line.
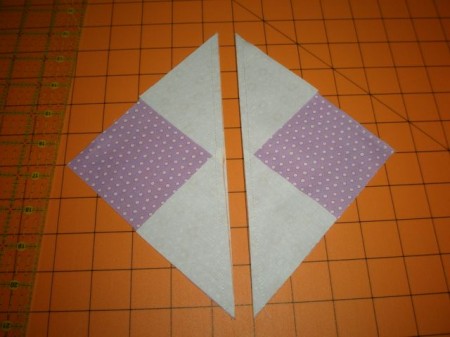
    Finger press the “sky” triangles away from the “goose” triangles.
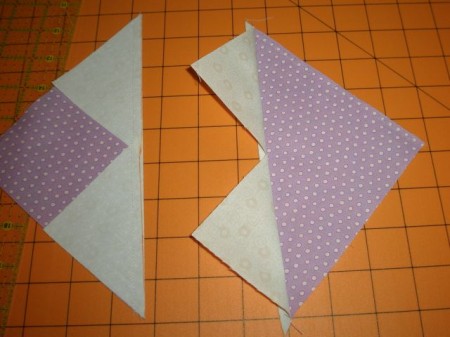
    Do it with both pieces. (At this point, they remind me of hearts–if you turn them, that is!)
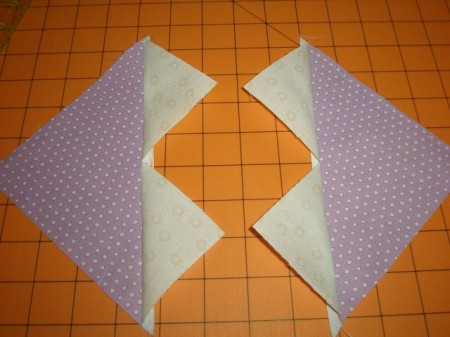
    Place the two remaining “sky” squares as shown and sew a scant 1/4″ on both sides of the drawn lines.
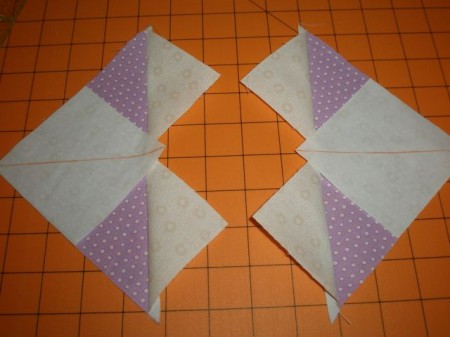
    Press with the iron and slice on the drawn lines.
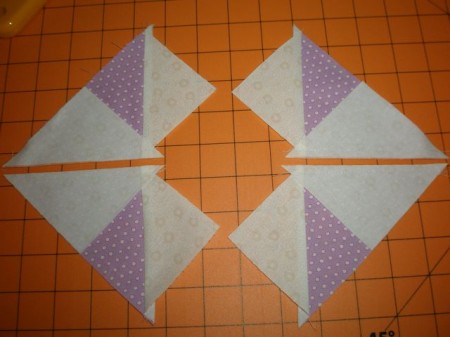
    Believe it or not, you now have four perfect flying geese!  Just press the “sky” fabrics over, and there they are!
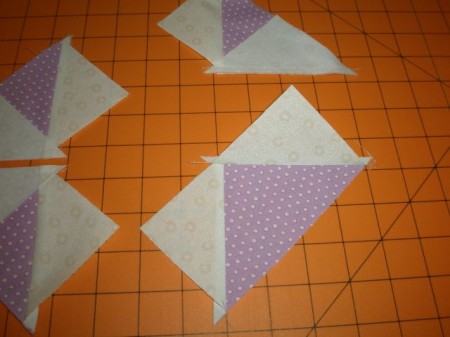
    Voila!  Trim the little ears off and you’re done!  At this point, each block will measure 3″ x 5-1/2″ and will give you a 2-1/2″ x 5″ finished block.
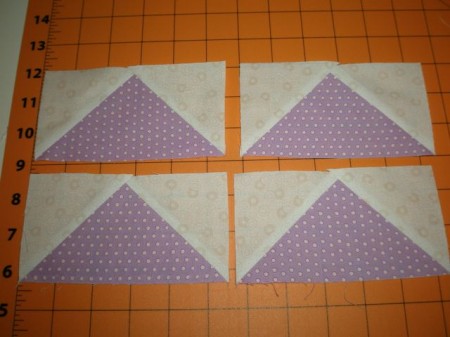
    Be sure to follow the fun on A Quilt Block A Day by clicking “Like” on the Facebook page.  I’ll be showing you lots and lots of ways to arrange flying geese blocks for a variety of quilts.

    And here’s that formula.  Note: A Flying Geese unit is always twice as long as it is tall.

    Decide on the finished width you want your block and add 1-1/4″.  That’s the size you need to cut your “geese” fabric, or the large square.

    To the height (which is half the width), or your “sky” fabric, add 7/8″.

    Now you can make any size block you want!

    For tutorials on other methods for making Flying Geese, check out Quilter’s Cache.

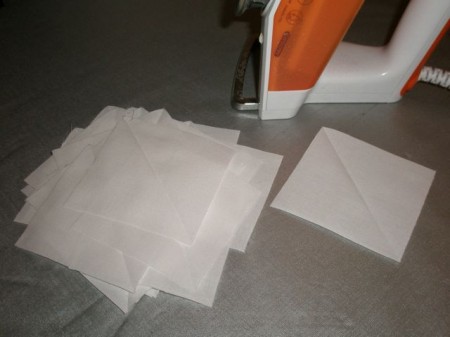
    P.S.  I HATE drawing diagonal lines on the back of my squares.  This is what I do in real life—press them with my iron which, of course, is orange!
  • 23Oct
    Categories: brilliant ideas, fabric design Comments Off on Laptop Sleeve

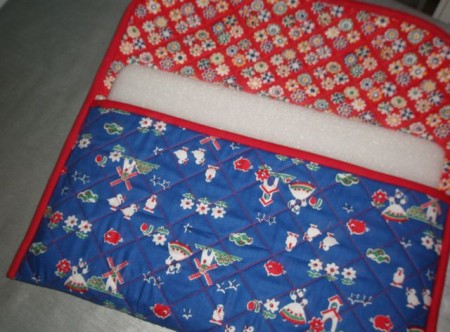
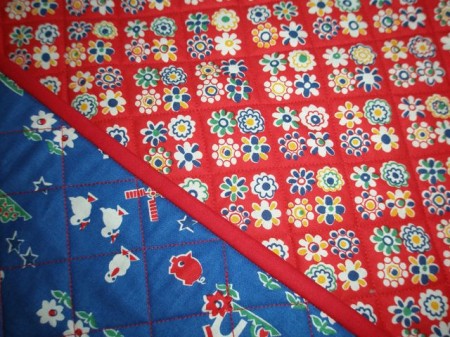
    I’m busy making Market samples from my new line of fabric – Bavaria.   Yesterday, I took a break from appliquéing roses to make a laptop sleeve.  I need to go shopping for a big red button and some Velcro for the closure.

    Since it will be displayed in the booth at Quilt Market, I didn’t want to put my real laptop in it.  Luckily, my sister recently bought a laptop sleeve, and it came with a nifty foam insert.  Perfect!

    This was so simple to make.  Here’s the “formula!”  By the way, this would work for an i-Pad, Kindle or any size notebook!

    Measure the width of your laptop and add 2-1/2″.

    Measure the height of you laptop, double it an add 5″.

    Cut two pieces of fabric and some fusible fleece this size.

    Layer and quilt.

    Round off the corners on the top edge.  I used a sewing basket lid as my guide!

    Cut a strip of binding 2-1/4″ wide and bind the bottom edge.

    Fold up the bottom, using your laptop as a guide.  Stitch the edges with a scant 1/4″ seam.

    Using more 2-1/4″ binding, bind the sides and top of the sleeve, turning the binding under at the bottom edge to finish.

    Voila!  It’s that easy.

    Note: I used the Four Flowers print for the lining of my sleeve.  When it was time to quilt the fabrics together, I just followed the path between the clusters of flowers.  No marking!

  • 13Jul

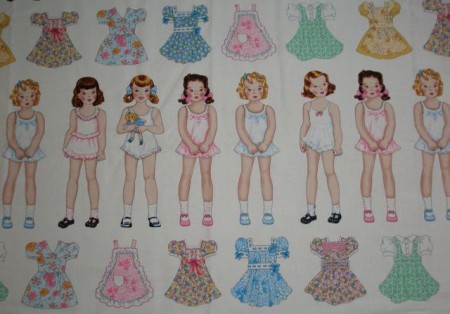
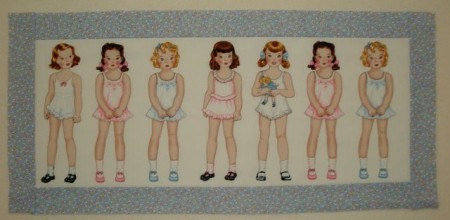
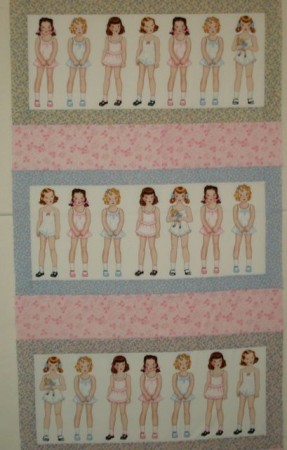
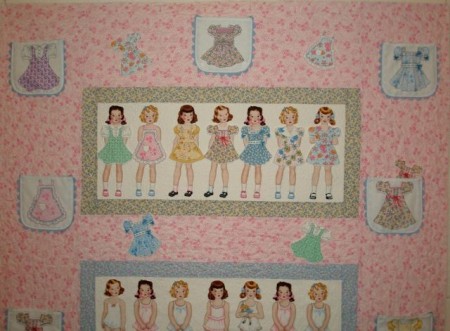
    My latest fabric line, Dolly Dear, is in stores and shipping now.  It has lots of pretty prints, but my favorite is the repeating stripe with the paper dolls and their dresses.

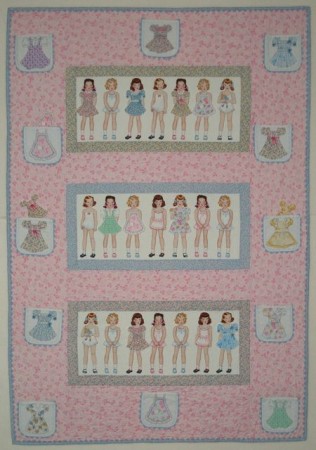
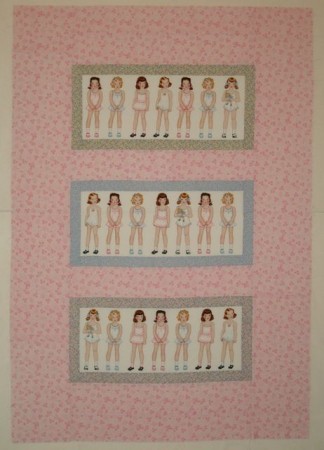
    I’ve designed a free pattern for a quit that I think any little girl would love.  The dolls are sewn into the body of the quilt, pockets are added around the outside edges, and the dresses are cut out so you can play dress up!

    I thought I’d walk you through the easy steps for making this quilt.  First, cut out three strips of the dolls and “frame” them with the Patsy Posy print.


    Sash them with the Pink Marigold fabric.

    Add borders of the same pink print.  I know they look really wide, but there’s a reason for that.  We’re going to add pockets!  At this stage, you need to quilt the quilt.  I stippled mine.

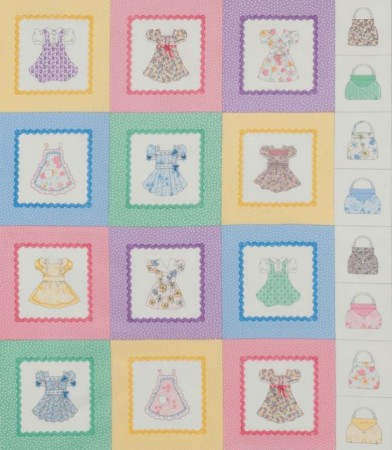
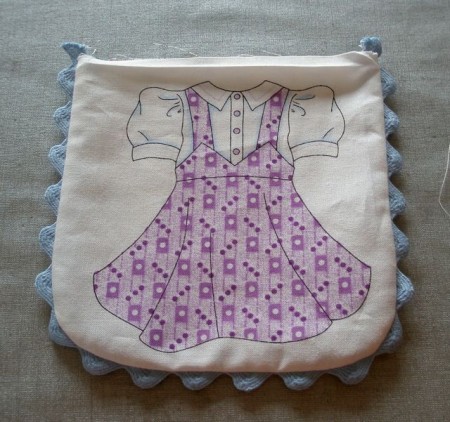
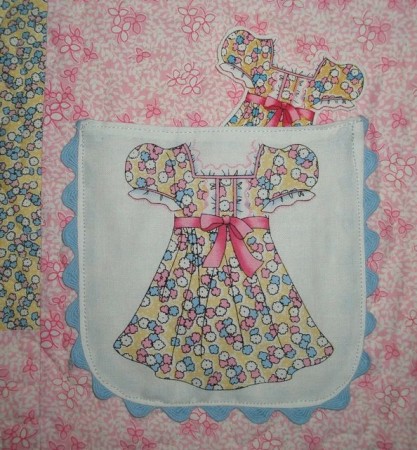
    Cut pockets and lining using the template provided with the pattern.  The front of the pockets are from the Dress Panel that goes with the line.

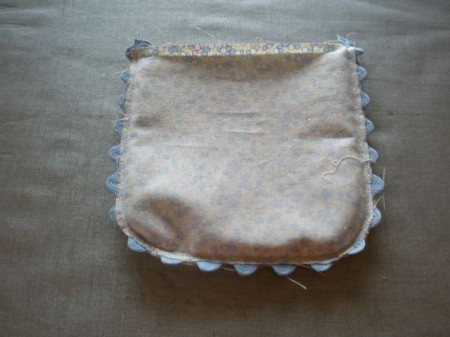
    I LOVE rickrack, and this seemed like the perfect place to use some!  Put the pocket front and lining right sides together, insert rickrack and stitch edges and bottom.

    Turn right sides out, press under 1/4″ at the top and top stitch closed.

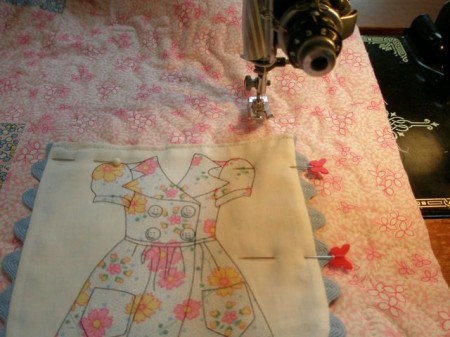
    You’ll need twelve pockets.  When they’re finished, topstitch down around the sides and bottom.

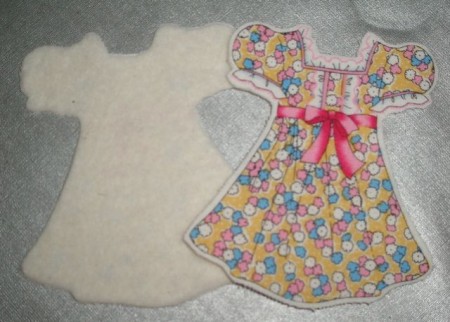
    Fuse some batting scraps to the backs of the dresses and cut them out.

    Now you’re ready to tuck them into the pockets….

    …or dress the dolls!


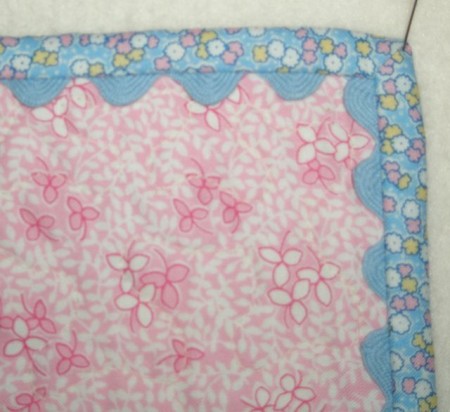
    I also added rickrack to the binding!  There’s no such thing as too much rickrack, is there?  The kit for this quilt includes the 12-1/2 yards needed!

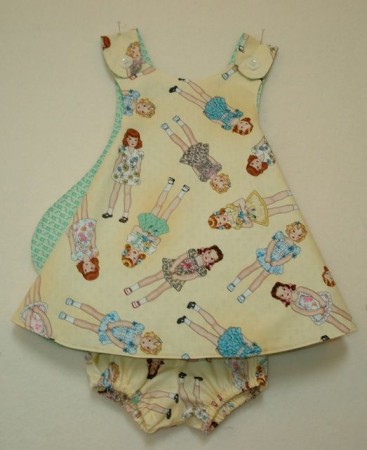
    Here are a few other things made with this fabric line.

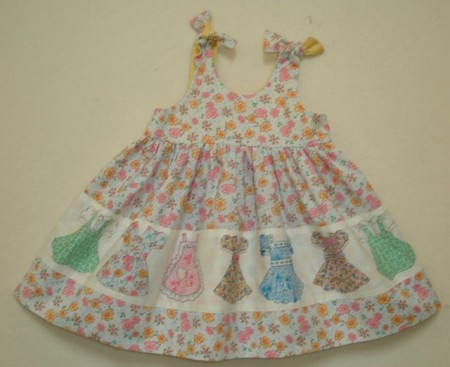
    This adorable sundress is made with the Tossed Dolls print and lined with the Green Jumble.

    The body of this jumper is the fabric I call Bette’s Bouquet, and this pattern is perfect for showing off the doll dresses.  Both these dress samples were made by Renee.

    This pattern from Yesterday’s Charm is one of my favorites.  Carol O. made this sample for me.

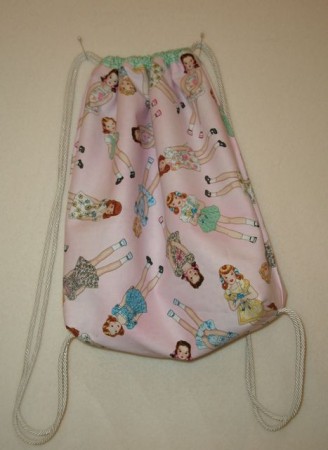
    Nan stitched up the backpack for me.

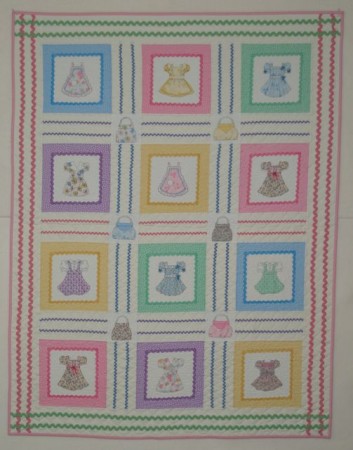
    And I made this quilt, Dress Up Time, from the Dress and Purse panel.  More rickrack–two sizes!!

    If you think I’m in my second childhood, you may be right!  But, I must tell you, I didn’t play with dolls in my first childhood, so I’m making up for it now!


  • 23Jun
    Categories: quilting Comments: 1

    I hope you’re taking part in the Summer Bow-Tie Quilt Along.  We’re making a Bow-Tie Block each day of summer!

    The previous post on my blog has a tutorial for making the traditional Bow-Tie block–which is a simple Four-Patch with a couple of sew-and-flip corners!

    But I thought you might like to learn how to make a 3-Dimensional Bow-Tie!    With this block, the center of the Bow-Tie 3-D.

    To make the block, you need:

    2) 3-1/2″ squares of light fabric

    2) 3-1/2″ squares of dark fabric

    1) 3″ square of dark fabric

    Normally, all three dark fabrics would be the same, but I thought it was easier to see the construction if I made the center a different print for this tutorial.

    Fold the 3″ square in half, wrong sides together.

    Place the folded square on a dark 3-1/3″ square.  Long raw edges should be even with the top, and short edge should be at the right side of the dark square.

    Place a light 3-1/2″ square on top.

    Stitch down the right side, catching the folded square between the 3-1/2″ squares.

    Turn squares out of the way, as shown below.

    Place edge of folded piece even with edge of  remaining light 3-1/2″ square

    Cover with dark 3-1/2″ square.  Stitch.

    At this point, your stitched pieces should look like this.  Press the 3-1/2″ squares to the dark.

    Line up the top edges of the squares.  As you do this, a little “pocket” will form from the folded piece in the middle.

    Pin, lining up the raw edges of the folded piece with the top edge to be stitched.  Stitch.

    When you open your block, the 3-D center will be formed!

    Voila!

    I like to press my last seam open. And, actually, I kind of like the different color center!

    Tags:
  • 19Jun
    Categories: brilliant ideas, quilting Comments Off on Summer Bow Tie Quilt Blocks

    Last summer, we had such fun making a Nine-Patch block everyday.  Well, summer is upon us again.  This summer, let’s do Bow Tie blocks! These are soooo simple.  It’s basically a four-patch.  What could be easier?!?

    I’ve set up a Facebook page so you can share your progress, post photos and get more ideas on what to do with your blocks.  CLICK HERE to become a fan!

    Now for a quick tutorial for a 6″ Bow Tie block

    For each block you will need:

    1) 3-1/2″ x 7″ light fabric

    1) 3-1/2″ x 8-1/2″ dark fabric

    Cut the light fabric into 2) 3-1/2″ squares.

    Cut the dark fabric into 2) 3-1/2″ squares and 2) 1-1/2″ squares.

    Put the two small dark squares on a corner of the light squares.

    Sew diagonally from corner to corner on the dark squares.  These are so small, you don’t really need to mark them.  If you’re not comfortable eyeballing them, you can finger press the small squares in half and sew down the crease.

    Trim 1/4″ away from the stitching.

    Press the little dark squares over.  Now, all you have to do is piece your four-patch!

    Stitch along the vertical seams.  Press toward the dark fabric.

    Join the horizontal seams and you’re done!

    I do like to press the last seam open to reduce bulk in the center.

    If you want to make 3″ finished blocks, cut your “large” squares 2″ and your “small” squares 1″.  In fact, you might want to make some of both sizes.  They can be very cute in the same quilt!

  • 09Jun
    Categories: brilliant ideas, Everything! Comments Off on Disappearing Nine-Patch

    Does this look like a Nine-Patch???

    Or this?

    How about this??

    All these layouts were done with these six blocks.

    After I cut them in half!

    Your center blocks don’t have to be solid, or even all the same color.  I just did that to make the illustrations clearer.

    I hope you’re having fun with the Summer Nine-Patch Project.

    Sign up for my email newsletter at annalena.com.

  • 03Jun

    I just had an email from one of my newsletter subscribers reminding me of a speedy way to make nine-patches.  I’d seen it done years ago, and forgotten all about it.  With this method, you get two nine-patches at a time.  How perfect for our Summer Nine-Patch Project! Now you can make two blocks a day faster than making one block the traditional way.  That means you’ll either end up with twice as many blocks, or you’ll only have to sew every other day!  Thanks, Peggy, for the reminder.

    Here’s a tutorial on how to make the Two-For-One Nine-Patch blocks.  The example is for a 9″ finished block, but at the end of the tutorial, I’ll give you the formula (and chart) so you can make any size block you want.

    1.  Layer a light and dark fabric, right sides together, and cut a 10-1/2″ square.

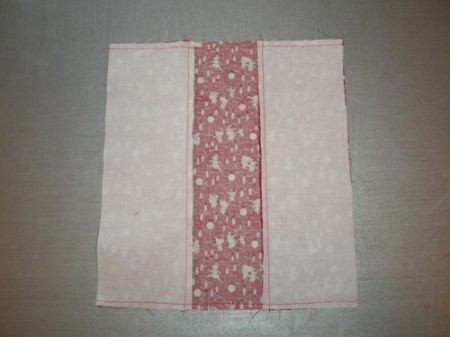
    2. Using a 1/4″ seam allowance, join the squares together on two opposite sides.

    3. Take the to your cutting board and measure in 3-1/2″ from one stitched side.  Cut.

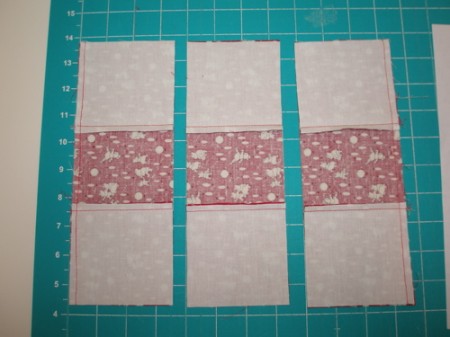
    4. Measure in 3-1/2″ from the other stitched side and cut.  You will have two stitched segments and two unstitched strips.

    5. Press the stitched segments toward the dark fabric.  Add a contrasting strip to one side of each block.

    6. Stitch and press toward the dark fabric.

    7. Place the two segments right sides together with the seams running in the same direction.  If you pressed everything toward the dark fabric, the seams will nest together.

    8. Now stitch together across the previously made seams.  Stitch both opposite sides.

    9. Cut 3-1/2″ from each seamed edge.

    10. Press toward the side with the most dark fabric.  Add the unstitched strips to the pieced segments, dark to light.

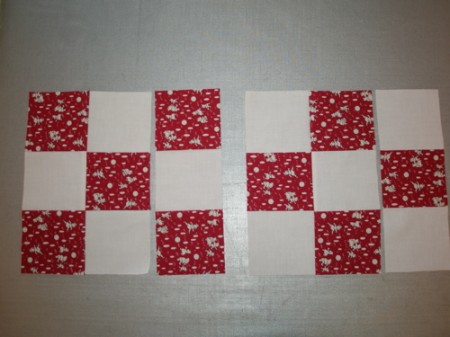
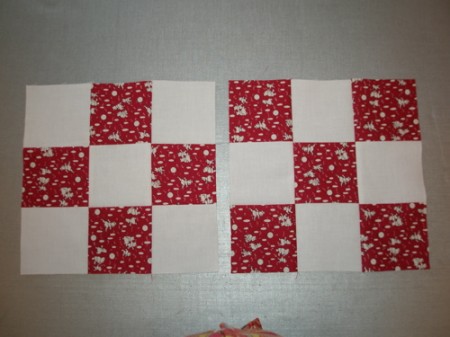
    11. Voila!  You have two mirror image blocks!

    Here’s the formula for cutting the squares.  Take the size of the strip that you would cut for a regular nine-patch block and multiply times 3–it’s that simple.  In our example, we would have cut strips 3-1/2″, so 3-1/2″ x 3 is 10-1/2″, the size of our square.

    Here’s a chart to make it a little easier.  Block sizes given are for finished blocks.

    For 3″ blocks, start with a 4-1/2″ square

    For 4-1/2″ blocks, start with a 6″ square

    For 6″ blocks, start with a 7-1/2″ square

    For 9″ blocks, start with a 10-1/2″ square

    For 12″ blocks, start with a 13-1/2″ square

    Have fun and be sure to join the Facebook group and post pictures of your blocks!

    Sign up for my email newsletter at annalena.com.