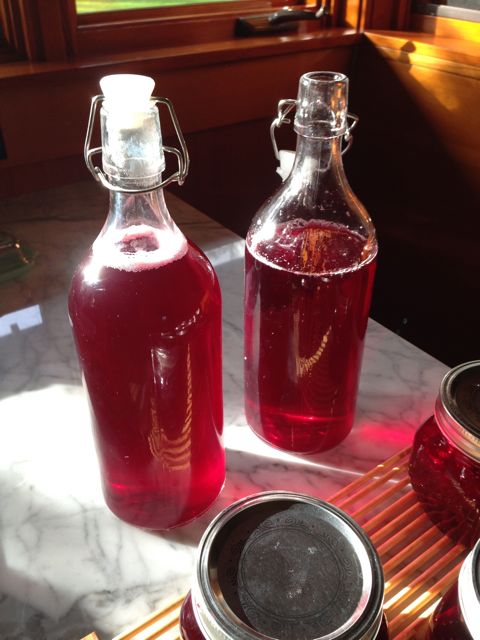
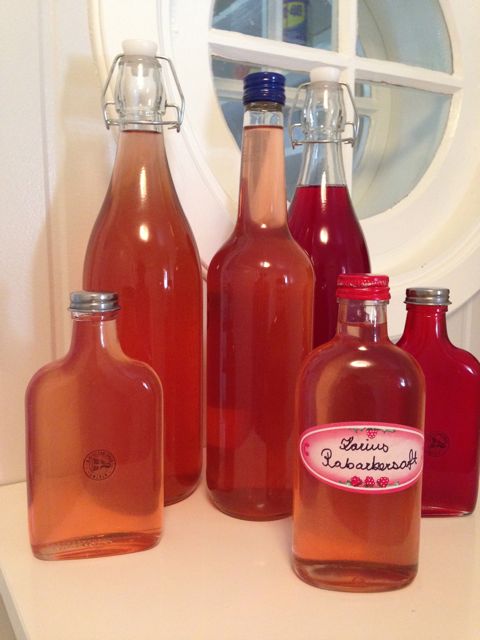
In Sweden last summer I learned to make “saft,” a fruit concentrate that you add to water to make a yummy drink. I made rhubarb saft and currant saft. Both were delicious. But now that it’s cranberry season here at home, I decided I should try my hand at making some cranberry saft!
It was mighty tasty!
A few people have asked for the recipe, so here it is.
Cranberry Saft
8 cups cranberries
4 cups sugar
4 cups water
Combine sugar and water in a saucepan and heat until sugar dissolves. Add berries and bring to a boil. Boil 15 minutes. Pour into a jelly bag and let drain several hours. Voila! Saft!
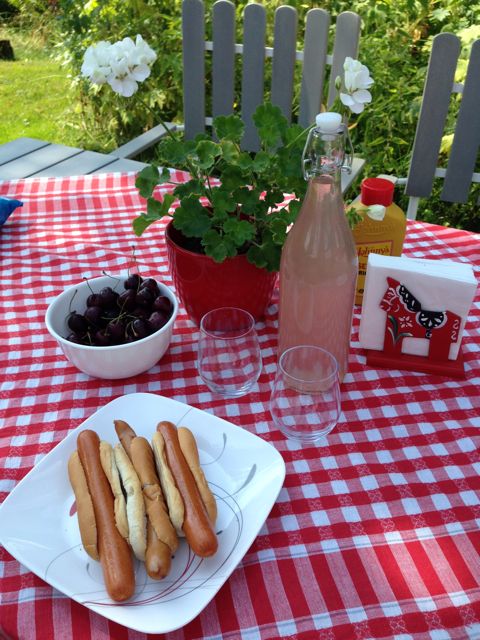
Add your syrup to still or sparkling water for a refreshing drink. I find a 1 to 4 ratio of syrup and water suits my taste, but experiment and see what you like.
This will keep several weeks in your refrigerator.
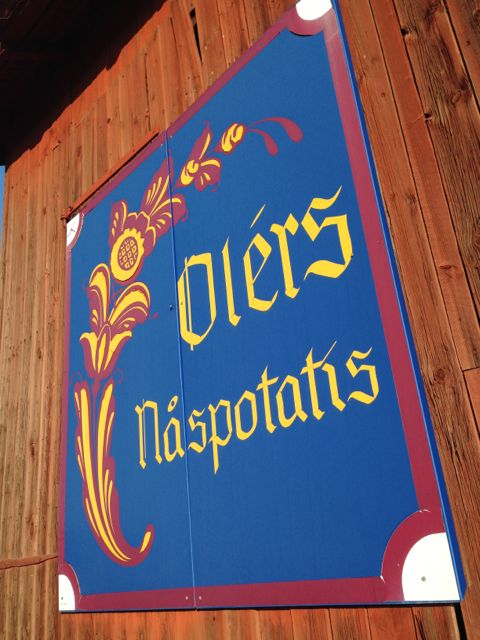
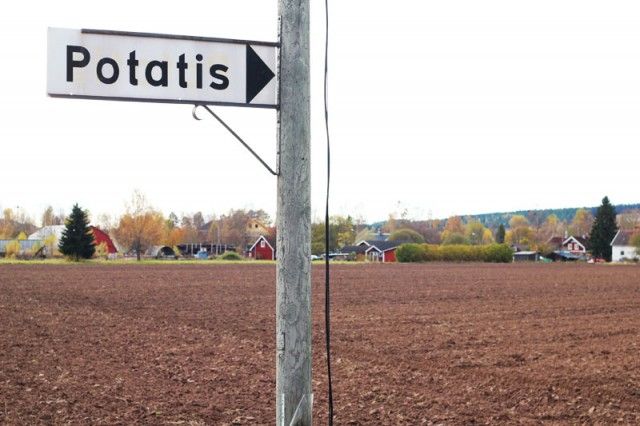
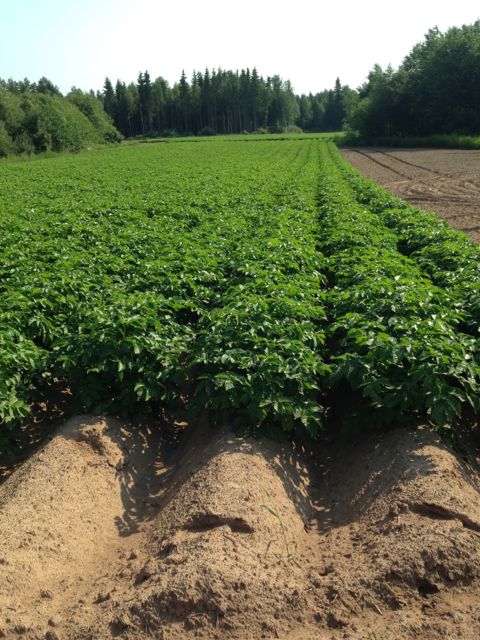
Nås, our village in Sweden is known for it’s potatoes.
The West Dala River runs through our village and the sandy soil is perfect for producing potatoes.
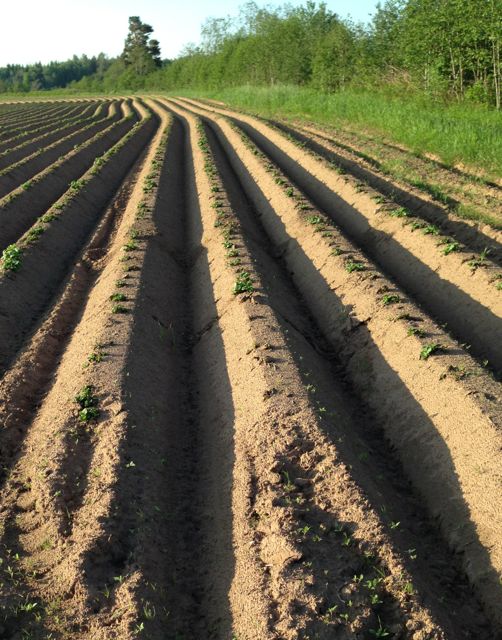
When we got to Sweden in June, the little plants were just poking up through the soil.
Nås is so far north that there’s about 20 hours of sunlight a day in June. This is the same field two weeks later!
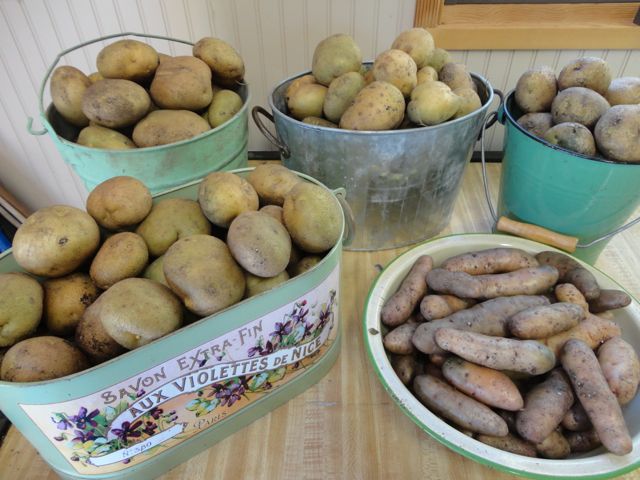
Here in Long Beach, we have very sandy soil, too, which means potatoes are a great crop to grow here, too.
Since we were going to be gone for two months this summer, I didn’t plant a garden this year—except for potatoes. They were left to their own devices while we were gone except for a timer on the sprinkler. Thank goodness they thrive on neglect! A few days ago I dug them all up.
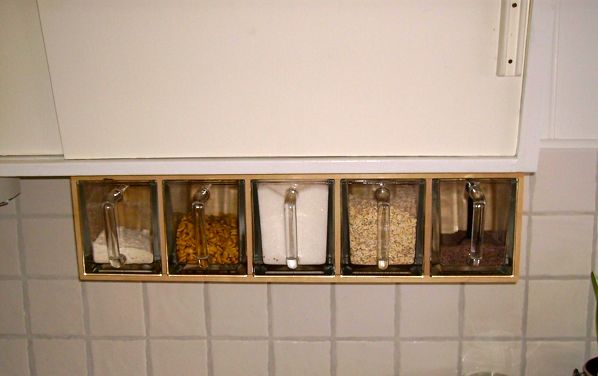
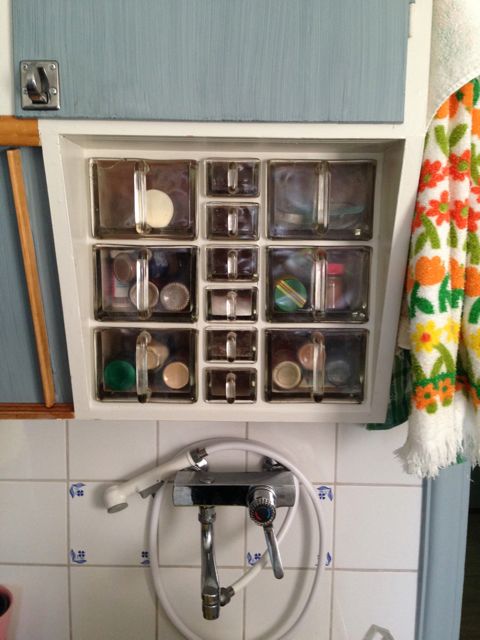
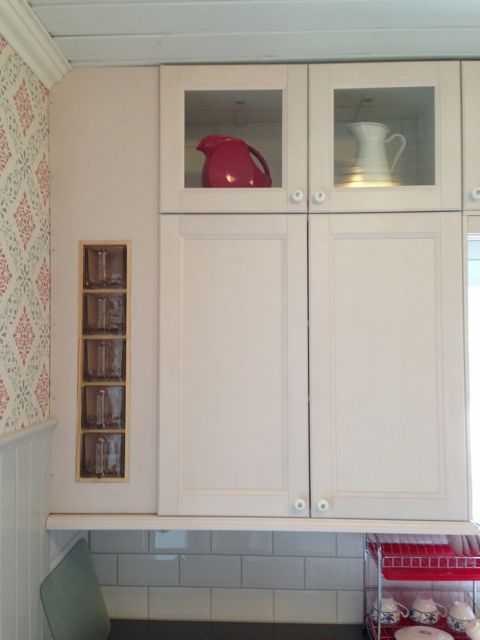
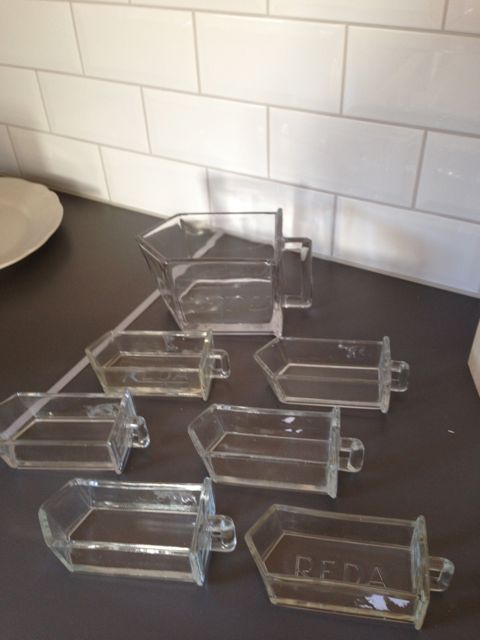
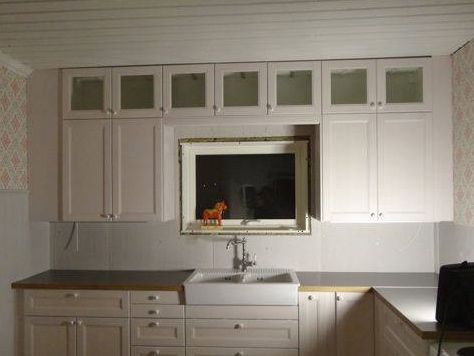
Kryddhylla? It’s Swedish for spice rack! I’ve always thought these under-counter spice racks you find in lots of Swedish kitchens are very cool.
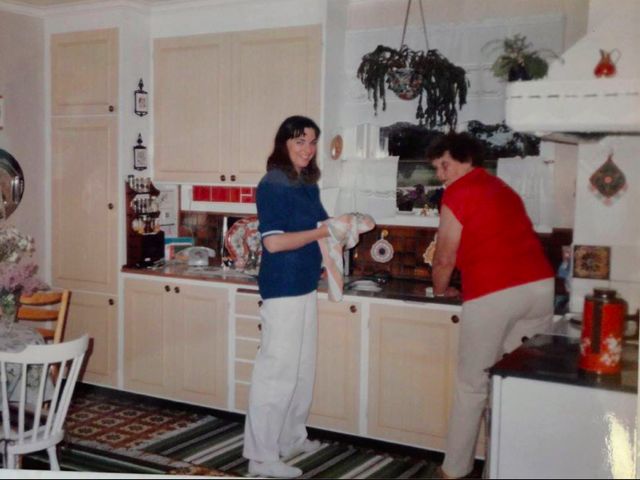
You can see a red one behind me here in Skräddar Anna’s kitchen in this picture taken in 1984!
This one’s a little different. It’s in Berit and Gunnar’s house.
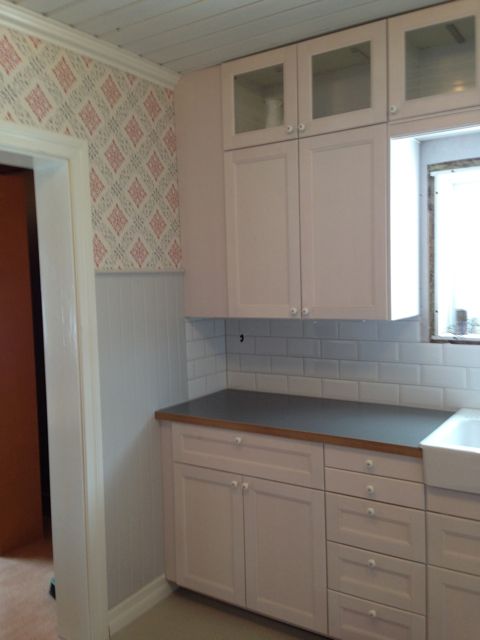
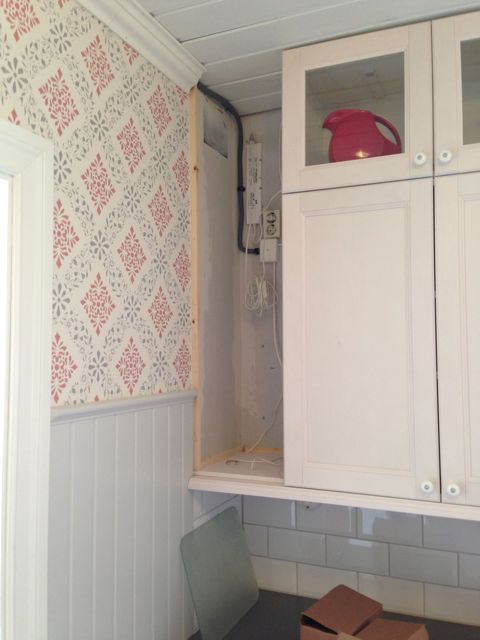
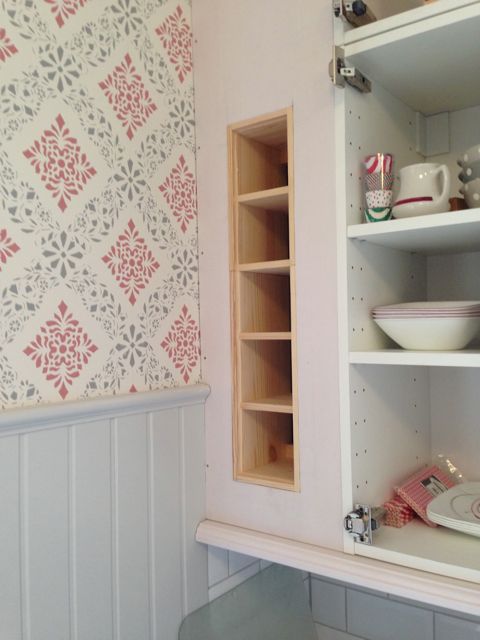
I wanted to find one for our Swedish house and was looking for an antique one that would go under our upper cupboards. But if you look at the picture below, you’ll see that blank panel on the very left. It was kind of boring, and kind of bothered me.
It was just there to hide some electrical. Hmmm. Why not put the kryddhylla there!?!
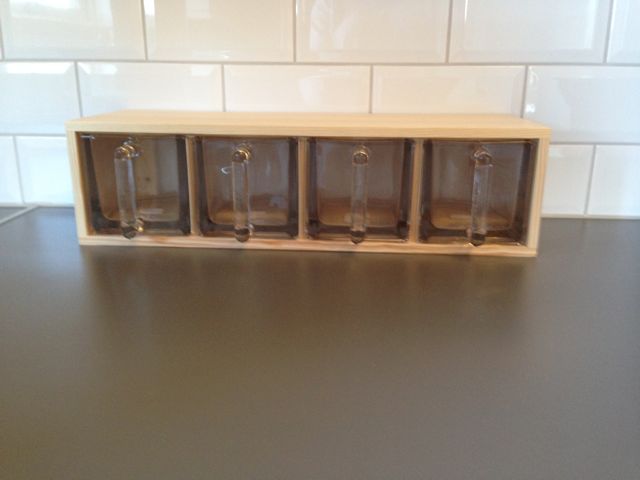
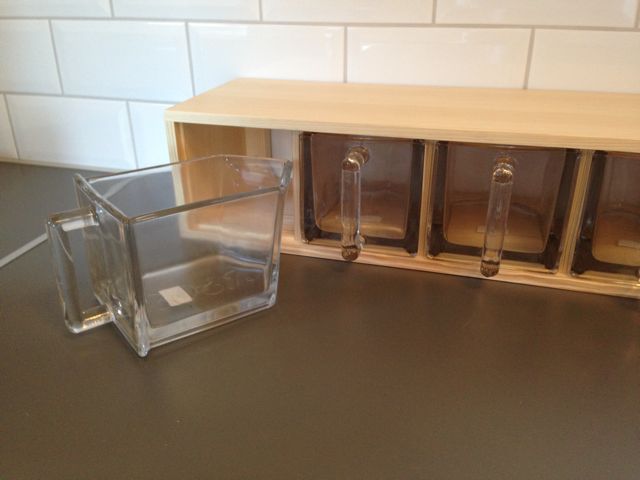
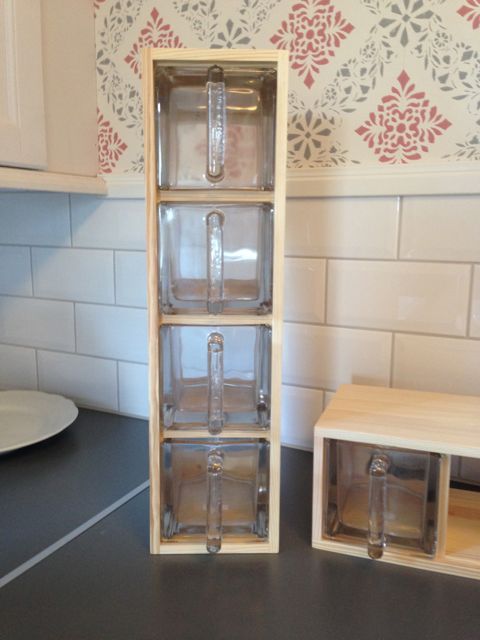
It would be a bit nontraditional to run it vertically, but, hey–why not! I found a source for new ones, that had four containers.
The glass inserts were square.
So they could go into the holder either way!
Five seemed to be right for the space, so we ordered a second one and did some creative carpentry.
And now we have our own kryddhylla! Yeah!
Oh! But on the other side of the cupboards, there’s a skinny space. It didn’t bother me so much.
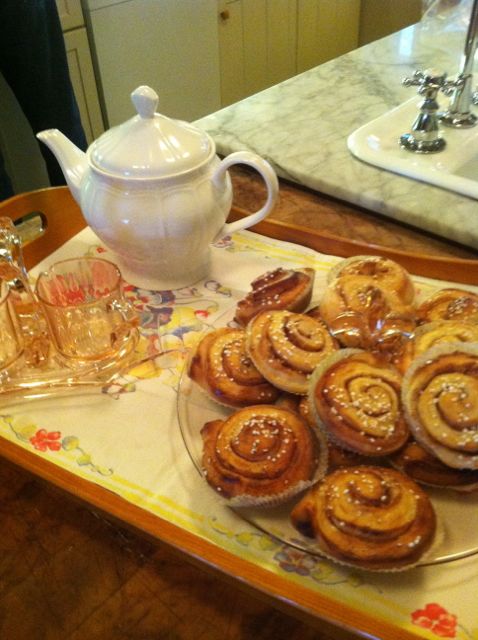
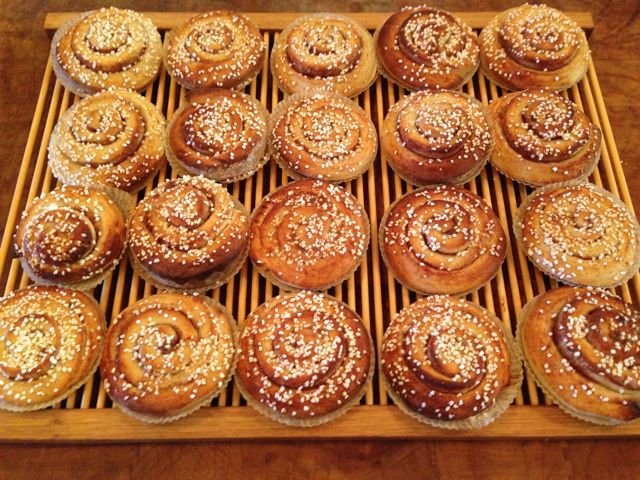
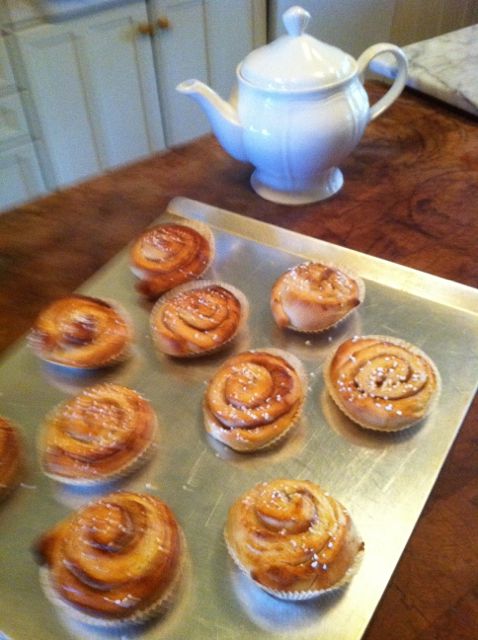
What’s not to love about a country that has a designated Cinnamon Bun Day!?! October 4 is Kanelbullens Dag – Cinnamon Bun Day! As a Swedish-American, I feel compelled to celebrate my heritage! 😉
If you want to celebrate your Swedish heritage, or just be a Swede for a day, I thought I’d share my Cinnamon Bun recipe with you. I make my dough in my bread machine, using the “dough” setting, but you could do it the old-fashioned way.
Bread dough ingredients
1-1/4 cups milk – room temperature
3/4 cup melted butter
1/2 cup sugar
1/2 teaspoon salt
1-1/2 teaspoon ground cardamom
2-1/4 teaspoons dry yeast (1 packet)
4 – 4-1/2 cups flour
Put all these ingredients in your bread machine and set it to the “dough” setting. Shortly before it’s done, gather/prepare the following ingredients.
Filling ingredients
1/4 cup melted butter
1/3 cup sugar
1 tablespoon cinnamon
1 egg
pearl sugar
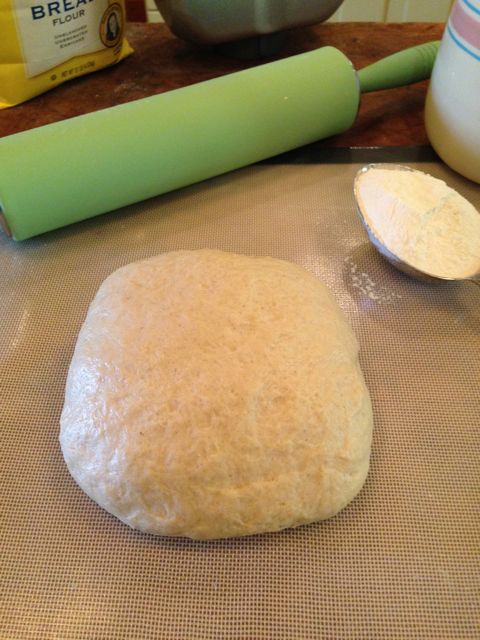
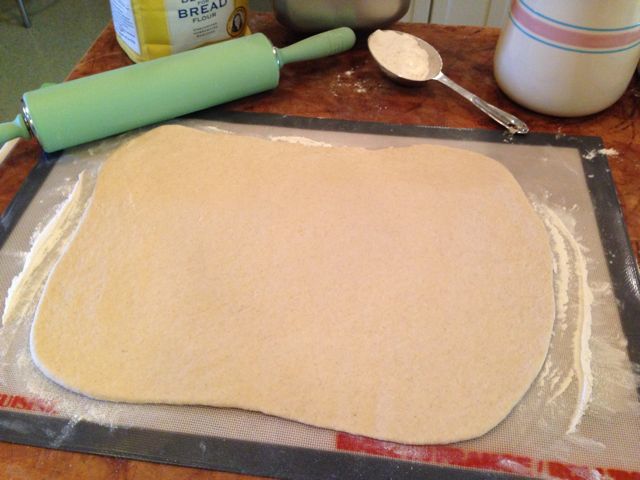
When the dough in the bread machine is done, turn it out onto a floured surface, punch it down and knead until smooth and shiny. Let rest a few minutes.
Roll dough into a 12″ x 18″ rectangle.
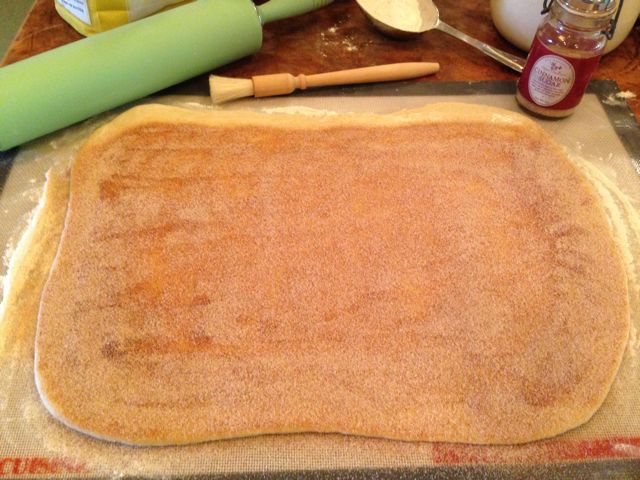
Brush with melted butter. Combine sugar and cinnamon; sprinkle over the dough.
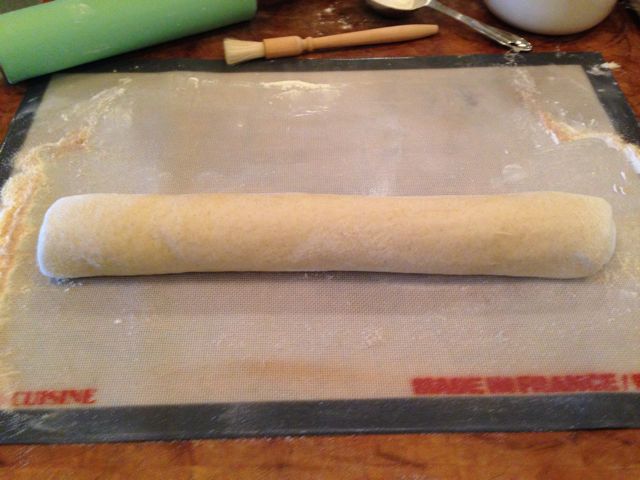
Beginning with the long side of the rectangle, roll up jelly roll style.
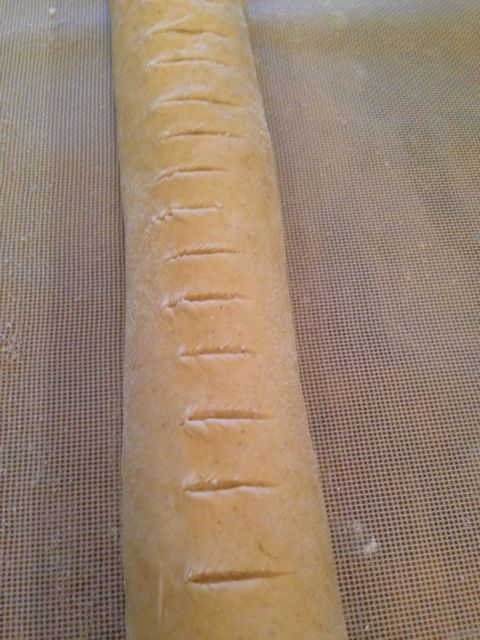
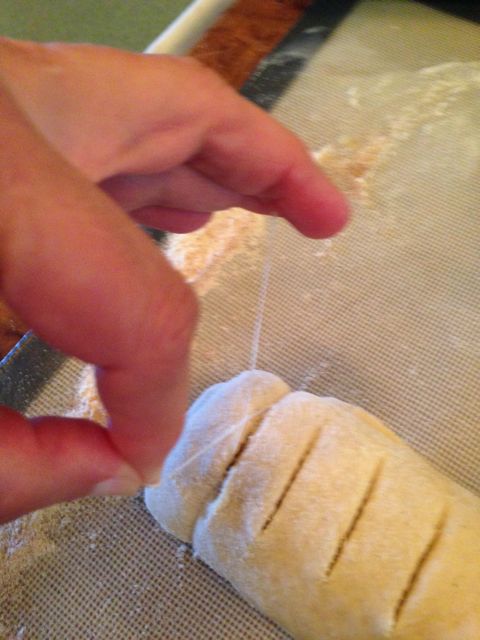
At this point, it’s time to cut the dough into 20 slices – or something close to that. I use a serrated knife to mark the top of the roll.
You can use a sharp knife or use a length of dental floss to do the cutting. If you use dental floss, slide it under roll, cross the ends and pull to make a clean slice! (I learned this tip from Bob, who used to watch his grandmother do this using a piece of string!)
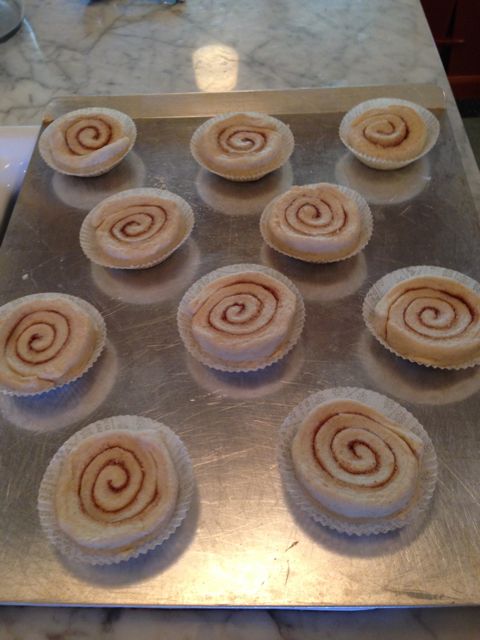
Swedish cinnamon buns aren’t crowded into a single pan, but baked in baking papers, individually, on a baking sheet. You can use cupcake papers for this, but they are a little deeper than needed. You should be able to find baking papers at a kitchen store.
Place each slice into a baking paper and place on a baking sheet. Cover and let rise until double—about 45 minutes.
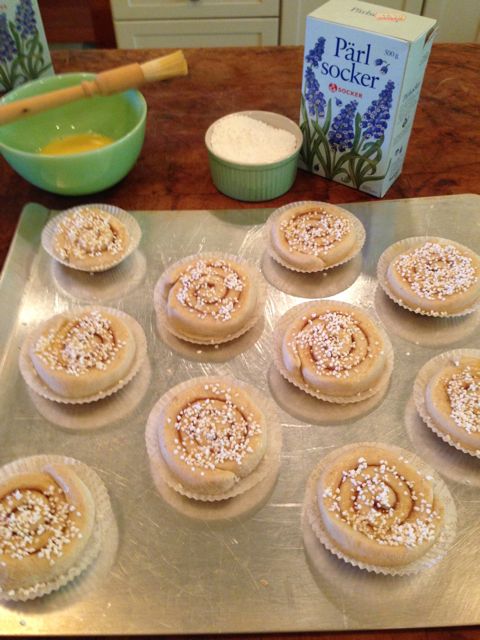
Make an egg wash with 1 egg and 1 tablespoon of water. Brush rolls with egg wash and sprinkle with pearl sugar. Don’t know about pearl sugar? It’s a coarse, dense sugar available at specialty food/kitchen shops or Ikea!
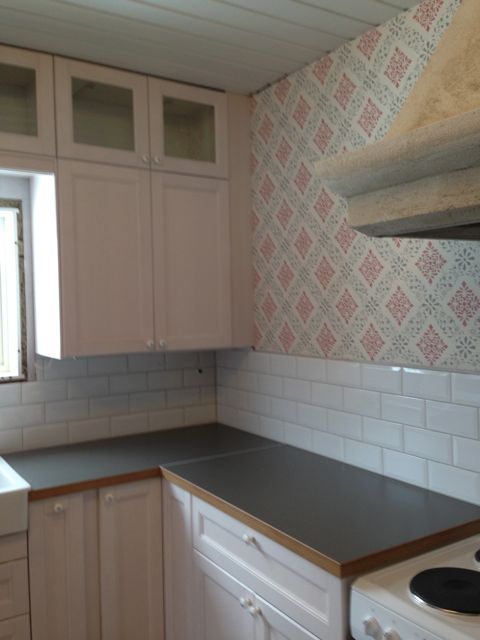
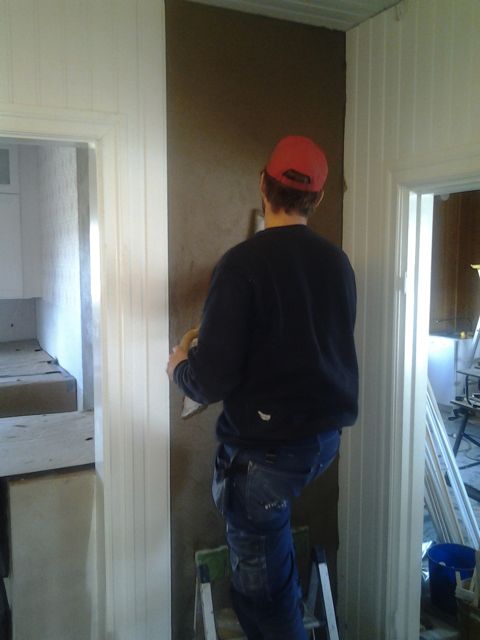
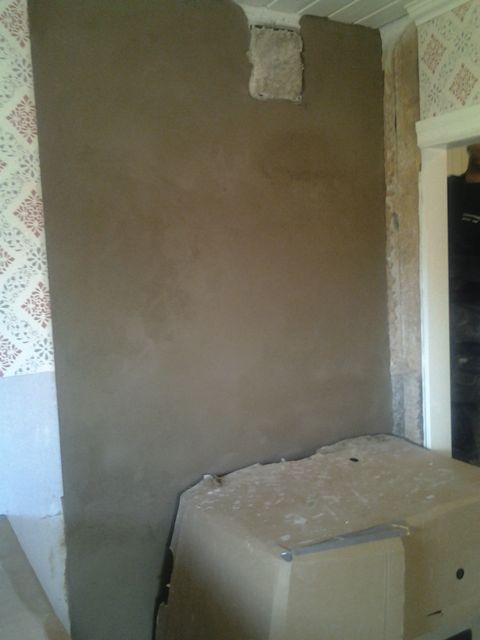
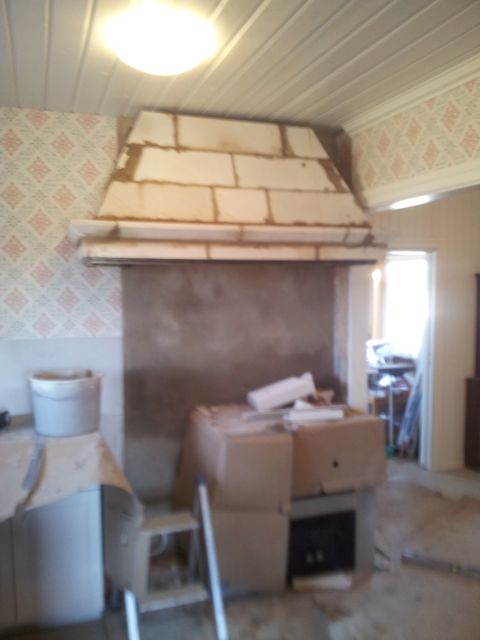
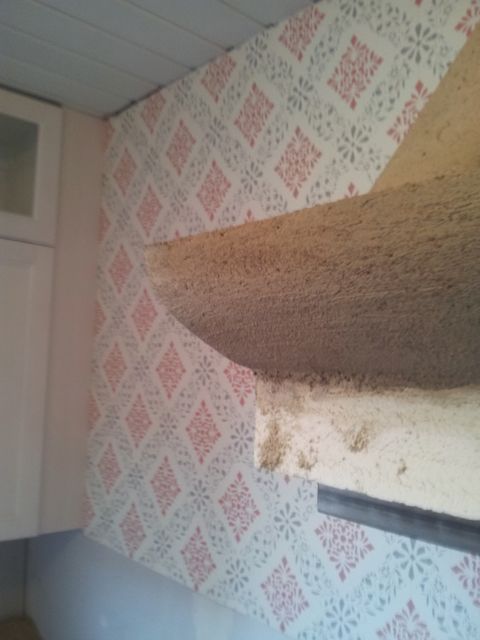
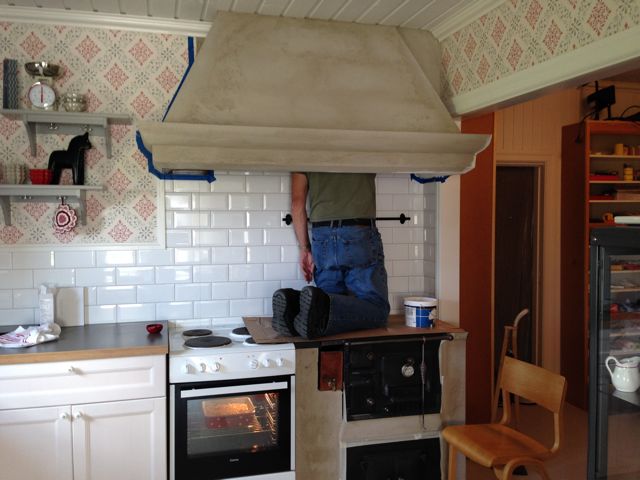
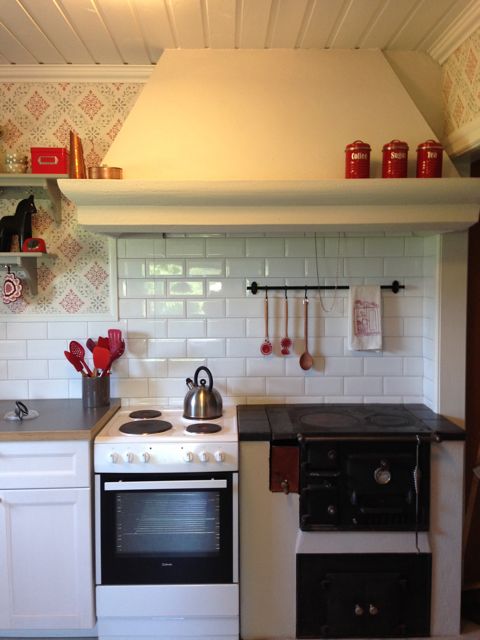
Before we returned to Sweden for the summer, Torsten and Mikael built the hood over our stoves. It started with Mikael putting a fresh layer of cement over the chimney. This is the hall side of the chimney.
This is the kitchen–with the wood stove covered up and the electric stove temporarily removed.
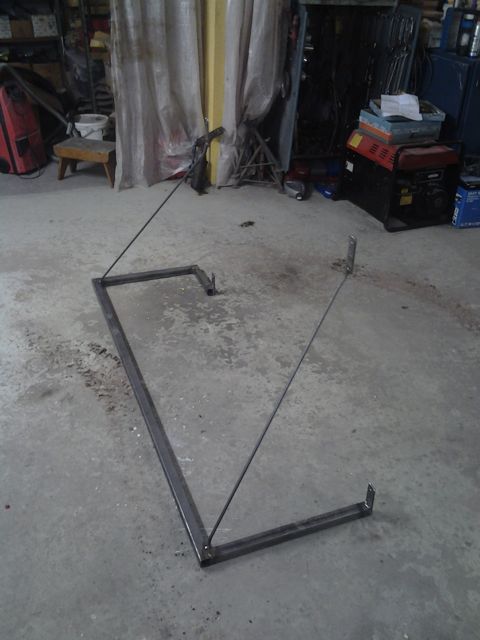
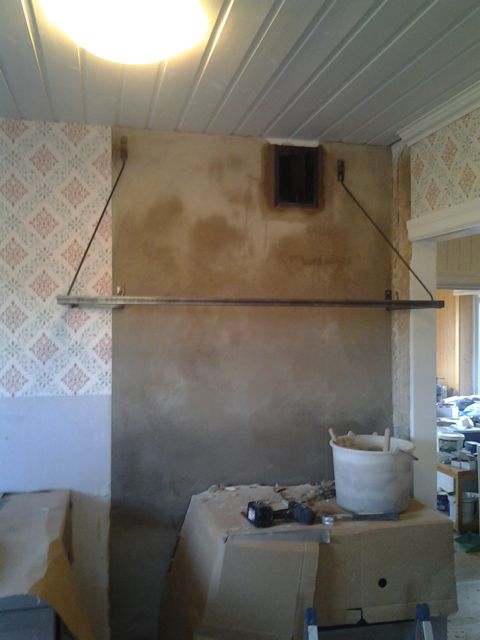
Traditional Swedish hoods are very different than the prefab hoods we’re used to in the US. Torsten built the steel framework…
…and installed it.
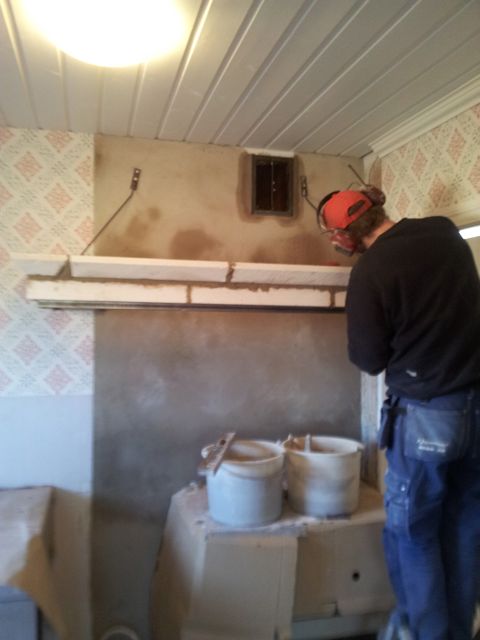
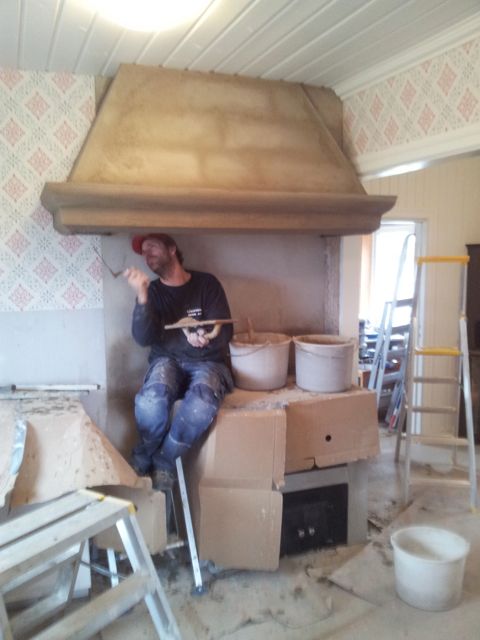
Then Mikeal started building the hood with bricks.
While the work was in progress, this was the only photo Torsten sent me!
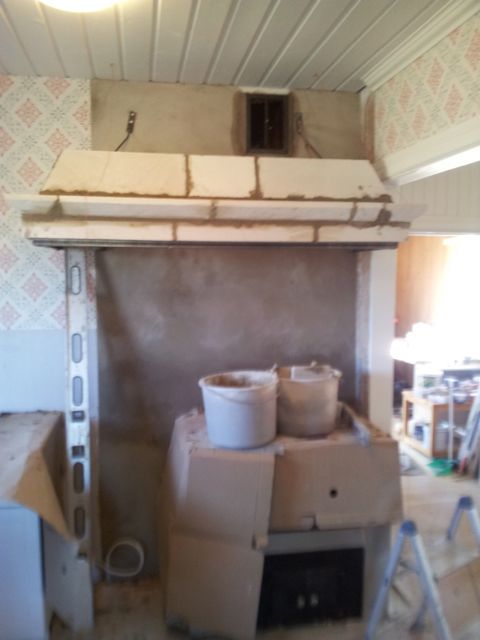
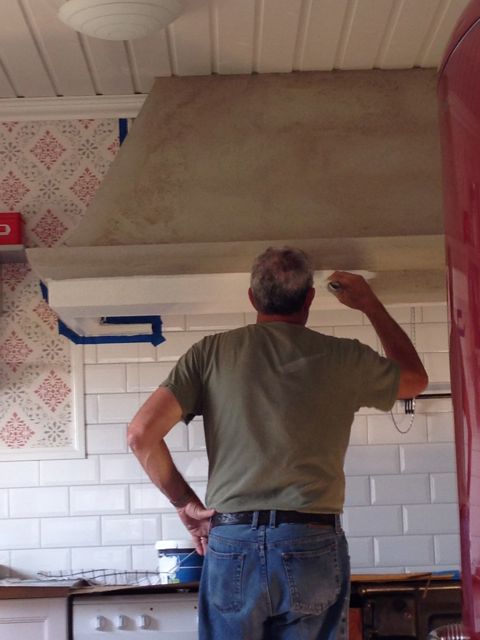
Once the bricks were in place, Mickael covered everything with a layer of cement.
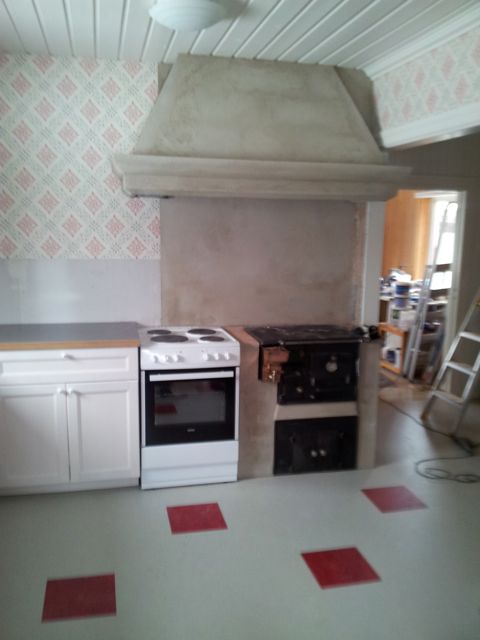
And I got my second sneak peek! It’s hard to be half a world away!
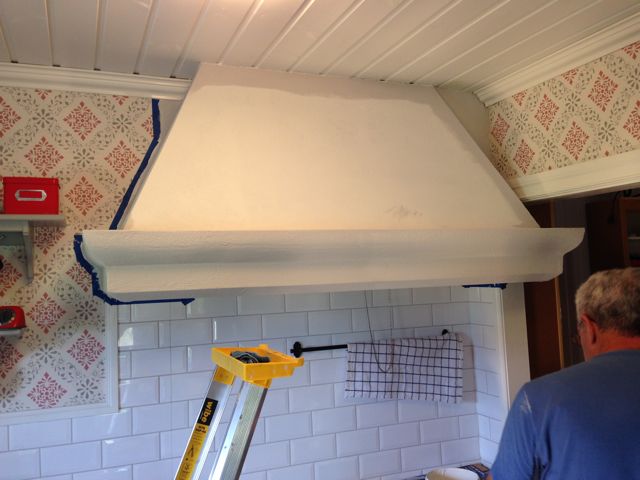
Finally, I couldn’t stand it any longer! I had to make a trip back to Sweden.
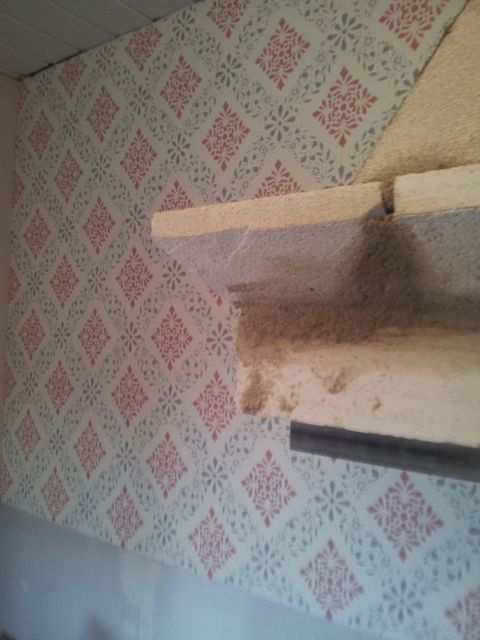
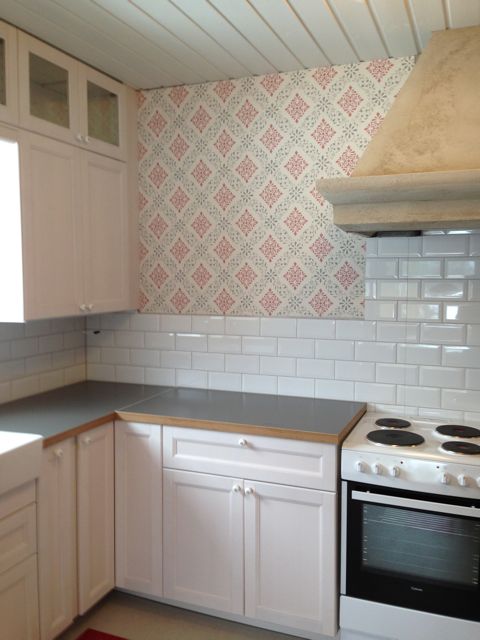
Everything looked fabulous, including the white tile back splash.
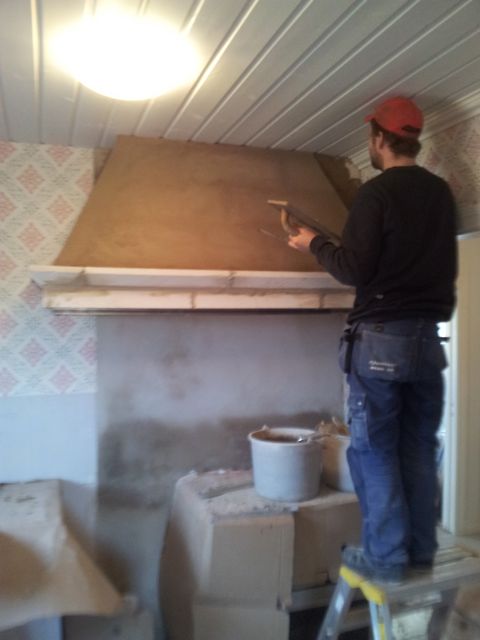
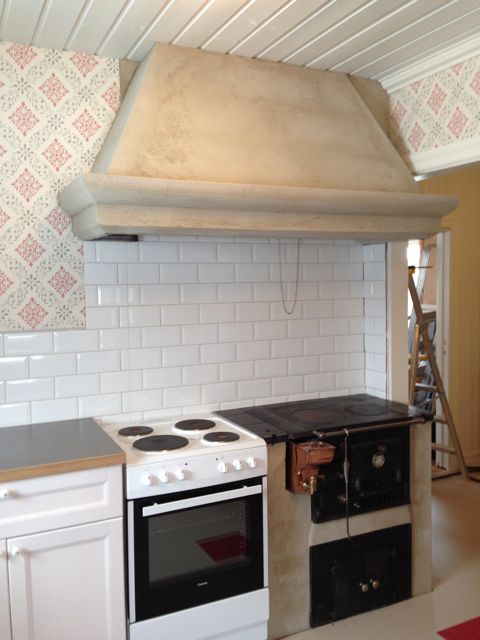
This summer, Bob painted all the cement.
Traditionally these hoods are painted white, and that’s what we did—with the first coat.
But it seemed so stark white that he put a second coat on with a tinge of gray in it.
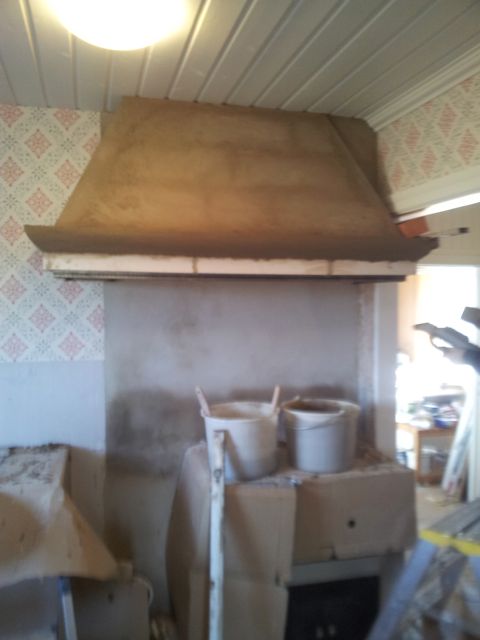
And it looks fantastic! The vedspis (wood stove) and hood really make this my Swedish dream kitchen.
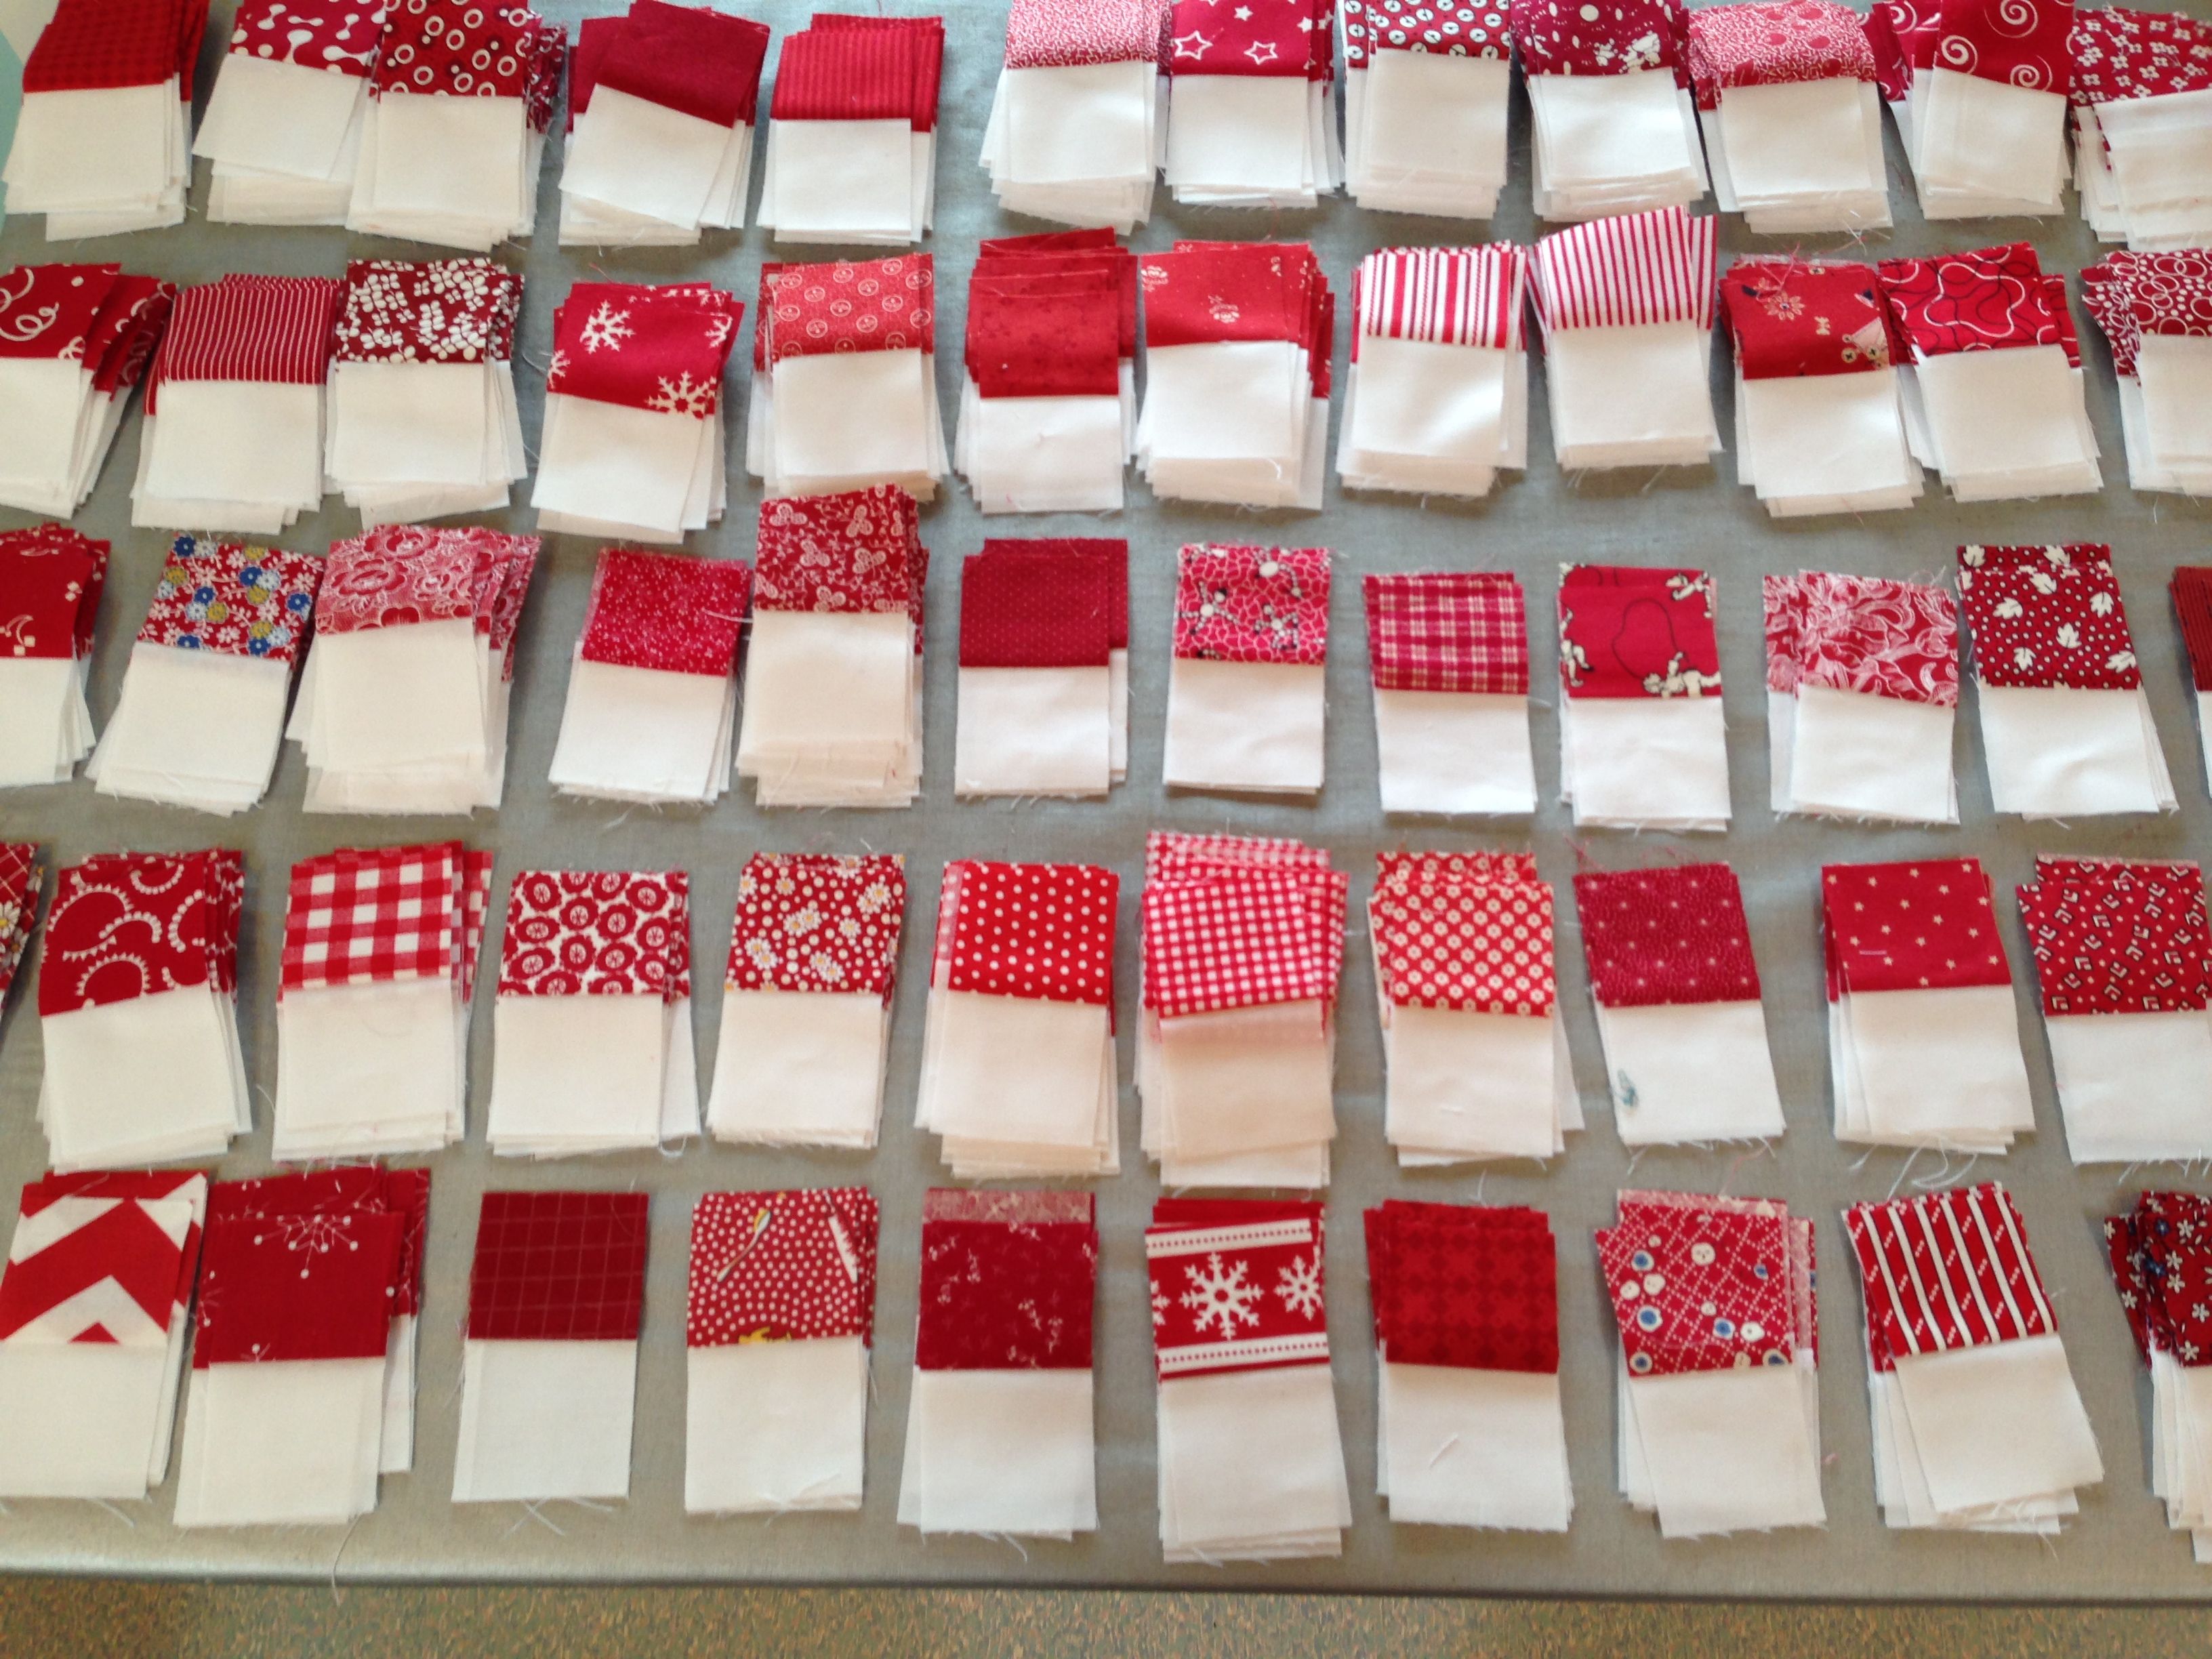
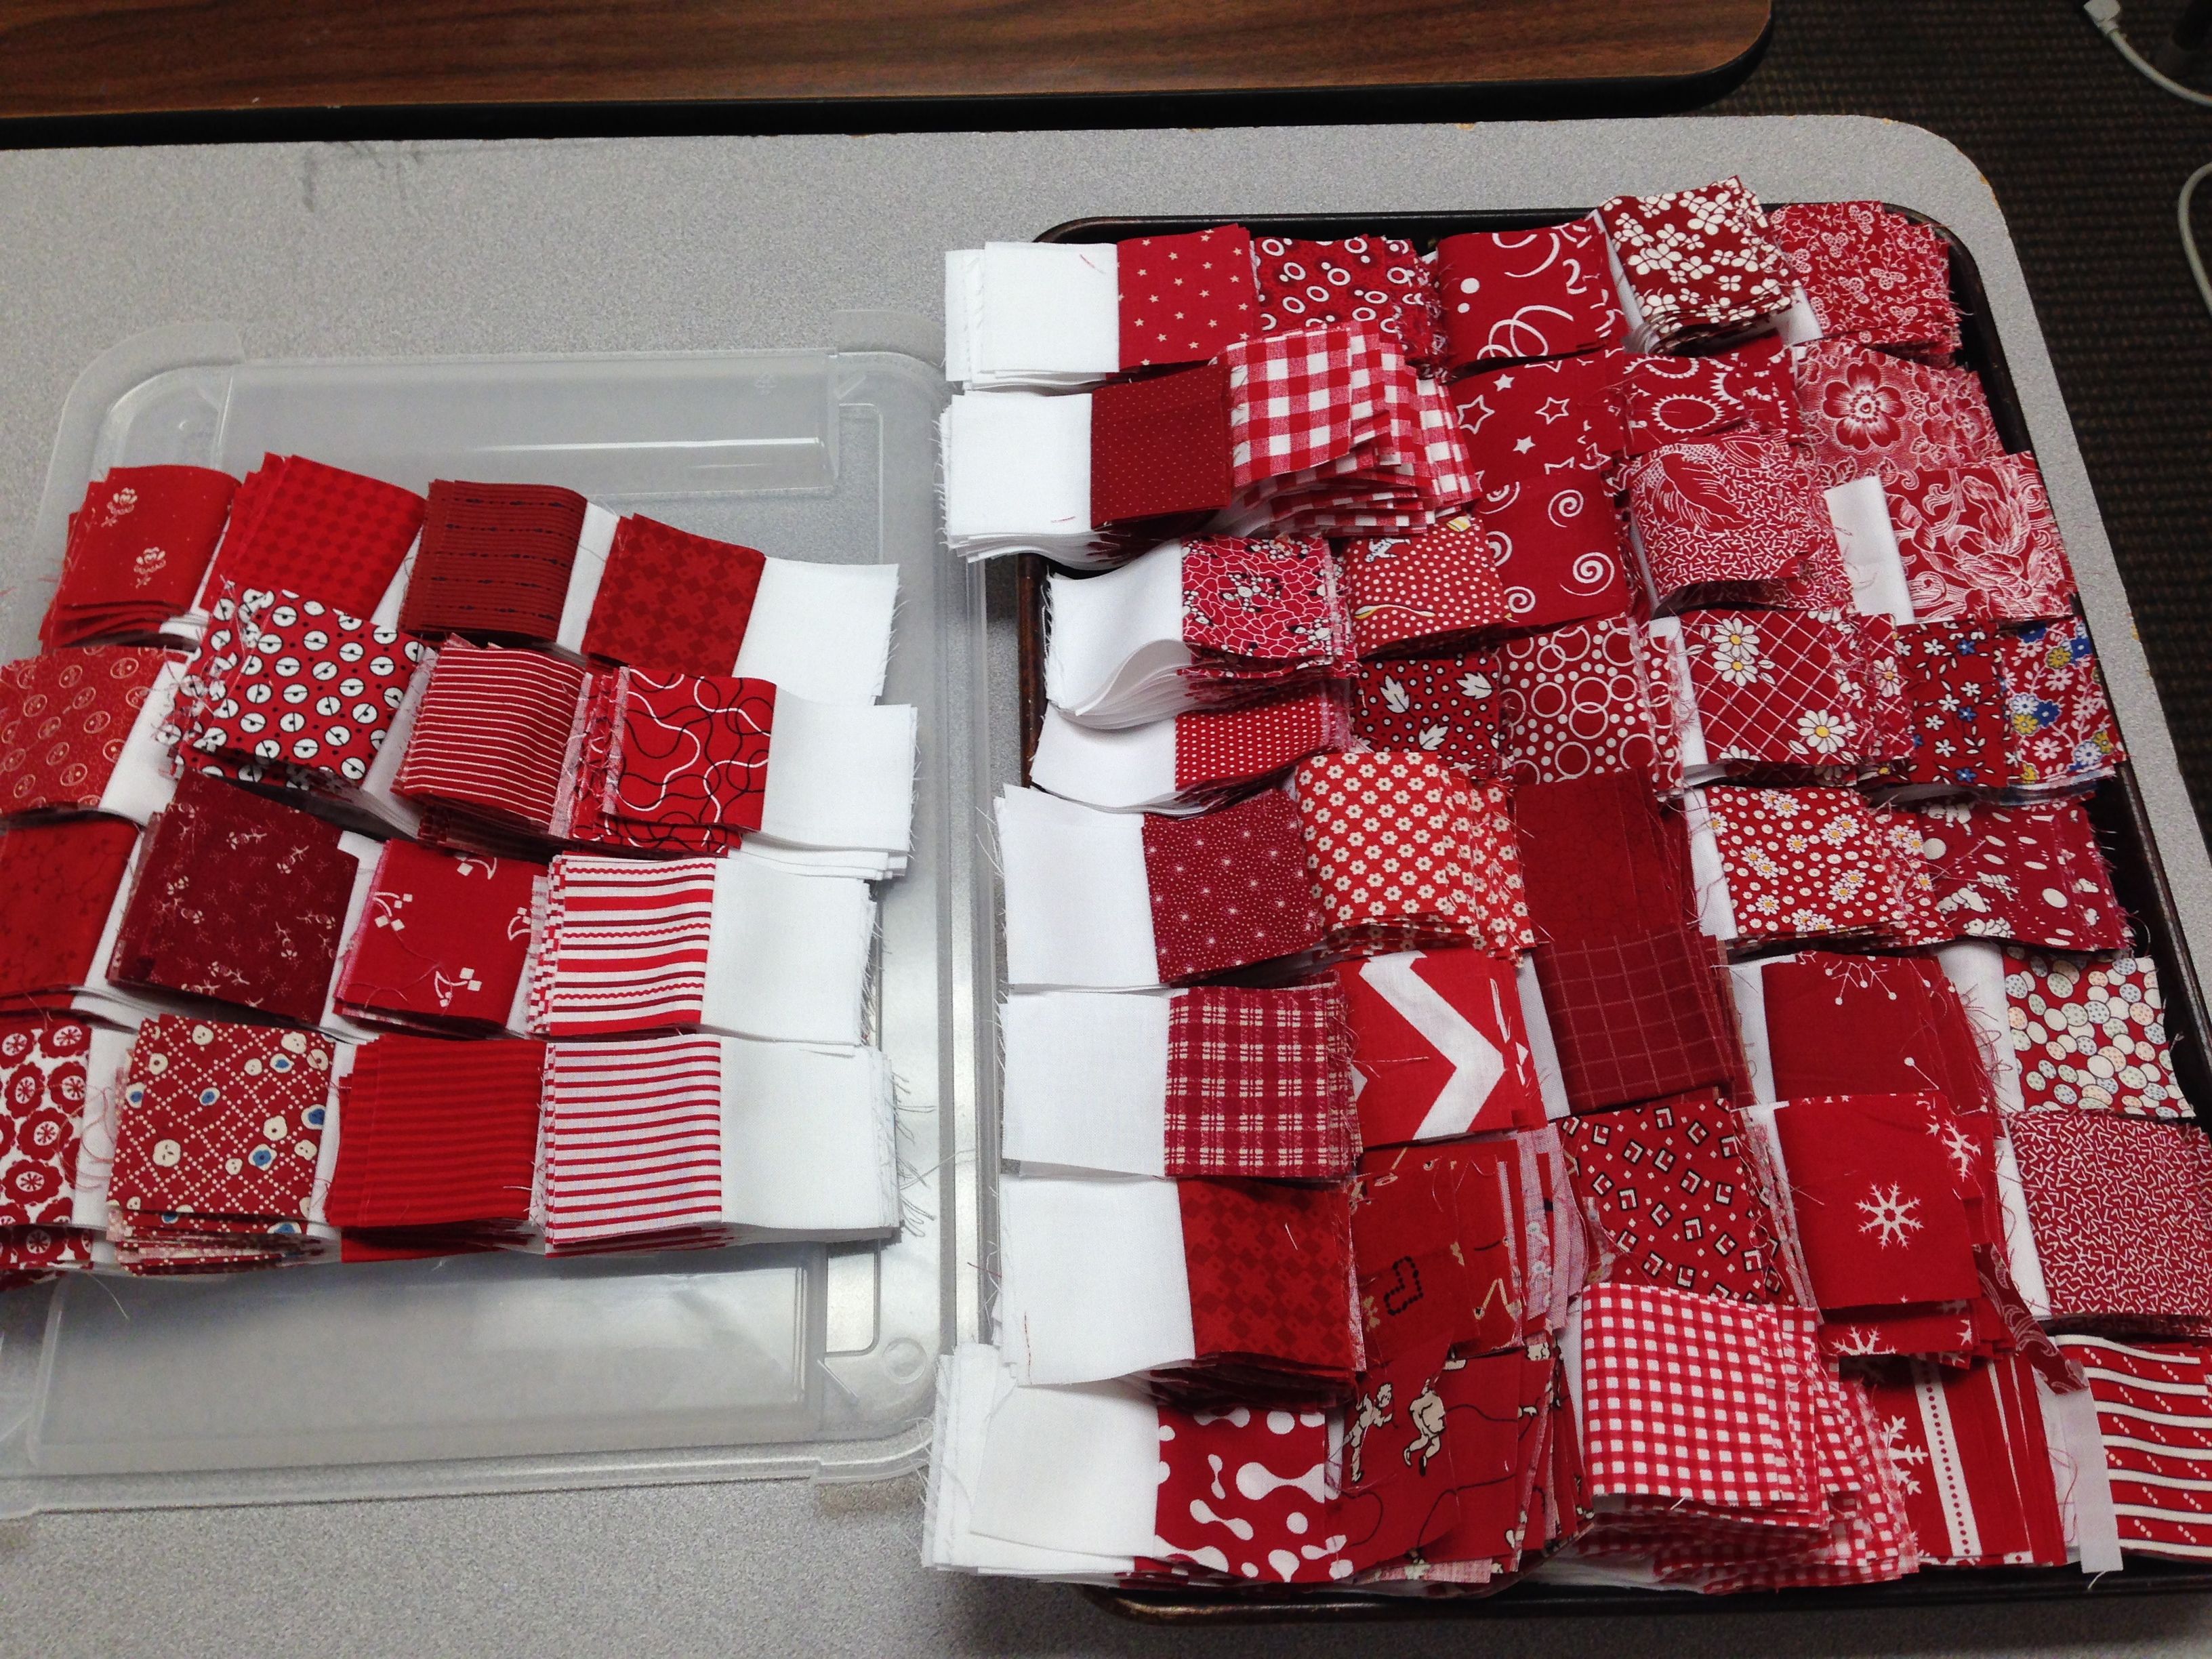
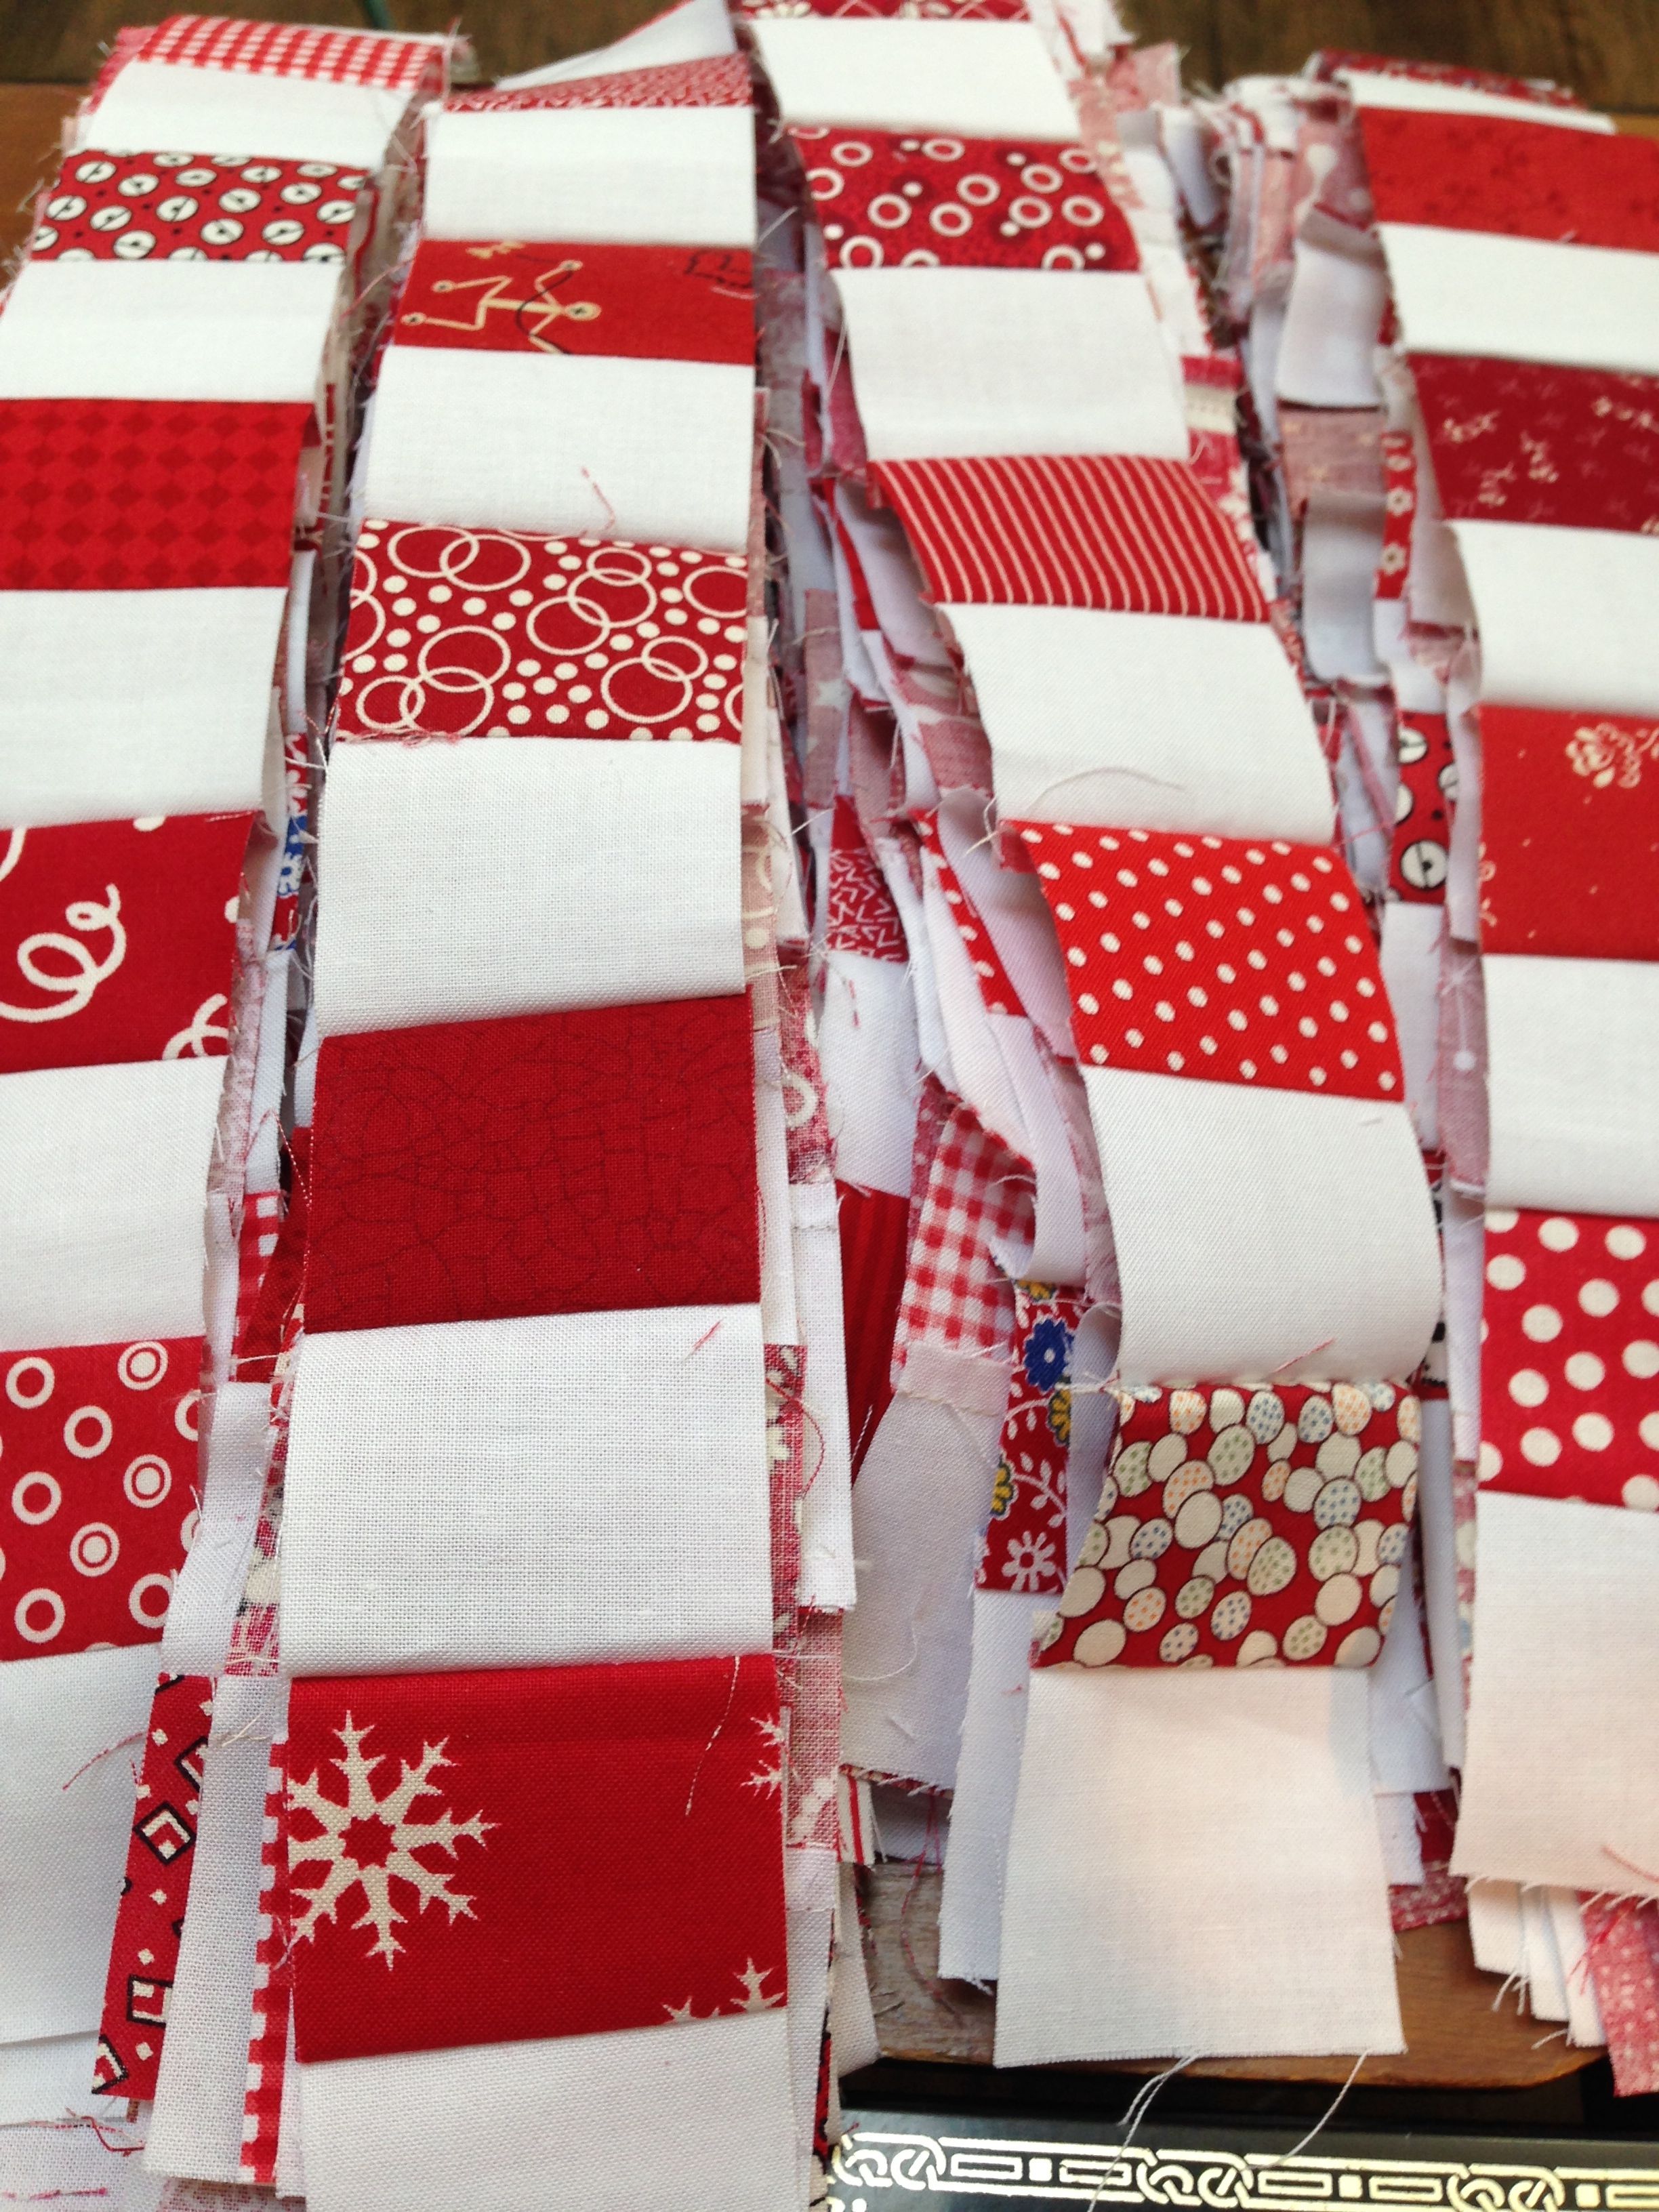
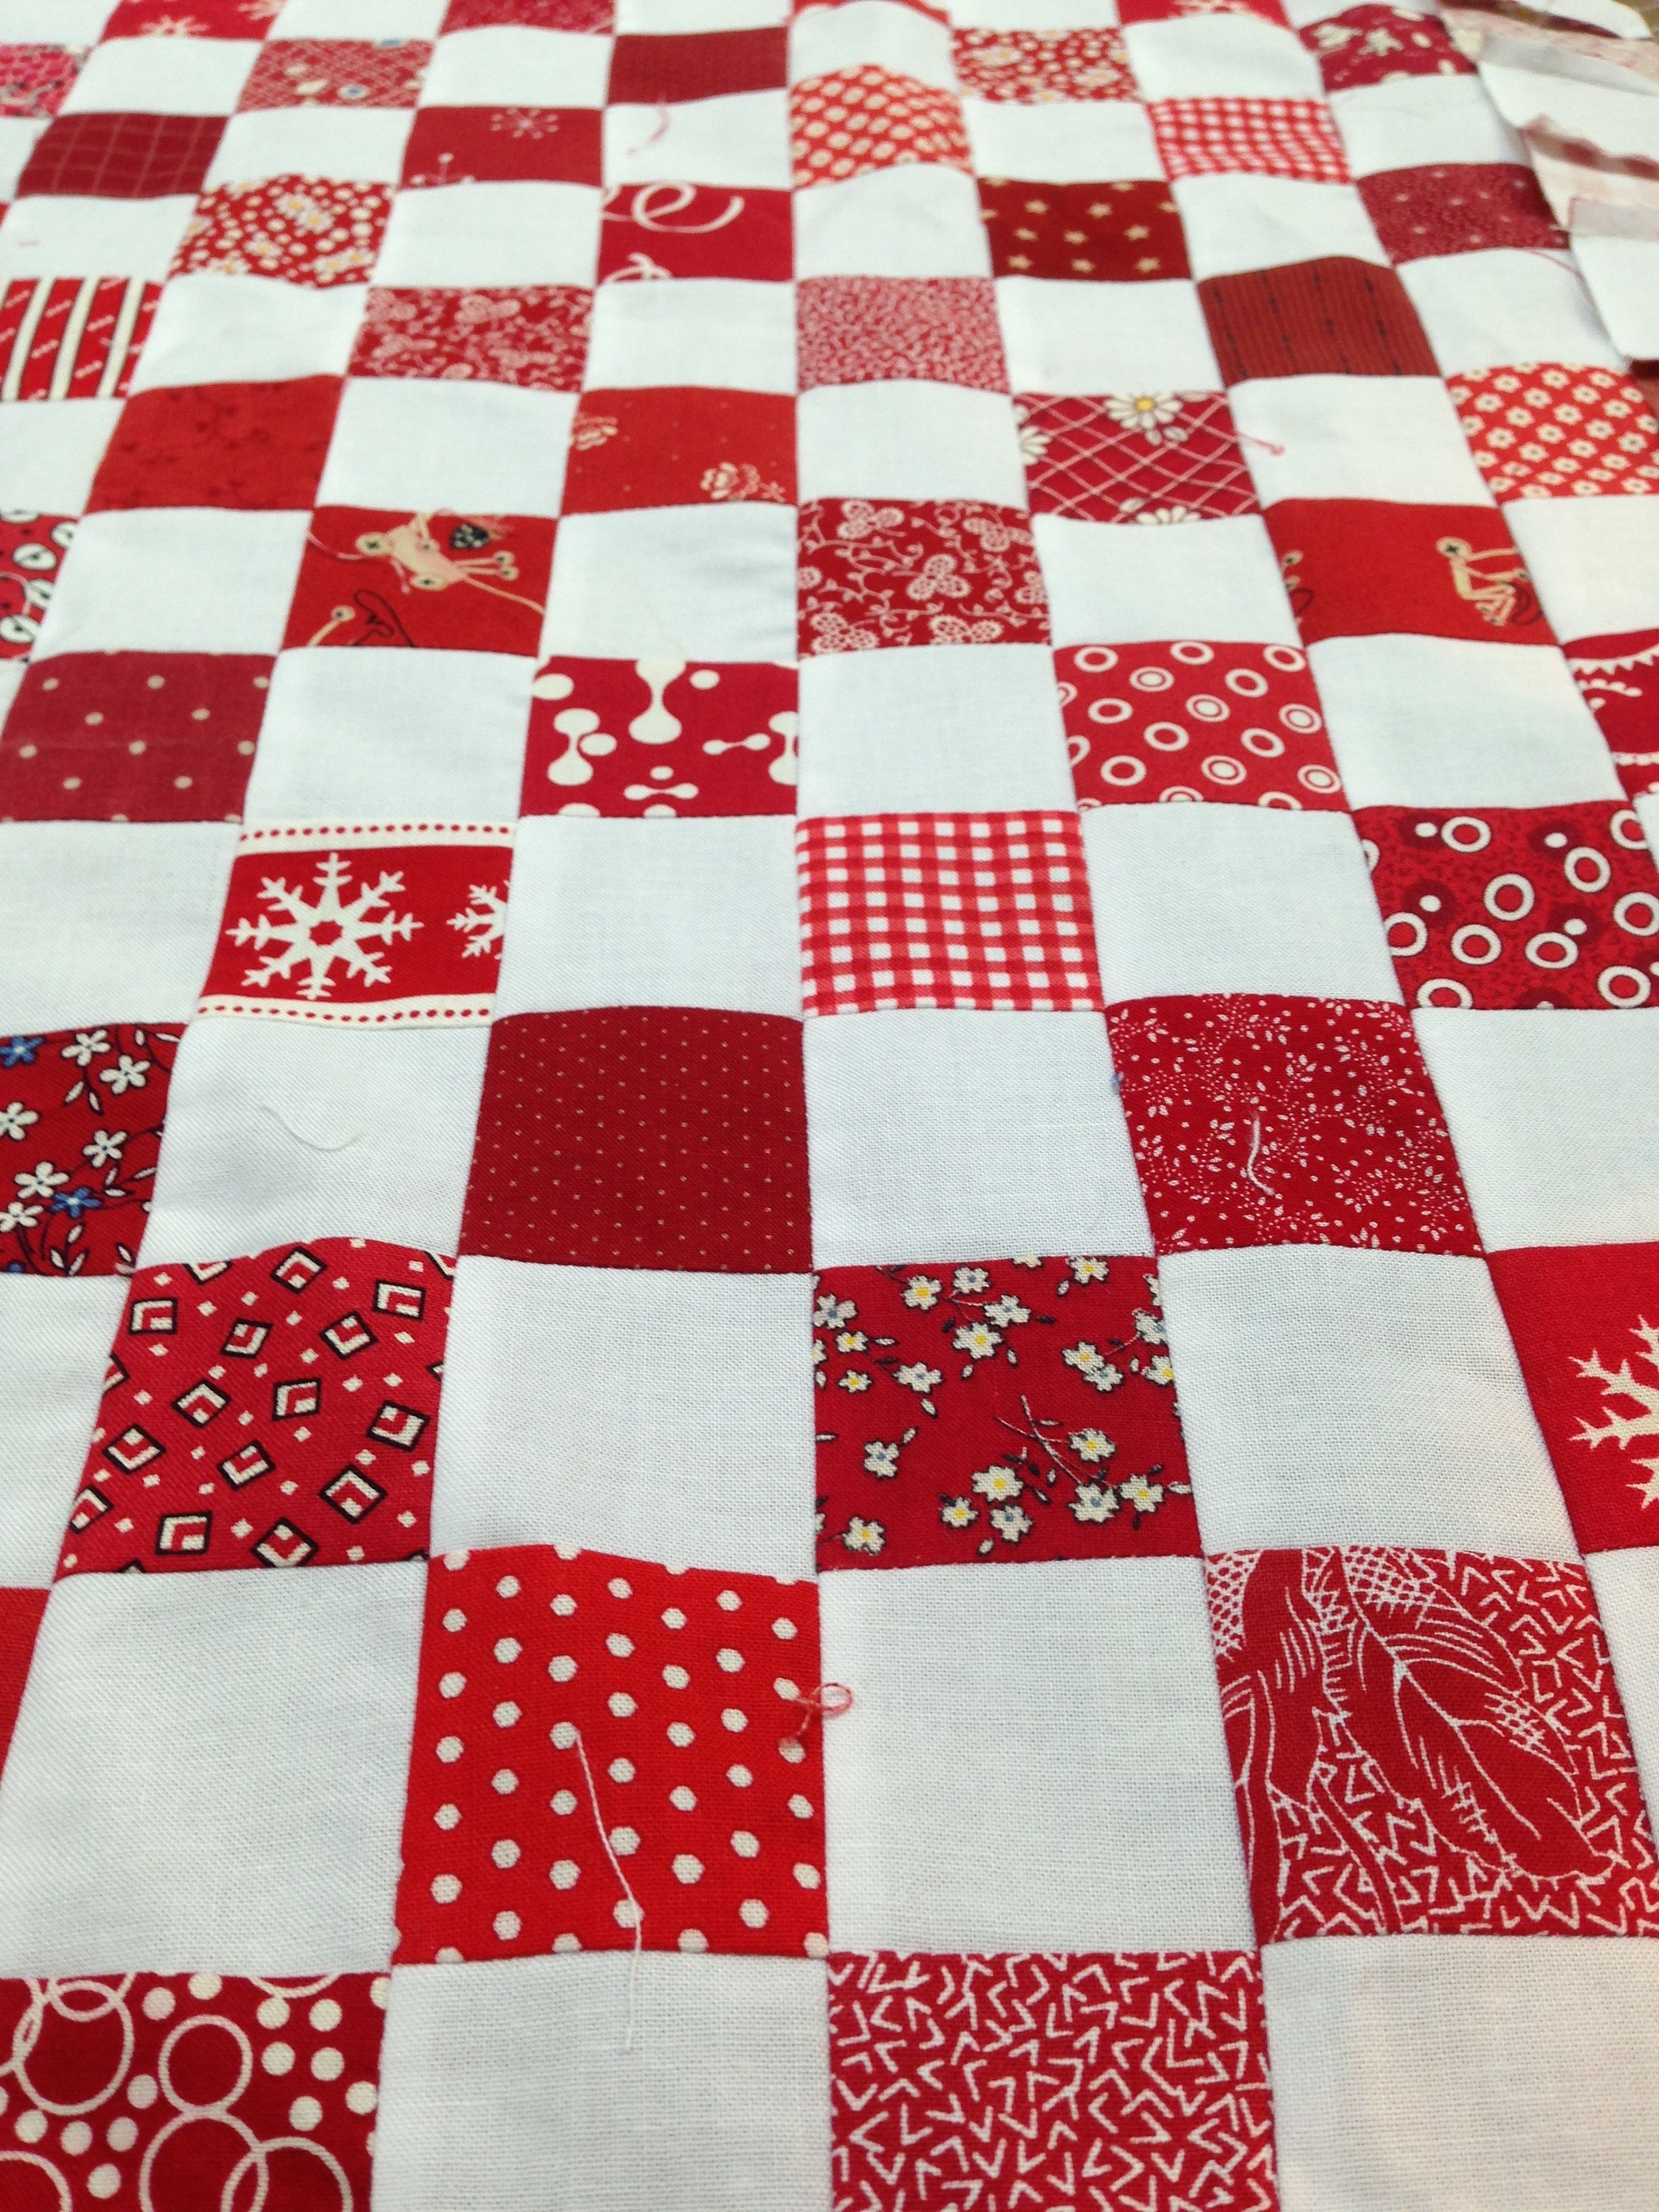
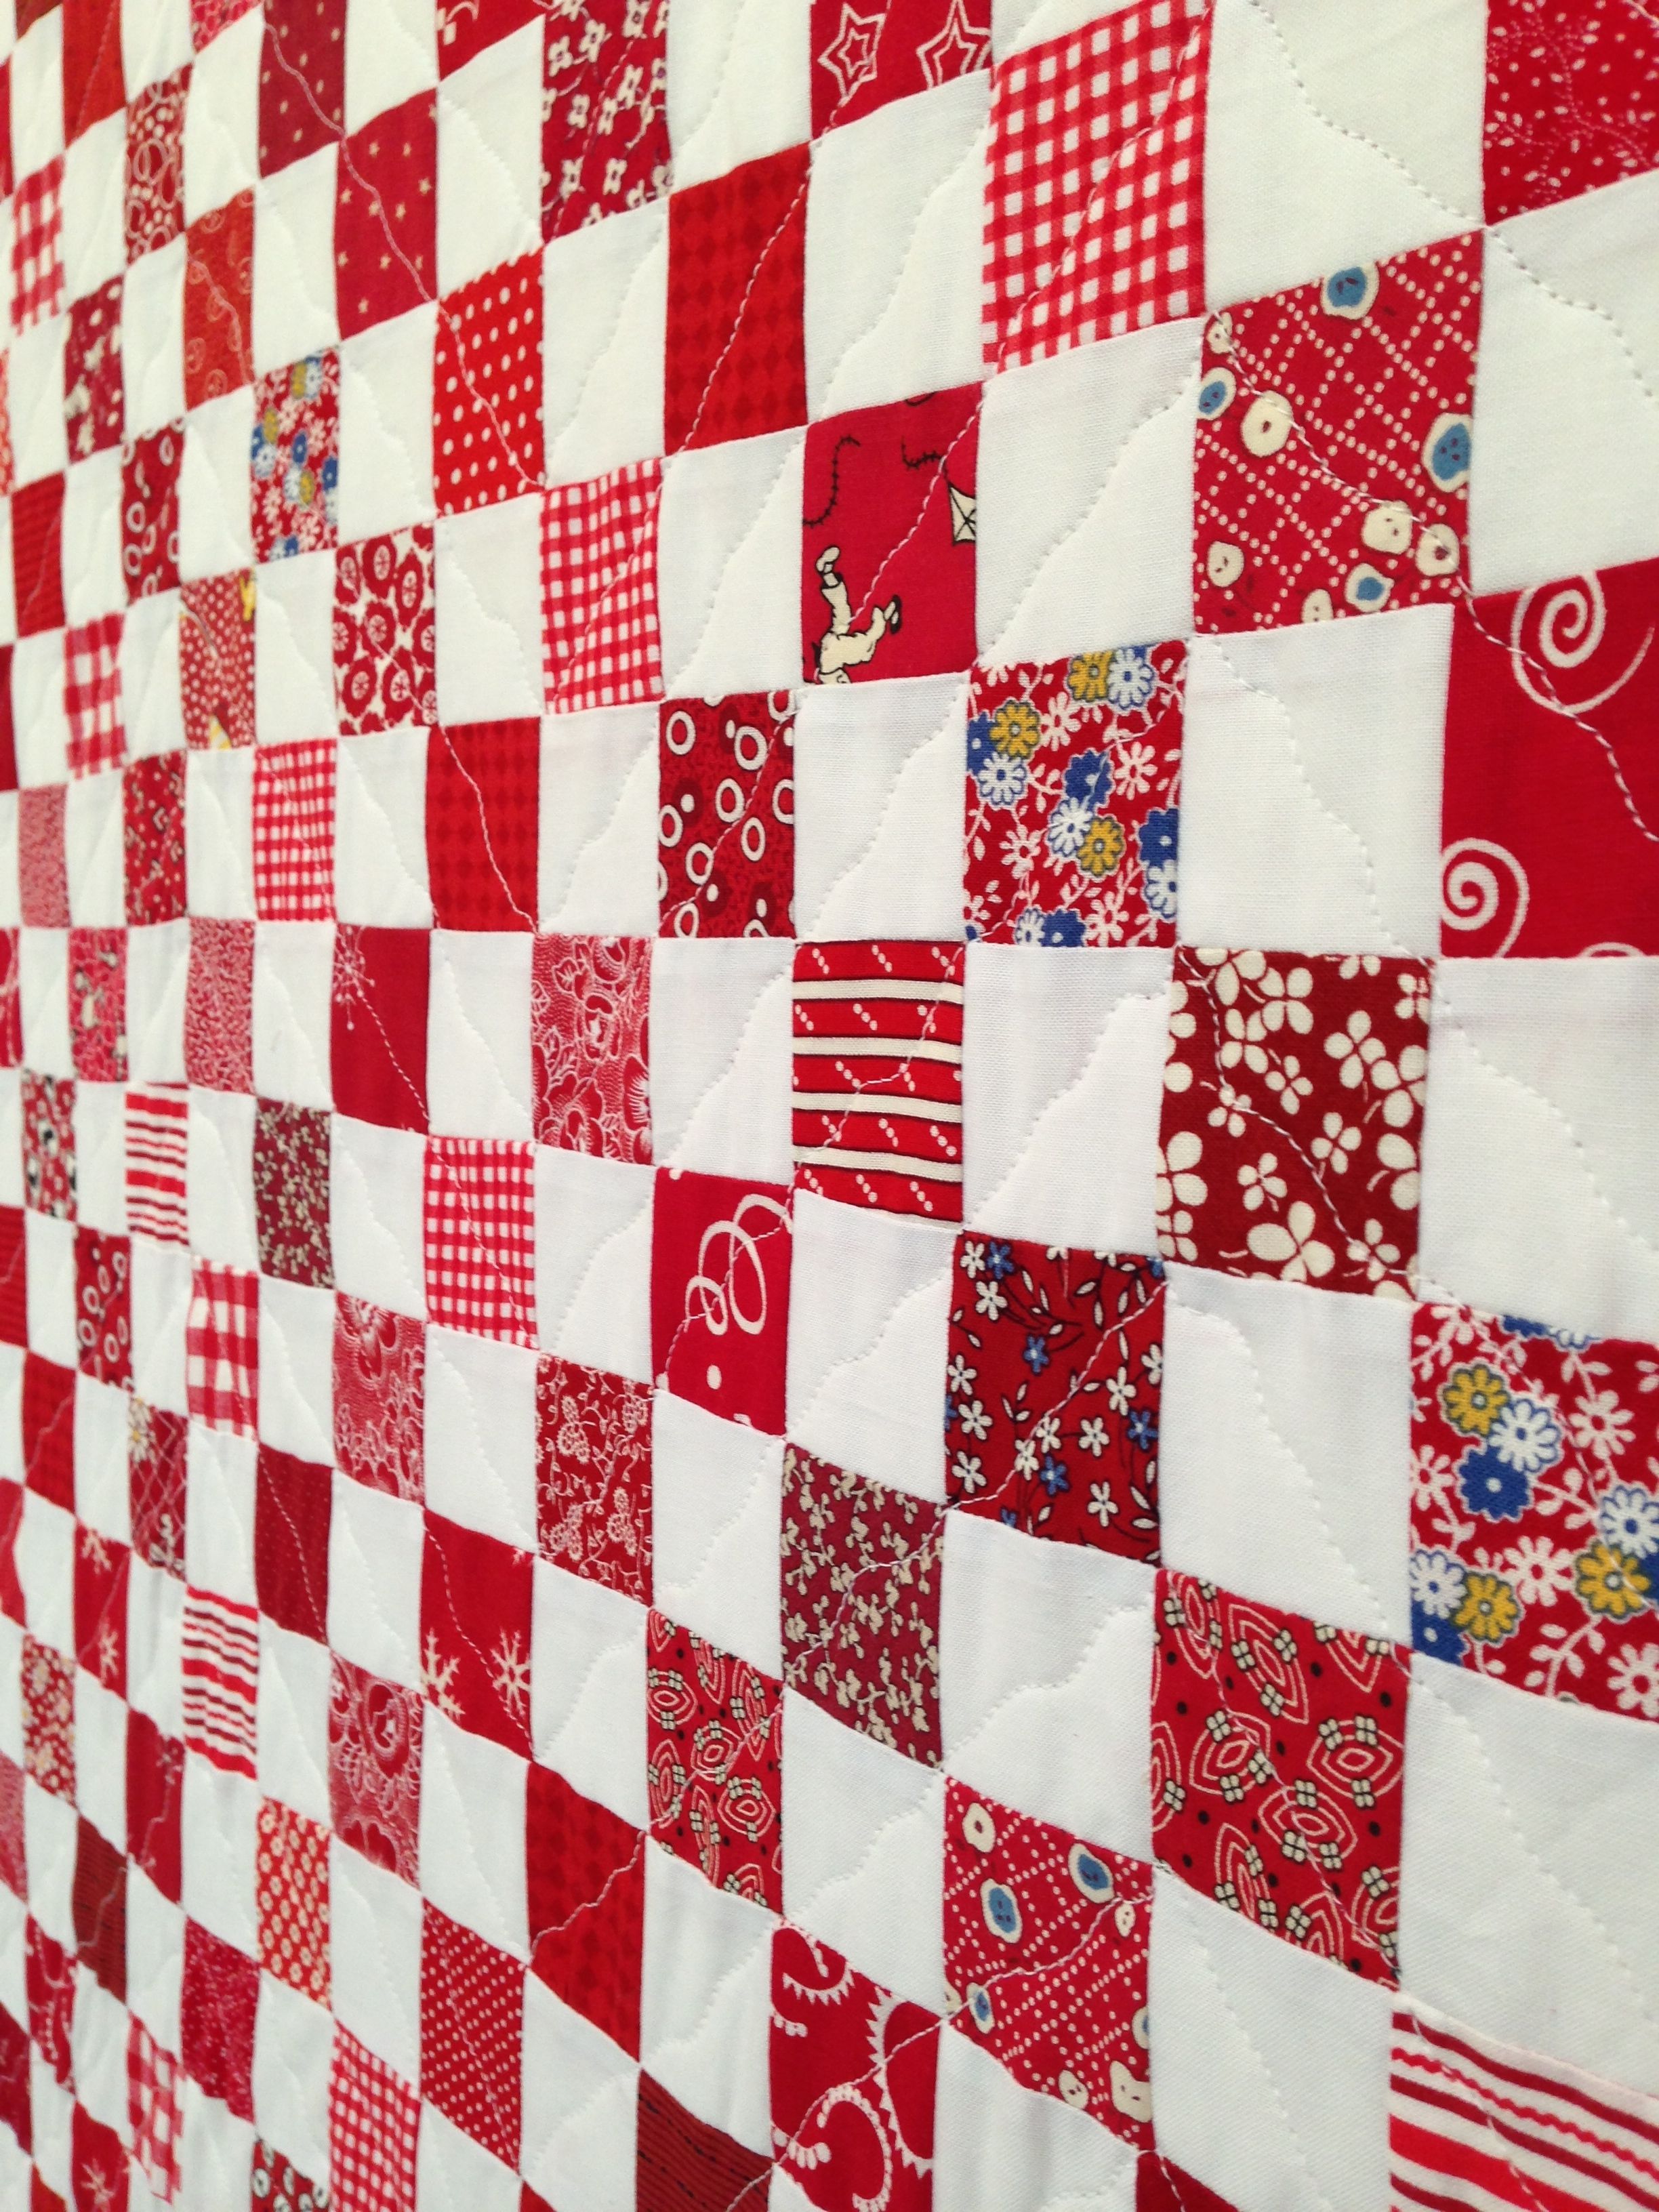
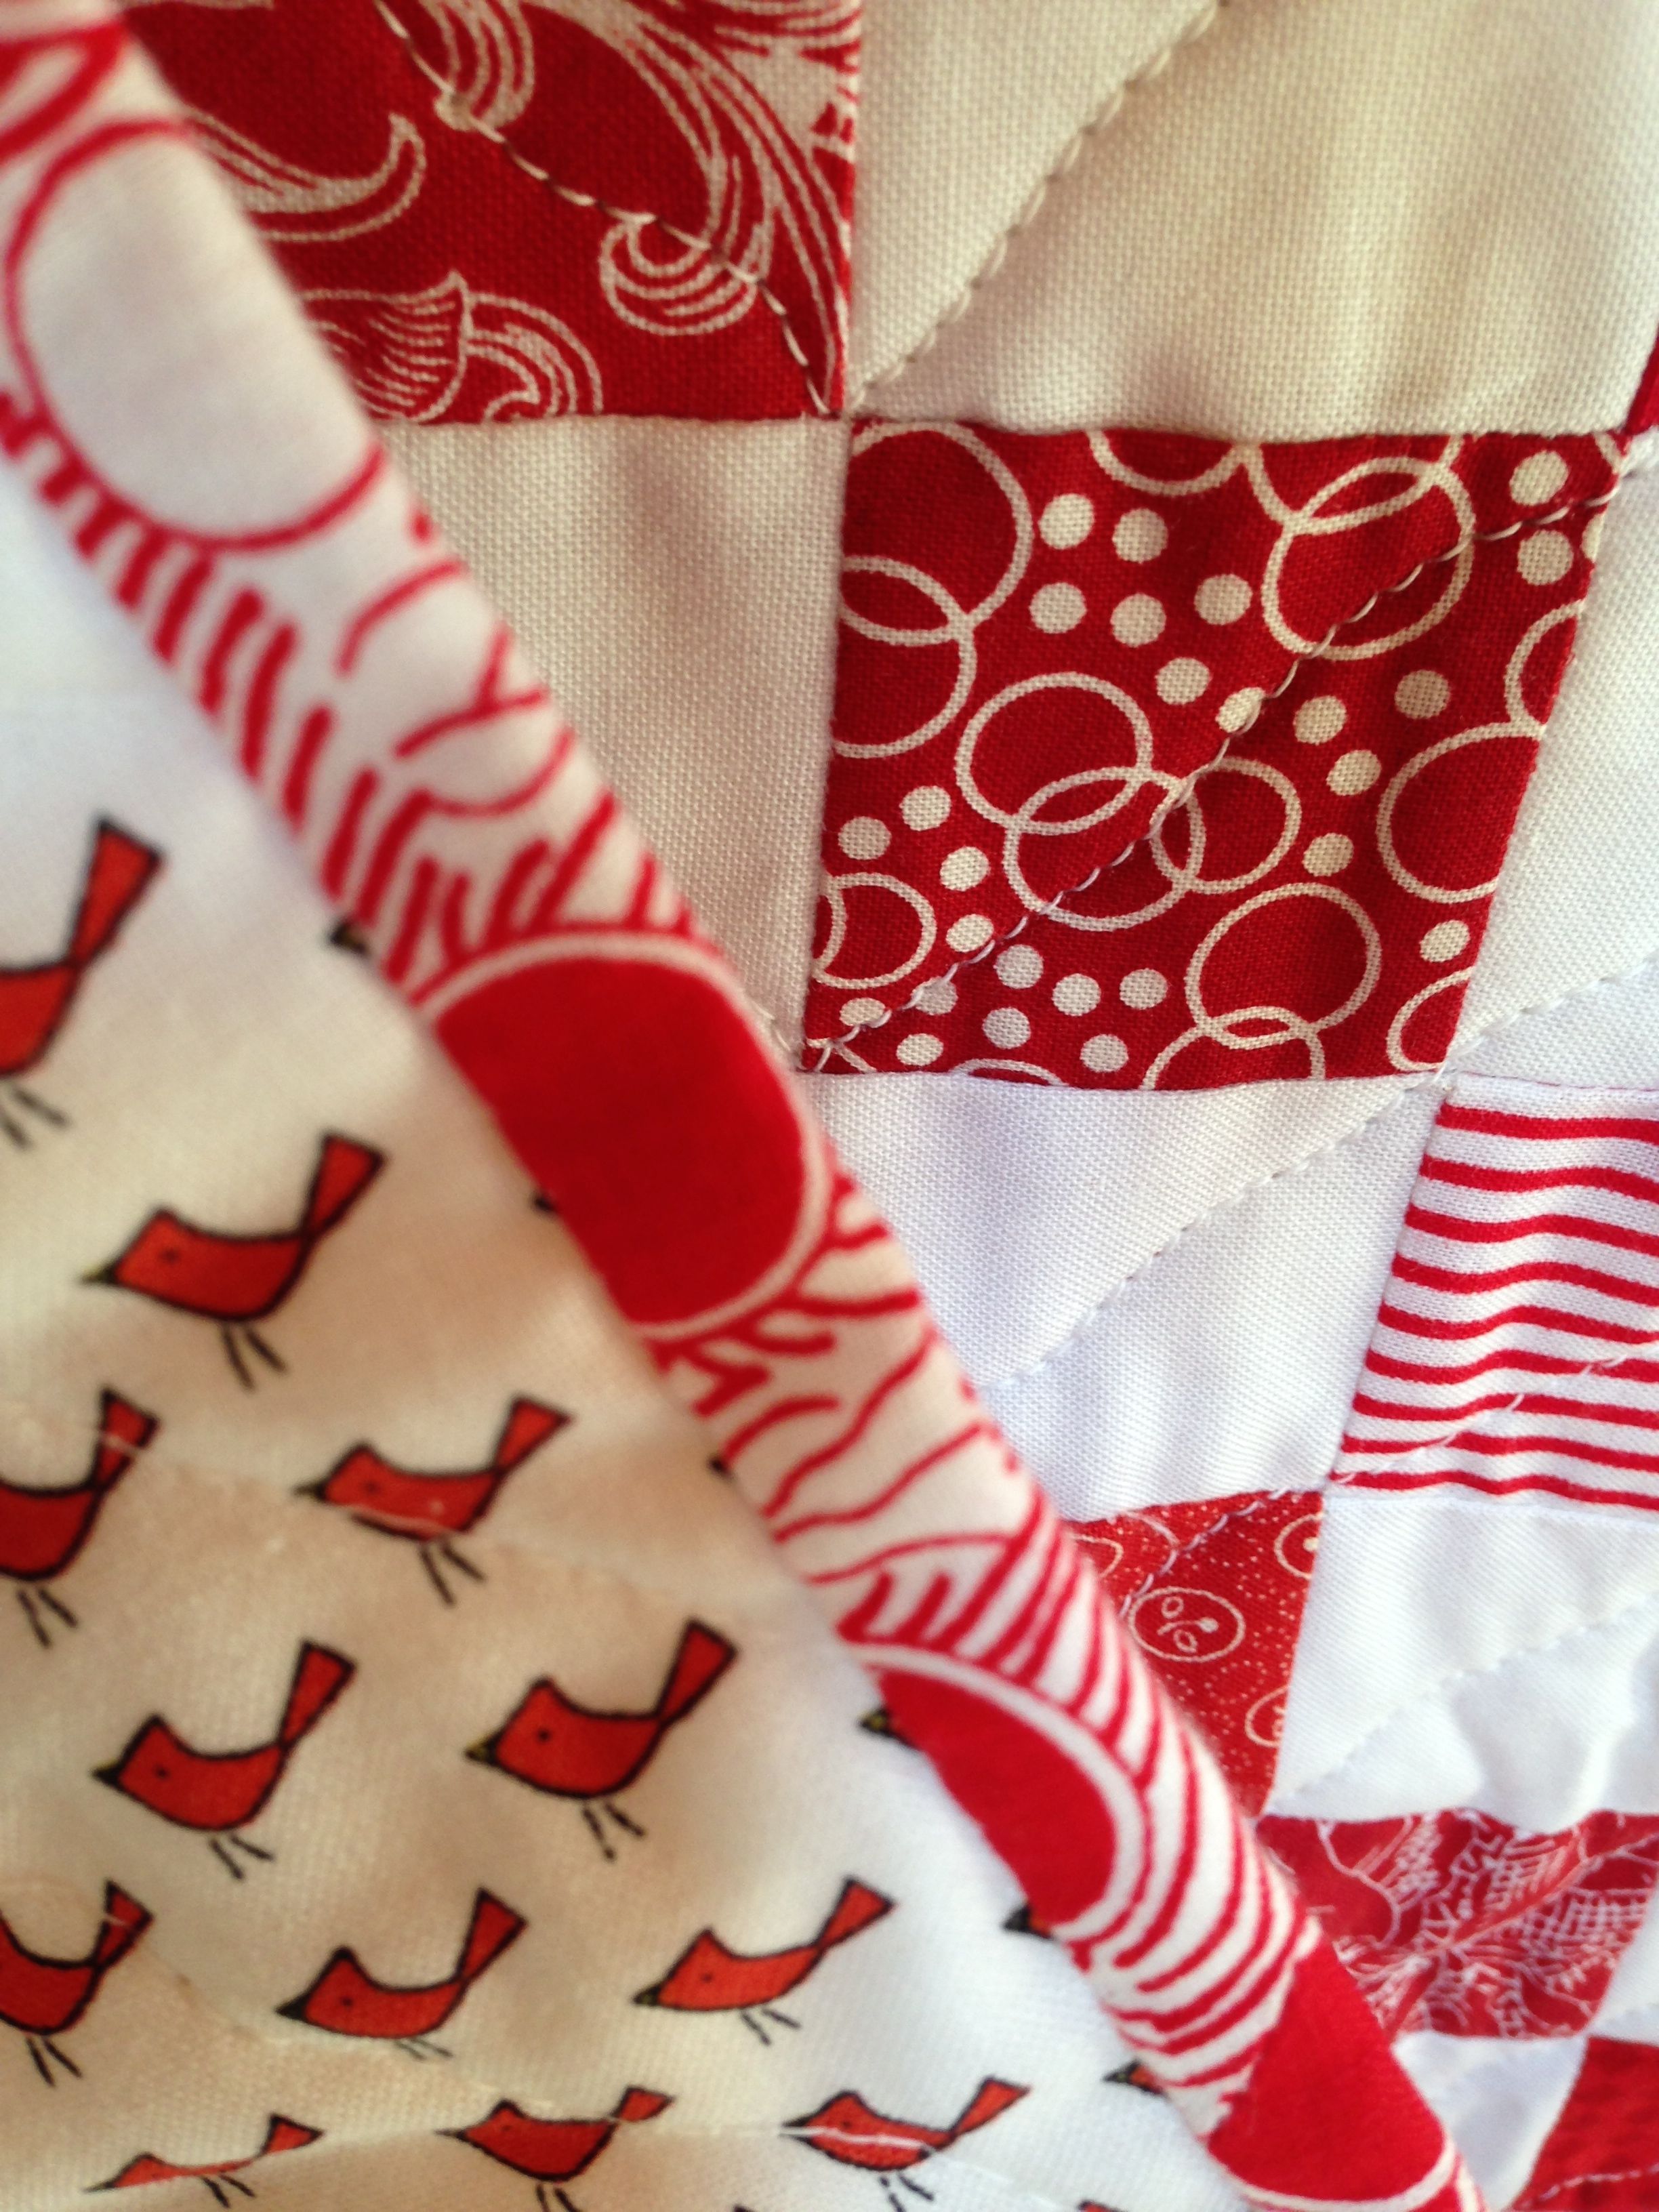
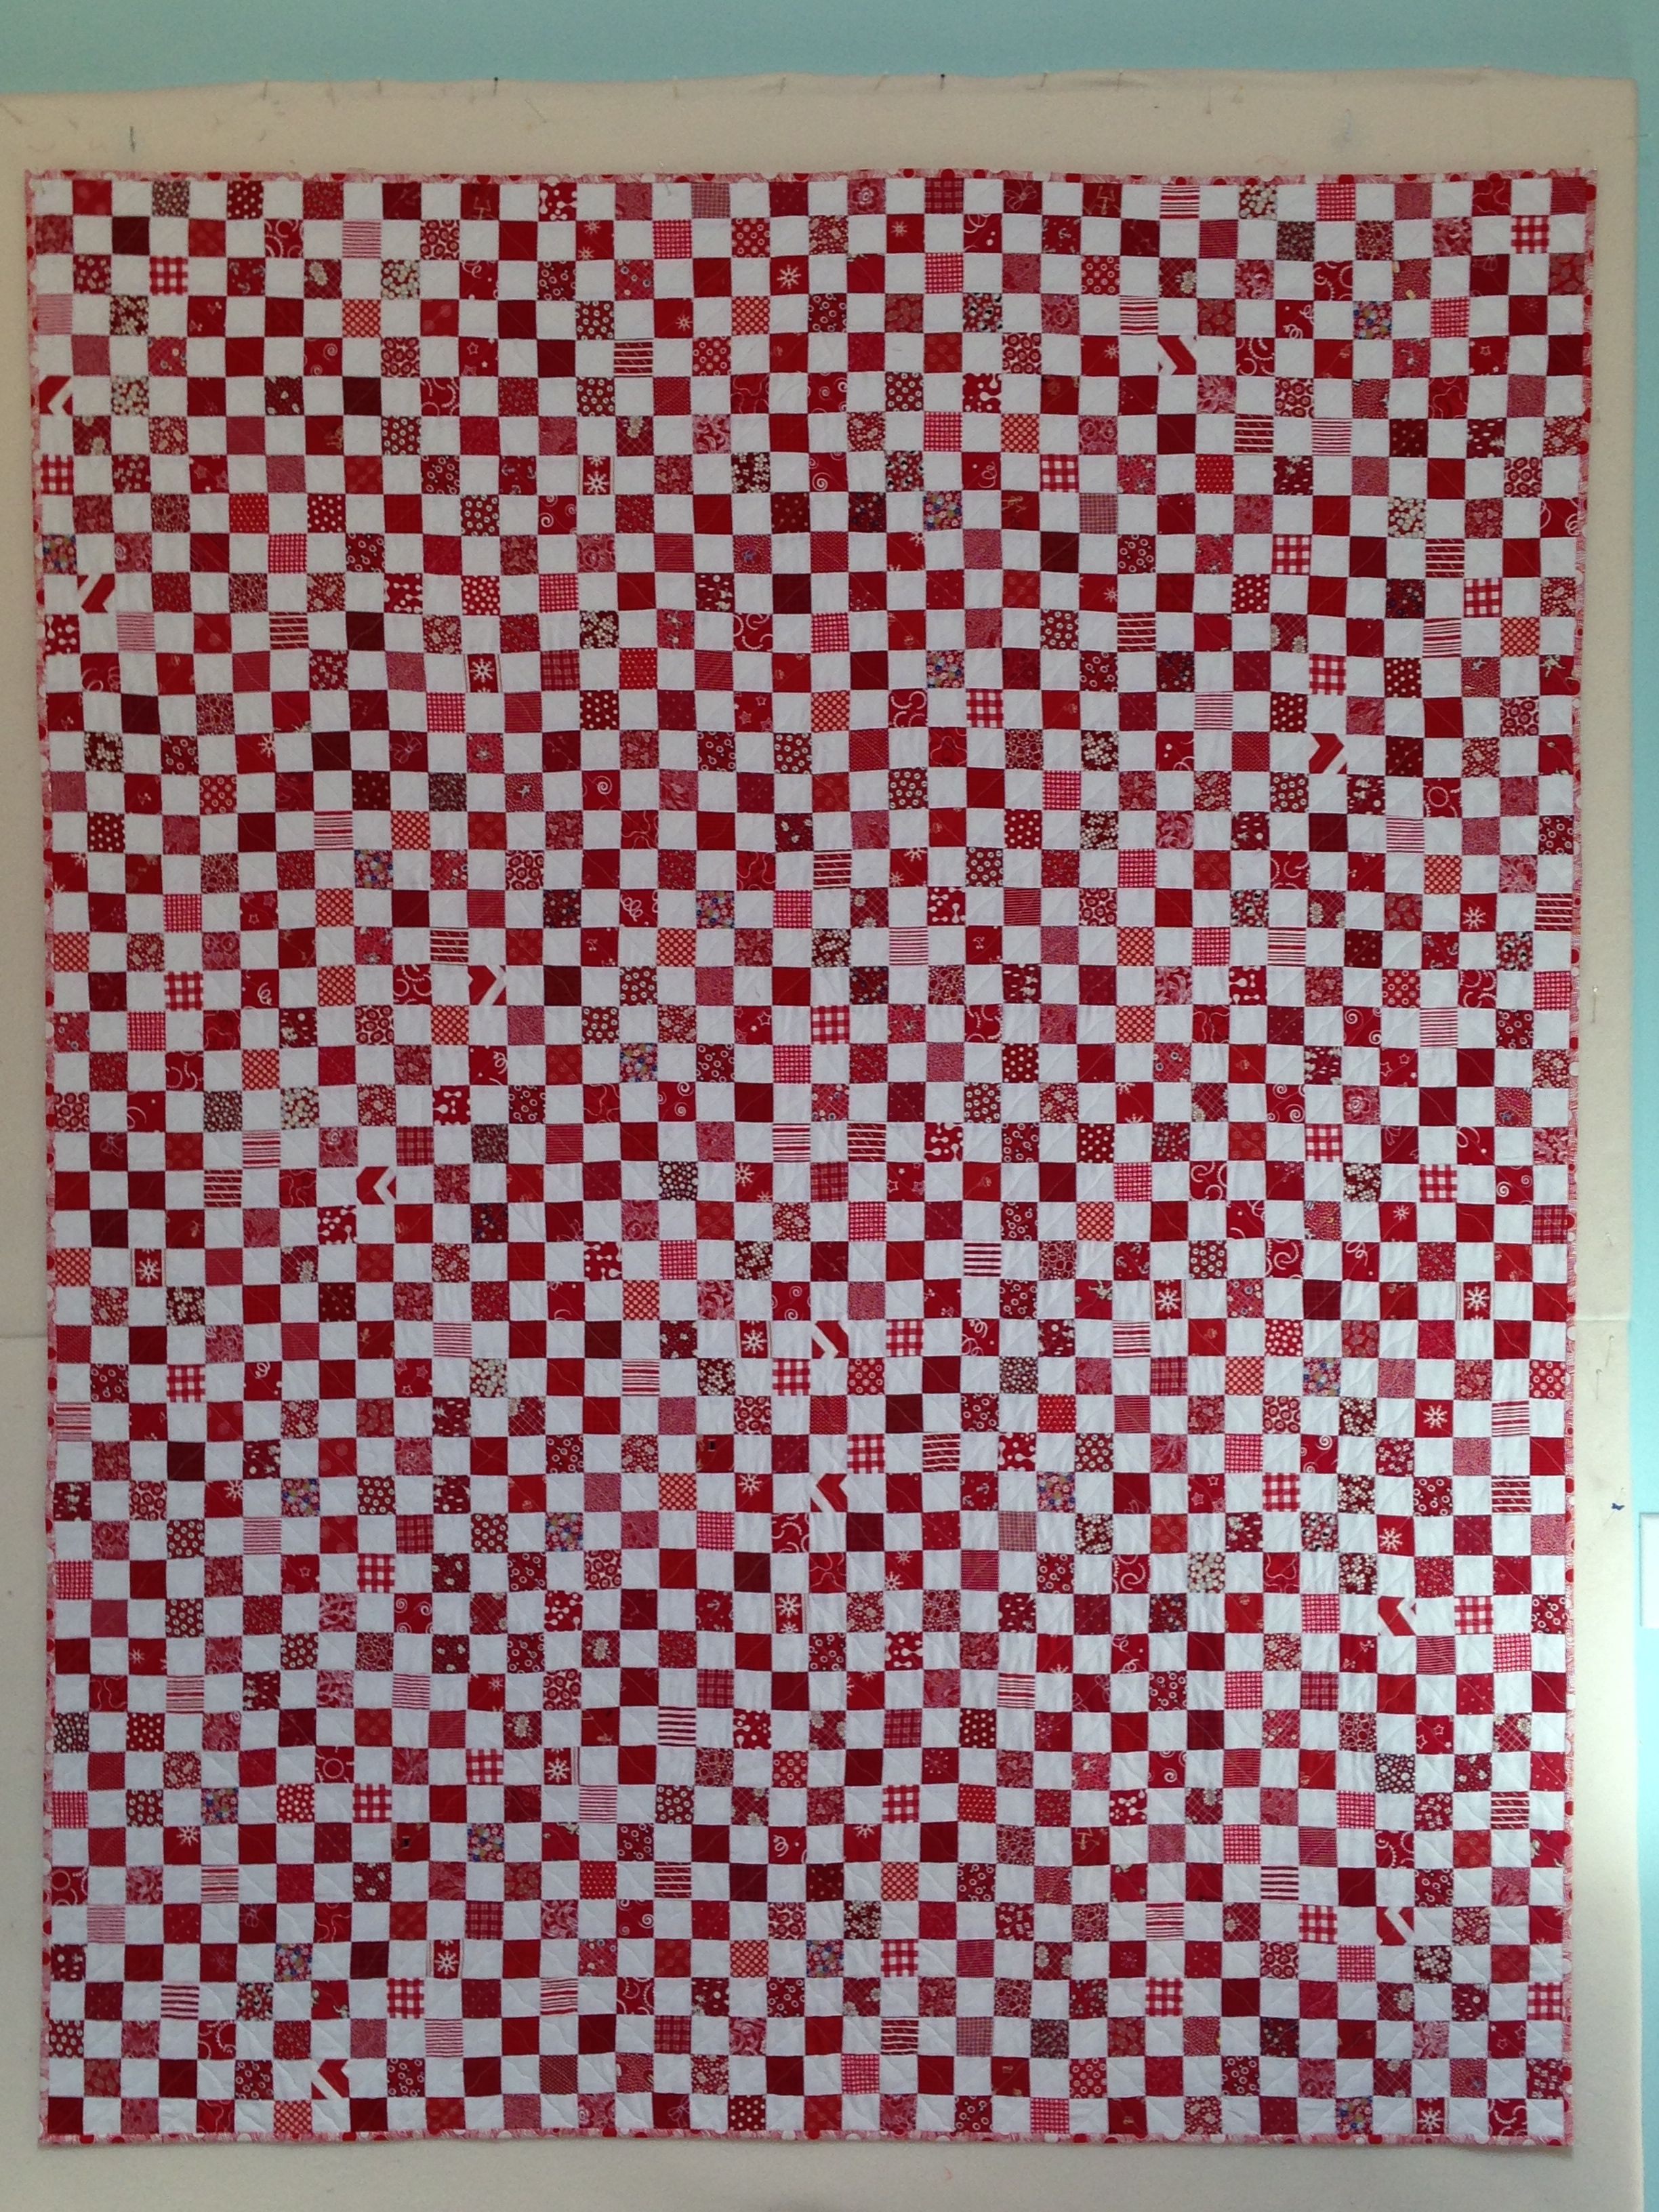
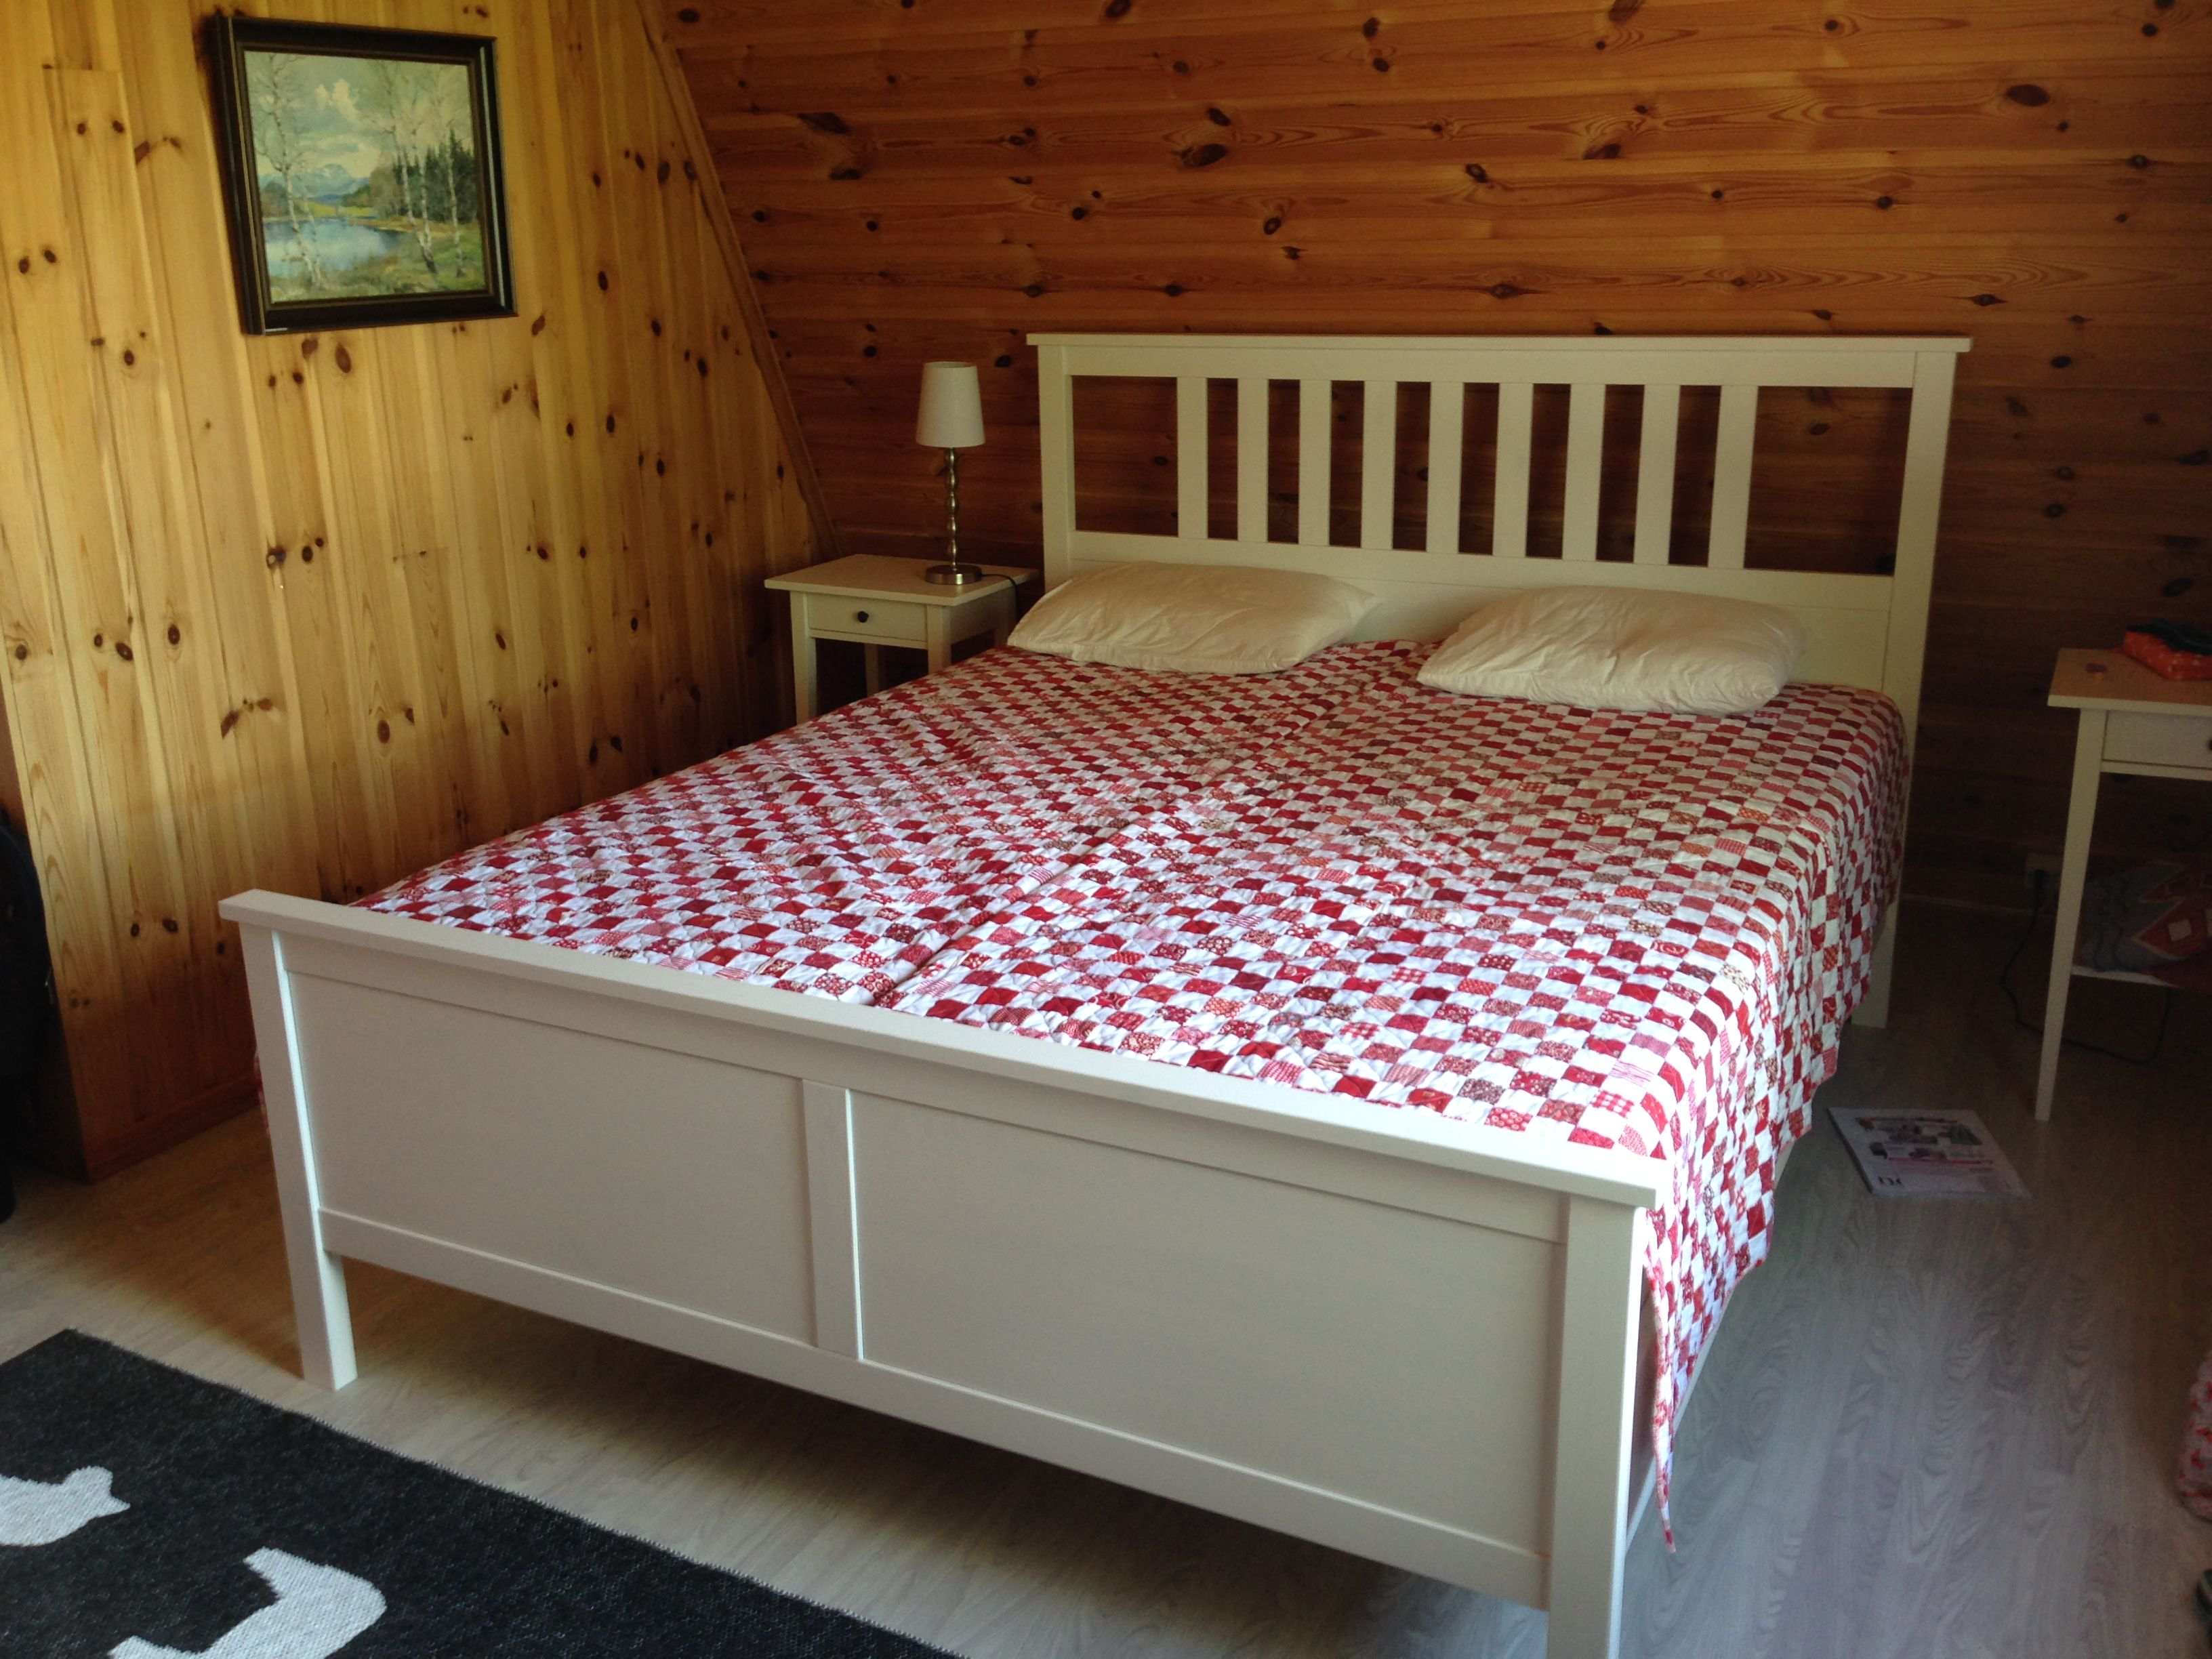
I decided I wanted something red and white and simple for the beds in Sweden. A checkerboard quilt seemed perfect, so I cut a bunch of 2″ strips from my red and white fabrics and sewed them together. Then I cut them in 2″ segments.
I hauled them to a retreat with me!
Then it was just a matter of sewing them together into longer and longer strips.
You know the drill. Once the strips were long enough it was time to sew them together.
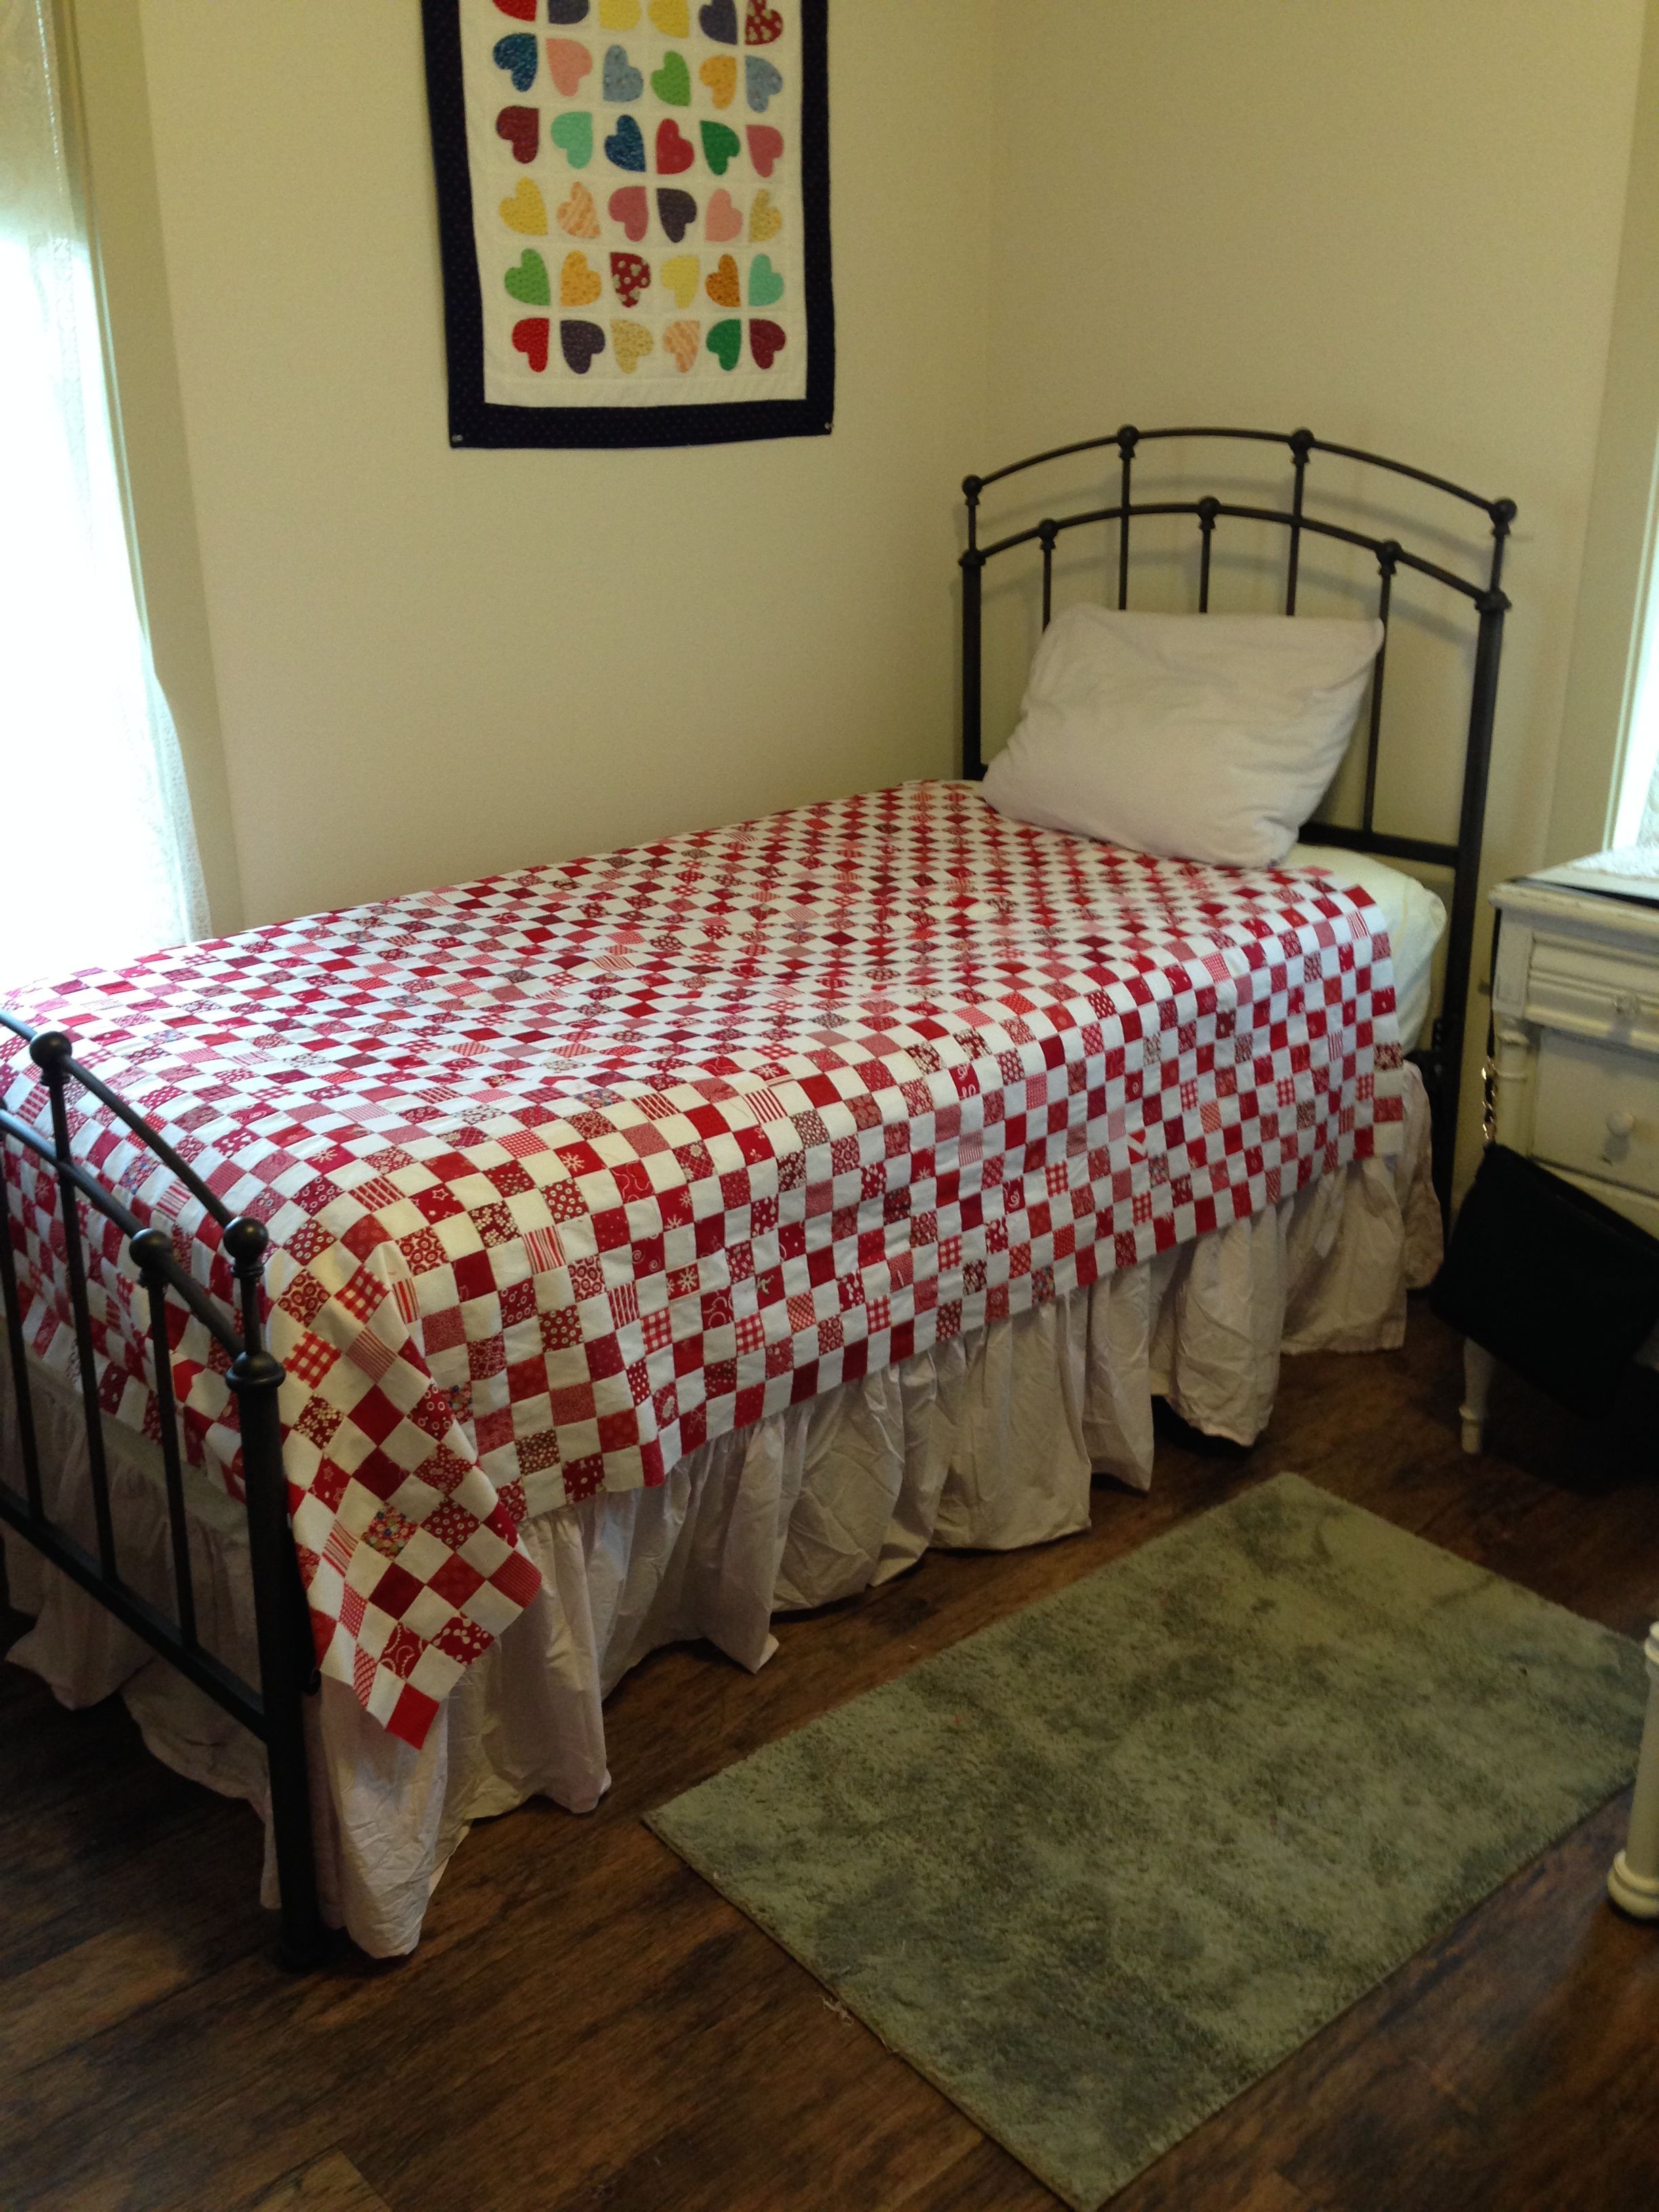
Here’s the first one when I finished it at the retreat and spread it on my bed.
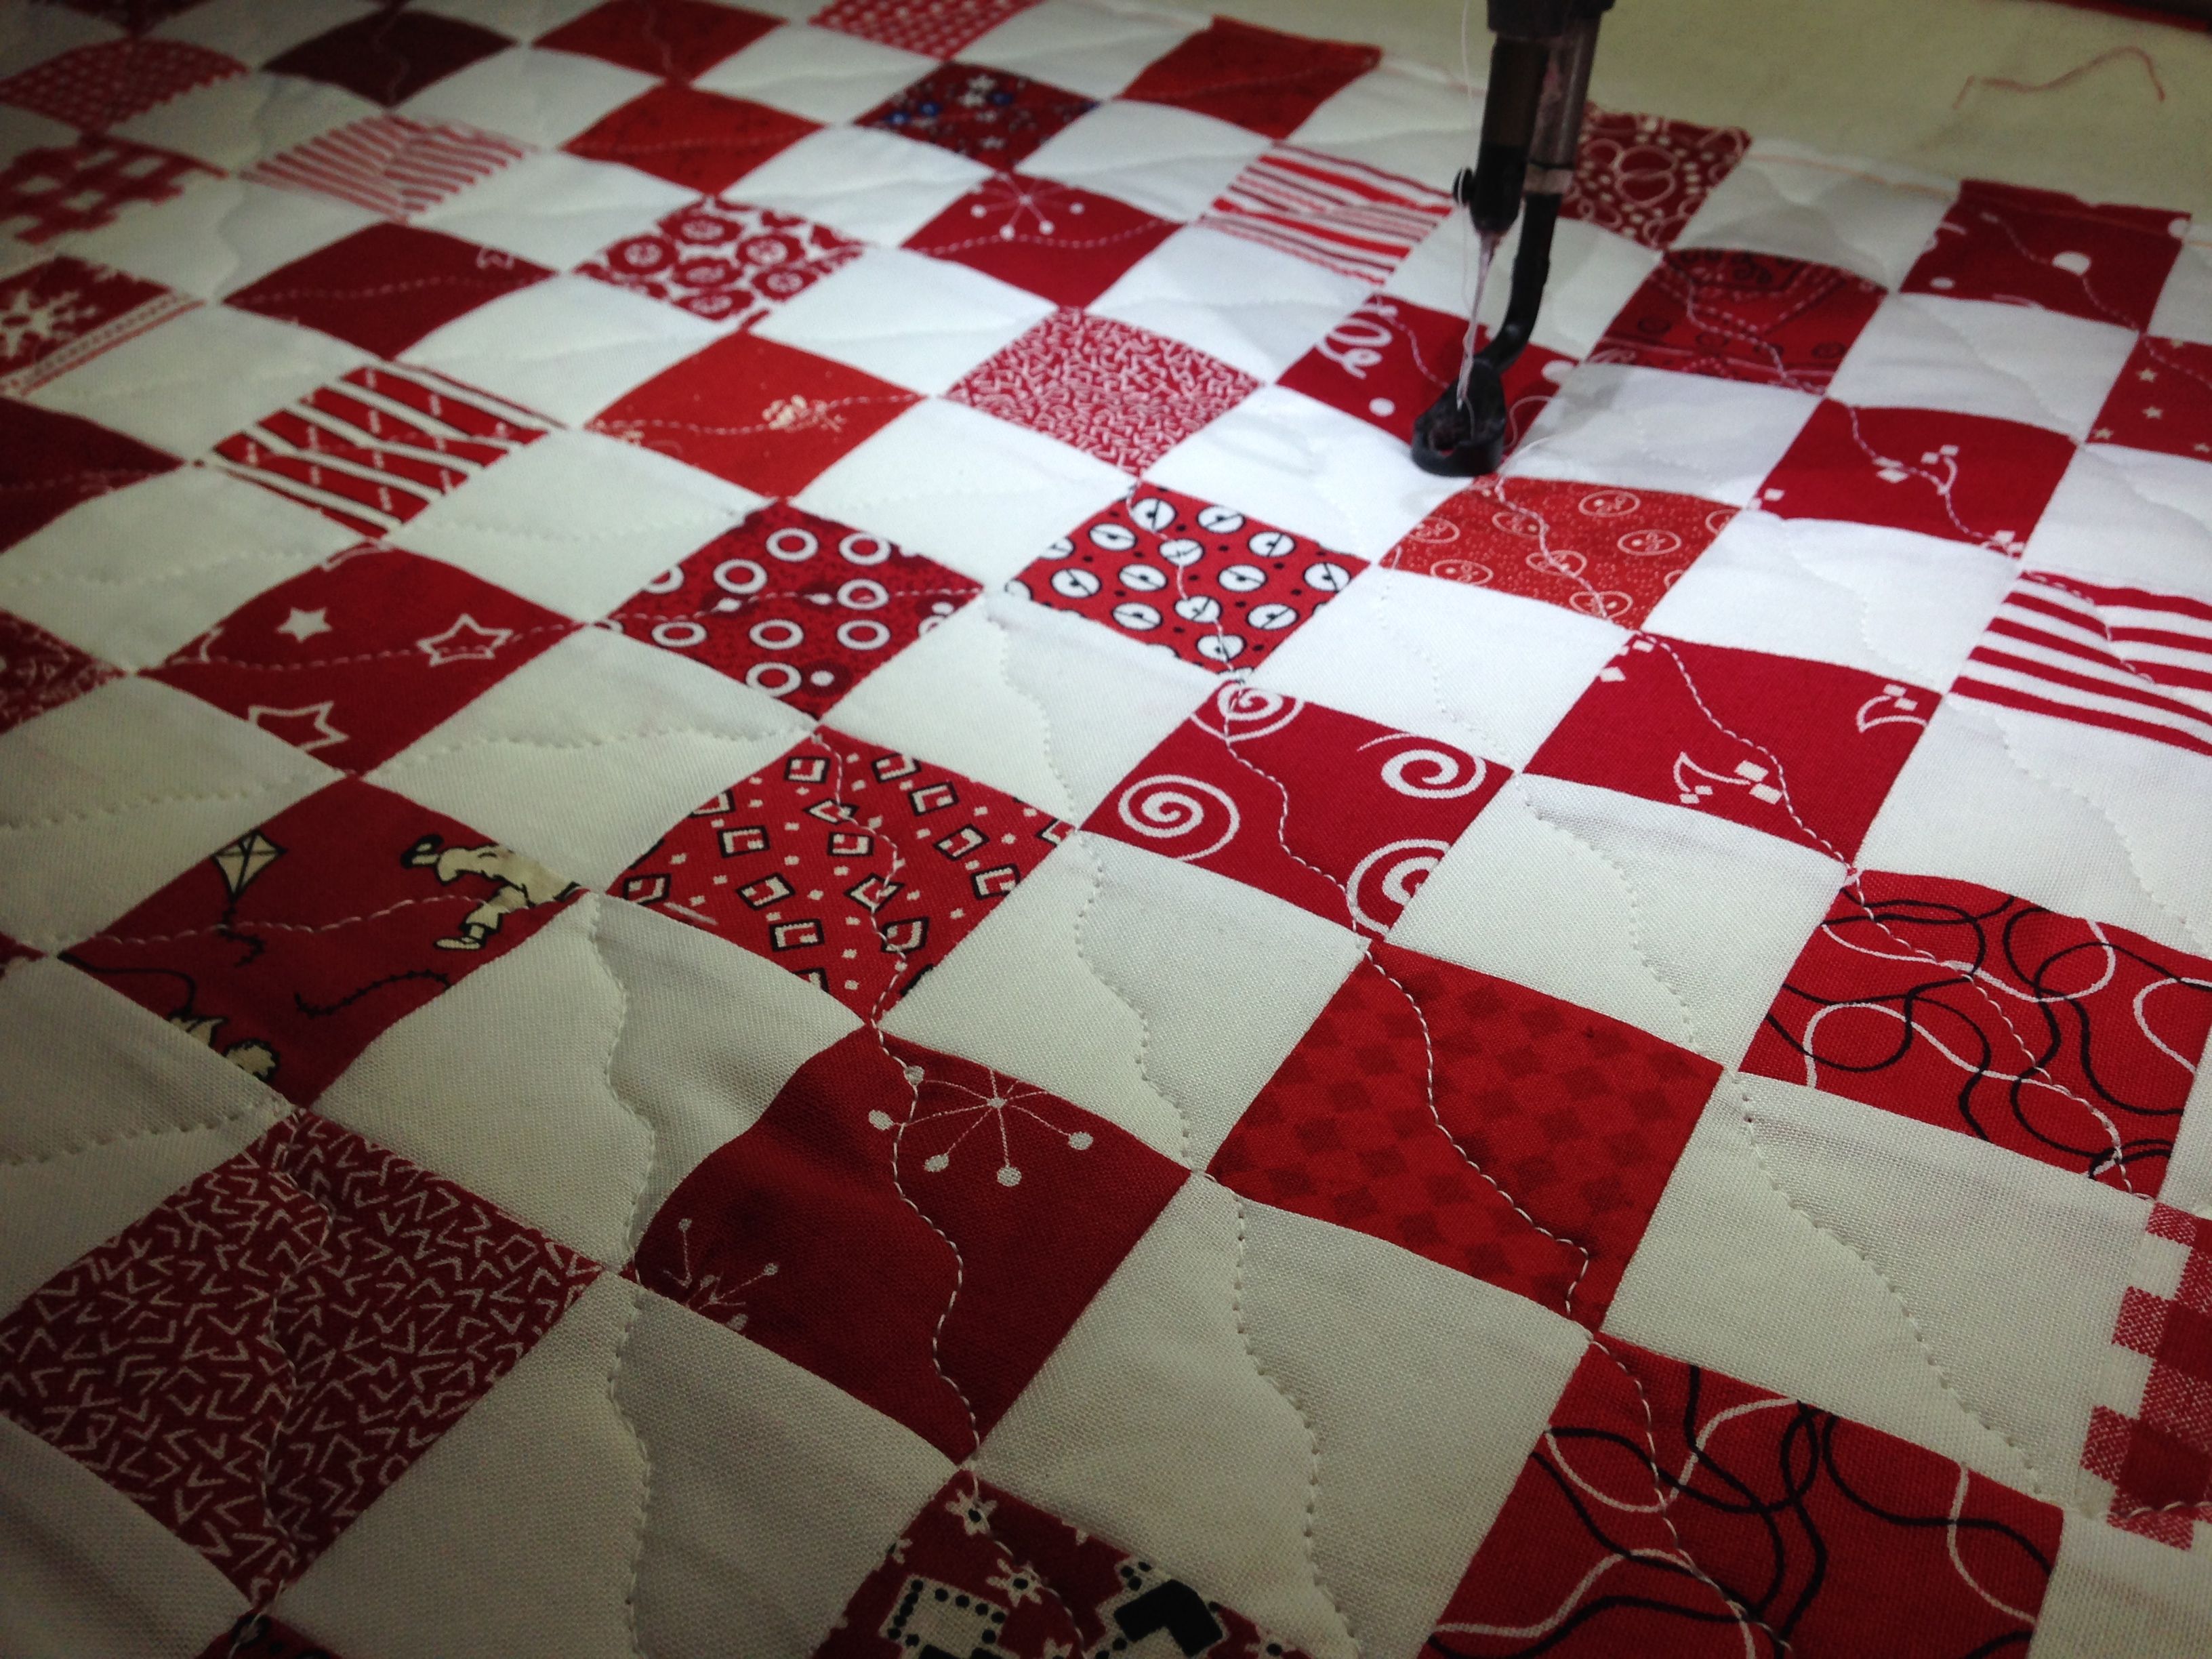
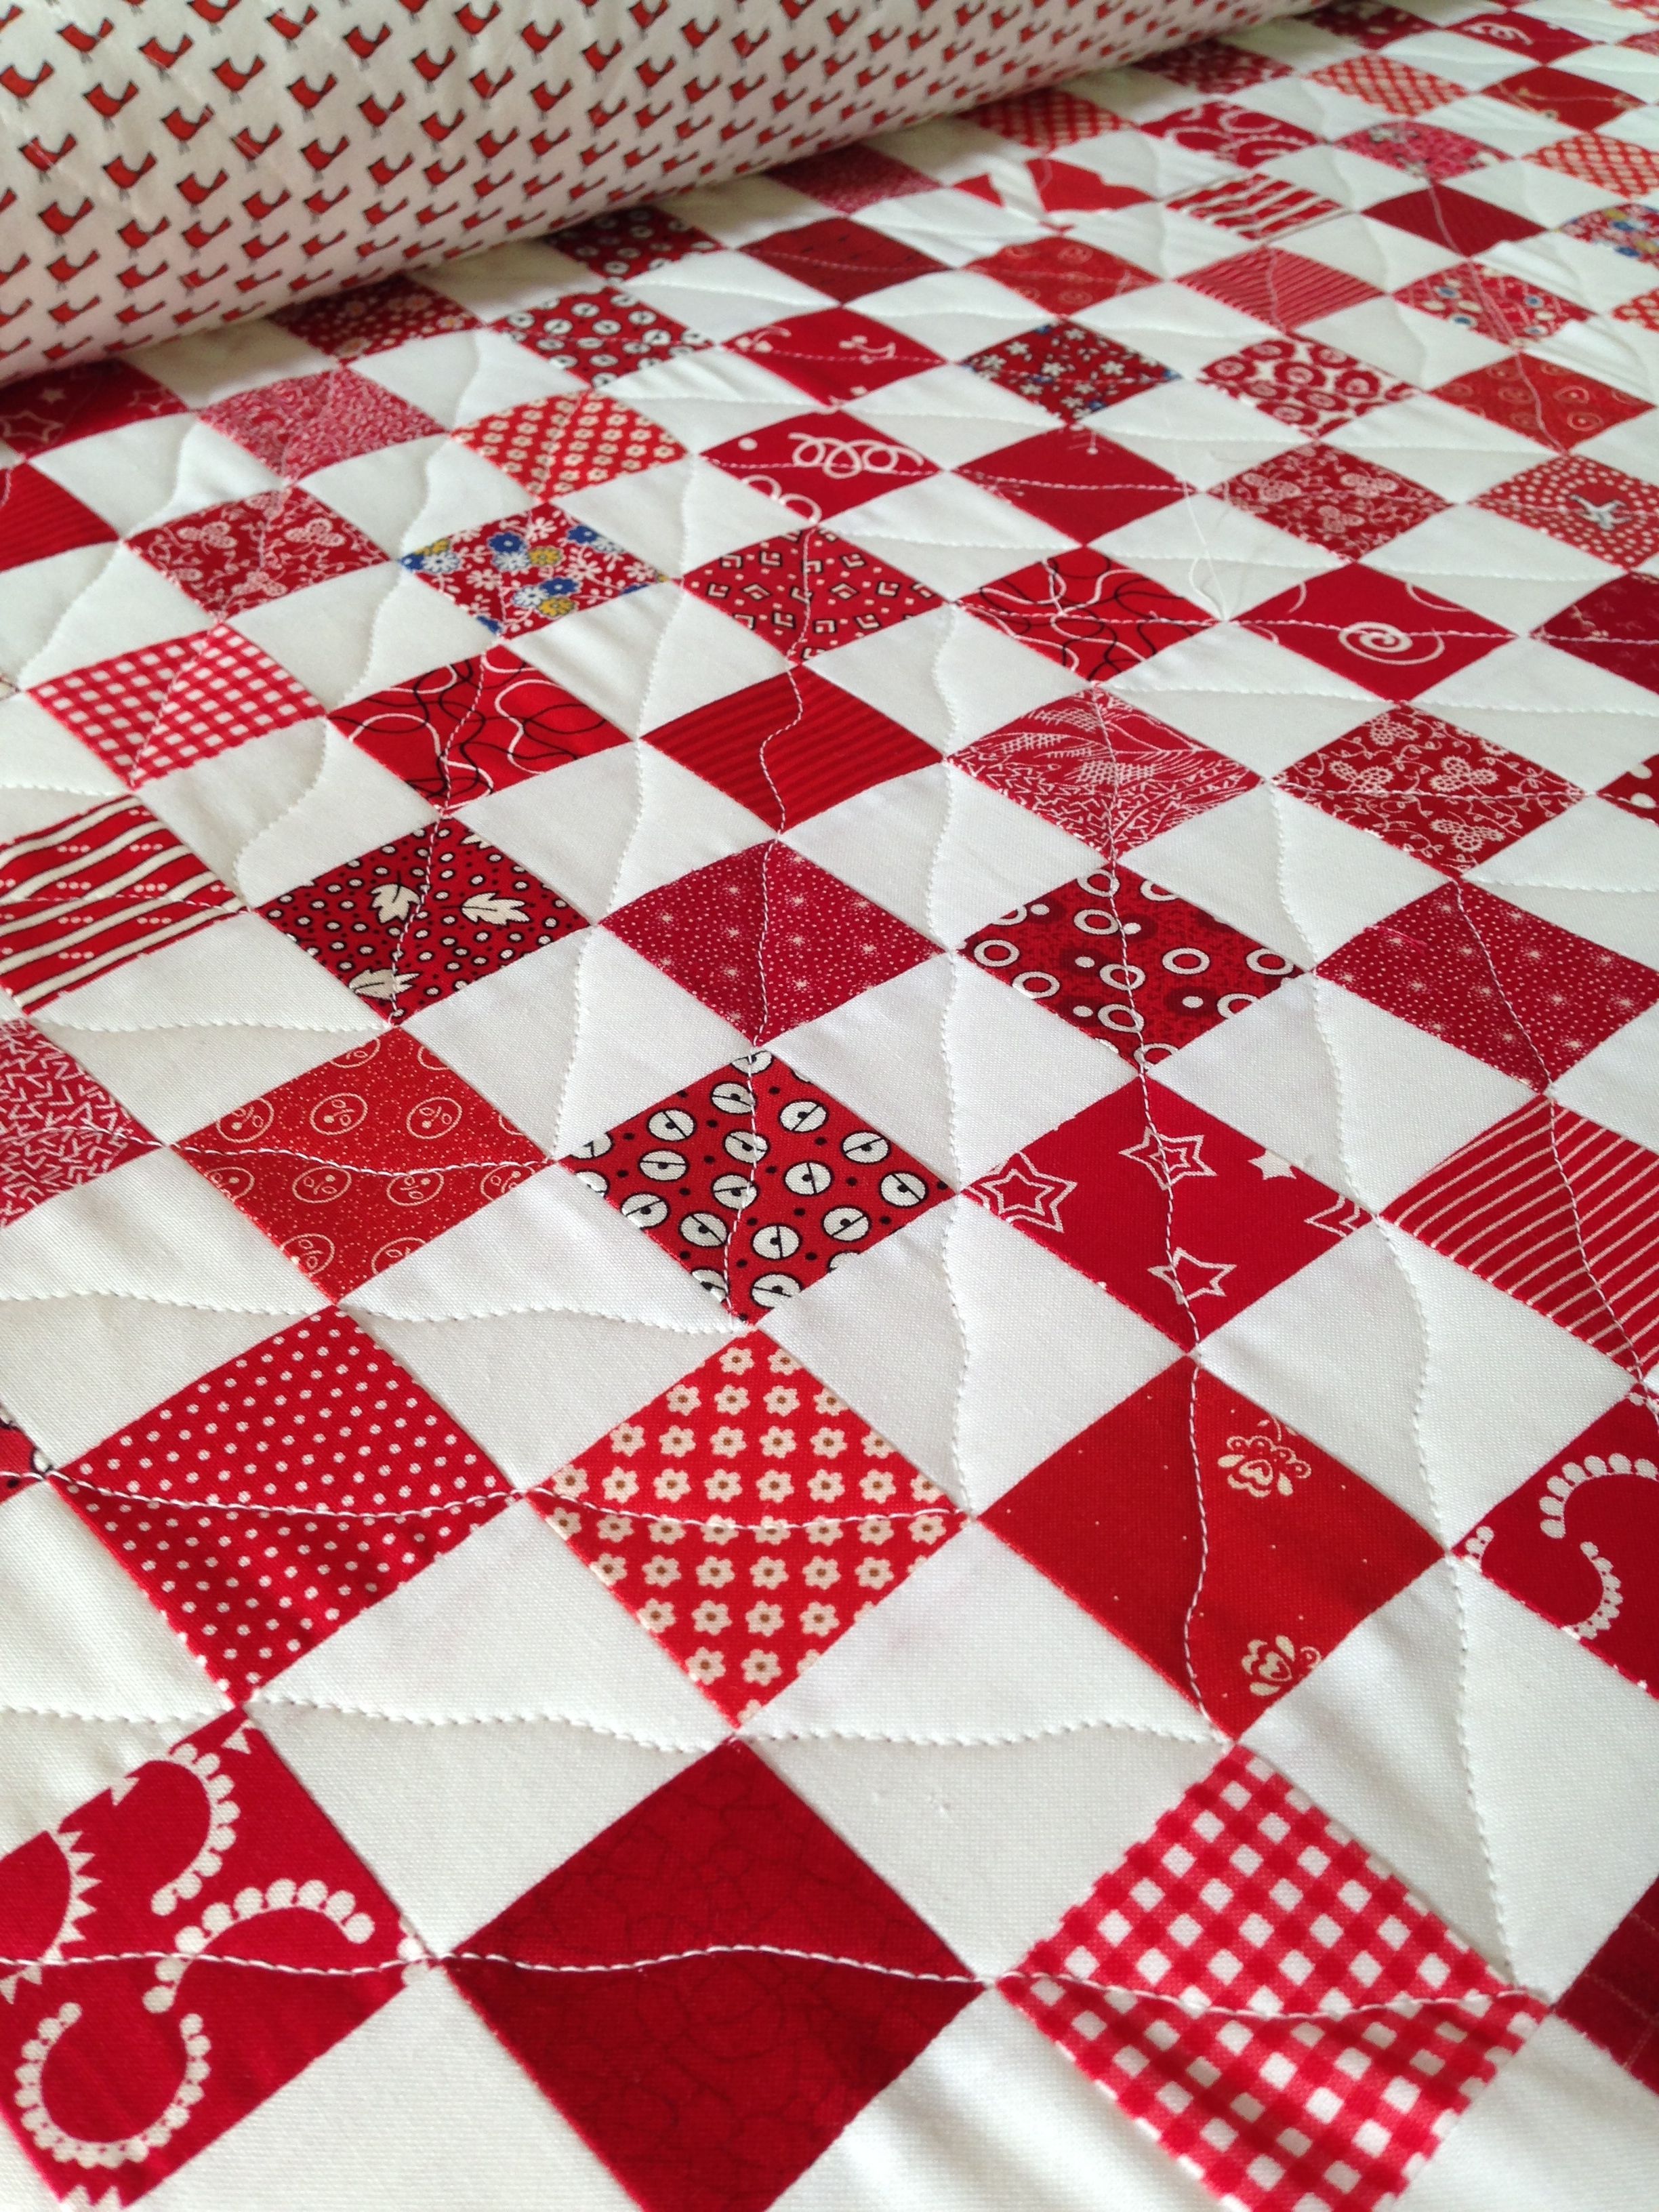
In keeping with the “simple” theme, I just quilted diagonally with wavy lines.
But I didn’t go all the way in one direction, I did more of a chevron pattern.
I was really pleased with the way it turned out.
I found this cute bird print for the back.
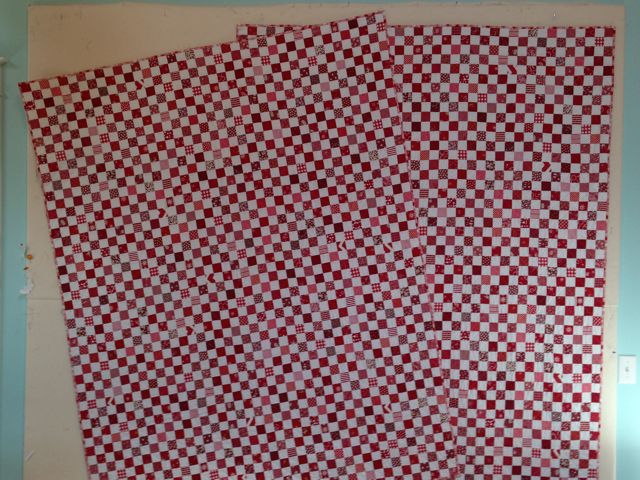
Each quilt was 40 squares by 50 squares, or 2000 squares! (Scary when you say it that way!)
Yes, I said “each quilt” because I made two of them!
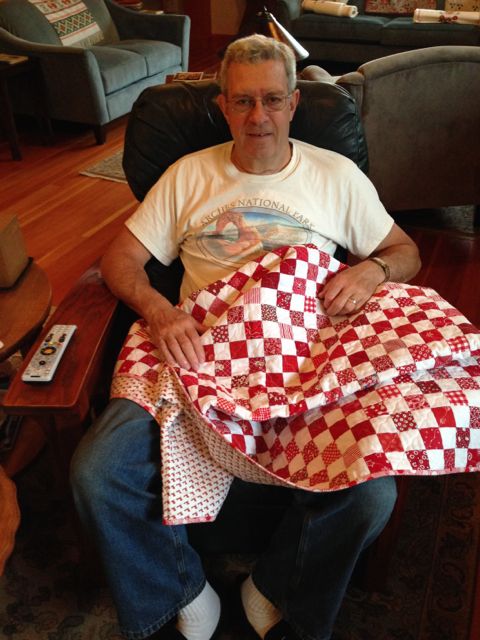
Here’s Bob getting his. I gave it to him before we left home so he could put it in his suitcase!
When we first got to Sweden, we had to sleep upstairs because our bedroom wasn’t remodeled yet.
But once the remodel was finished, we brought the bed—and the quilts—downstairs to their new home.
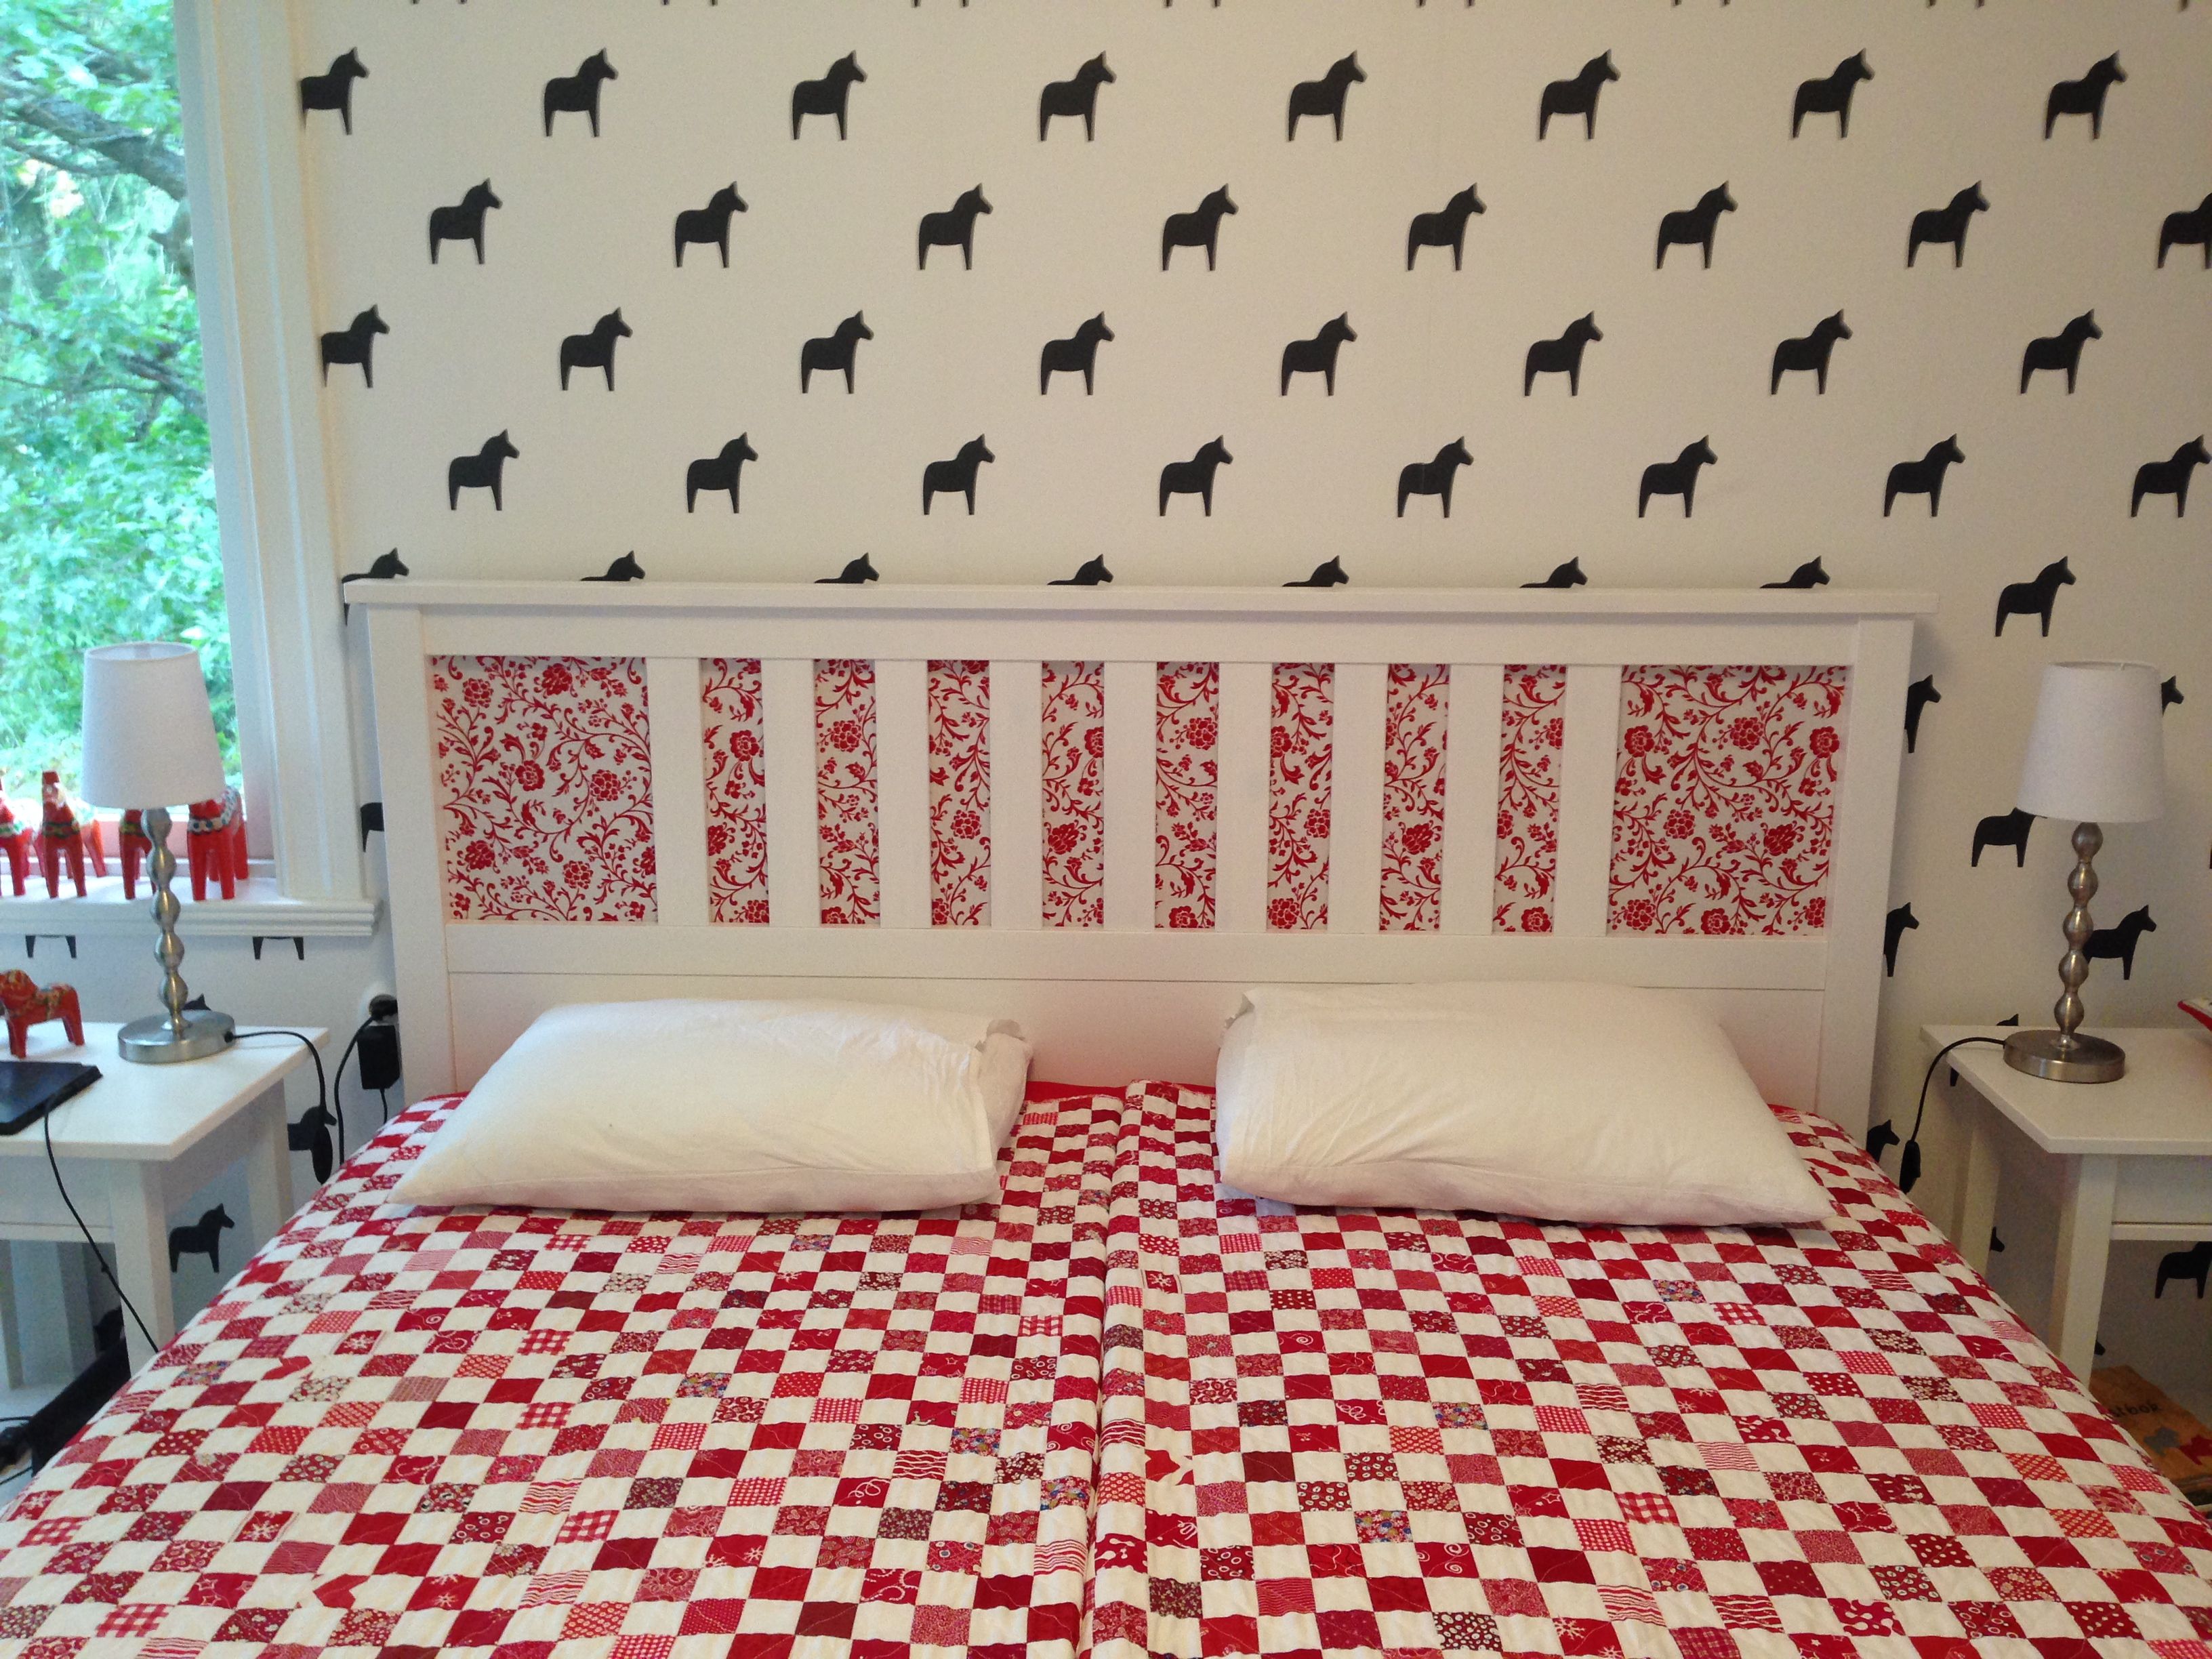
I didn’t like the way the Dala horses showed through the wallpaper. It looked like they were in jail! So, I added some fabric to the back of the headboard.
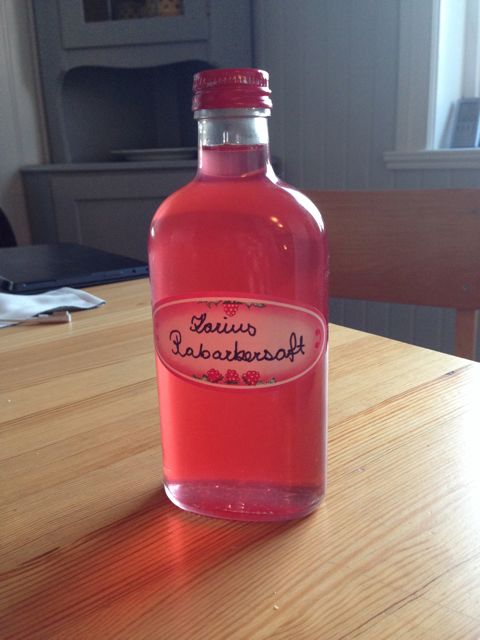
It all started when our summer neighbor in Sweden, Karin, brought us a bottle of homemade rhubarb saft (pronounced “soft”).
Saft is a fruit concentrate that you add to still or sparkling water for a refreshing summer drink. It’s so delicious, I just had to try making some myself. And Karin was nice enough to share the recipe.
You will need:
4 – 5 pounds rhubarb
2 lemons
Boiling water
5 cups sugar
2 pinches sodium benzoate
2 pinches citric acid
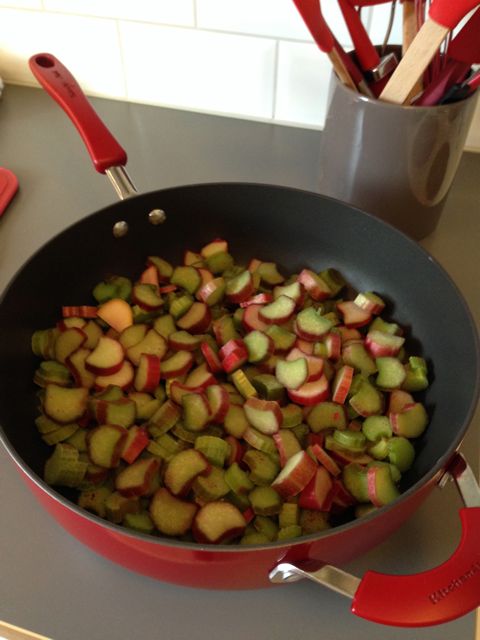
Wash the rhubarb and cut into 1/2″ slices. Place half in a heatproof pan or bowl.
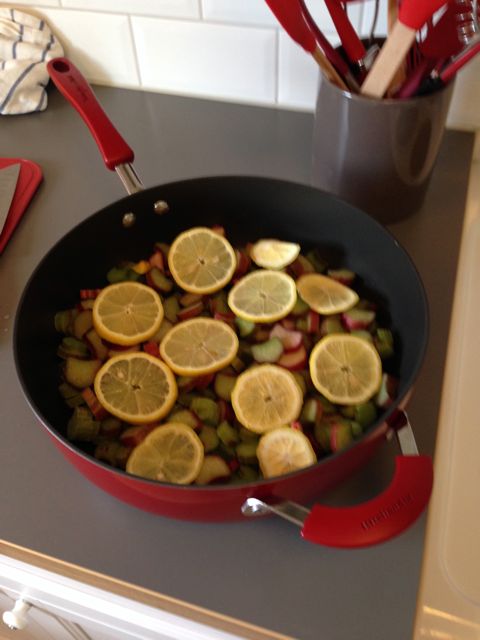
Wash the lemons and slice thinly. Spread over the rhubarb in the pan.
Add the rest of the rhubarb.
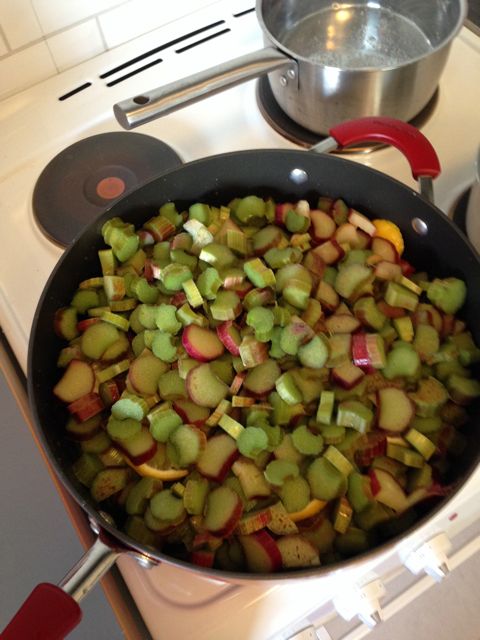
Cover with boiling water.
Cover with plastic or a lid and put in a cool place (our cellar worked great) for four days.
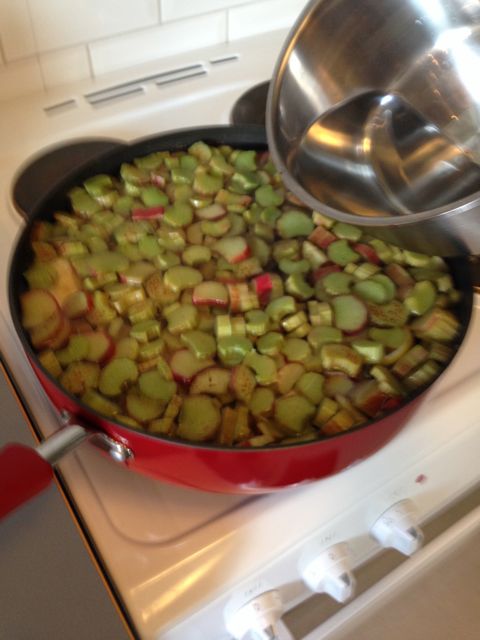
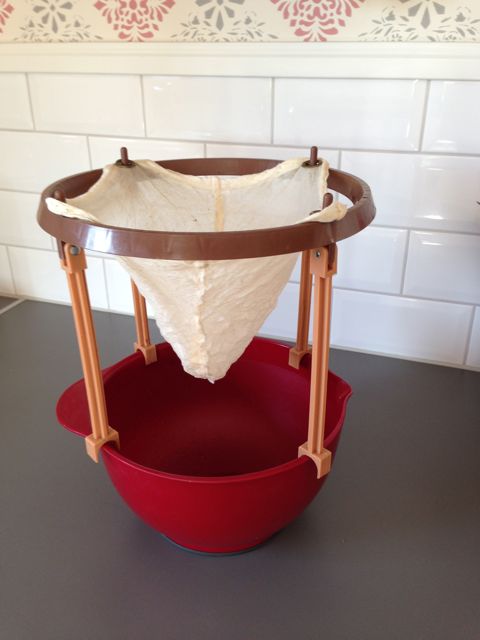
Strain the fruit through a jelly bag or two layers of cheesecloth. Let it run about 60 minutes.
Add the sugar and boil for 20 minutes. Let stand for five minutes and skim.
Add preservatives. Pour into warm bottles and seal.
Pour about 2″ in the bottom of a glass. Add flat or sparkling water.
Much to my delight, I discovered we have several rhubarb plants in our yard here at our Swedish house. My grandmother was the best pie maker, and one of my favorites was her rhubarb custard pie. I couldn’t wait to make one!
When I posted a photo of this on my Facebook page, several people asked for the recipe, so here it is. I didn’t have a pie plate here, so I used this 10” square pan. And, I didn’t have a rolling pin, so had to adapt a no-roll pie crust recipe I found online. I liked this one because it used both butter and oil.
Rhubarb Custard Pie
Crust
1-1/2 cups flour
1 tsp salt
2 tbl sugar
¼ cup cold butter, grated
¼ cup oil
2 tbl milk
Mix dry ingredients. Stir in grated butter to distribute evenly. Add milk and oil. Stir. Dough will be crumbly. Press into bottom and up the sides of a 10” square pan (a 10” pie pan or 9” x 13” pan would work, too). Chill while preparing filling.
Rhubarb Filling
3-1/3 cups rhubarb
1-1/3 cups sugar
2-1/2 tlb flour
½ tsp salt
4 egg yolks
1-1/3 cup heavy cream
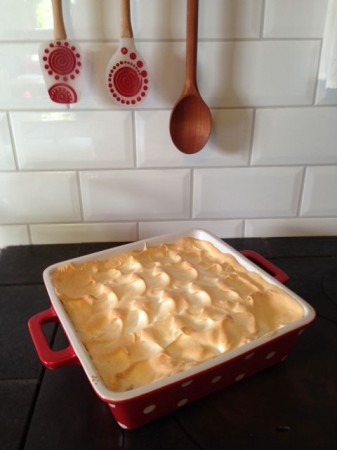
Cut rhubarb into small pieces and spread over crust. Whisk remaining ingredients. Pour over rhubarb. Bake at 350 degrees 50 – 60 minutes, until custard is set. About 5 minutes before pie is done baking, prepare meringue.
Meringue
4 egg whites
¼ tsp cream of tartar
¼ cup sugar
Beat egg whites and cream of tartar until foamy. Gradually add sugar and continue beating until stiff peaks form. Spread meringue over top of pie, all the way to the edges. Make peaks with the back of a spoon or edge of a spatula. Return to oven for 10 minutes, or until meringue is golden brown.
You can serve this warm or cold. Refrigerate after a few hours.
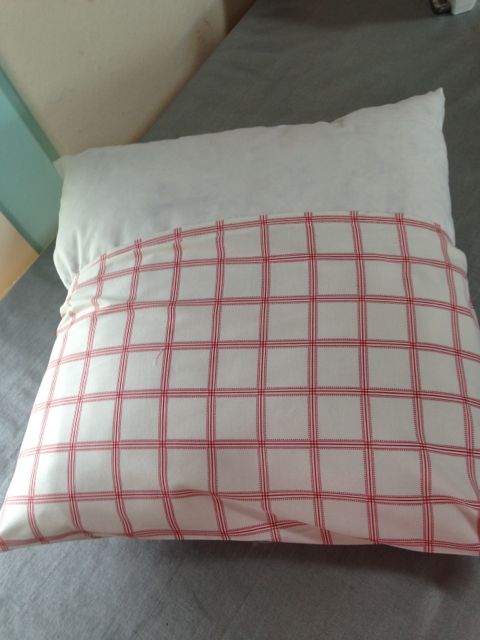
I actually made this pillow in nine minutes—and, I was taking photos along the way!
It only required sewing two seams–TWO SEAMS! This is for an 18″ pillow form.
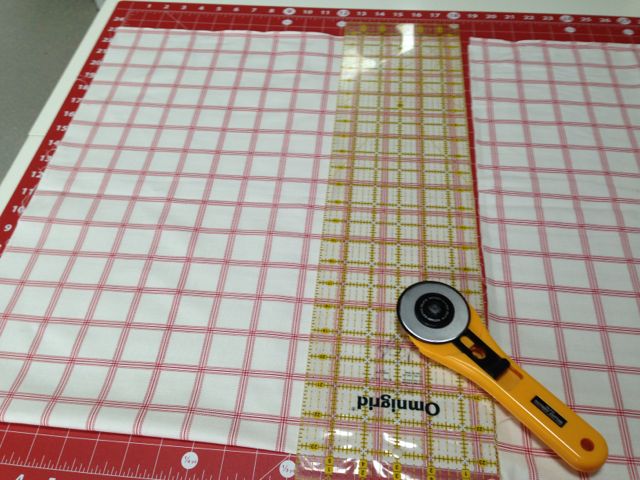
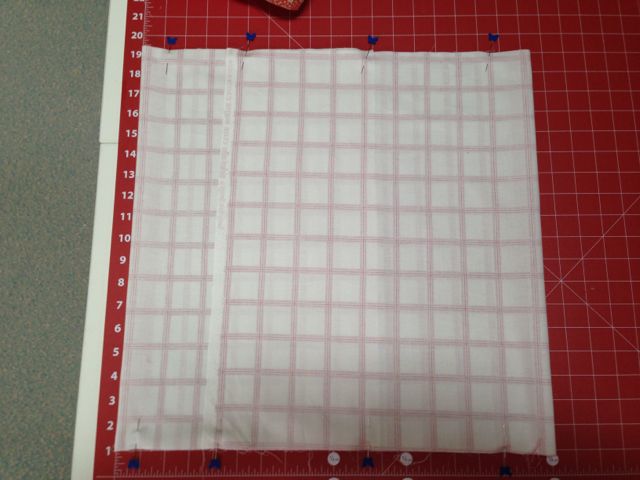
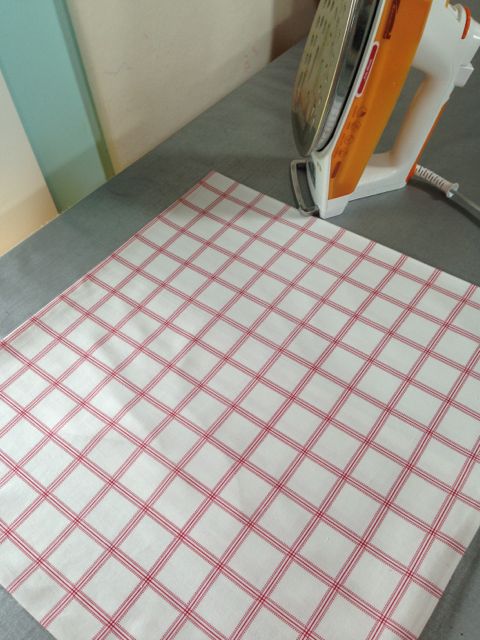
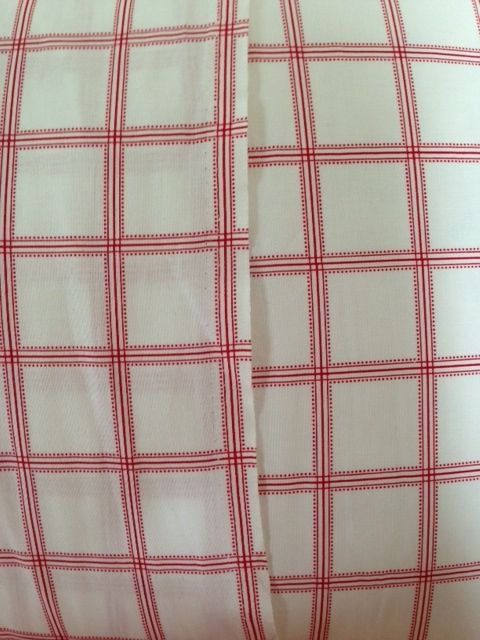
First, cut a half yard piece of your chosen fabric, 18″. I got to thinking if you bought a half yard of fabric, you could skip this step! And, no, I didn’t add anything for seam allowances, because I like my pillow to fit snugly.
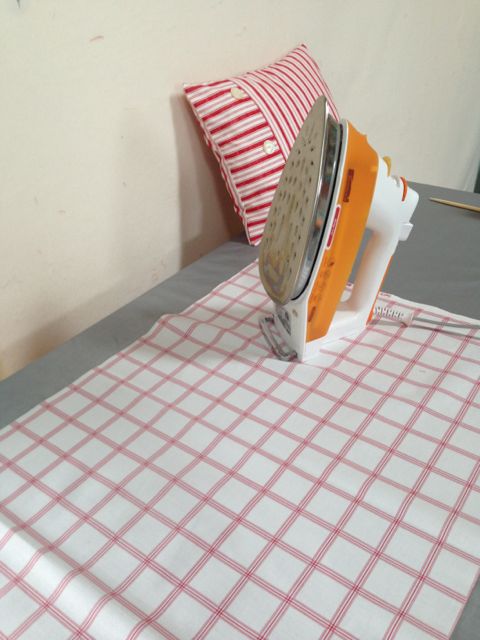
Take it to the ironing board and press it, getting rid of that fold mark in the middle.
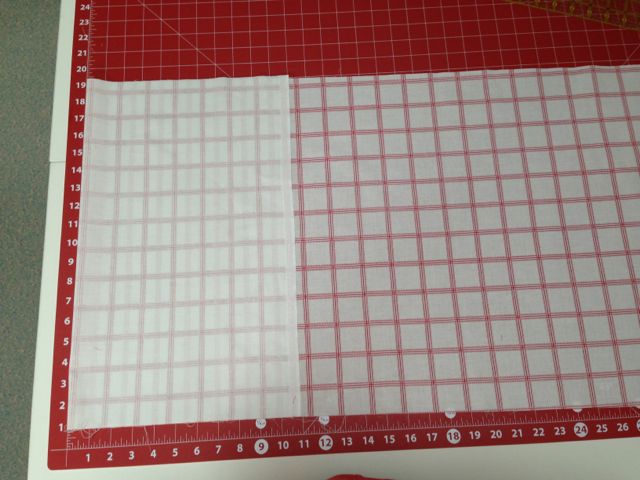
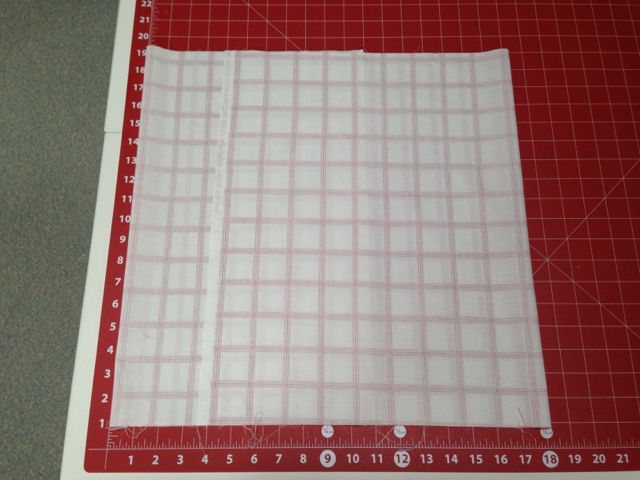
Now, back to the cutting board. Lay the fabric facedown, lengthwise, with about 11″ hanging off to the left of your first mark. Fold that hanging down part over so that the fold is along the first mark on your cutting board. We’re taking advantage of the selvedges here, so this should be the selvedge without the printing on it.
Now fold the other half over, making that fold along the 18″ mark.
Stick some pins in along the top and bottom edges.
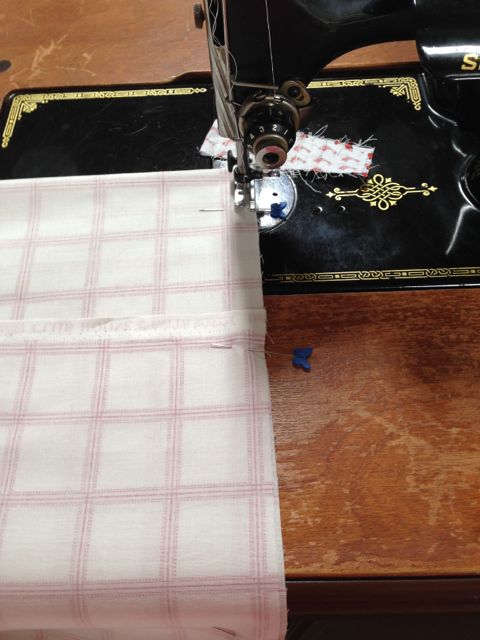
Take it to your machine and sew the two seams! I went back and forth where the fabrics overlapped.
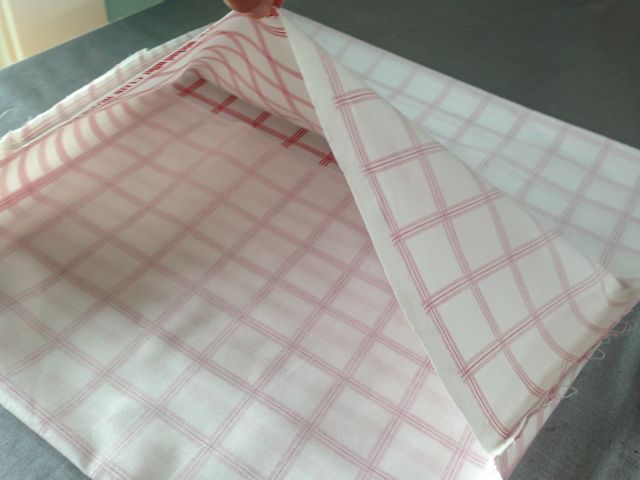
Reach in and turn it right side out!
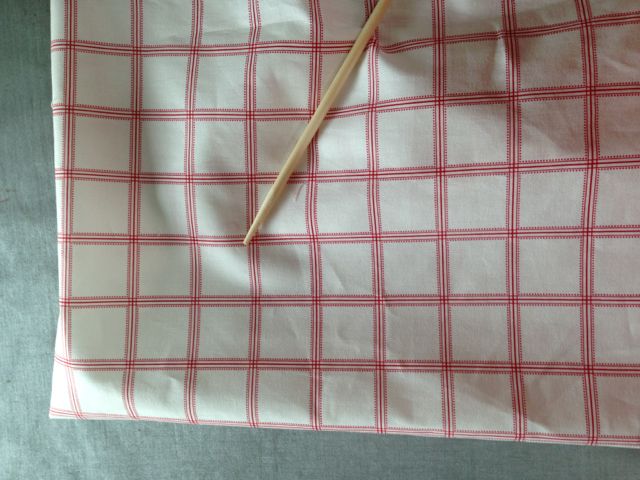
I use this little wooden gizmo to poke out the corners.
Press again.
Stuff in your pillow form and, voila!
A quick pillow in just 10 minutes—or less! It even looks good on the back!
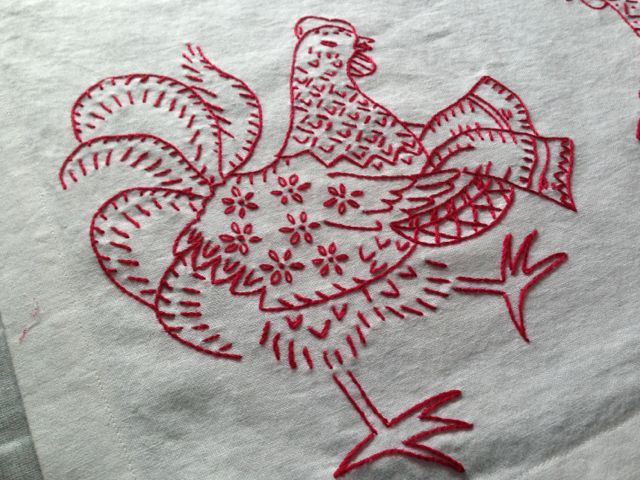
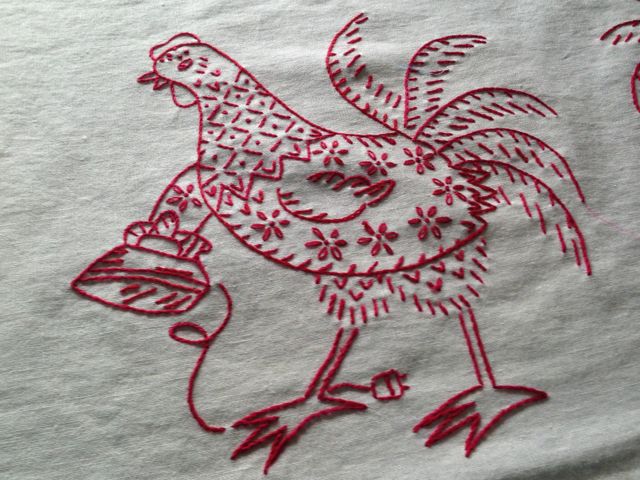
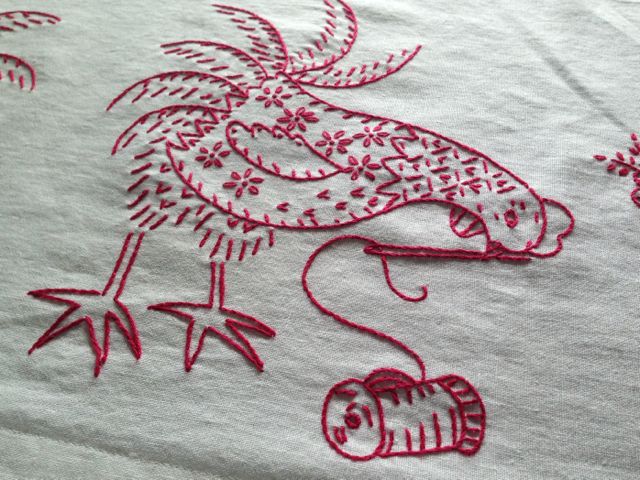
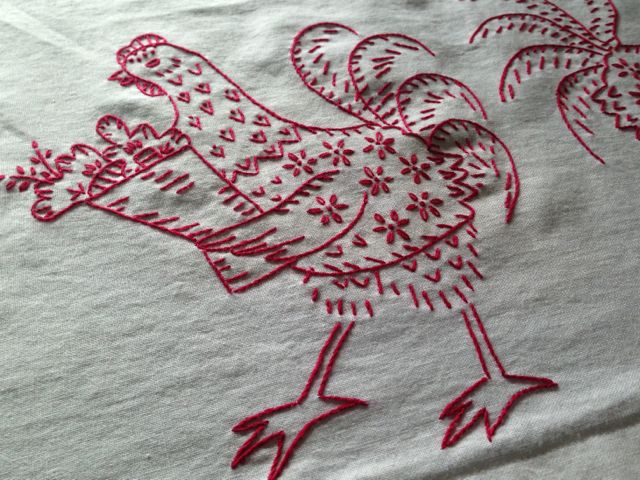
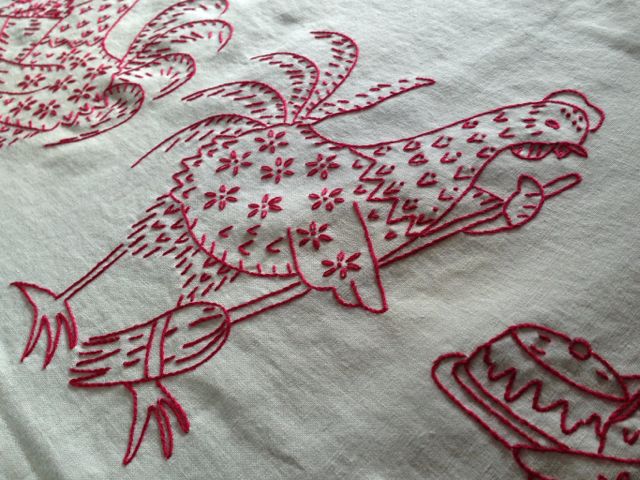
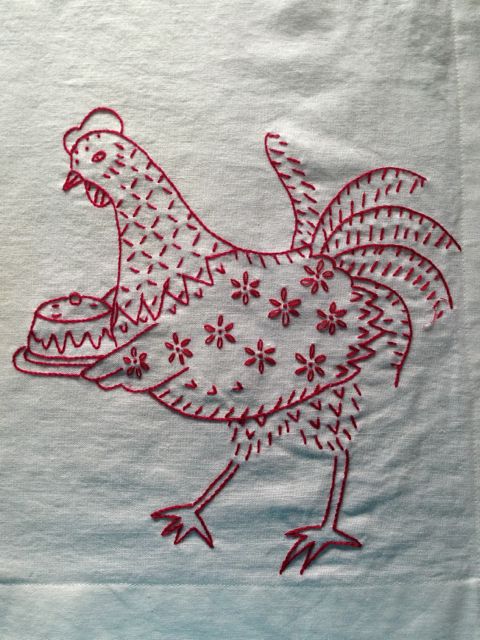
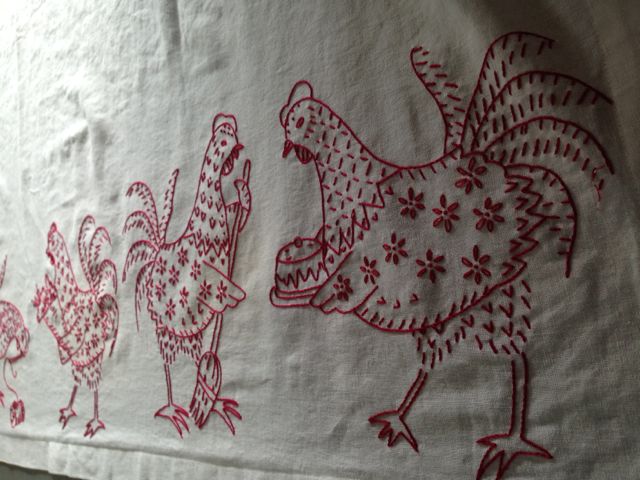
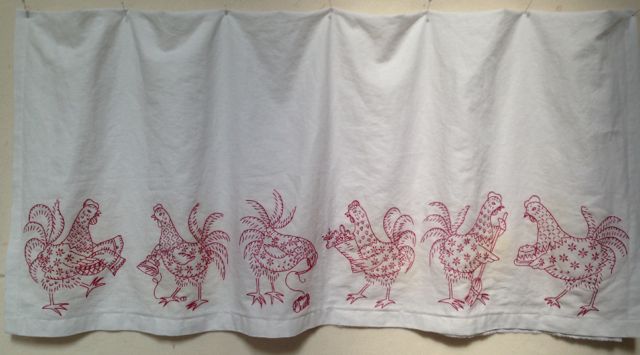
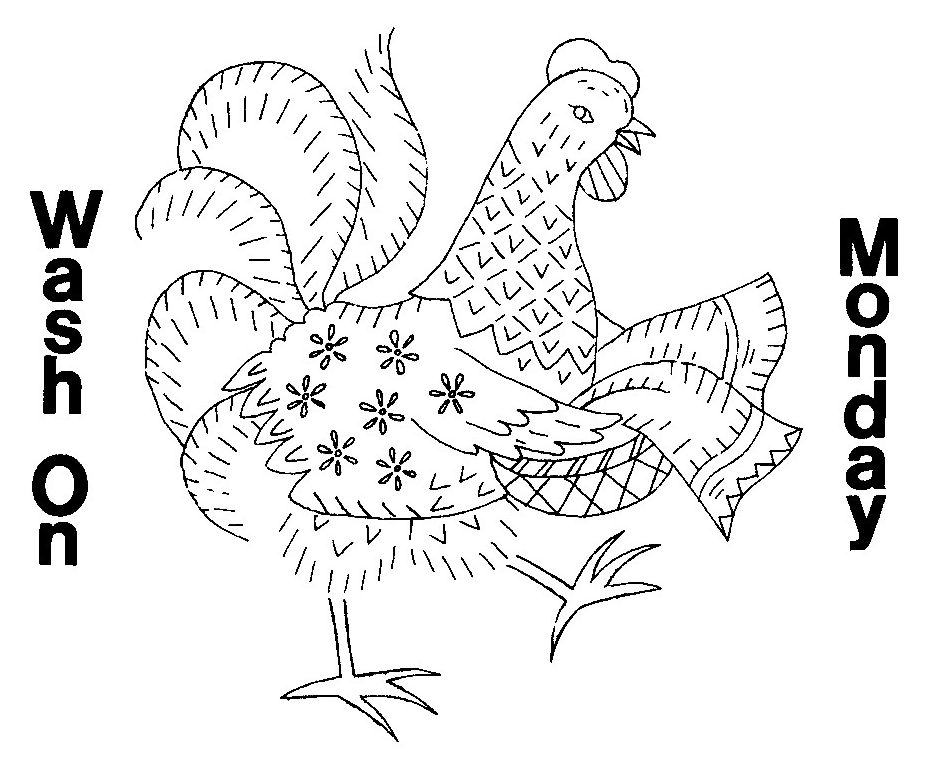
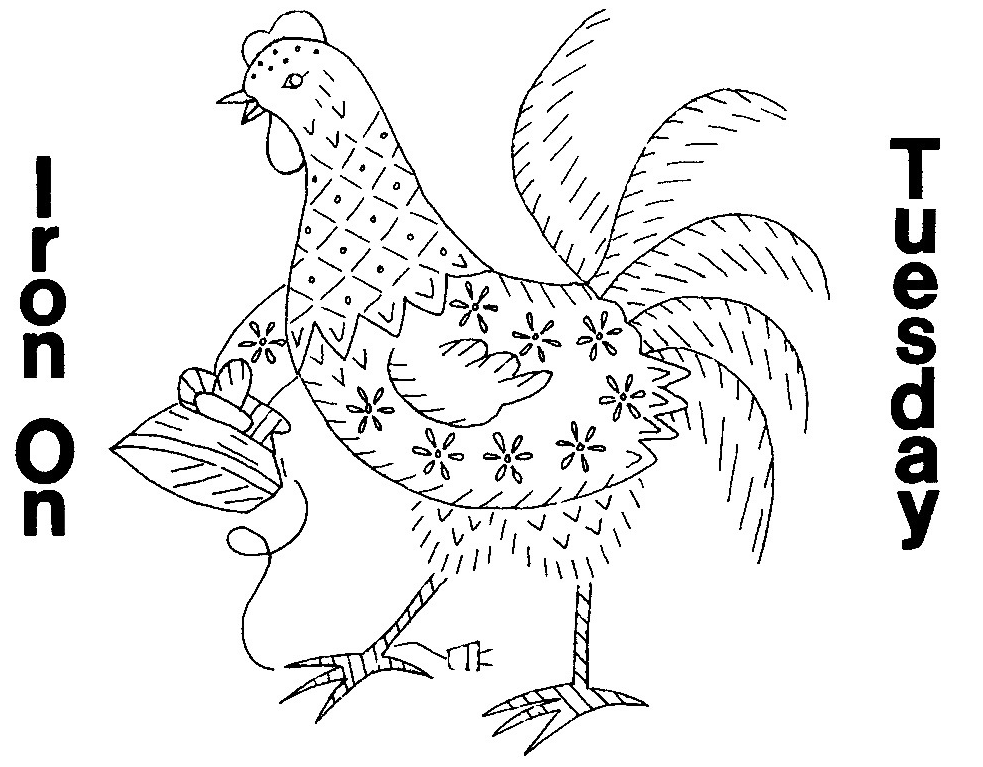
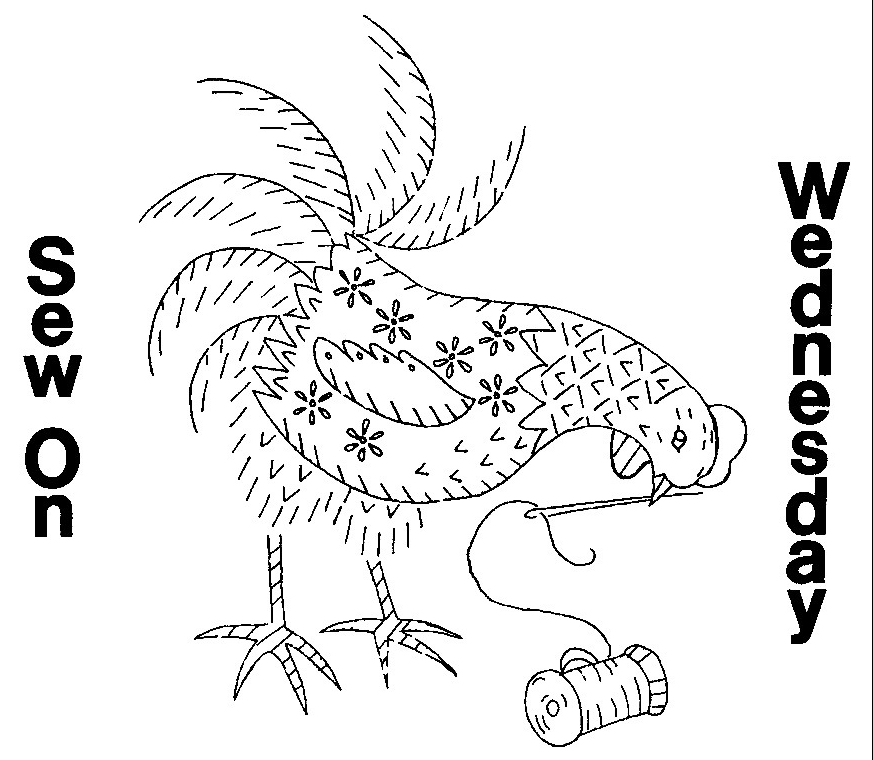
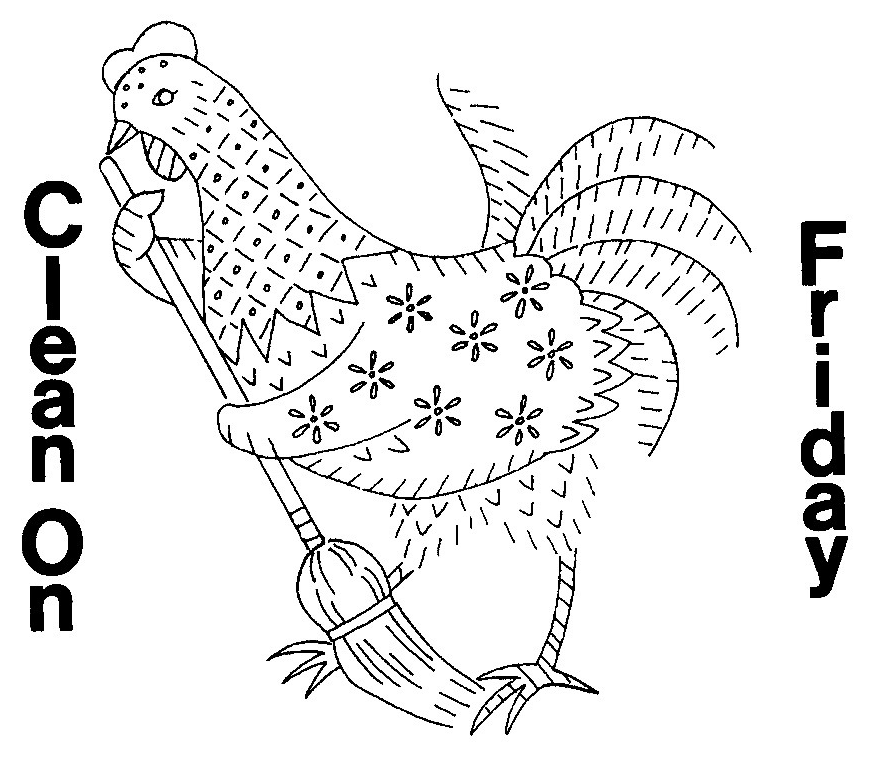
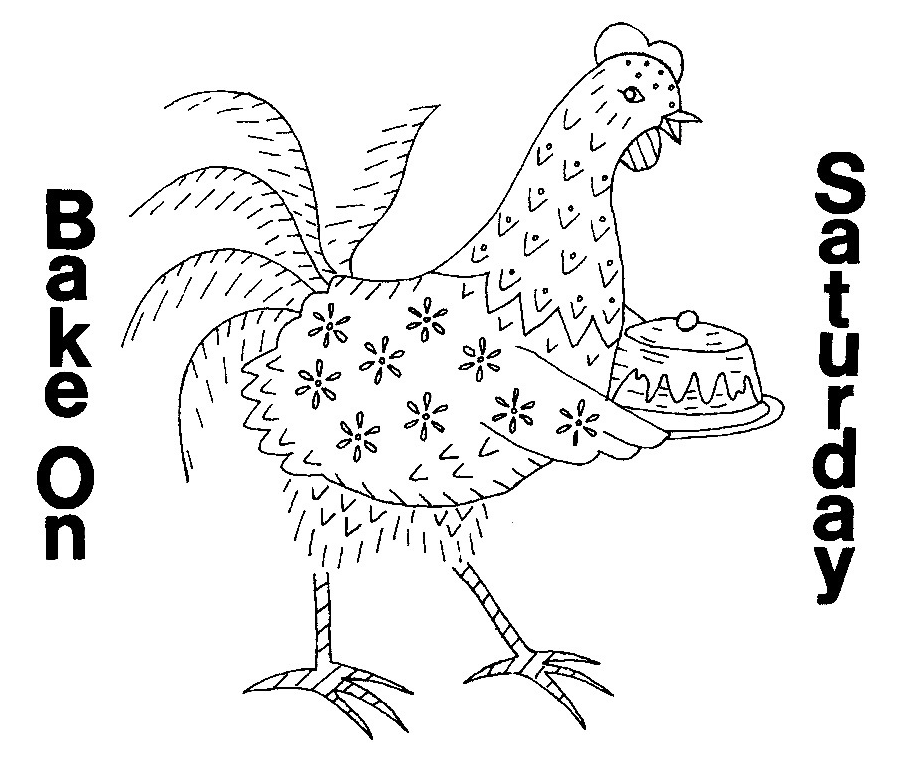
I wanted to embroider something to hang in my kitchen window in our Swedish house, and when I found these chickens doing their days-of-the-week chores, I knew they were the ones!
These industrious gals have it all figured out–washing on Monday.