I’m so excited! I just discovered an amazing way to make scrappy Four-Patch blocks lickety-split! All of the blocks end up different, and you really only have to measure once!
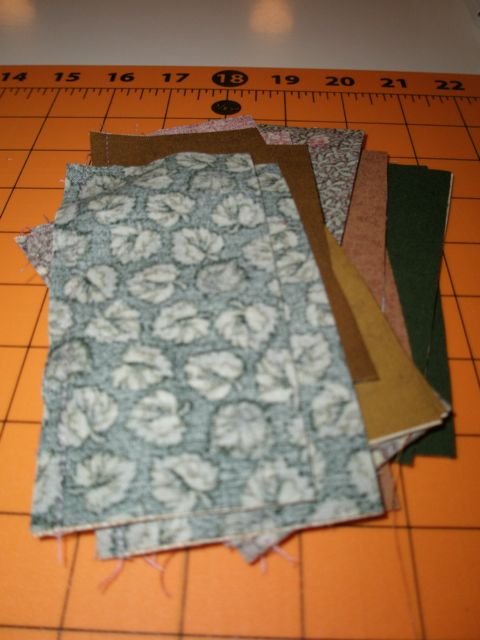
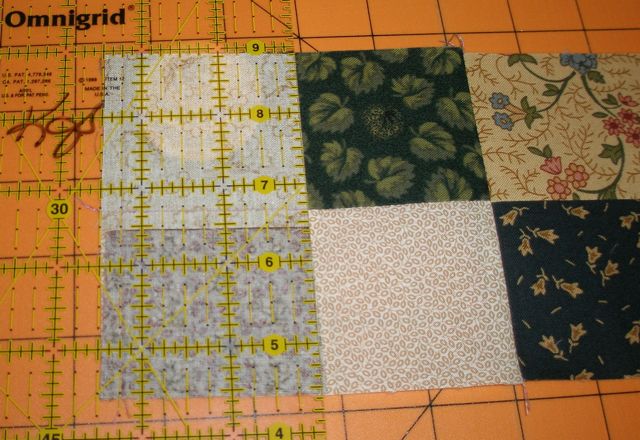
You start with squares of any size. That’s right, it doesn’t matter what size your squares are! For this tutorial I used 5″ squares, because I had a little packet of them.
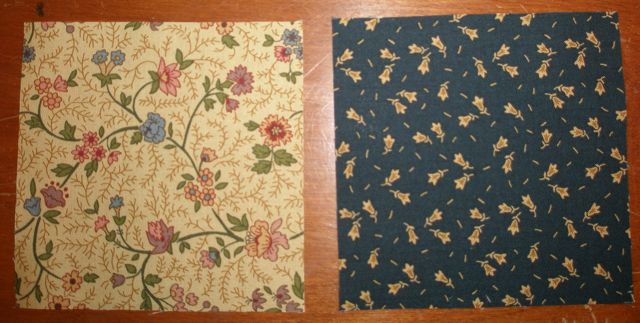
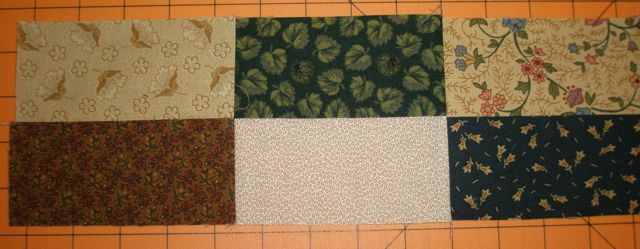
Place two squares, right sides together. I tried to match a dark with a light, but some were medium, so I just let them pair up randomly.
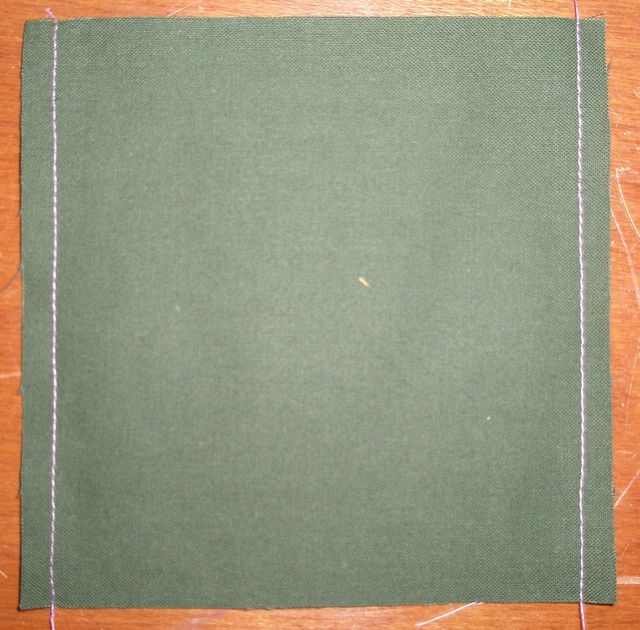
Sew down BOTH sides. I fed a lot of pairs through my machine at one time, doing first one side, then doing the other side of the stack.
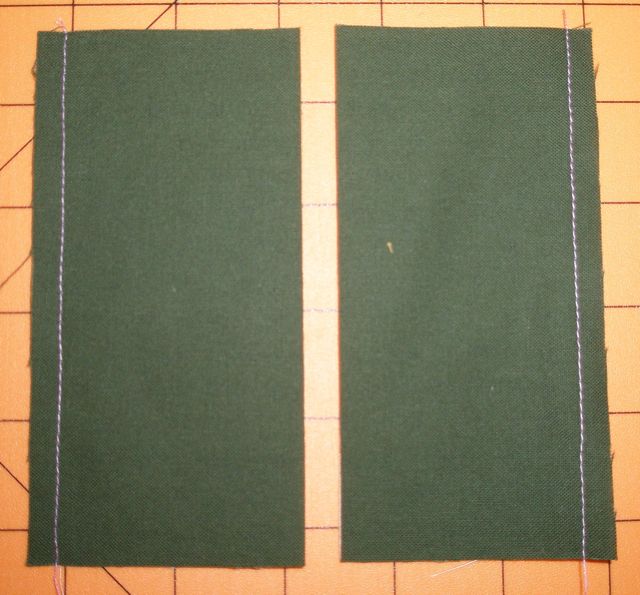
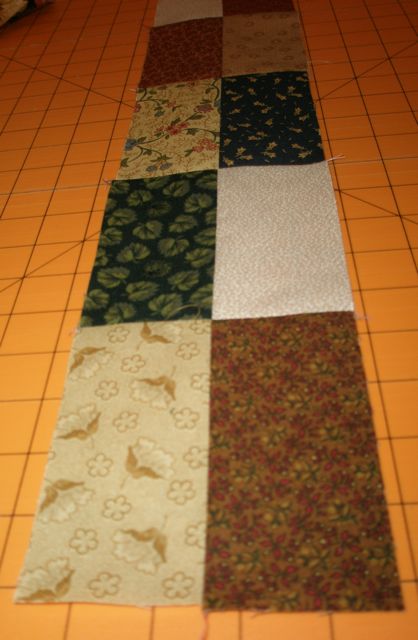
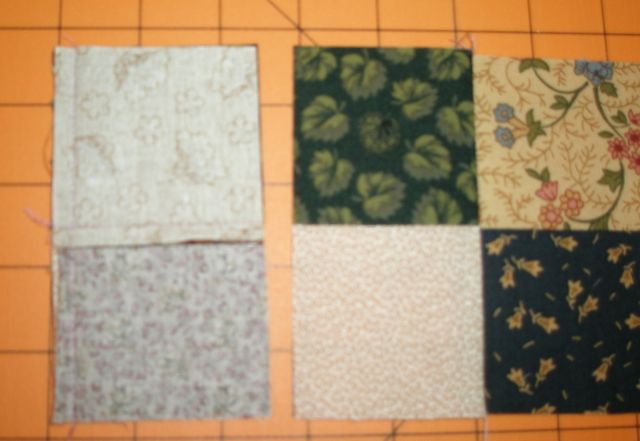
Now slice them in half through the middle. Since my squares were 5″, I sliced at 2-1/2″ but, remember, any size square will work, just find half, and slice!
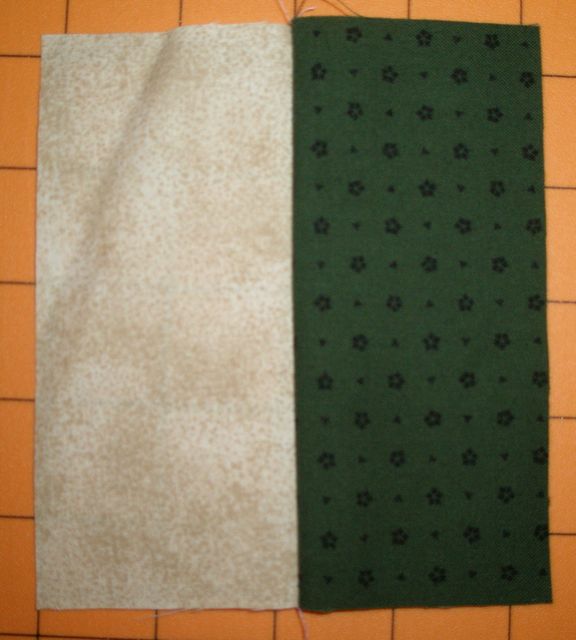
Open the pieces up and press toward the dark–if you have a dark!
Do this will all your squares.
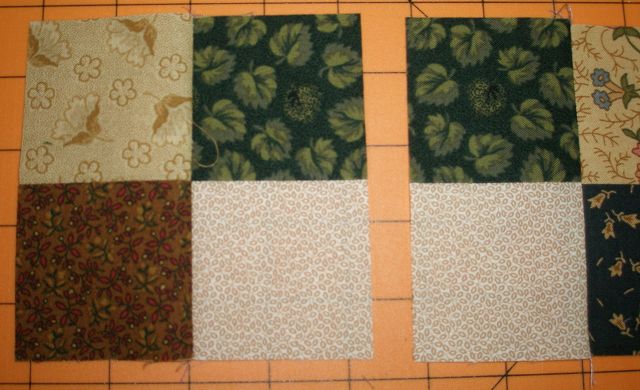
Now sew them together as shown below…
…all of them!
Once you have them all sewn together, slice a 2-1/2″ piece off one end. Set this two-patch aside. You only have to measure this first one. After this, the magic begins!
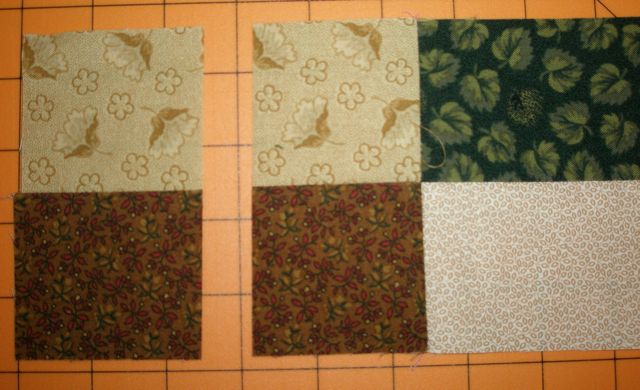
Flip the short piece over…
…and use it as a guide for your next cut!
There’s your first Four-Patch!
See! Now just keep going, flipping and cutting, until you get to the end. At the end, you’ll have a two-patch, which you can sew together with your first cut piece.
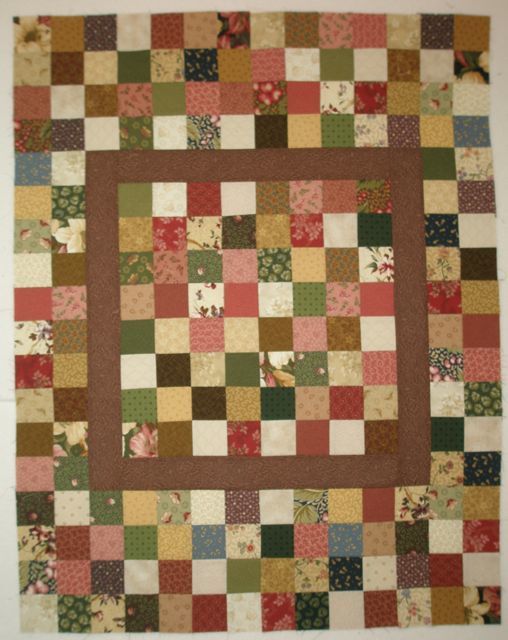
From my charm pack, I was able to make this little quilt. I thought the brown in there added a little interest.
Try this method and let me know what you think!
13 Responses
February 14th, 2013 at 4:49 pm
Looks like a great idea. Shall try it soon, and confirm it. PGH.
February 14th, 2013 at 7:12 pm
How neat is that??? I was not doing anything tonight so may try this out. Thanks.
February 15th, 2013 at 4:10 pm
Thank you! how great is this post??? This is why I love reading your blog, thank you very much!
February 17th, 2013 at 11:45 am
Ok – this looks like just too much fun!!! Bookmarking this tutorial and will be giving it a go this summer! thank you!
February 19th, 2013 at 11:47 am
Hello!
Thank you for commenting on my blog! I made the Nås heart warmer because it is beautiful and because it was a challenge! I am not from Dalecarlia but from a region in the south, Småland. Småland har allways been a poor area, (lots of people left it for the USA), and the old textiles that has been preserved here does not have the vibrant colors of Dalecarlia. One exception of this rule is the area from which my grandfather comes; Södra Unnaryd. I have started making a folkdräkt from that area, but right now only the hat is finished! )You can see it in the blog!) I am interested in all things textile and historical and I will look around in your blog to see what I can learn about the american textile tradition. I have relatives that emigrated around 1880, but they dissapeared and we have no idea what happened to them. This makes me a bit curious, I have sometimes thought of trying to find out what happened to them, and what kind of lives they got! But in the meantime I think I will try to learn more about things like quilts and red work, for me those things are typical american handicrafts! (we have similar things here, but the quilts are much more simple!)
February 19th, 2013 at 1:20 pm
Now that is cute!! really!! I will try it. thanks much.
August 3rd, 2013 at 9:21 am
Great fast way to piece. I have done the same process to start but your next 2 steps are faster. Thanks for the tip!
August 3rd, 2013 at 12:44 pm
Neato !!! Have to try this.
August 9th, 2013 at 12:07 pm
This looks so easy!! Can’t wait to try it. DMC
September 5th, 2013 at 11:17 am
I love this idea! I love scrappy quilts and have tons of squares cut out already! Thanks for the tutorial.
September 5th, 2013 at 5:40 pm
Cool!
September 5th, 2013 at 10:38 pm
Very cool idea!! Thanks you for sharing.
~ Vicki 🙂
September 8th, 2013 at 4:54 am
Great technique!