• 28Aug
    Categories: Everything! Comments: 2

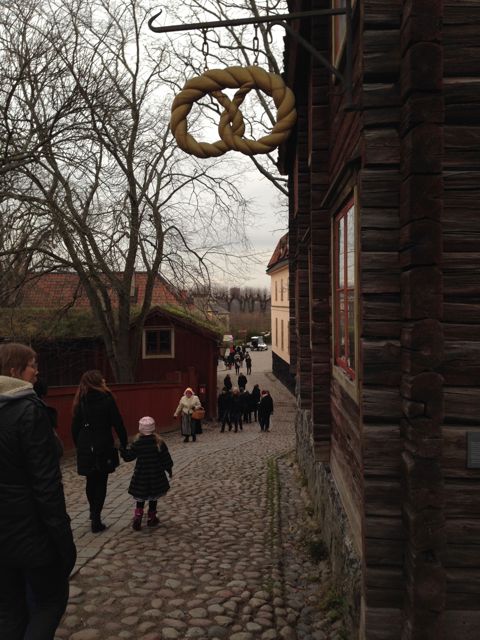
    Sweden has a long history of baking hard bread from rye flour.  The hard, crisp bread was often hung from a pole suspended from the ceiling, where it would keep all winter.

    hb1

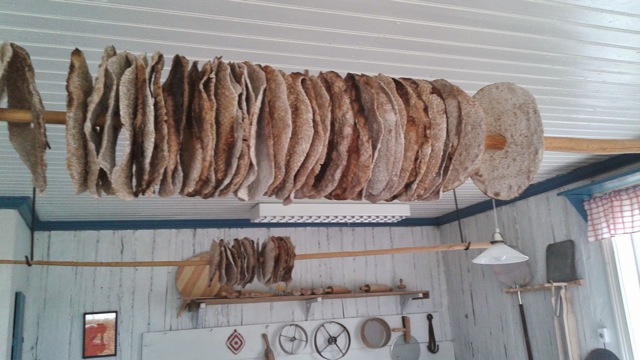
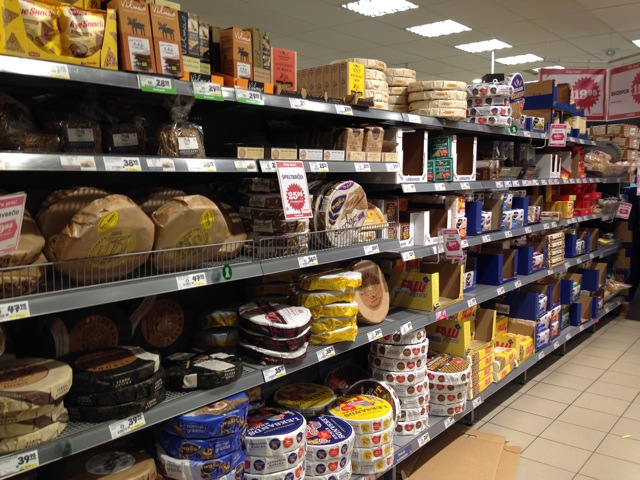
    It’s still hugely popular.  In many households it’s served with every meal.  Every grocery store has an aisle filled with lots and lots choices.

    bd1

    For years there was small bakery that still baked their bread in wood fired ovens.  It was called Vika Bread.  They had eight wood fired ovens and a great package!

    skb01

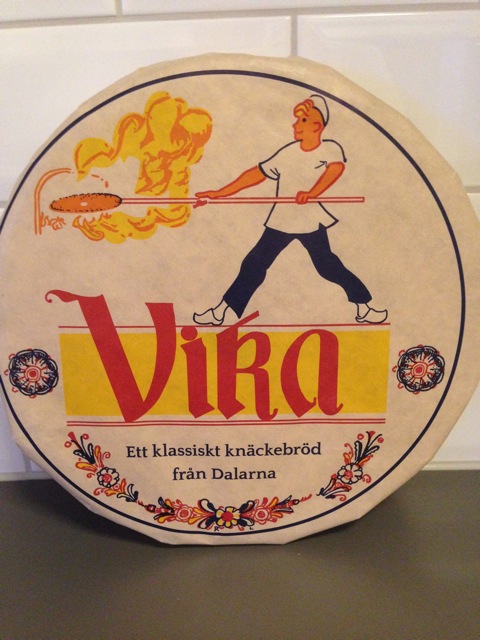
    About a year ago, Vika bread was bought out by one of the big hard bread producers.  Sadly, they moved the operation from the small town where it was produced and—sadder still—they destroyed the wood fired ovens.

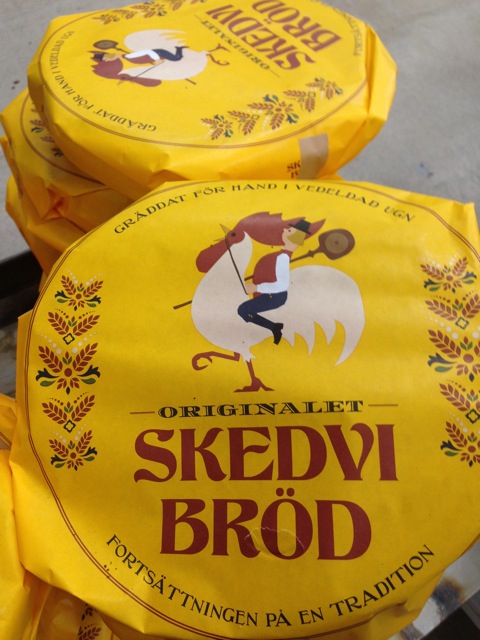
    But….a couple of young entrepreneurs have started a new wood fired bakery!  It’s in the little town of Stora Skevdi, and is called Skevdi Bread!

    skb07

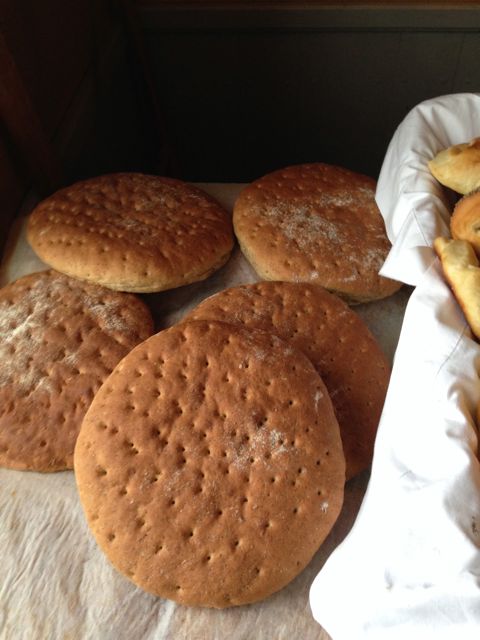
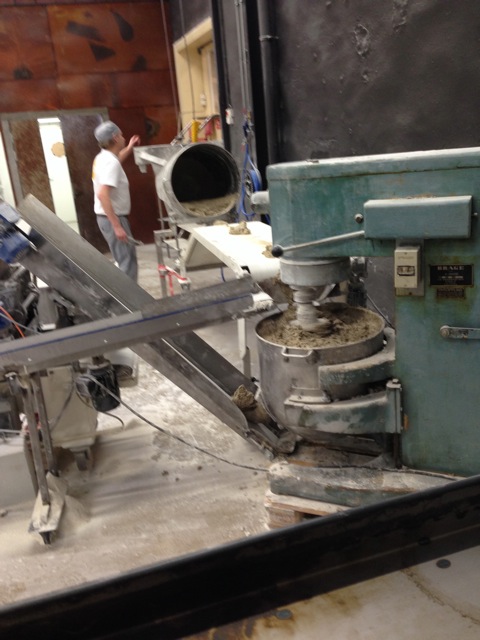
    They have four ovens—and the public is welcome to come observe the operation! The dough is mixed in giant mixers, rolled by a machine and the big rounds are cut out—with a little hole in the middle, just like in the old days.  They spend a short time in a proofer, then it’s off to the ovens.

    skb15

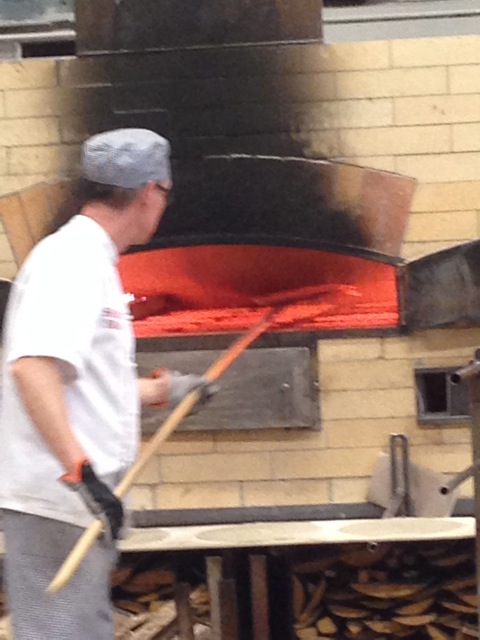
    There are slabs of wood burning on each side of the domed oven—each one tended by a single baker.

    skb04

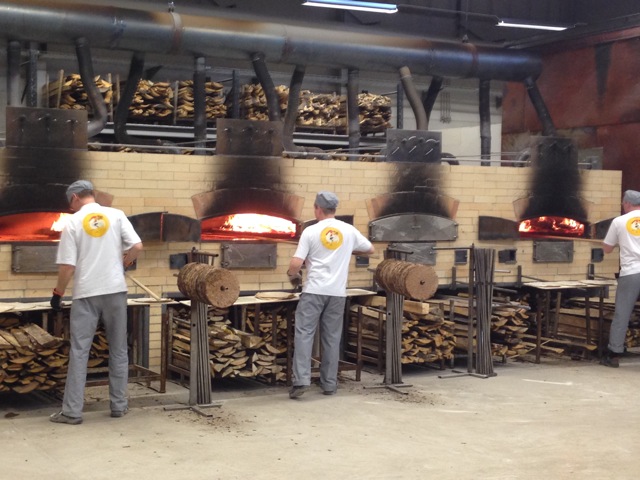
    They use large paddles to slide the rounds into the oven.  Each oven holds fifteen rounds.  After they’re in the oven a few minutes, they move the ones in the middle to the edges.

    skb08

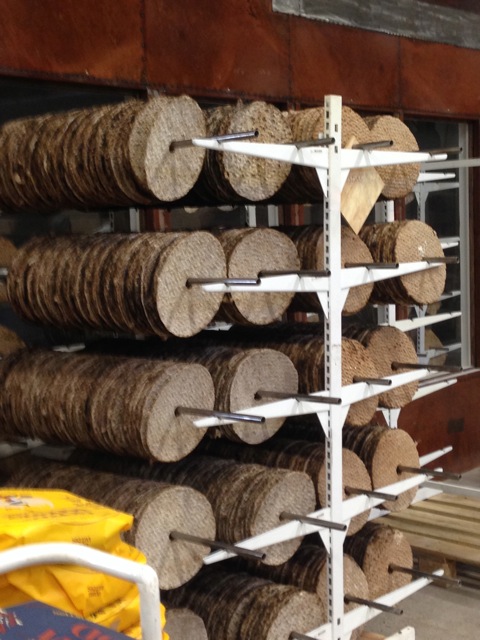
    They don’t bake very long.  When they’re finished, the baker slides them over a metal pole to cool.  That’s the purpose of the small hole in the middle.

    skb11

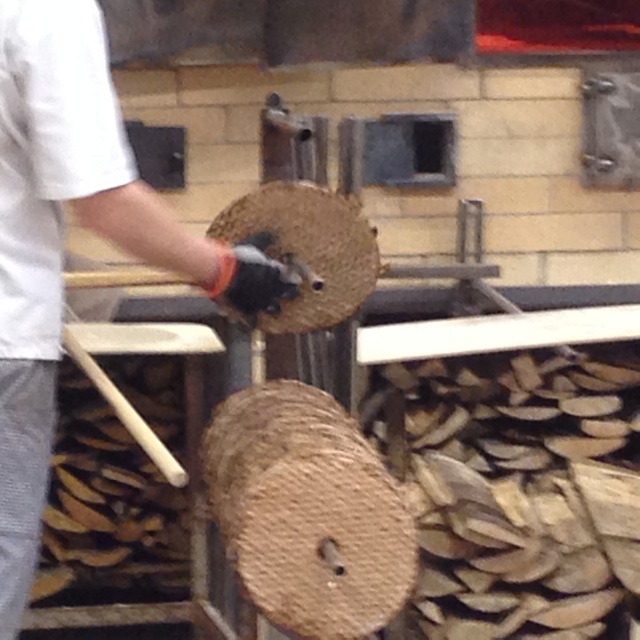
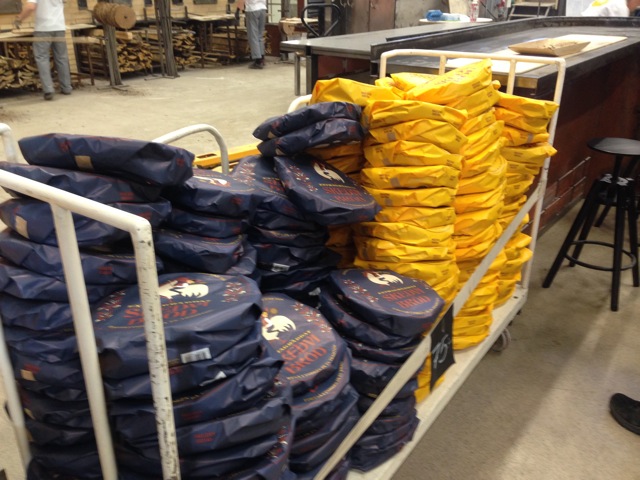
    When the rods are filled, they’re moved to a specially made rack.

    skb03

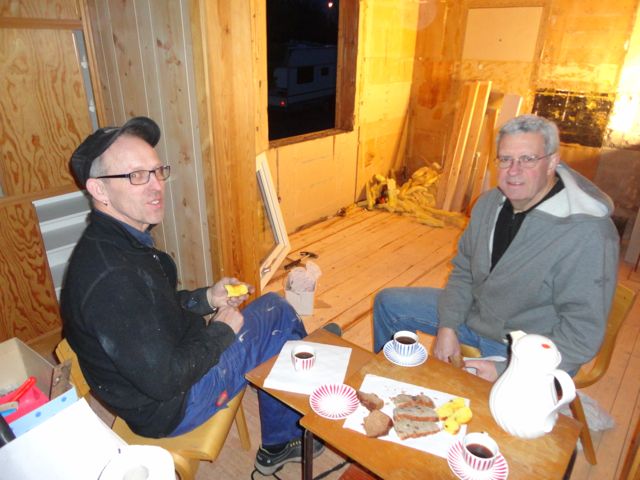
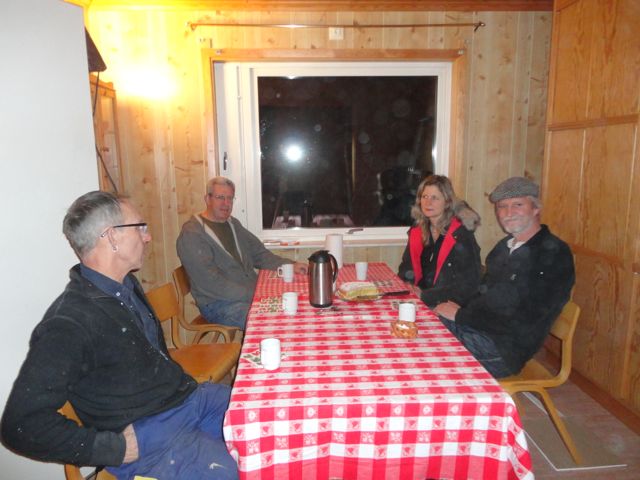
    While we were watching, one of the bakers came over and asked if we’d like to try a warm sample.  you bet!

    skb09

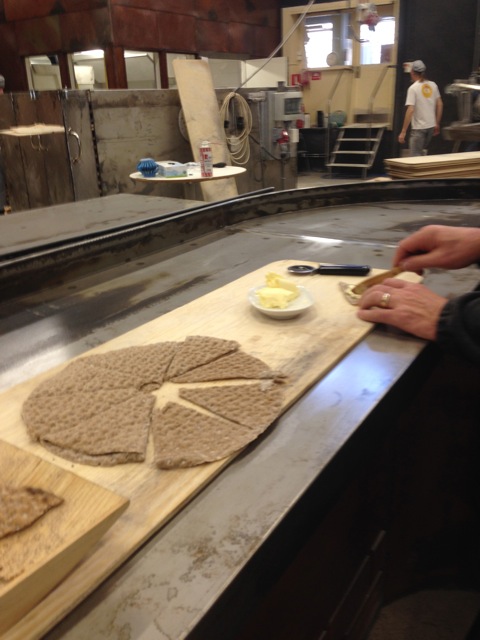
    It was really tasty.  I’d never had warm hard bread before.  It was delicious!

    The cooled rounds are inspected…
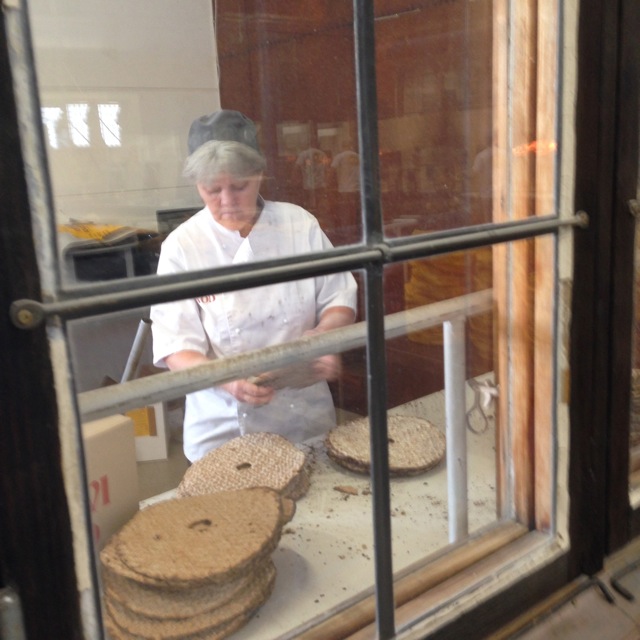
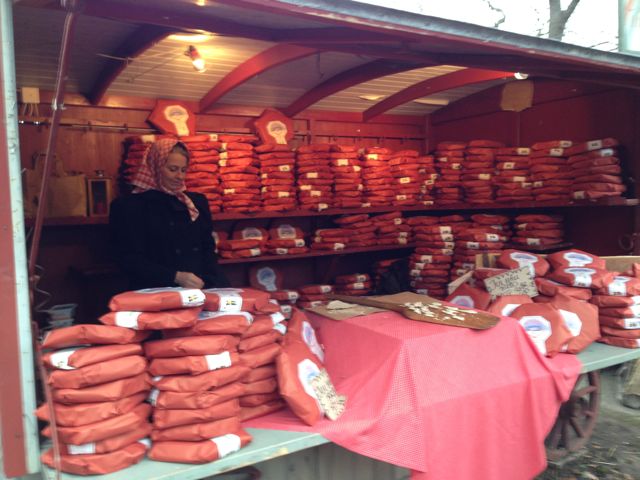
    skb10

    …and hand wrapped.

    skb06

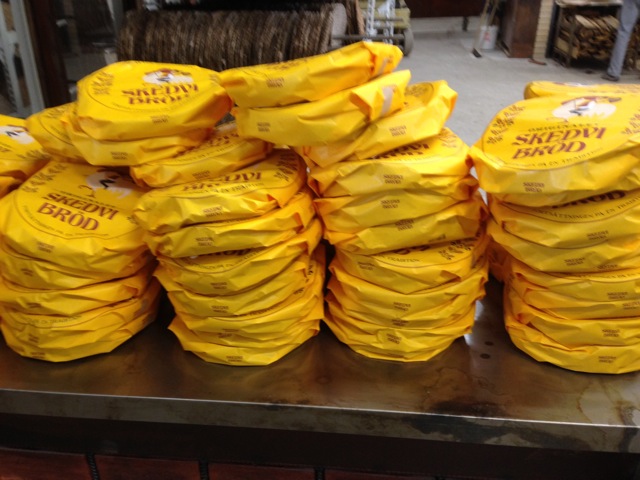
    The yellow wrapped are “regular” and the blue ones are “dark” baked.

    skb05

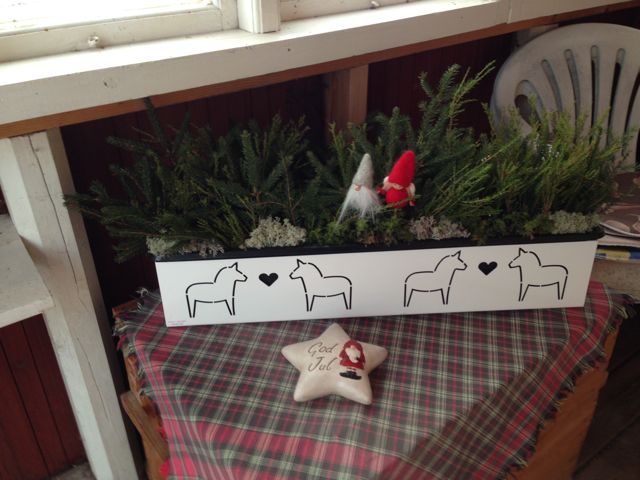
    Last summer at “Cow Midsummer, ” a festival in Dala-Floda, I’d purchased a hand crafted wooden basket to serve hard bread in.

    bsk1

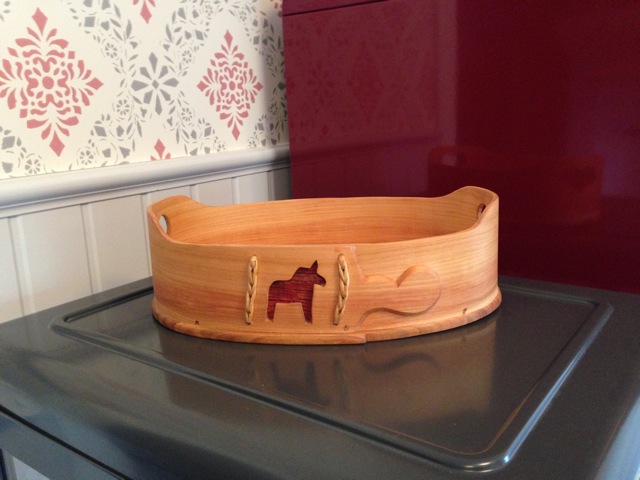
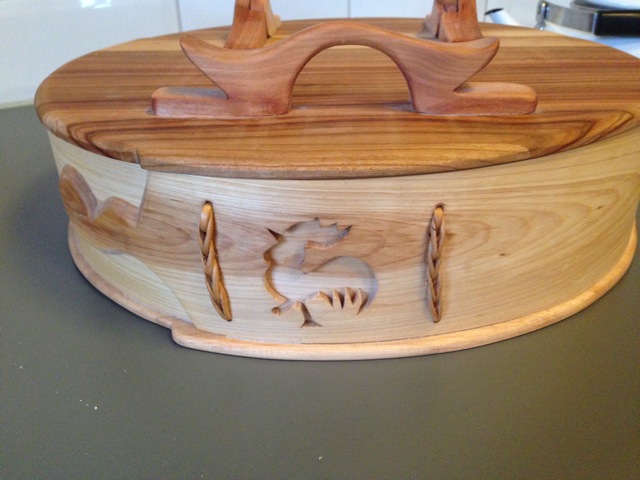
    At Skevdi Bread, they had a great storage box with their logo cut into it.  It reminded me of the one I already had—and I decided to buy it.  When I got home and compared the signatures on the bottom, sure enough—made by the same craftsman!

    skb13

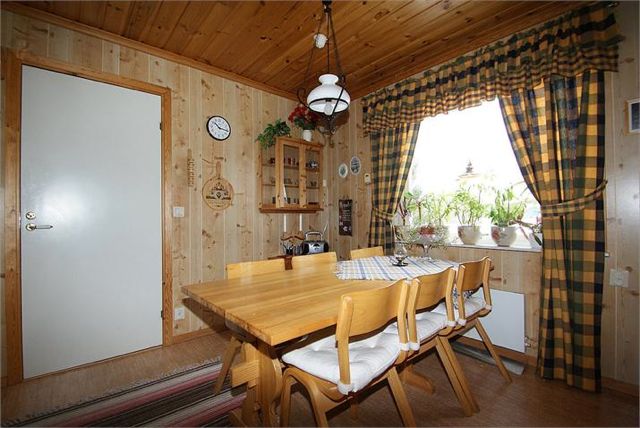
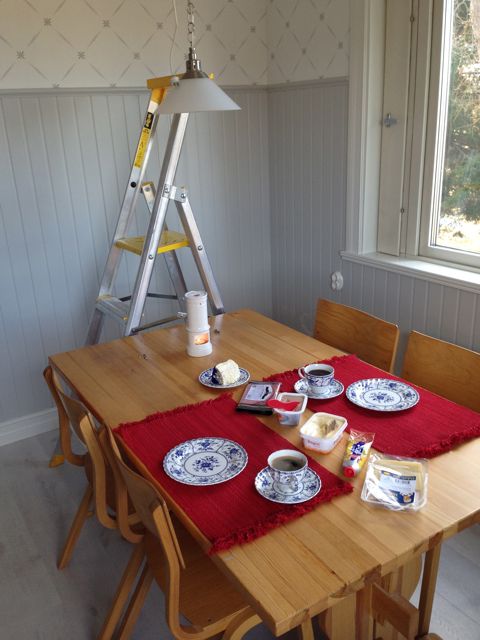
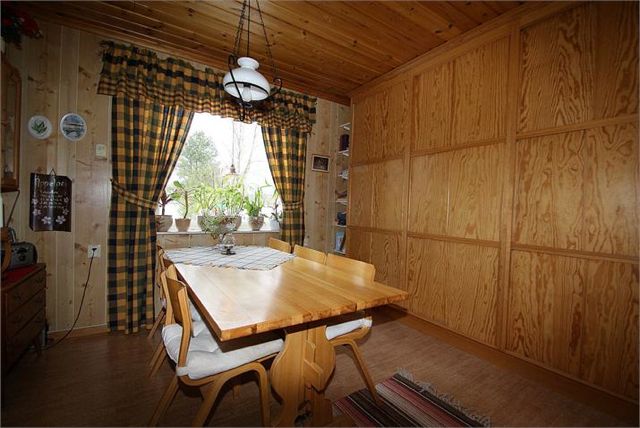
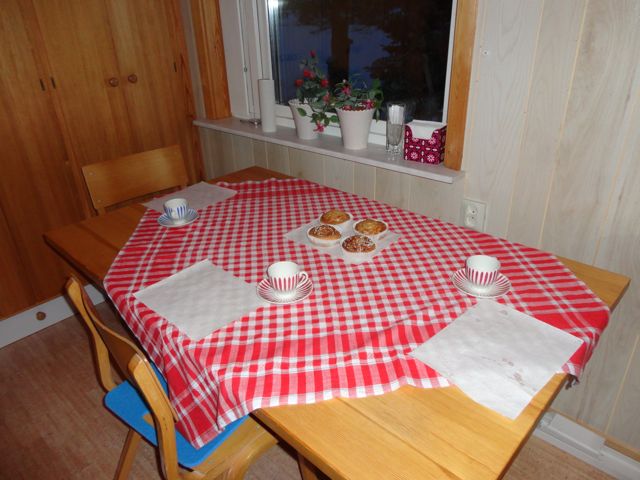
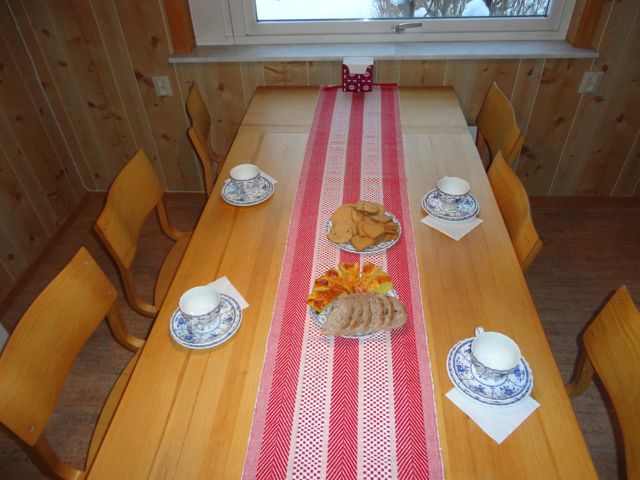
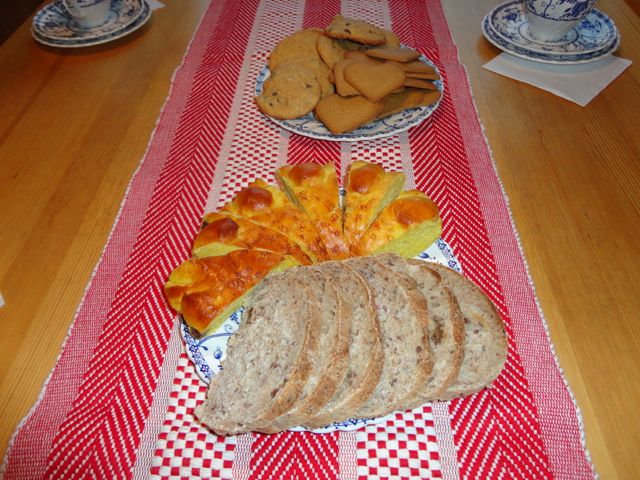
    Now you’ll find Skevdi Bread on our table for most meals!


    Tags:
  • 16Jun
    Categories: Everything! Comments: 2

    Last year a Swedish friend posted on Facebook that she was making syrup from the new growth on spruce trees.  I was intrigued, and asked for more details.  I got better than that.  Bob and I got an invitation for a visit and a taste!  Iris served it over ice cream and sent us home with a little in a jar.  It’s hard to describe the taste except to say it tastes like spruce!

    syrup on ice cream1

    I could hardly wait to try it this year.  And I was double blessed because I was home in in Washington in May when the spruce shoots were ready there, and in Sweden in June, when they were ready here!

    spruce syrup1

    Iris’ method was a no cook method.  You pack a jar with spruce tips…

    spruce syrup2

    …and add an equal amount of sugar.

    spruce syrup3

    This you put in a sunny windowsill and shake it everyday.  Leave it for a few weeks.  The result will be a beautiful, very light colored syrup.

    BUT, I’m not always so patient!  I did some research online and found you can cook your ingredients and have results much faster.

    It was fun but time consuming to gather the spruce tips.  The variety of spruce seems to be a little different in Long Beach than it is in Sweden.  In Sweden, a gently pull was all that was needed to remove the tips.  In Long Beach, I found it was easier to use a pair of kitchen shears, as they didn’t pull right off.

    spruce1

    Following the recipe I found online, the Long Beach batch used equal parts tips, sugar and water, and it took nearly five hours to cook it all down enough to make a syrup.  Below is the Long Beach batch.

    spruce syrup4

    In Sweden, I reduced the amount of water and the syrup cooked down much faster.  The result was a syrup that is a bit thicker and also darker, but I don’t know if that was the cooking method or the difference in the spruce.

    spruce3

    Here’s my recipe.

    SPRUCE TIP SYRUP

    4 cups water

    8 cups spruce tips

    8 cups sugar

    Note: It’s easy to adjust the amounts, depending on how much you pick.  Just figure one part water, two parts spruce tips, two parts sugar.

    Rinse spruce tips in a colander to remove any dust or dirt.

    Put tips and water in a large pan and bring to a boil.  Remove from heat and let set 24 hours.

    Strain liquid.  Discard spruce tips.

    Return liquid to the pan and bring to a boil.  Add sugar.

    Return to a boil, being careful not to let it boil over.  Reduce heat and simmer 1 – 3 hours.

    Enjoy!

    Besides eating the syrup on ice cream, we’ve eaten it on toast–like honey.  If you try it, let me know how you use it, too!

  • 23Dec

    I sneaked off to Sweden for two weeks in early December to get a little taste of Sweden at Christmas and do a little shopping.  My neighbors, Ronny, Anna, Maya and Elwira picked me up at the airport and we spent two days in Stockholm!

    swdc08

    It was late in the afternoon by the time we got there, but we went to Gamla Stan – the old city – and enjoyed the Christmas Market!

    Screen shot 2014-12-23 at 6.31.32 AM

    It was crowded but a great way to get some Christmas spirit.

    swdc63

    The next day we went to Skansen, the outdoor museum.  Our first stop was the old bakery.

    swdc05

    It smelled wonderful in there!

    swdc01

    The breads were beautiful.

    swdc02

    And the cookies delicious!

    swdc03

    Instead of gingerbread men, there were goats, pigs and hearts!

    swdc04

    There were dozens of booths selling items, including this one selling a thin, hard bread.  I brought some home with me!

    swdc07

    It was so fun checking out all of the wonderful offerings.

    Screen shot 2014-12-23 at 6.32.09 AM

    I would have liked to have it all!

    Screen shot 2014-12-23 at 6.32.34 AM

    When I got to our house in Nås, I discovered Anna had a surprise for me.

    swdc15

    She had decorated my front porch!

    swdc16

    After a few days in Nås, Anna and I went to Borlänge to do a little more retail therapy.

    swdc28

    I fell in love with the Christmas stars…

    swdc30

    …and bought one for our dining room window.

    swdc48

    Here’s some of the other loot that I bought that day!

    swdc29

    These tomte tidbit plates were just too cute to pass up.

    swdc31

    Before coming home, I got to go back to Stockholm with Sven-Eric.

    swdc75

    The windows of the NK Department Store were absolutely charming.

    swdc67

    They were animated and drew quite a crowd.

    swdc68

    Inside this giant tree hung from the ceiling.

    swdc69

    There were rows of tomtar.

    swdc71

    They were pretty hard to resist.

    swdc72

    Some of these little guys found their way to our grandchildren this Christmas!

    swdc74

    It was a great start to the holiday!

    Tags:
  • 10Sep
    Categories: Everything! Comments: 1

    It all started when our summer neighbor in Sweden, Karin, brought us a bottle of homemade rhubarb saft (pronounced “soft”).

    Saft1

    Saft is a fruit concentrate that you add to still or sparkling water for a refreshing summer drink.  It’s so delicious, I just had to try making some myself.  And Karin was nice enough to share the recipe.

    You will need:

    4 – 5 pounds rhubarb

    2 lemons

    Boiling water

    5 cups sugar

    2 pinches sodium benzoate

    2 pinches citric acid

    Wash the rhubarb and cut into 1/2″ slices. Place half in a heatproof pan or bowl.

    Saft3

    Wash the lemons and slice thinly.  Spread over the rhubarb in the pan.

    Saft4

    Add the rest of the rhubarb.

    Saft5

    Cover with boiling water.

    Saft6

    Cover with plastic or a lid and put in a cool place (our cellar worked great) for four days.

    Saft7

    Strain the fruit through a jelly bag or two layers of cheesecloth.  Let it run about 60 minutes.

    Saft2

    Add the sugar and boil for 20 minutes.  Let stand for five minutes and skim.

    Add preservatives.  Pour into warm bottles and seal.

    Saft8

    Pour about 2″ in the bottom of a glass.  Add flat or sparkling water.

    osd1

    Perfect on a hot day!


  • 20Apr

    I found an inexpensive airfare to Sweden in March and decided to take a quick trip over there to look for some furniture for our Swedish house, primarily a bed so we’d have someplace to sleep this summer.  Instead, with Torsten’s help and encouragement, we remodeled the dining room!

    Here’s what it looked like in the real estate listing photos.

    drm01

    The ceiling was natural knotty pine, the walls had plywood panelling….

    drm02

    …and there was a wall of built-ins along one side of the room.

    drm03

    It isn’t a very big room, so we removed the built-ins.  Since you can never have enough storage, we’ll find someplace else in the house to use them.

    drm04

    Then I pulled the moldings and plywood paneling off the walls.  The old glue was quite dry, so they came off easily, but it took a lot of sanding to get rid of the glue that was left on the particle board.

    drm05

    Now we had a bare wall where the cabinets used to be.

    drm06

    And we just happened to have an extra window that we took out of the kitchen when we put a smaller one in there.  So, Torsten cut a hole in the wall and, voila! A new view!

    drm08

    It even makes the outside of the house look better.

    drm13

    I put a coat of paint over the particle board to seal it and mudded the seams–all in preparation for wallpaper above the wainscoting.

    drm09

    Torsten nailed up the wainscoting…

    drm10

    …and I painted it the same gray as we used in the kitchen.

    drm11

    All of the moldings were painted white.

    drm17

    The ceiling got four coats of white paint.  This is my “three-ladder-method” for ceiling painting.  Luckily the room wasn’t any bigger, or we would have needed more ladders!

    drm12

    The old flooring was a yellowish brown sheet vinyl.  It didn’t look so great up against the gray Marmoleum in the kitchen.

    drm15

    The solution?  Winter Oak Pergo!  Here it is, laid out in the bedroom acclimating to the house.

    drm14

    I loved it from the minute we started putting it down.

    drm18

    What do you think?

    drm19

    Then my favorite part–wallpaper!

    drm20

    Torsten is a saint.  Not because he can do everything, but because picking a geometric wallpaper for an old house would make most people swear like a sailor!

    drm20

    He didn’t utter one cross word, and it looks terrific!

    drm21

    The previous owners left us the dining room table, so of course we had to have fika in the newly finished room.

    drm22

    There are still some things to do–like paint the table and the corner cabinet, and put up window coverings, but I think it looks pretty darned good for two weeks work!

    drm23

    And, oh, I did buy some furniture.  On the last day before I left, we went to Ikea and bought a bed and nightstands–and this cute rug for under the table!

    drm24

    I’ll be ready to host a dinner party before long!


  • 19Feb

    Once the cabinets were in, it was time to put up the wainscoting, which was painted a pale gray.

    kth02

    I had hoped to find a wallpaper that looked like stenciling, and I did!

    kth03

    Lucky for us, Torsten is a jack-of-all trades.

    kth04

    I couldn’t be happier with the way the wallpaper looks.

    kth07

    You can see how the wallpaper wraps around the room.

    kth15

    Corner and ceiling moldings complete the look nicely.

    kth06

    Our refrigerator didn’t arrive before we left, but Torsten sent a picture.  I love the shape and the color!  Now to find the perfect skinny cabinet to go next to it!

    fr1

    The window still needs molding, but I had to play with placing a Dala horse on the sill.

    kth05

    Or perhaps he looked better in one of the high cupboards?

    kth01

    I even had a few things to put inside the cupboards.

    kth08

    It’s really looking great, but there are a few things to do, like the hood and tile black splash.

    kth14

    I love the little details, like the porcelain knobs on the kitchen cabinets,

    kth12

    We used similar hardware on the door.

    22

    We chose a vintage style for the light switches and…

    kth09

    …outlets.

    kth10

    The faucet, too, has a vintage feel.

    kth11

    After weeks of construction, it was fun to put out the towels I’d made.

    twls1

    I had fun adapting some Aunt Martha patterns.

    twls2

    I added a Dala horse to each one.

    twls3

    Even though they are a bit corny!

    twls4


  • 14Feb

    While we only took a day and a half off from working on the house while we were in Sweden, don’t think it was all work and no food!  From the very first day, we made sure there was coffee and a little something to eat, even if the atmosphere left something to be desired.  In Swedish, a coffee break is called a fika (FEE-kah).  And in Sweden, fika is taken very seriously.

    fd07

    Luckily, Bertil and Sonja left us a dining room table.

    tbl1

    Berit and Gunnar came often to help—and bring fika!

    fd08

    And our neighbor, Byns Mats and Annacari welcomed us with a pensionärer kaka — a special and delicious cake.  Good thing I’d brought linens!

    fd09

    For awhile we had to move the table into the bedroom, but that didn’t mean we skipped fika!

    fd18

    My Aunt Evelyn was responsible for keeping my family in contact with our Swedish relatives, and I thought it fitting that I bring her china with me to our Swedish house.

    dsh1

    I used it for the first time when Sven-Eric and Anna came for fika.

    fd20

    It was very special.

    fd21

    Fika isn’t always something sweet.  Sometimes it’s a sandwich.   Don’t you love a country whose cheese puffs are shaped like hearts!?!

    fd16

    And if we had Coke instead of coffee, there was no problem keeping it cold!

    fd17

    One day, when I had to drive to Vansbro to the hardware store, I stopped at the Vansbro Konditori for semlor – wonderful buns filled with almond paste and whipped cream!

    fd11

    Sometimes we brought a Thermos of coffee from Torsten’s, sometimes we got coffee at the mini-mart, and sometimes family or friends brought coffee.  Luckily, a few days before we left, we got our electric stove and were finally able to boil our own coffee!

    fd19

    So, as you can see, we worked hard, but, like good Swedes, we didn’t skip fika!


  • 08Feb

    At the end of December, we returned to Sweden with the plan to get the new kitchen done in just under a month!  We were down to bare walls and floor.  My first job, hammering in all of the nails on the floor to be sure everything was smooth!

    kch01

    I mentioned in an earlier post that the existing window came down too low to allow a counter under it, so we bought a new window.

    kch02

    You can see how much lower the other one was.  You can also see that it’s very dark out!  Sunrise was at 9:30 and sunset at 3:00!

    kch03

    We covered the walls with new plasterboard and decided to paint the ceiling white.  Bob suited up and put on four coats of paint–two of oil based sealer and two latex.

    kch04

    In the meantime, I painted the panels for the wainscoting a pale gray.

    kch06

    I had chosen linoleum tiles for the floor, mostly gray with a few red.

    kch08

    Torsten and Bob did a good job of interpreting the design I sketched out on a piece of plasterboard!

    kch09

    Ever since we’d bought the house in September, I’d been planning the kitchen on Ikea’s nifty kitchen planner.

    Screen shot 2013-12-07 at 9.41.22 AM

    So off we went to Ikea, plan in hand.

    ikea1

    Bob and Torsten looked over installation brochures while we waited for assistance.

    kch12

    Here’s our kitchen – in boxes!

    kch13

    It took two rooms to put them all!

    kch14

    And then the fun began!  Torsten and Gunnar figuring it out.

    kch15

    Is it all going to fit?

    kch16

    The Ikea system uses rails that are mounted on the wall, and the cabinets hang from them.

    kch17

    You have to love the Swedish instructions, because they tell you to take a “fika” (coffee break) after getting the rails up!

    kch22

    We did as told, then the guys started hanging the cabinets.

    kch18

    Let’s see, put tab “A” in slot “B”.

    kch24

    Like all old houses, are walls weren’t exactly straight, but with some tweaking, everything went up.

    kch23

    It was exciting when the doors started going on.

    kch25

    I couldn’t resist putting a Dala horse in one of the cabinets!

    kch26

    The new stove fit perfectly between the cabinets and the wood stove!

    kch27

    Once the cabinets were in, the wainscoting was next.

    kch28

    A little electrical work….

    kch29

    ….and the proud installers!

    kch30

    Next, the finishing touches!

  • 07Feb

    I think at one time, every Swedish house had a vedspis – wood stove.  Often they had one in the kitchen and one in an upstairs apartment.  Many houses still have them, but many have been removed.  Our house had one originally, but it had been replaced by the freestanding fireplace which we removed when we dismantled the old kitchen.  They are quite different than wood cookstoves in America.  I decided right away that I wanted one, and when I mentioned to one of my Swedish relatives, Sven-Eric, that I was going to look for a renovated one, he told me he had two in his barn, and I was welcome to take one!  I learned this on my way to the airport, so I didn’t get a chance to look at them.  Luckily, Torsten took charge and uncovered them.  One was cracked, but one was in good shape.  Well, relatively speaking!

    vdsps01

    Before we returned to Sweden, Torsten and his mason friend, Mikael, got the vedspis put in place for us.  First they had to shovel a path to the barn where it was stored.

    zsn1

    These wood stoves aren’t freestanding, so a brick base had to be built.

    vdsps03

    They could see where the original vedspis had been.

    vdsps02

    This part is for wood storage.

    vdsps04

    It is cast iron like the stove and has two doors.

    vdsps05

    Once the base was built, the vedspis was set on top.  Nice and level!  The top left door is the firebox, the one below is the clean-out and the big one is the oven door, with a built-in thermometer!

    vdsps06

    More bricks to surround it.

    vdsps07

    The right side is complete.

    vdsps08

    Mikael is leaving a space for a water cistern next to the firebox.

    vdsps09

    Then the bricks get covered with a special cement.

    vdsps10

    It’s beautiful!  If you compare this photo to the first one, you can see that Torsten did a lot of work removing old rust and, undoubtedly, years of grime!

    vdsps11

    Here’s the wood storage with the doors on.

    vdsps13

    The stove was in relatively good shape, leading Mikael and Torsten to speculate that it was in an upstairs apartment and not used too much.

    vdsps12

    You can see the layers of paint on the old chimney–and evidence of a chimney fire!

    vdsps14

    We had to grind all of the old paint off so it can be re-cemented.  Ugh.  It was a nasty job.

    vdsps15

    We found an old copper cistern on an online auction site.

    vdsps17

    The heat from the firebox heated the water, so you always had hot water to wash your dishes!

    vdsps18

    Did you know there is really something called Stove Black—and it does just what the name says?

    vdsps19

    You can see what a difference it made!

    vdsps20

    The cement will be painted white, as will the hood which will be built over this and the electric stove.

    vdsps21

    And it makes the kitchen so cozy when you have a fire!

    vdsps16

    Thank you, Sven-Eric, Torsten and Mikael!


  • 06Feb

    When we bought our house in Sweden in September, we knew the first thing we wanted to do was remodel the kitchen.

    It had a large, freestanding fireplace that kind of blocked the door as you entered.

    ktde01

    We knew it had to go!  Let me tell you, it was one heavy dog!

    fp1

    There was a lovely window that let in a lot of light, but it was so big, that there was no room to put a counter under it.

    ktde02

    And the sink and stove were right next to each other.  I thought it would be nice move the sink under the window.

    ktde03

    There was an island and two floor to ceiling cabinets on the left in this photo….

    ktde04

    …one of which held the oven.

    ktde05

    And on the opposite wall was a huge refrigerator and huge freezer!  It was all quite cramped.

    ktde06

    We decided to take it all out!

    ktde07

    Right down to the bare walls.

    ktde08

    So that’s what we did!

    ktde09

    It’s amazing what you uncover in an old house, like an old doorway, layers of old wallpaper and signs of a chimney fire!

    ktde10

    I loved looking at the old wallpapers, and tried to preserve a little of each.  This is the oldest and original, from 1930 when the house was built.

    ktde11

    This one, which has orange in it, was next.  It almost looks like old linoleum.

    ktde12

    There was this rather plain basket weave.

    ktde13

    My color scheme for the new kitchen is white, gray and red, so imagine my delight when I found this one in those very colors!

    ktde14

    Tearing out a kitchen is a big job–and we did it in two days–then headed back home.

    ktde15

    Of course we were anxious to get back and start on the new kitchen, but that had to wait.