• 14Feb
    Categories: quilting Comments: 6

    I’m so excited!  I just discovered an amazing way to make scrappy Four-Patch blocks lickety-split!  All of the blocks end up different, and you really only have to measure once!

    You start with squares of any size.  That’s right, it doesn’t matter what size your squares are!  For this tutorial I used 5″ squares, because I had a little packet of them.

    Place two squares, right sides together.  I tried to match a dark with a light, but some were medium, so I just let them pair up randomly.

    Sew down BOTH sides.  I fed a lot of pairs through my machine at one time, doing first one side, then doing the other side of the stack.

    Now slice them in half through the middle.  Since my squares were 5″, I sliced at 2-1/2″ but, remember, any size square will work, just find half, and slice!

    Open the pieces up and press toward the dark–if you have a dark!

    Do this will all your squares.

    Now sew them together as shown below…

    …all of them!

    Once you have them all sewn together, slice a 2-1/2″ piece off one end.  Set this two-patch aside.  You only have to measure this first one.  After this, the magic begins!

    Flip the short piece over…

    …and use it as a guide for your next cut!

    There’s your first Four-Patch!

    See!  Now just keep going, flipping and cutting, until you get to the end.  At the end, you’ll have a two-patch, which you can sew together with your first cut piece.

    From my charm pack, I was able to make this little quilt.  I thought the brown in there added a little interest.

    Try this method and let me know what you think!

    Tags:
  • 15Jan

    Last month the Longview, Washington library had a red and white quilt show.

    It meant a snowy, 150 mile round trip drive from here, but I’m so glad we went.

    I’ll just be quiet and let you enjoy the show!


  • 21Nov

    In June I posted a tutorial for String Piecing for A Quilt Block A Day.

    Finally, I’ve finished 100 blocks.  Now I just have to decide how to put them together!

    My first thought was to set them in a Chevron pattern.

    It didn’t look as good on the design wall as it did in my mind, so I went more traditional, with X’s and O’s.

    Hmmm……I’m liking that, but I just had to try one more setting.  I call this Exploding Diamonds.

    Oh, wait!  Just one more…….  How about if I do Offset Diamonds!?!

    Oh, too many decisions.  What do you think?  Leave me a comment and let me know your favorite setting.  I’ll enter your name in a drawing to be held November 28.  The winner will win 100 fabric strips to get you started on your own string pieced quilt!

  • 20Nov
    Here’s the last batch of photos from the retreat!
    Sarah made this wonderful quilt.
    Nana Pat did a pretty Garden Maze quilt.
    Here’s Sue’s elegant table runner.
    Pearl made this amazing Wedding Ring variation…
    …as well as these spinning stars.
    Here’s Judy’s fall table runner.
    Penny made this “plus” quilt from batiks.
    Kathy’s ready for Christmas!
    And after working on this for a couple of retreats, she’s finally finished it!  Congratulations, Kathy!
    Barbara was making Halloween pot holders in a spider web pattern.
    Anna’s beautiful Hunter’s Star.
    I love scrappy quilts, like this on of  Sharon’s.
    Pat T. did this fabulous Bargello.
    Mary made a batik strippy quilt.
    I love how Mary W. added the circles to this strippy quilt.
    Karen V. also made an elegant table runner.
    And several of us had fun making three baby quilts from three yards of fabric.
    This is a great technique for fast charity quilts.
    The pattern is from Anita Grossman.
    There’s a technique for folding your fabrics and making just two cuts, then you’re ready to sew!
    The pattern can be found here.
    I hope you’ll try it!
    Tags:
  • 14Nov

    I’m finally finding time to post more photos from our fall retreat!

    Lois made this great “guy” quilt.

    Laraine did airplanes.

    This quilt is Becky’s.  What a striking way to set rail fence blocks!

    She also made this crimson and gray quilt for a WSU fan!

    Sylvia showed off her embroidery skills.

    Marsha pieced this broken star and set the blocks in a very interesting way!

    Karen J. put us all to shame.  She cut out, pieced AND quilted this at the retreat!

    Oh, and she worked on this project and a couple of others as well!

    I really tried to bring this quilt home with me.  Kirstie made it for her granddaughter with my orange square dance fabric.  Her granddaughter’s favorite color is orange, and we have the same birthday!

    Tracey had intended to use green as her accent color in this quilt, but she forgot to bring it.  Luckily I’d brought some solid red, and in the end, we all loved the choice!

    Mary made this lovely, pastel quilt.

    The bright yellow in Sarah’s quilt really makes it pop.

    Bonnie and her husband specialize in floor coverings with quilt patterns in them!

    Julie brought this great family treasure.  It’s tied at the corners of the blocks.

    She also made this London pillowcase to commemorate the summer Olympics.

    Connie had some Day of the Dead fabric that she didn’t really like, so she cut it up and did a string quilt, just like we were doing at A Quilt Block A Day.

    Sandy’s group had done cowboy boot blocks, and she was putting them all together.

    There are more to come, and I hope I get them up in a more timely fashion!

    Tags:
  • 08Nov
    Categories: quilting Comments: 4

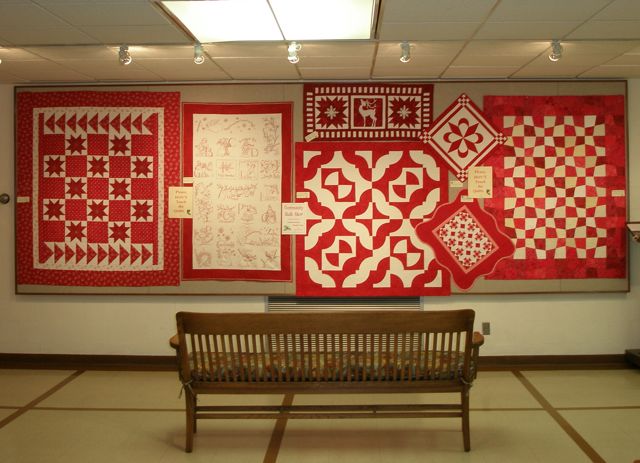
    My friend, Melinda, was just over in Walla Walla and went to the quilt show at the museum there.  Today she shared slides from the show, and I just had to post them.

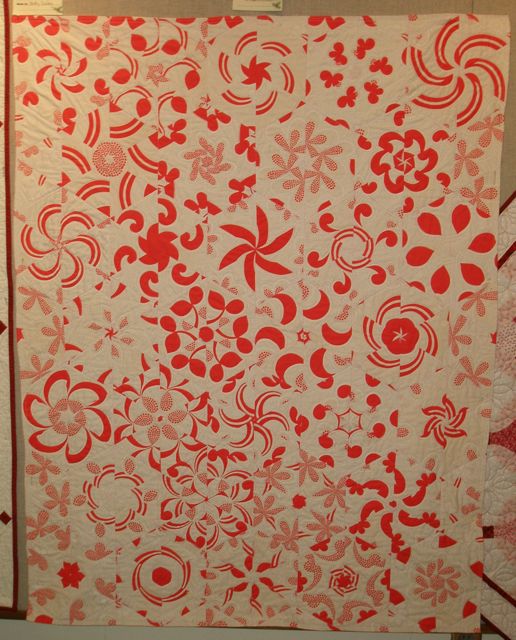
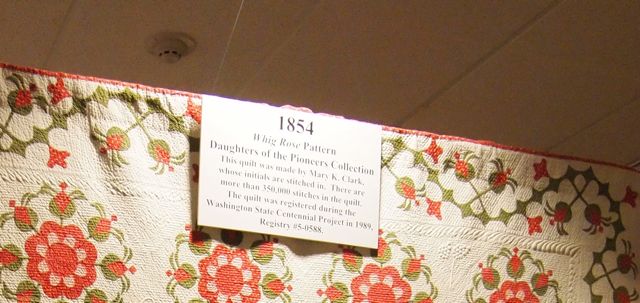
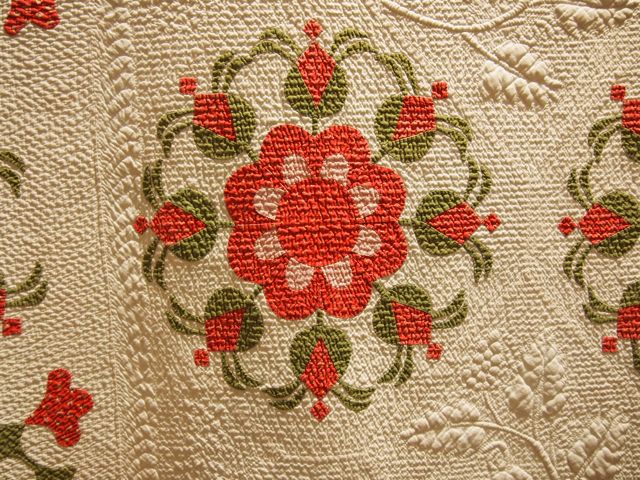
    This Whig Rose was definitely the star of the show.  Amazingly, they have the provenance of the quilt.  It was made in 1854 by Mary K. Clark.

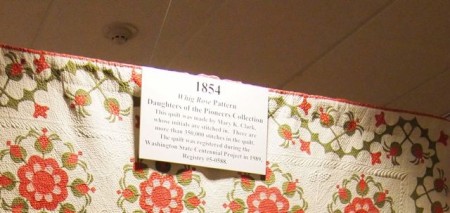
    The quilting is incredible.  There are over 350,000 stitches in it!

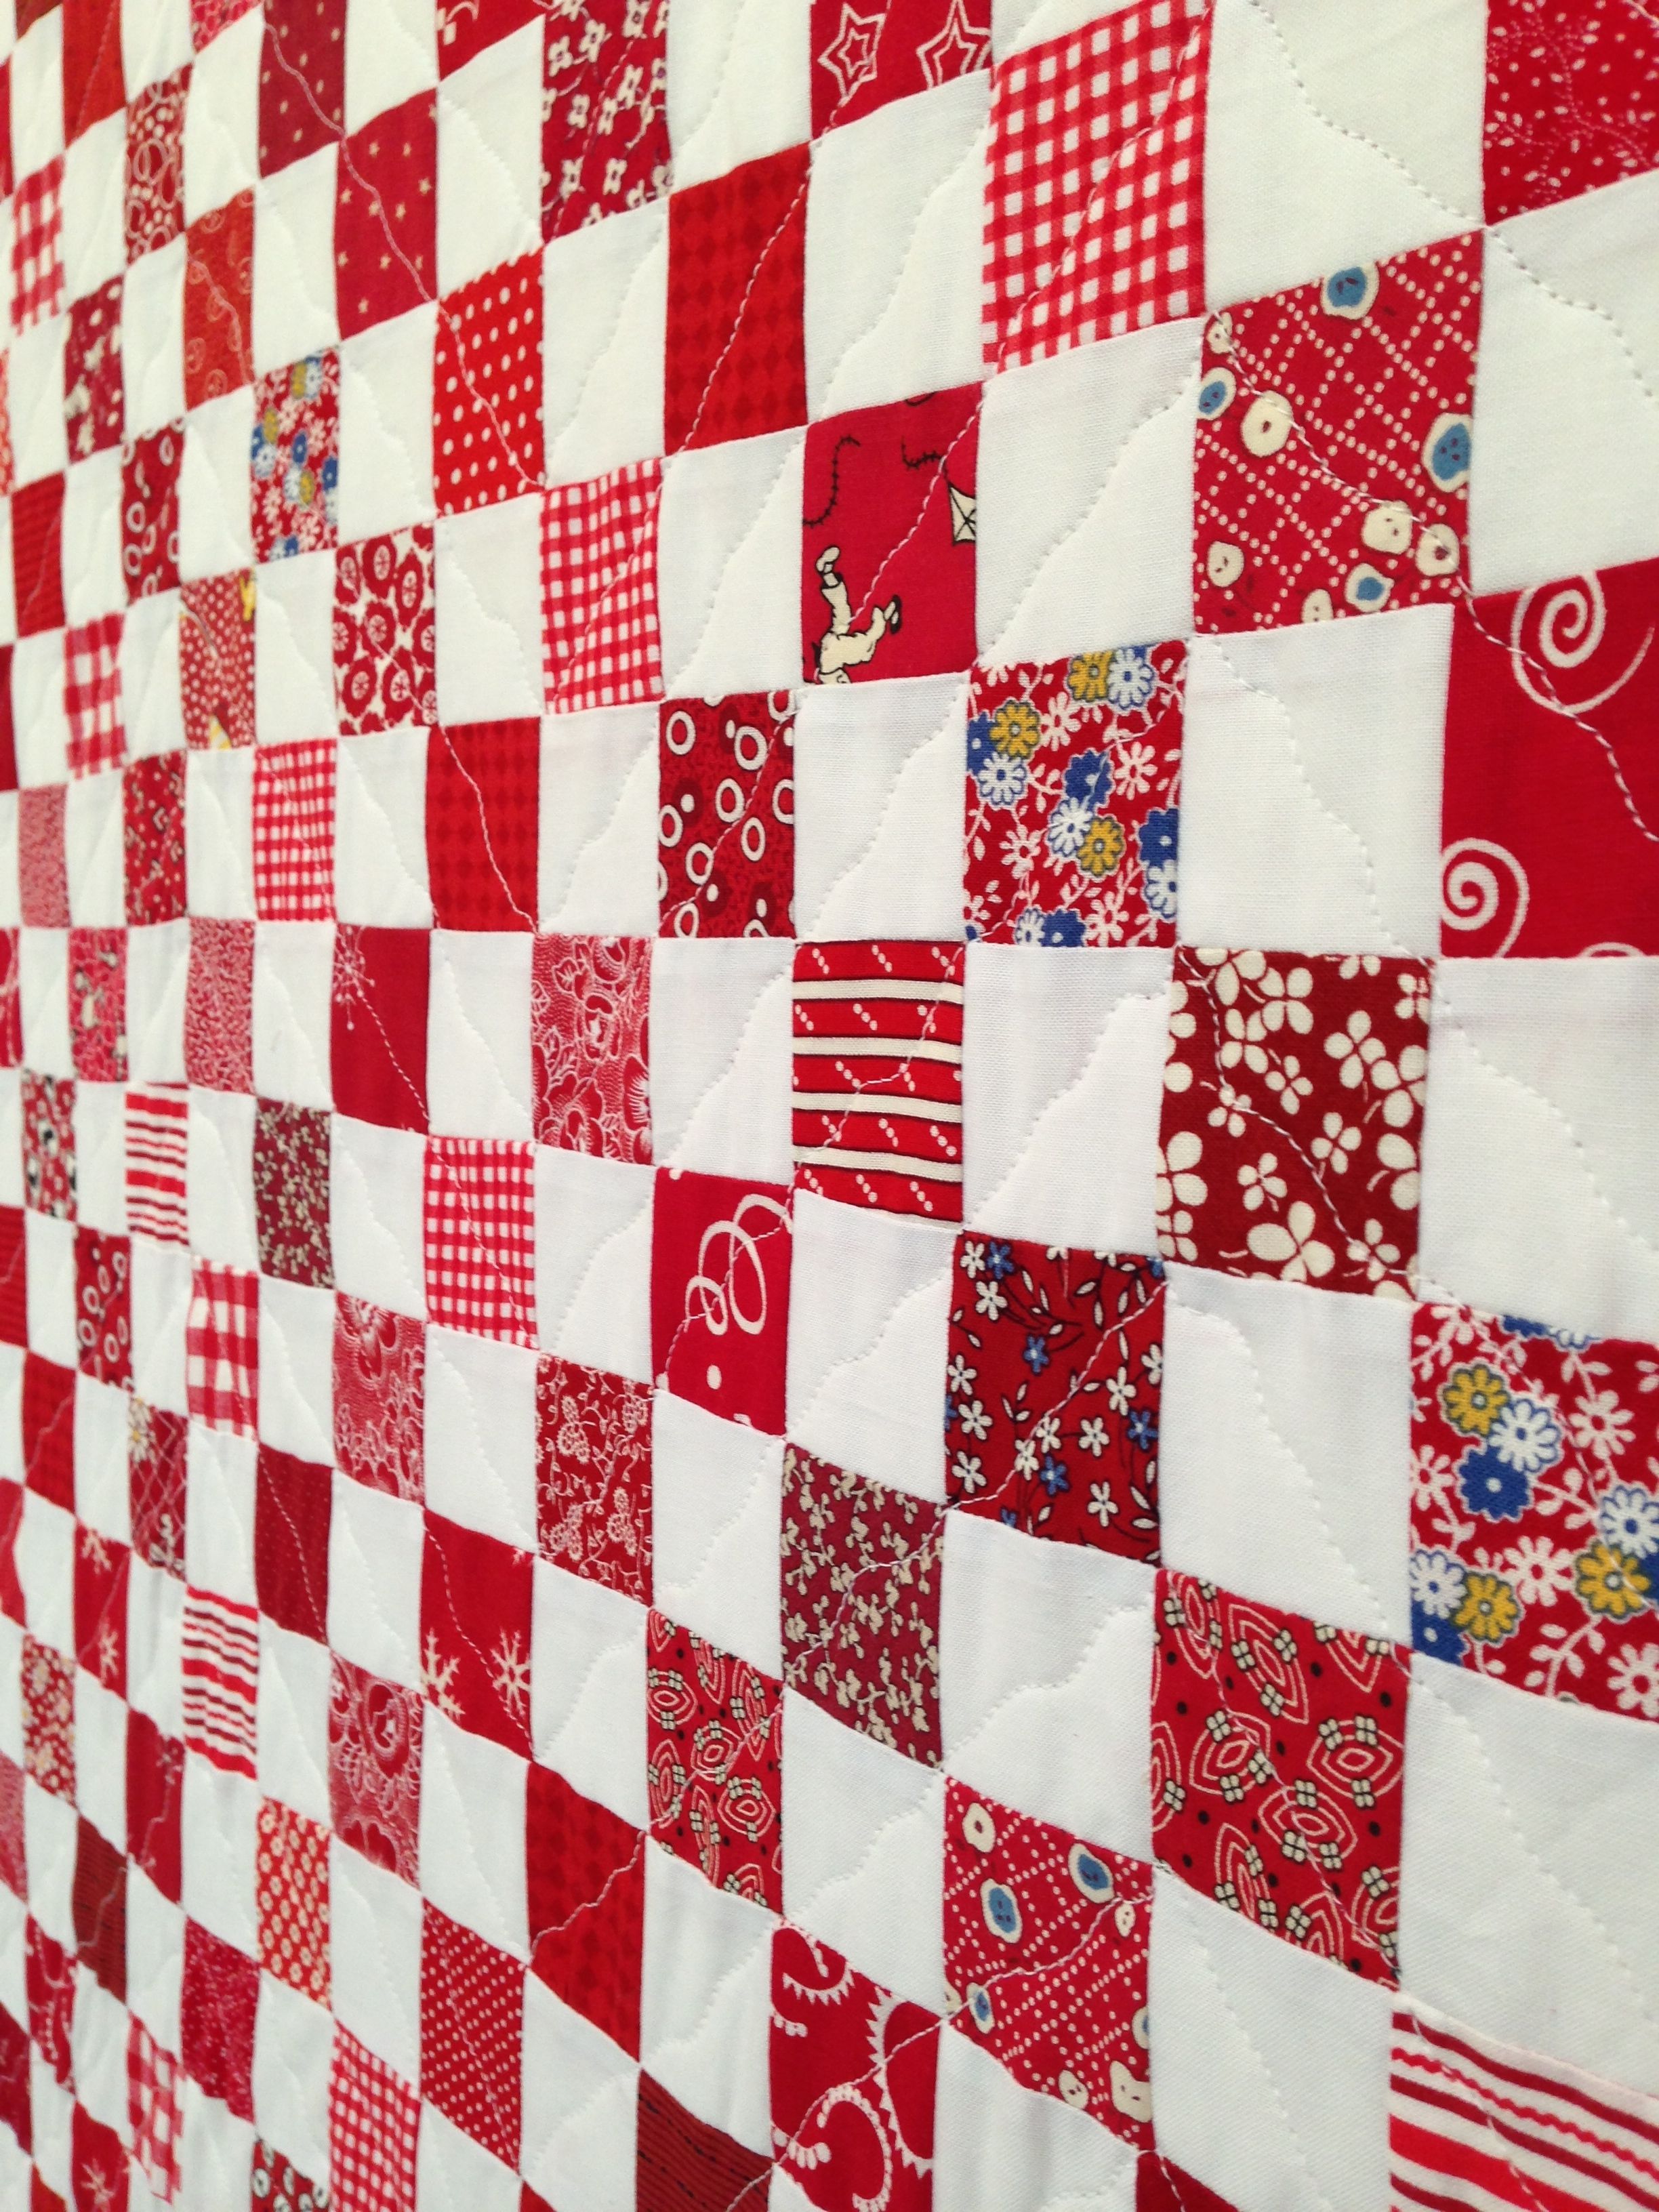
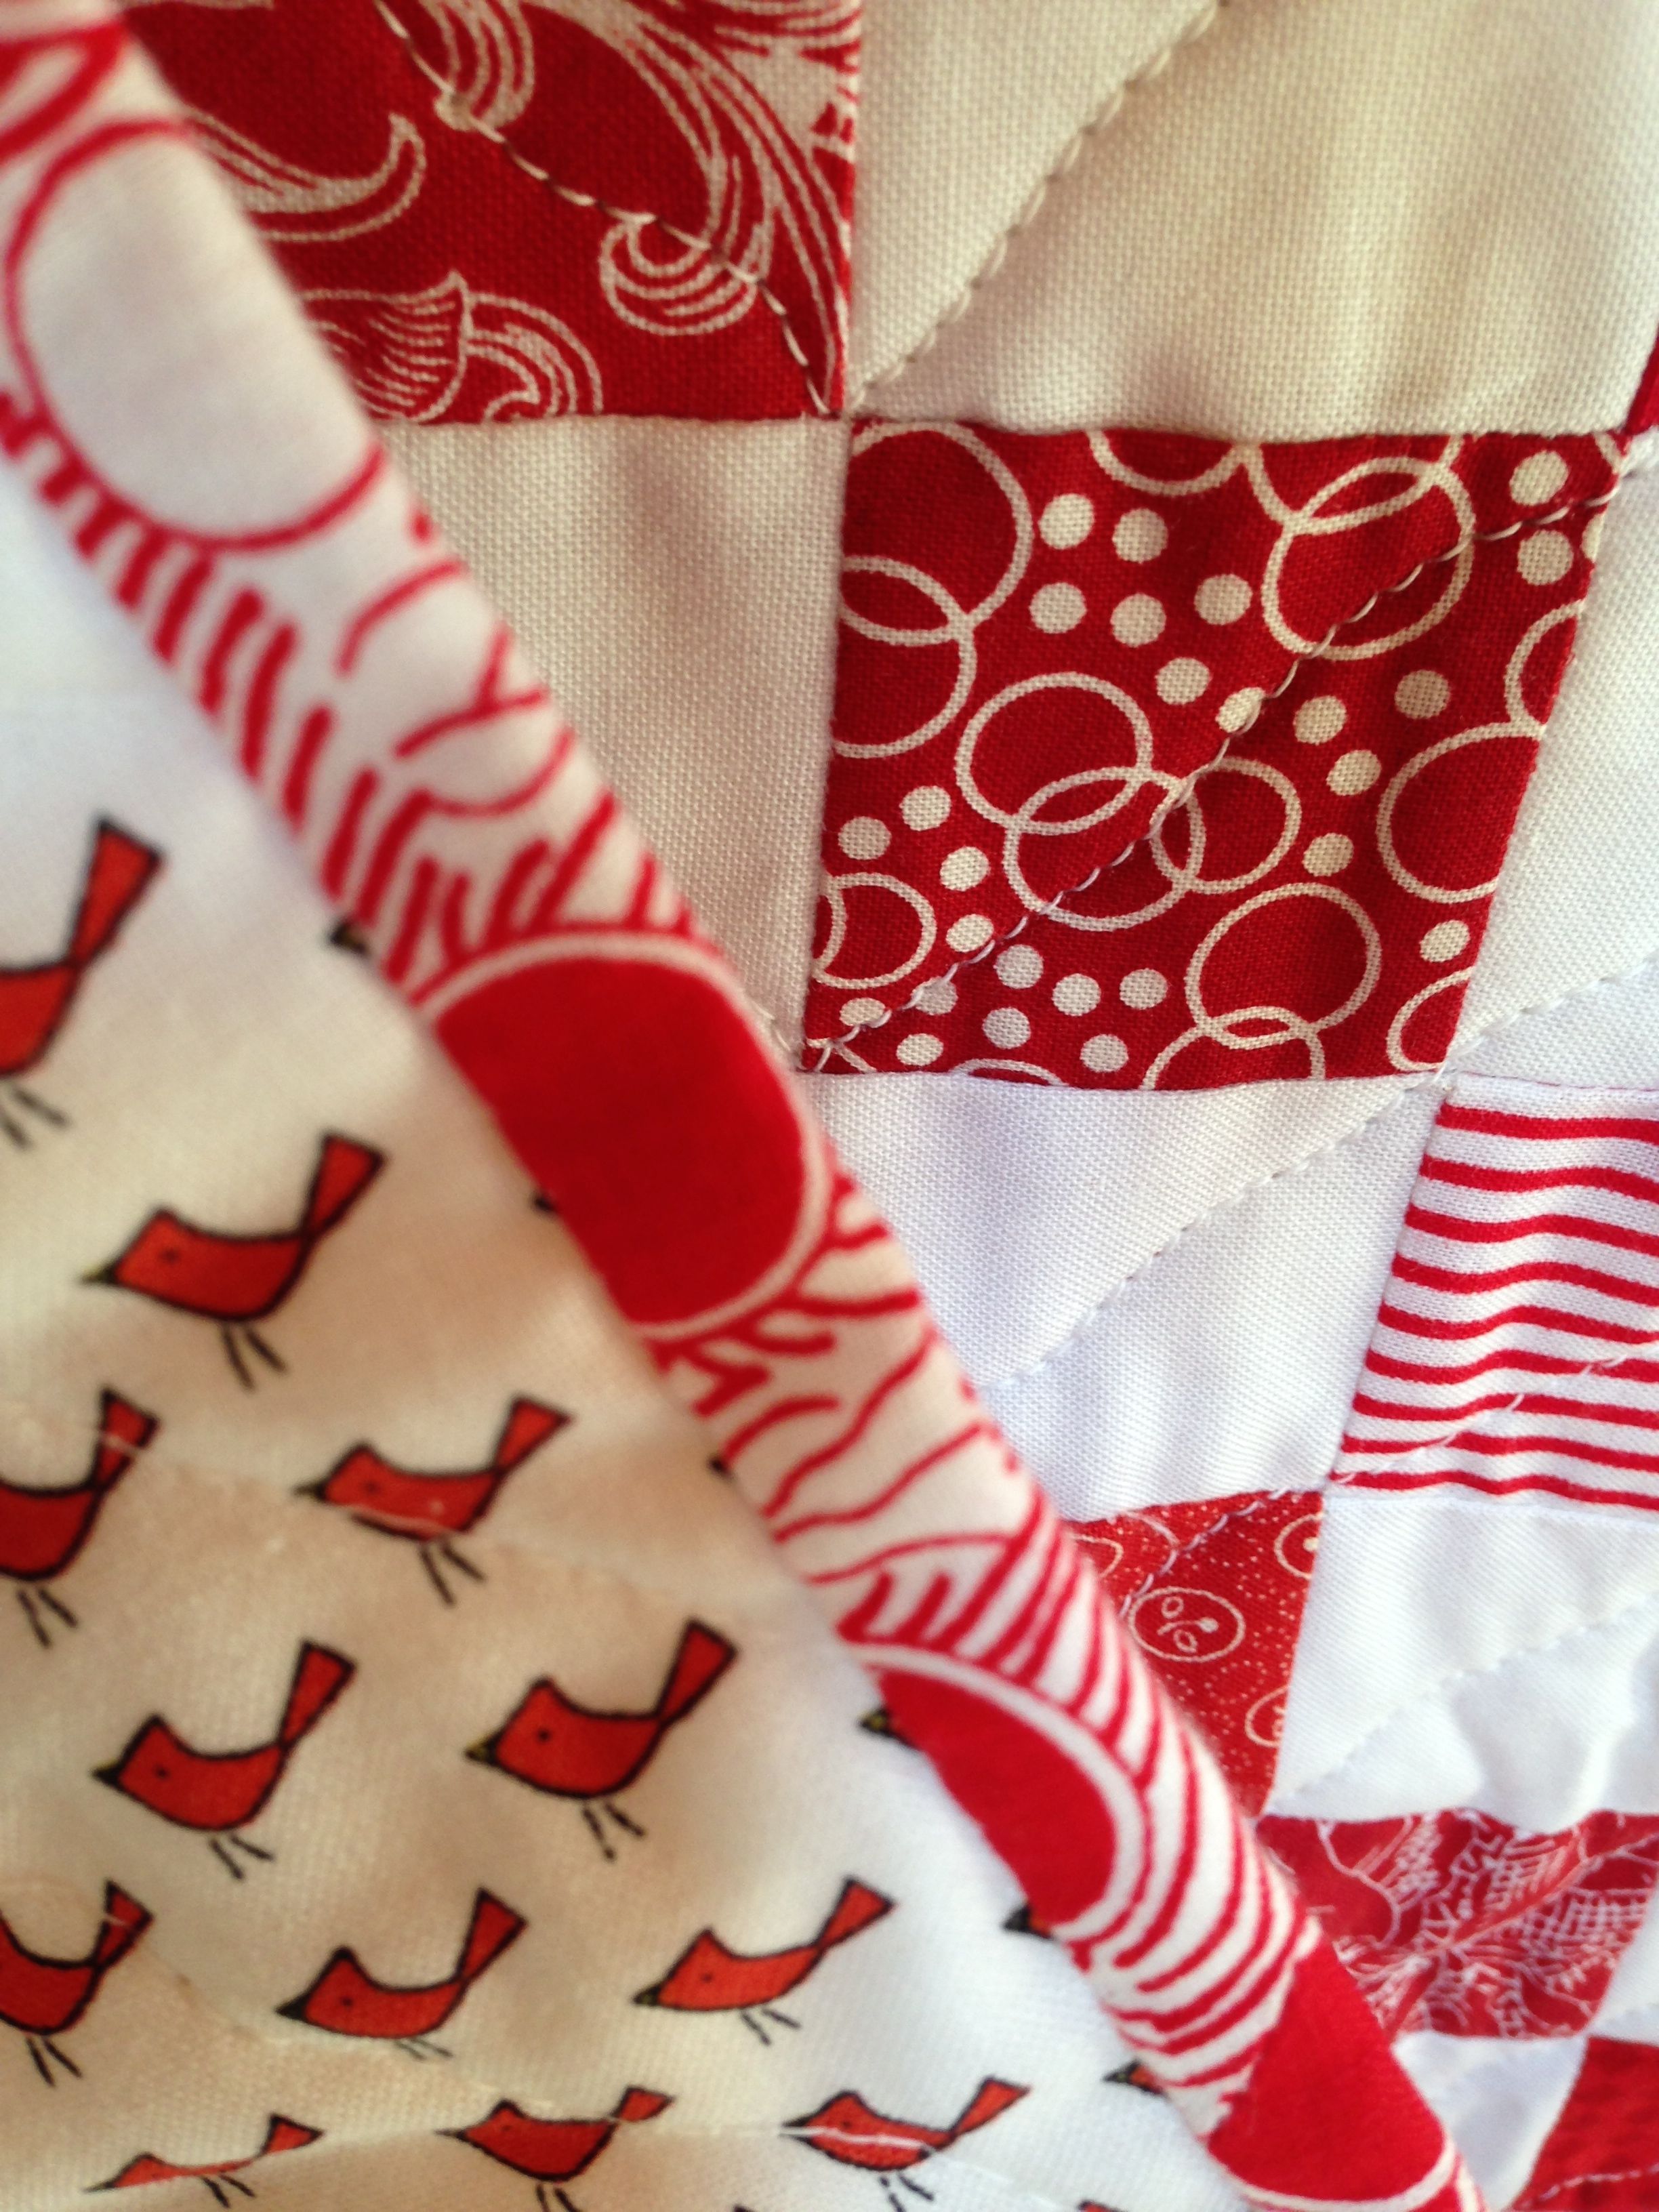
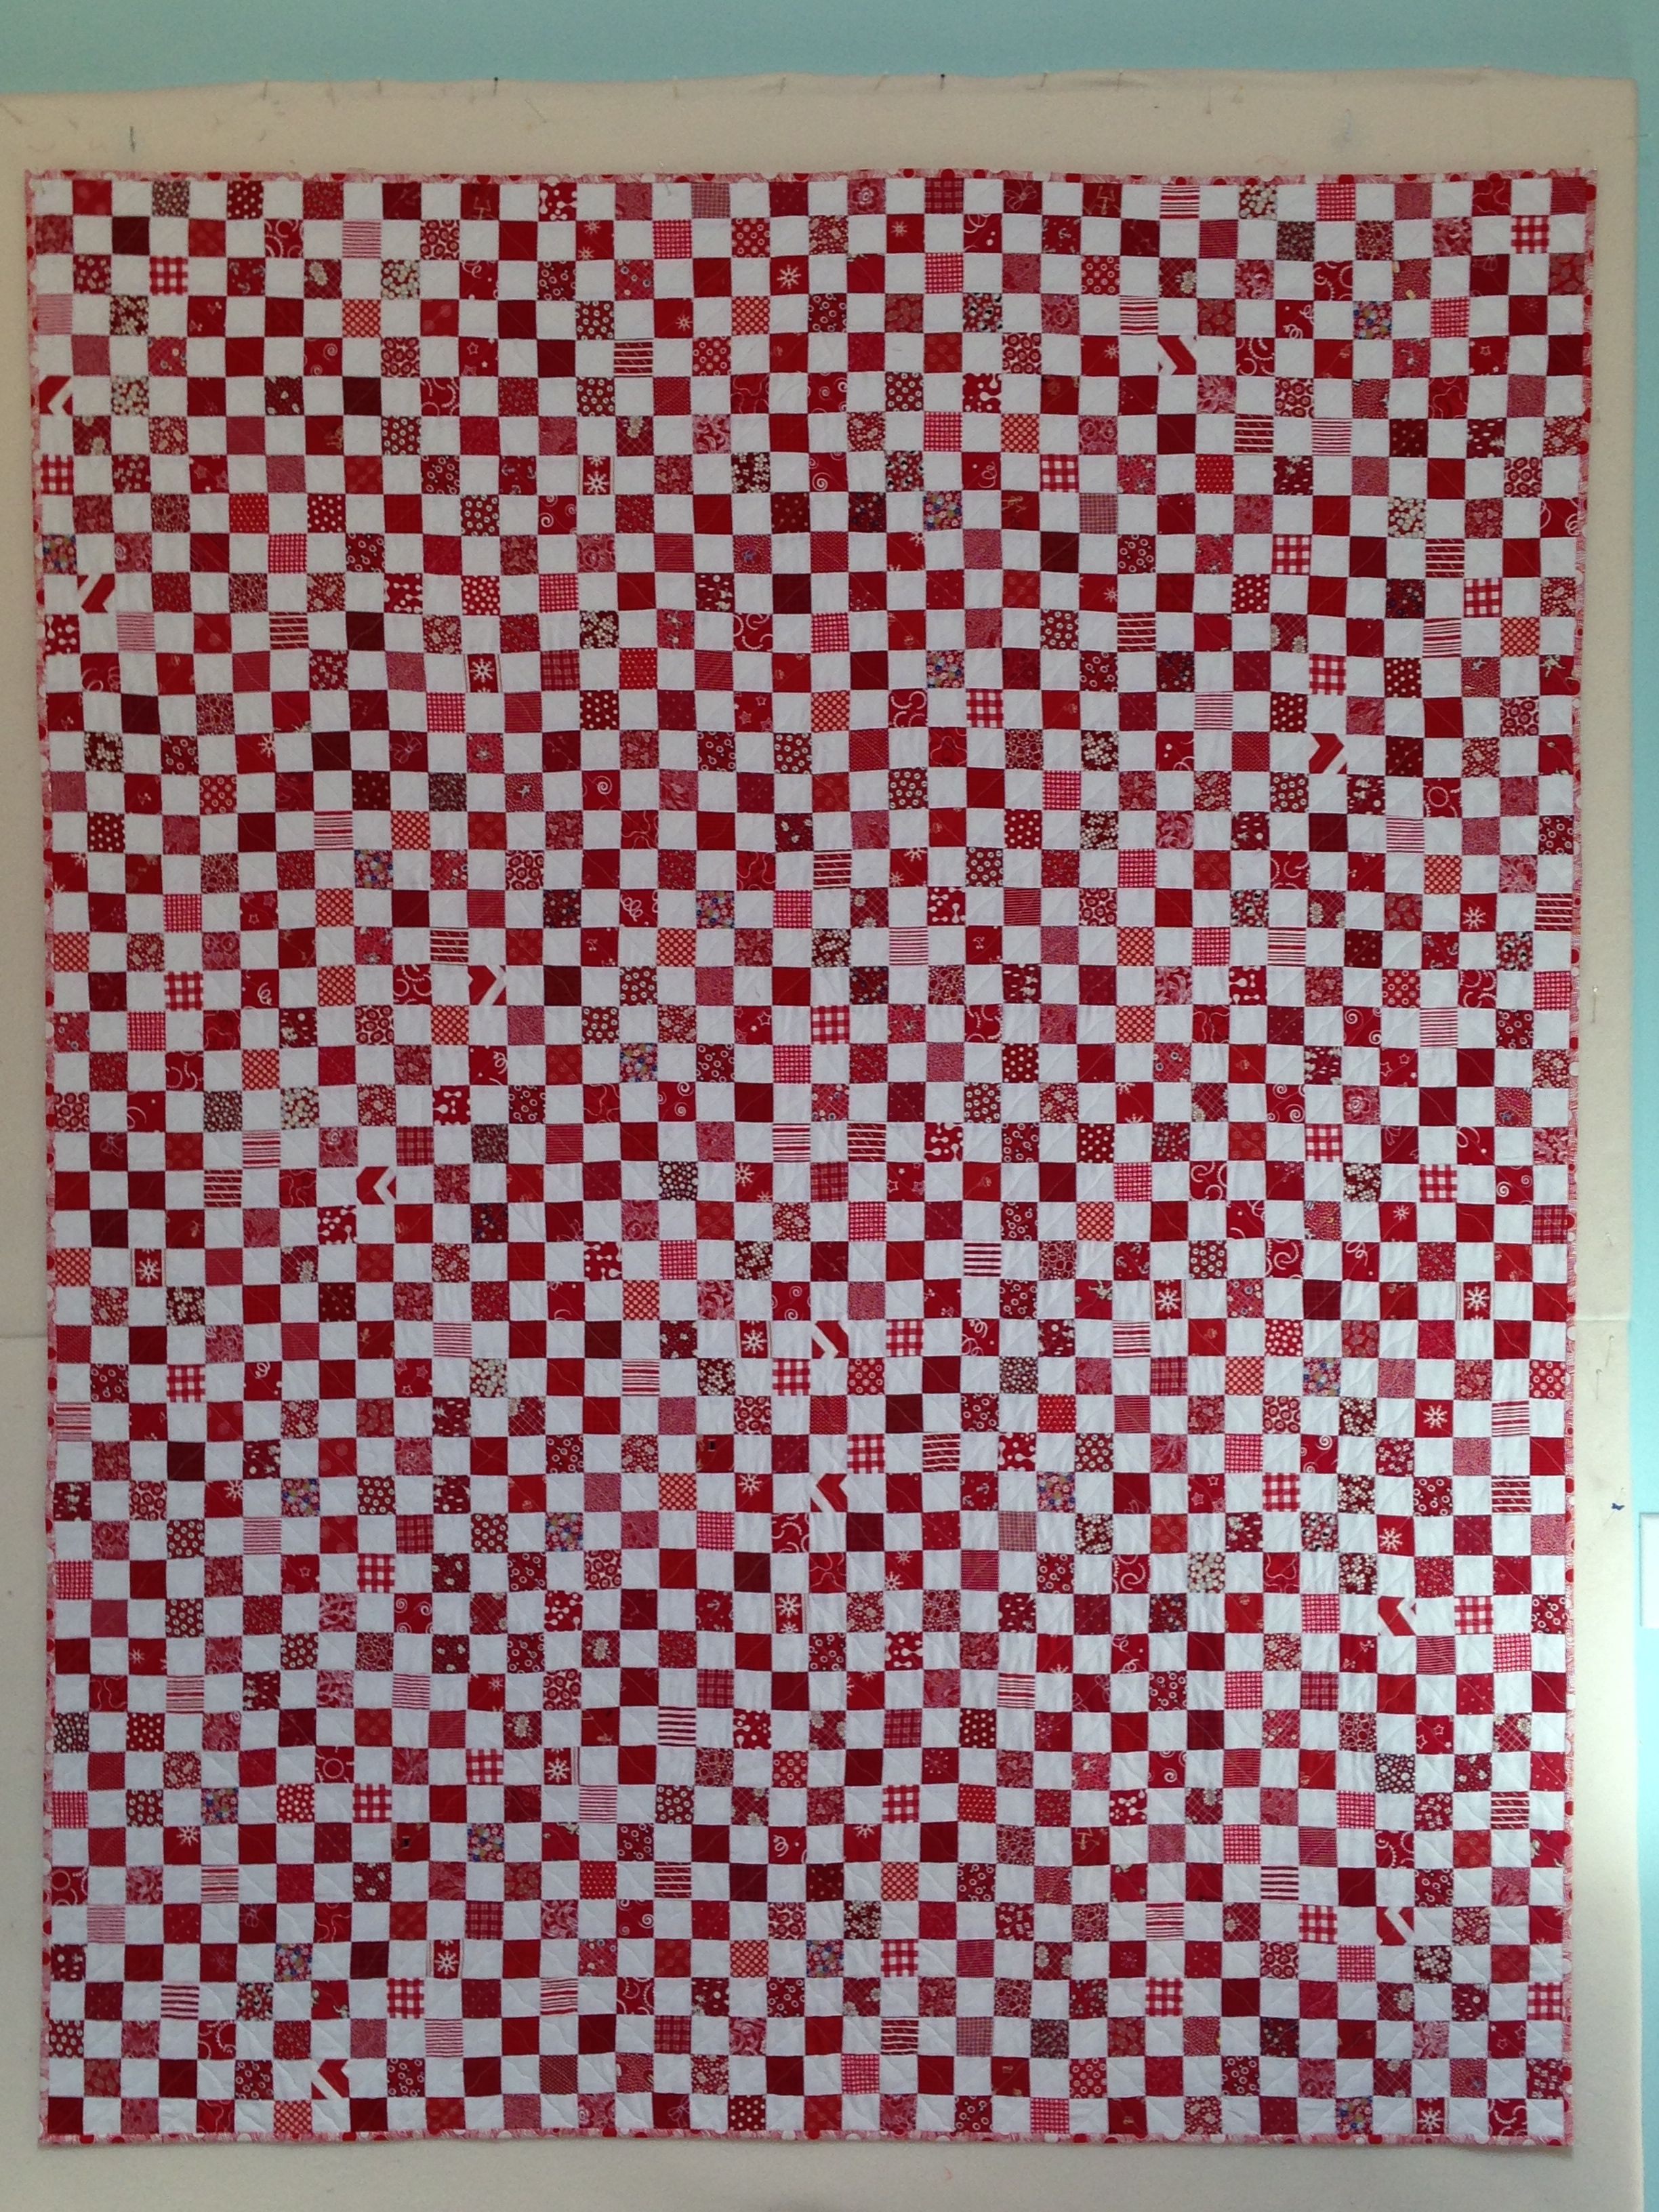
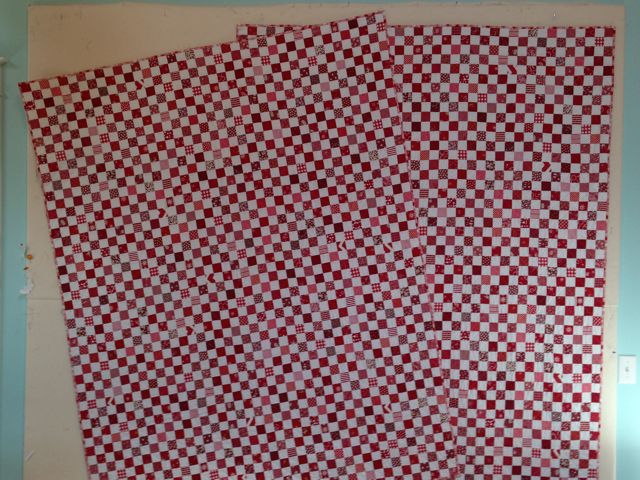
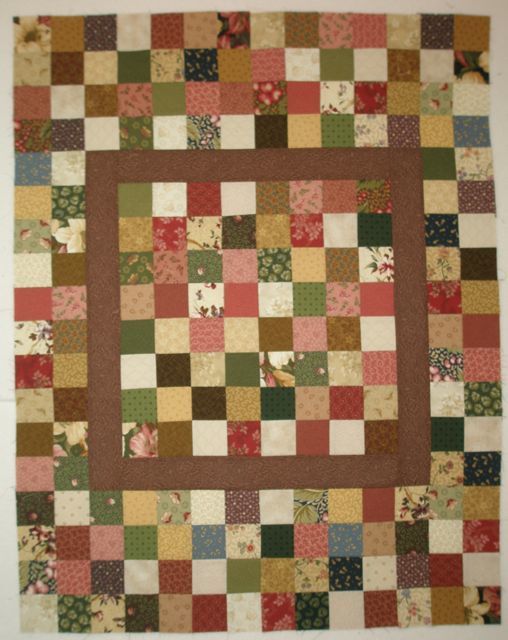
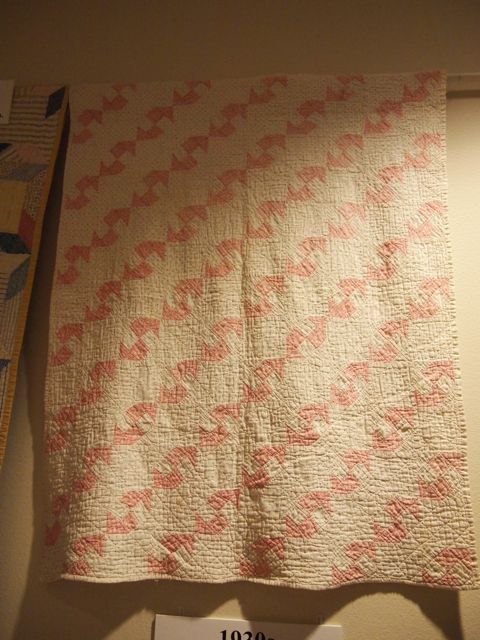
    This Enhanced Four Patch is a sweet quilt.  It’s not a design you see very often.  From the 1930′s.

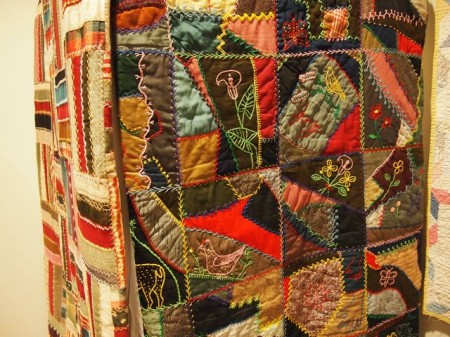
    This is a really fine example of a Victorian era Crazy Quilt.  It has an amazing variety of stitches!

    The example below isn’t quite a crazy quilt, but it is a great study of embroidery stitches as well.  From 1907.

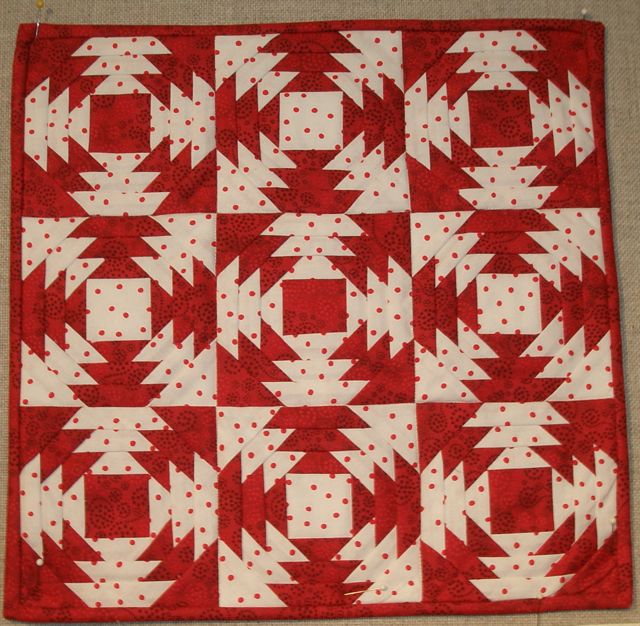
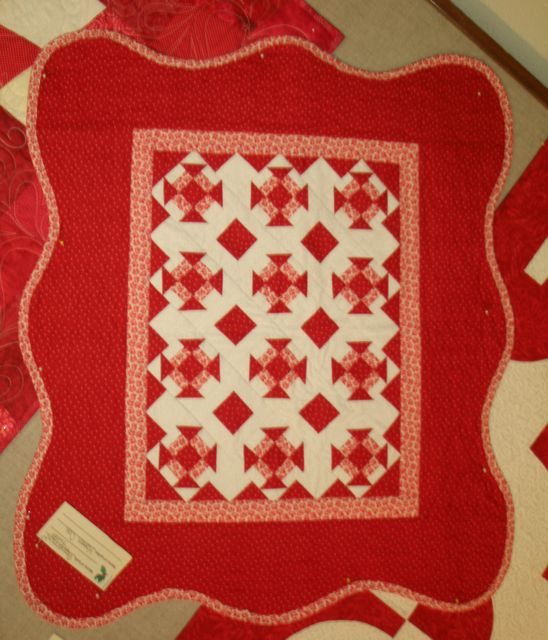
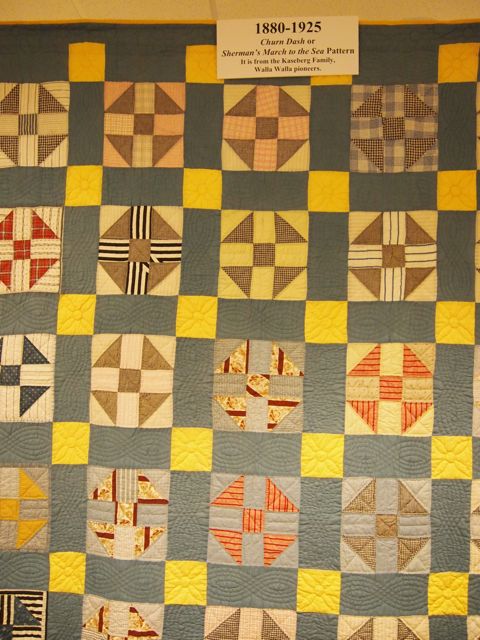
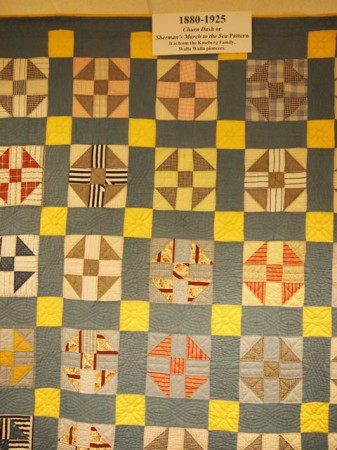
    Here’s a Churn Dash.  I see the label also refers to this pattern as Sherman’s March To The Sea.  I hadn’t heard that reference before, but I love it!  Quilt names say a lot about the what was happening in people’s lives.

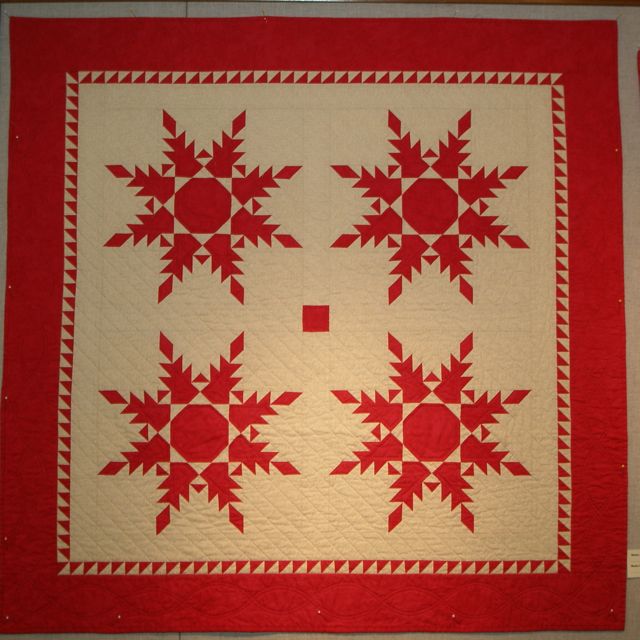
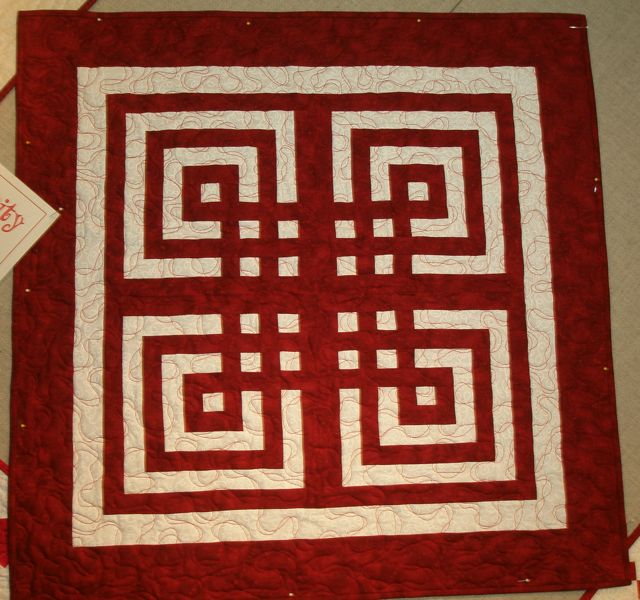
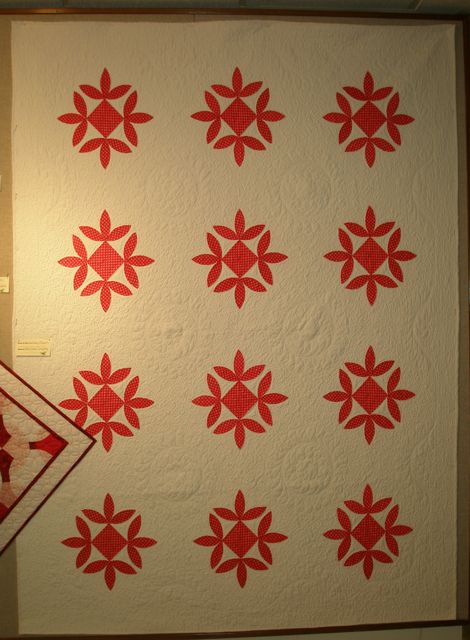
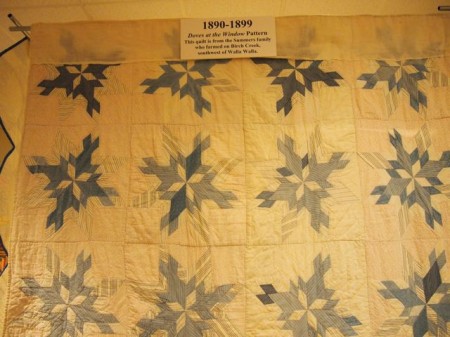
    Doves at the Window is a very difficult pattern to piece.  Do you see the four doves in each block?  Isn’t it interesting that quilters were doing “abstract” designs over 150 years ago?

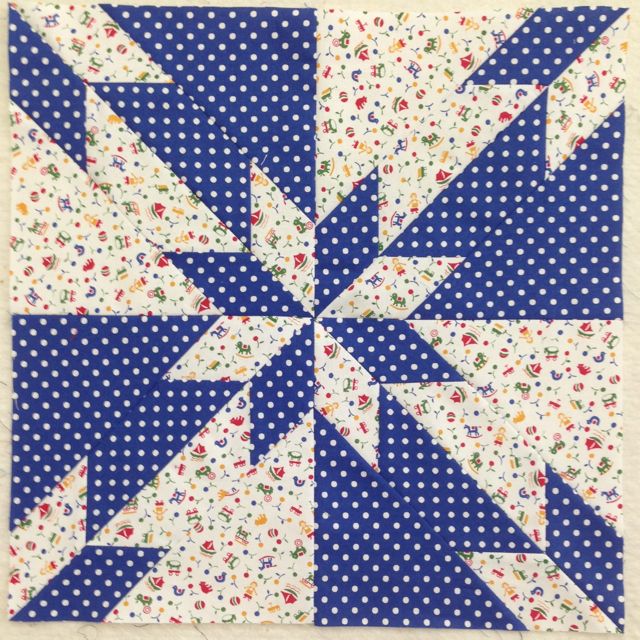
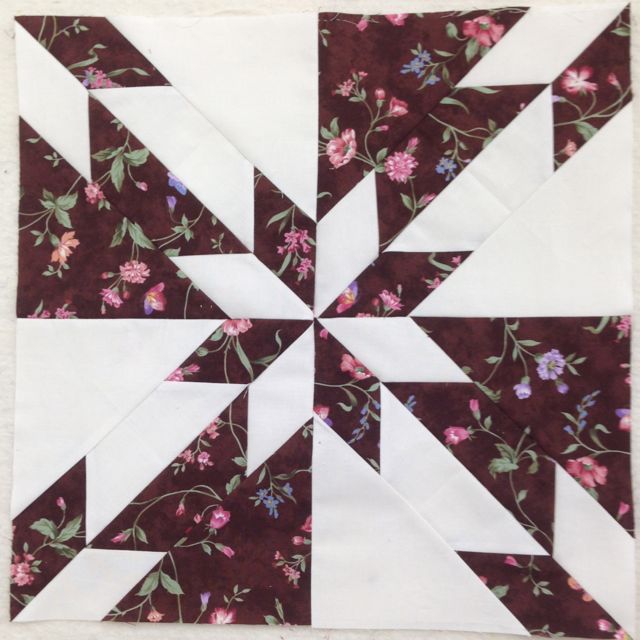
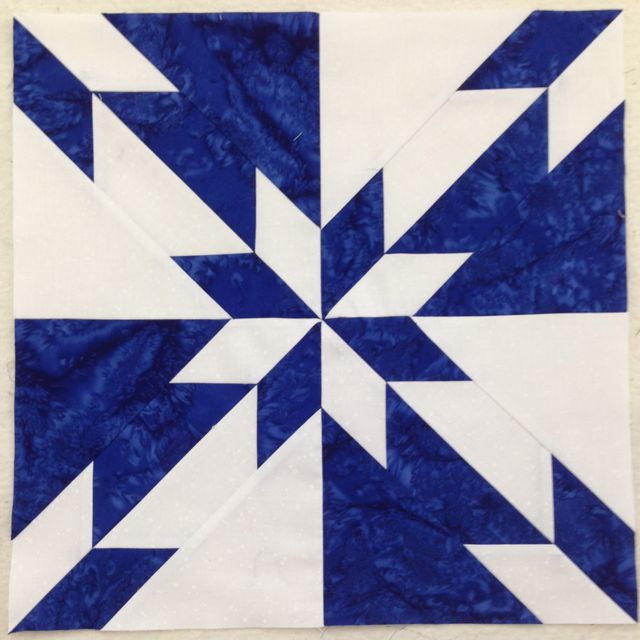
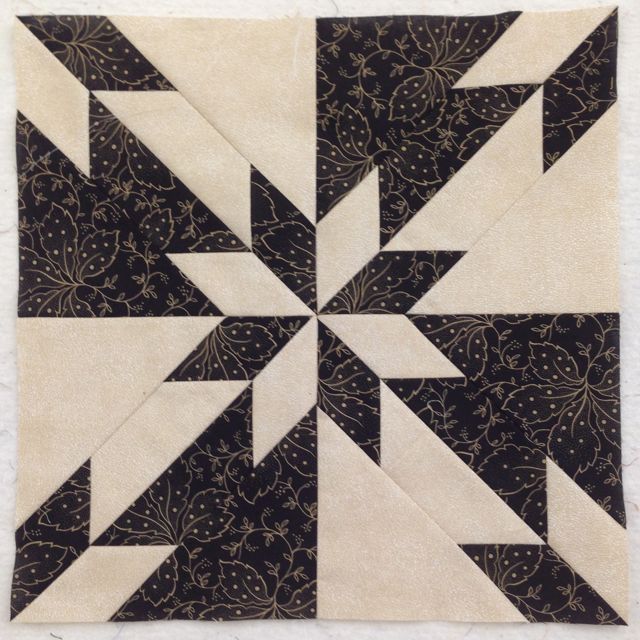
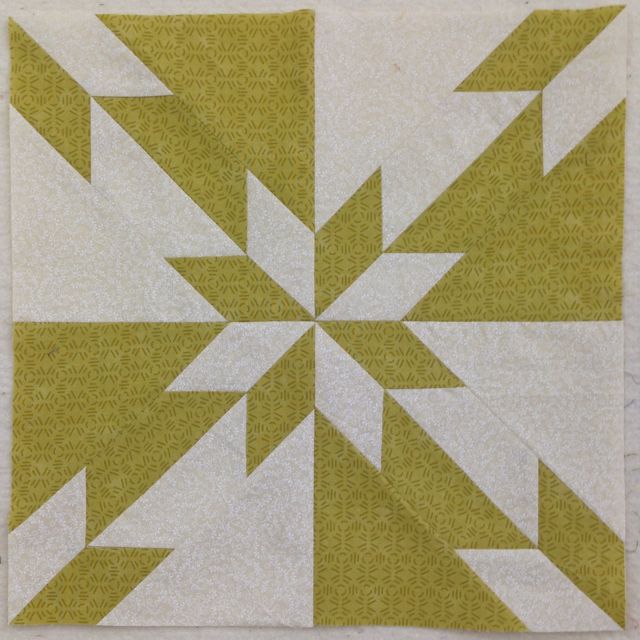
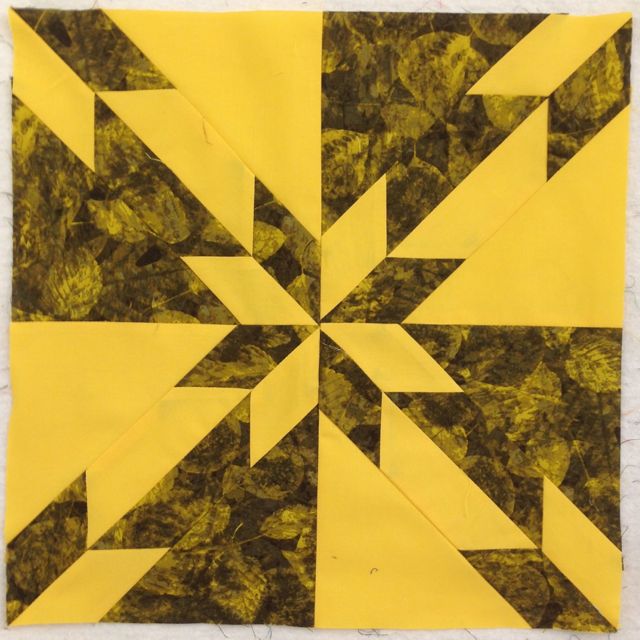
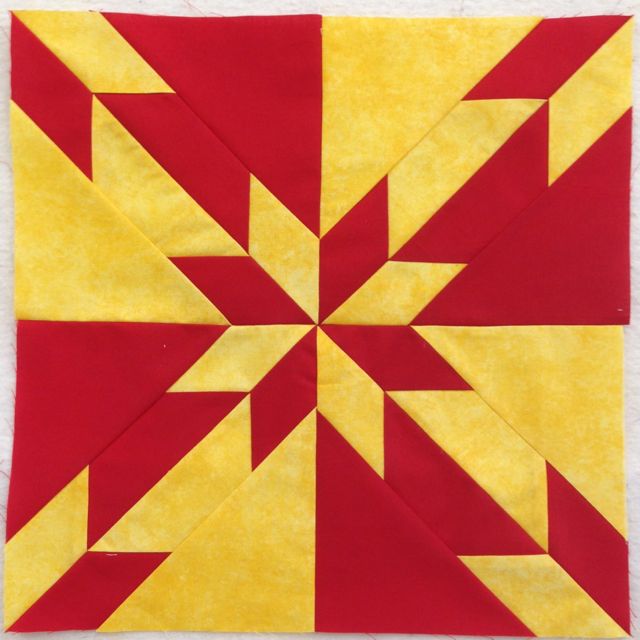
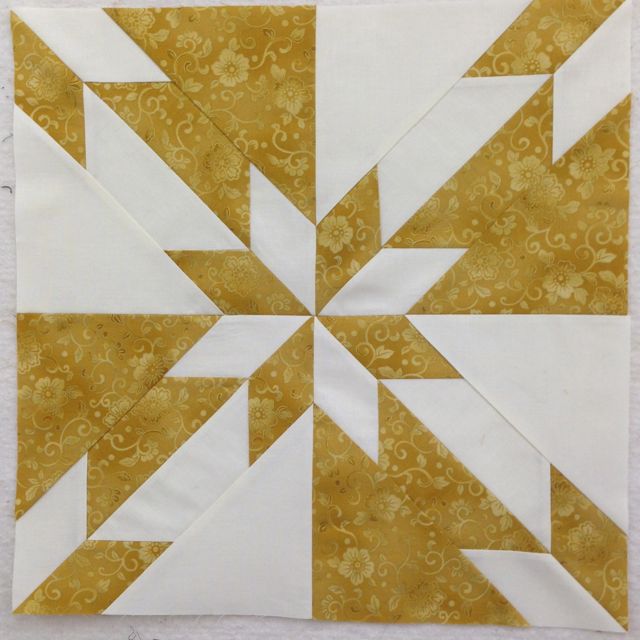
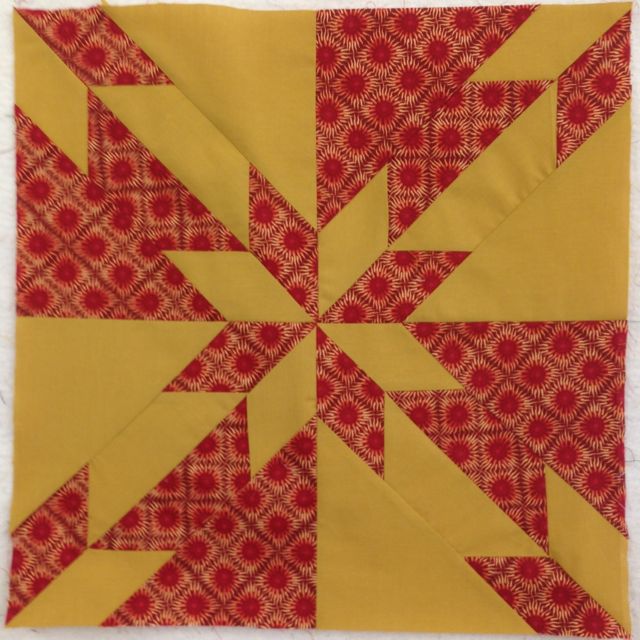
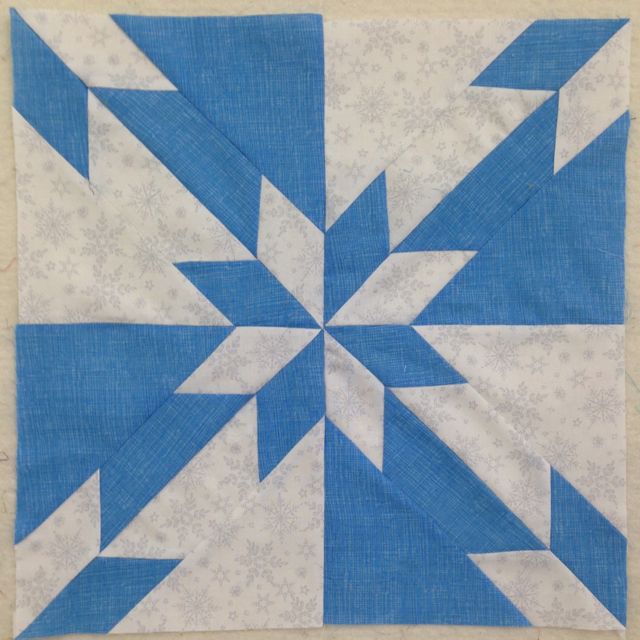
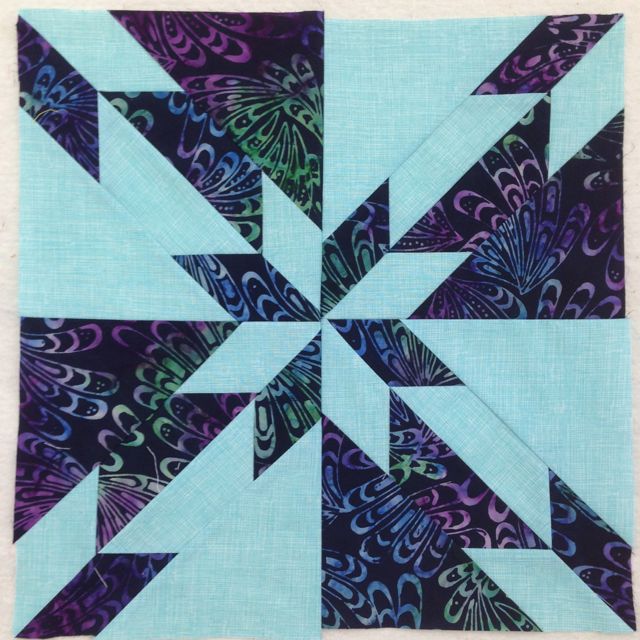
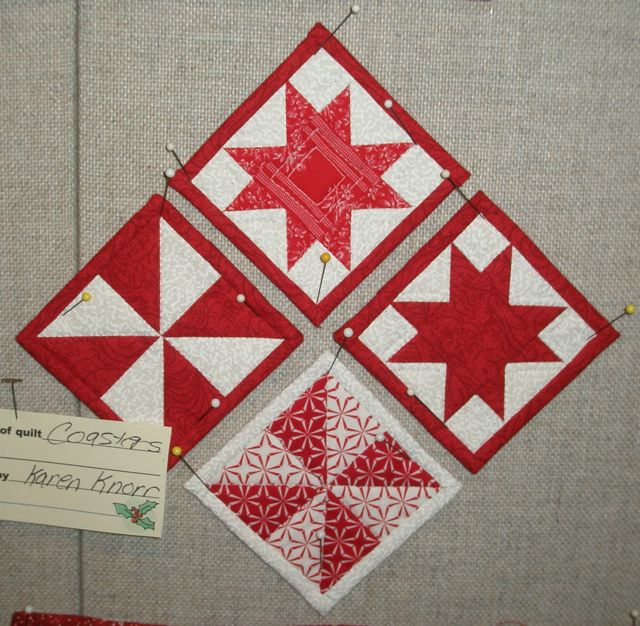
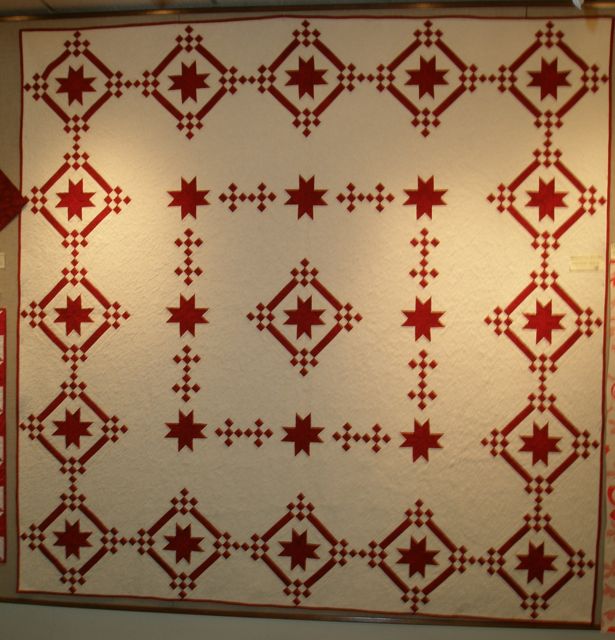
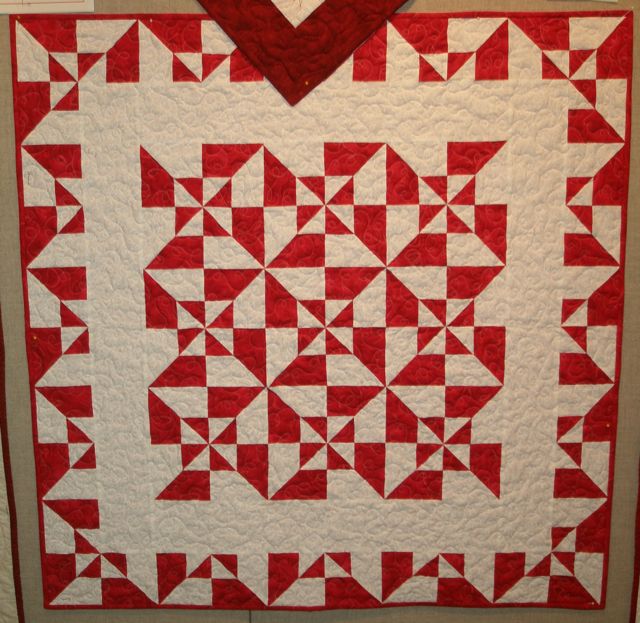
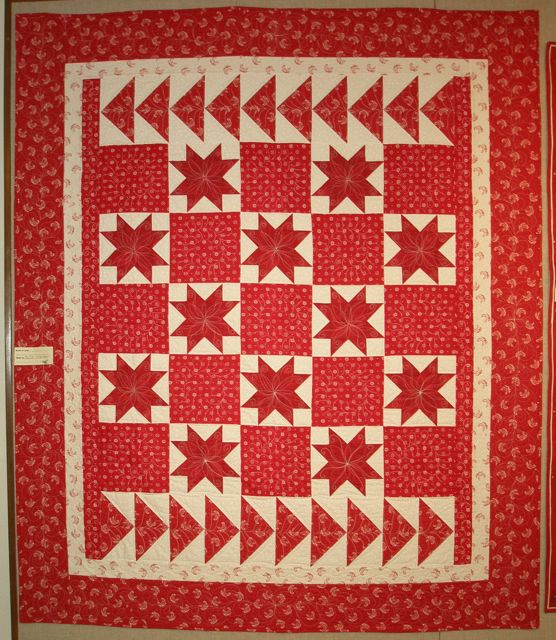
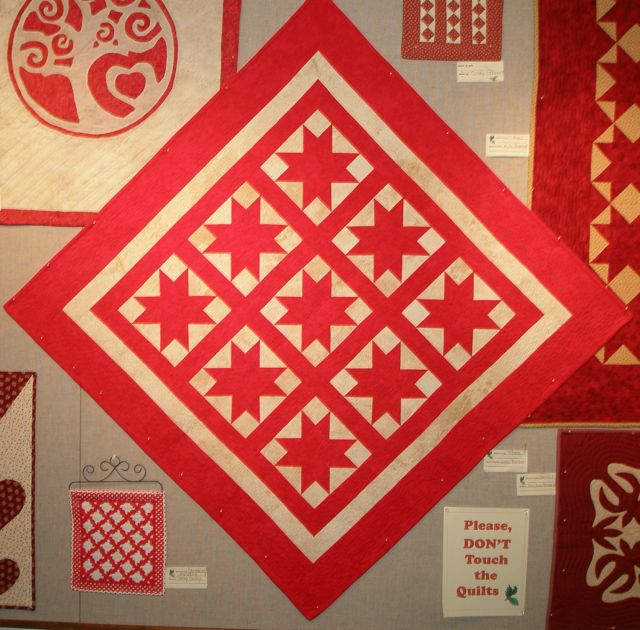
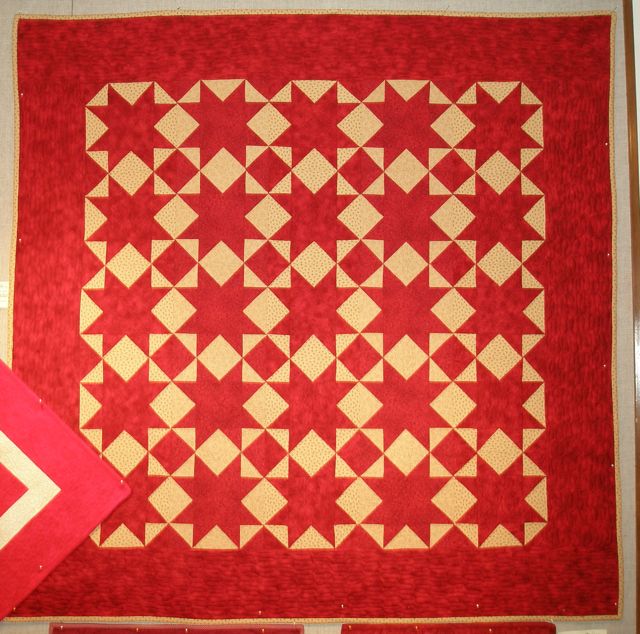
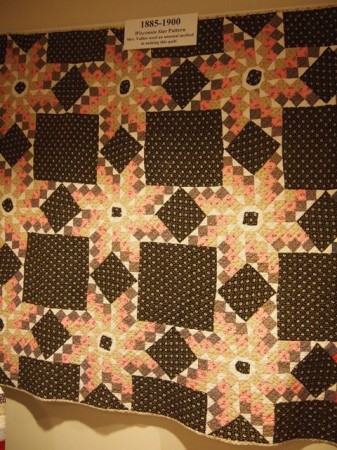
    I’m not at all familiar with this pattern, called Wisconsin Star.  It’s quite interesting the way it is pieced.

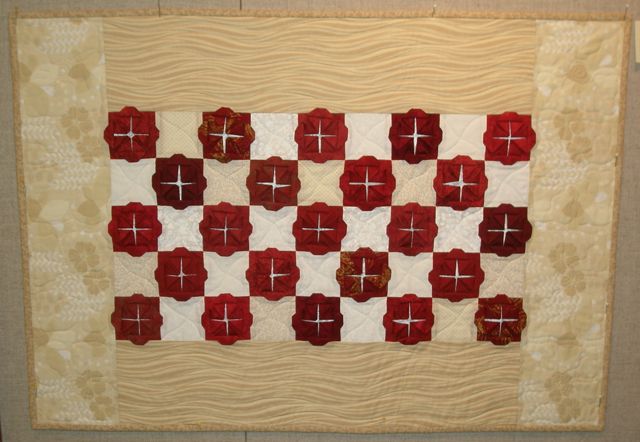
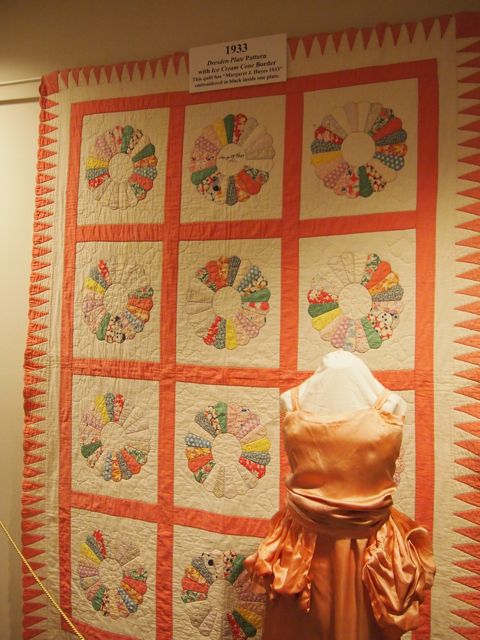
    Here’s a very traditional Dresden Plate.  Melinda thinks it may be from a Ruby McKim pattern entitled Friendship Ring–and I agree.  It has 20 petals in the plates and the ice cream cone border.

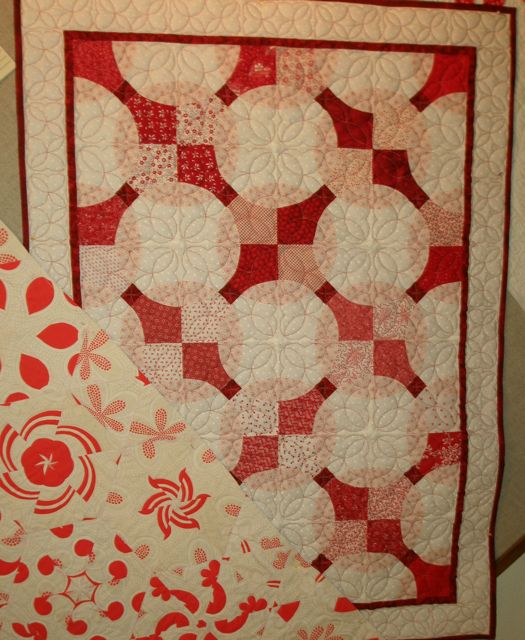
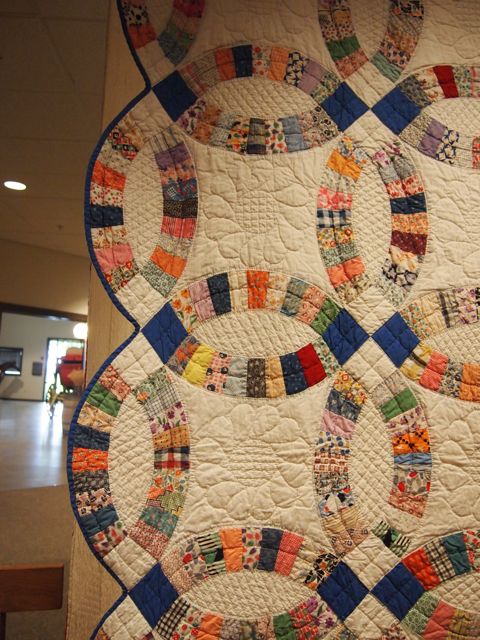
    The Double Wedding Ring pattern is probably one of the most recognizable quilt patterns—even among non-quilters.  The quilting on this one is lovely.

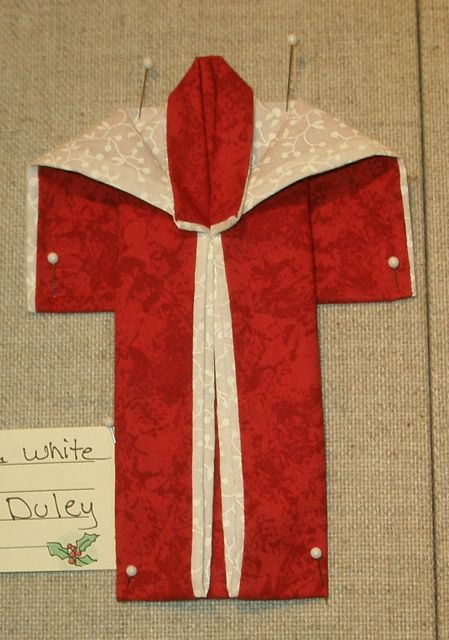
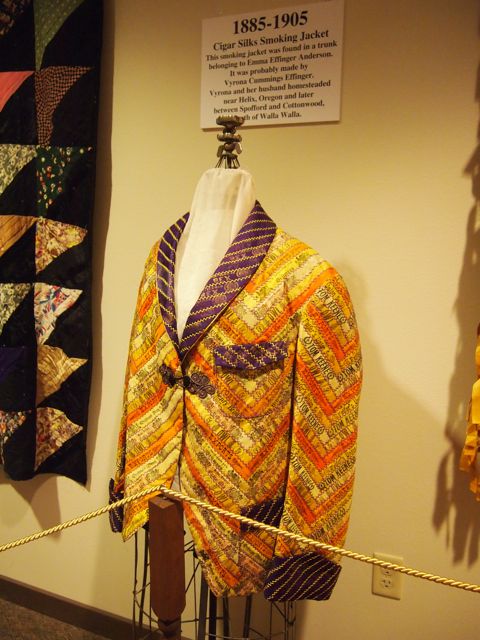
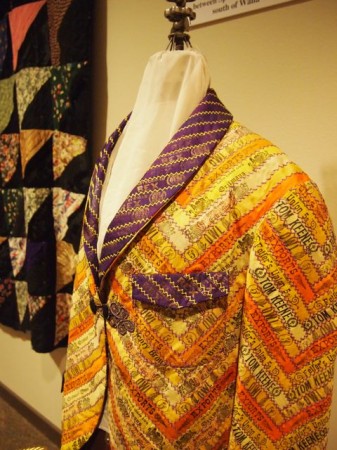
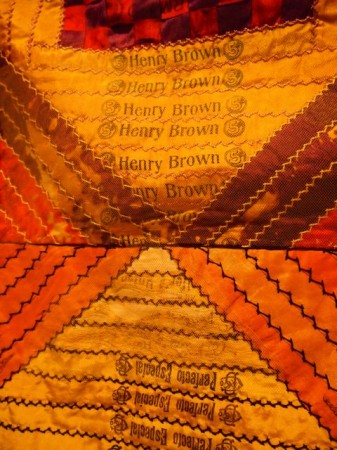
    Now this is incredible!  Small silk bands were wrapped around cigars to identify the manufacturer.  Never ones to waste bits of fabric (and undoubtedly attracted by their bright colors), women began to collect and save cigar silks.  They were most often yellow.  The maker of this jacket certainly had a huge collection of silks, and the purple ones are the perfect choice for the collar and cuffs.

    Her chevron design is perfectly pieced.  And once the piecing was done, she did a feather stitch—by hand, of course—along the edge of each band!

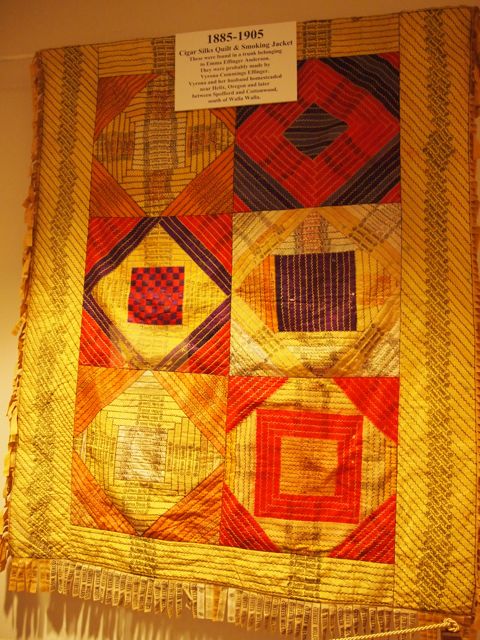
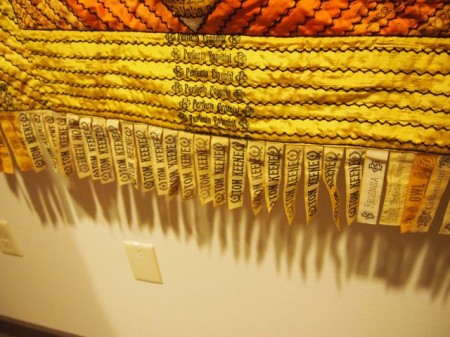
    This cigar silk quilt was found in the same trunk as the jacket.

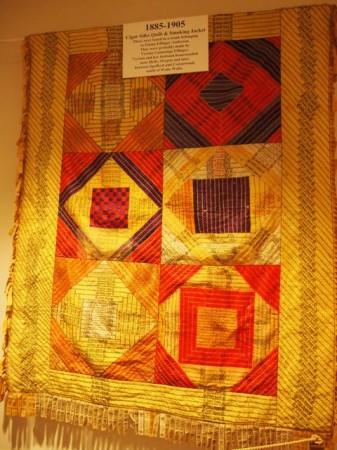
    Again, beautifully sewn and feather stitched.

    And don’t you love the “fringed” border?

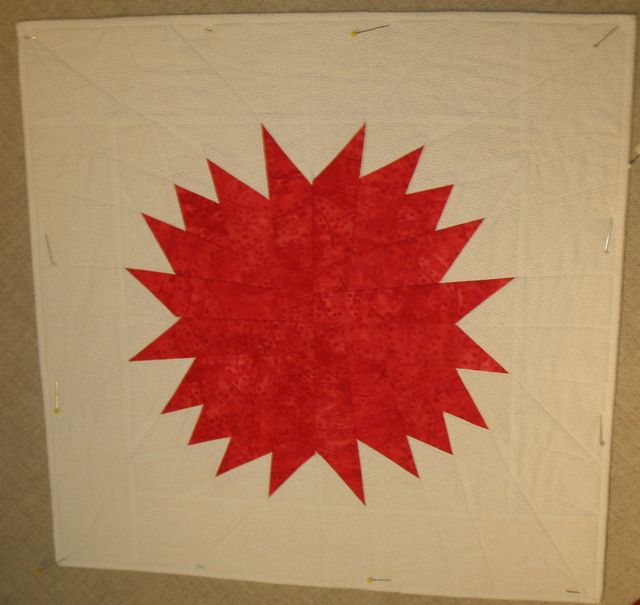
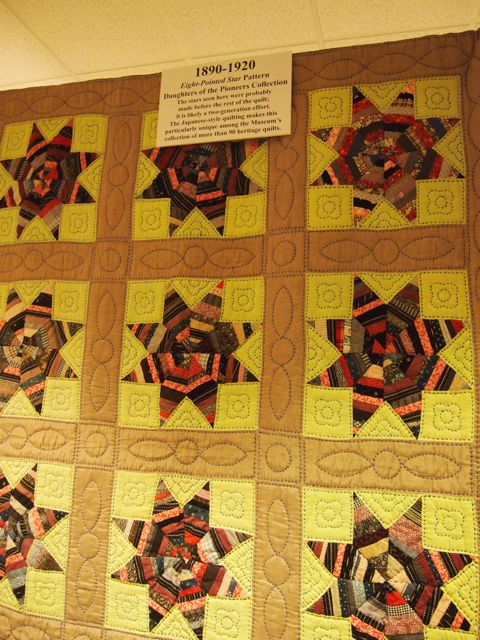
    An Eight Pointed Star.  The label refers to “Japanese” quilting.  Perhaps it’s reminiscent of Sashiko.

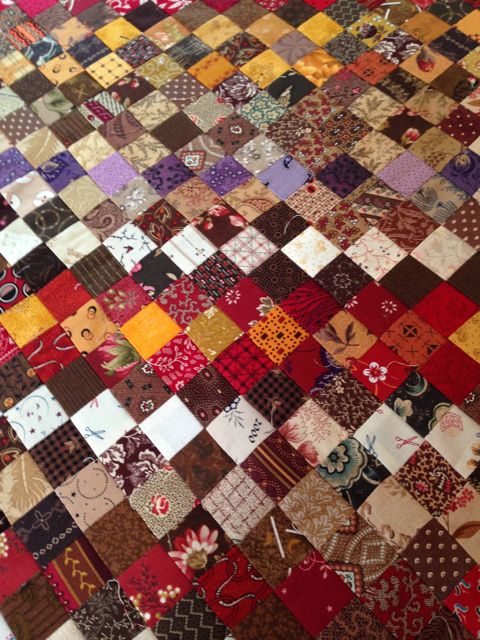
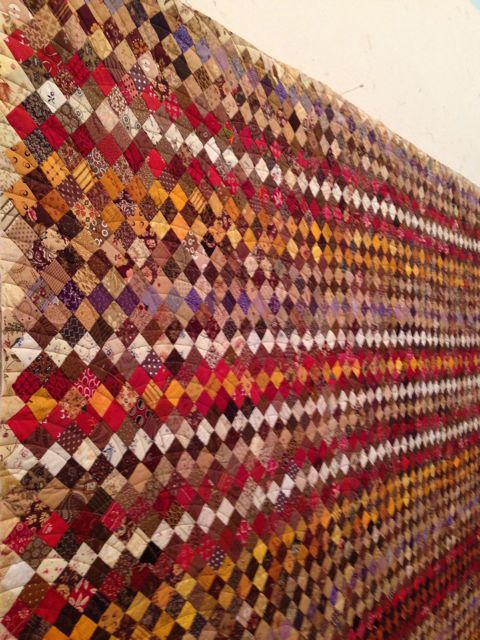
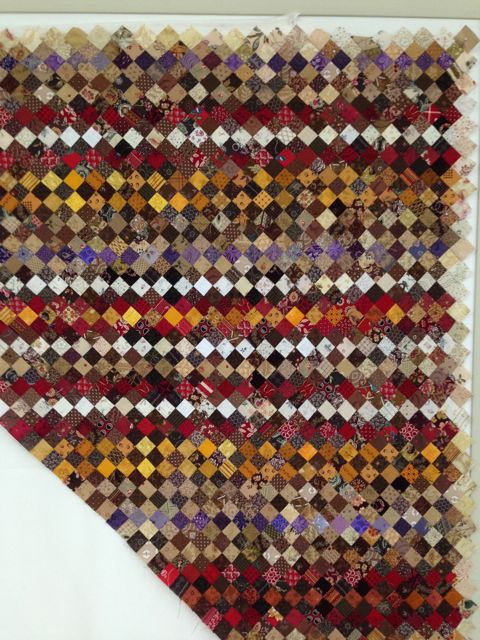
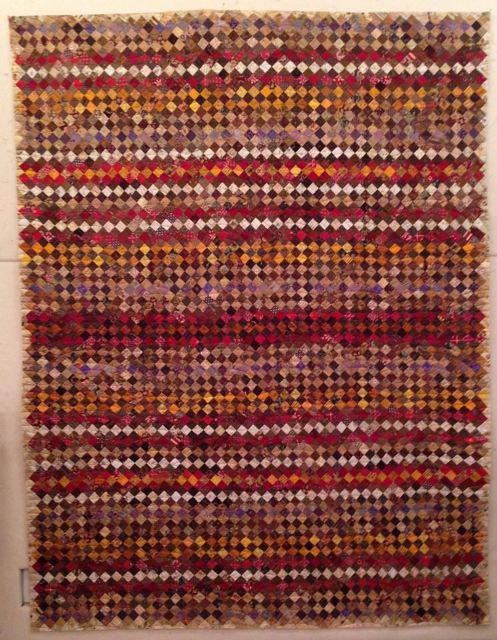
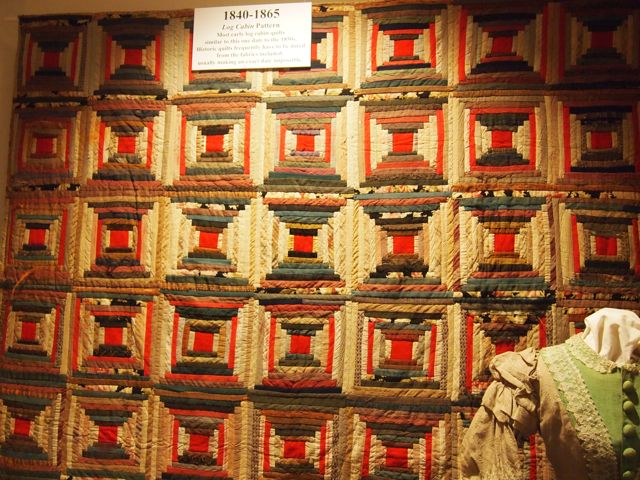
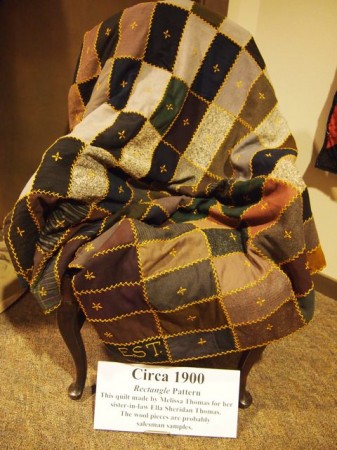
    This wool quilt was probably made from suiting samples from a tailor’s sample book.  My husband’s grandfather and great-grandfather were both tailors and we have some quilts similar to this.

    This is a very old Courthouse Steps quilt.

    I suspect it’s foundation pieced.

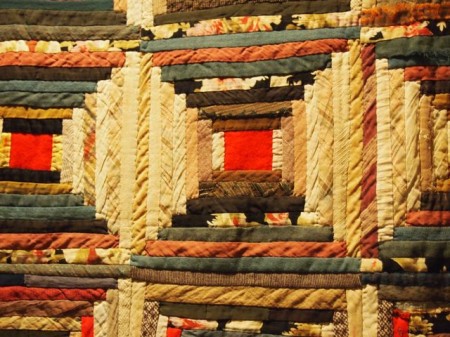
    Even utilitarian quilts are pleasing to the eye.

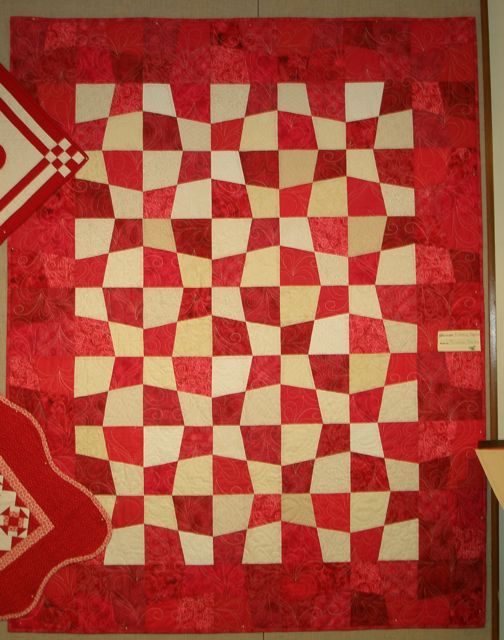
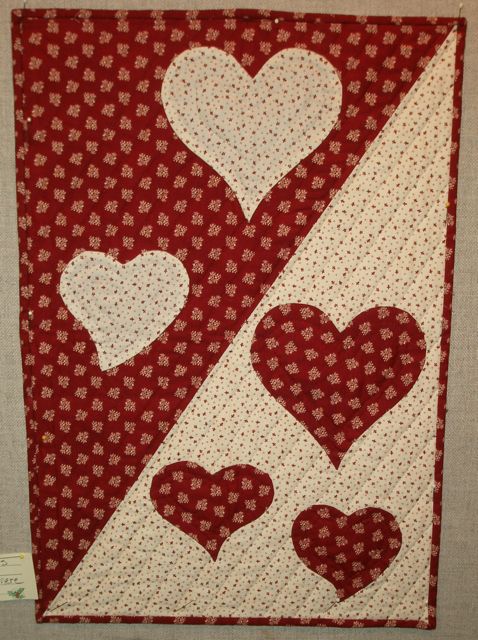
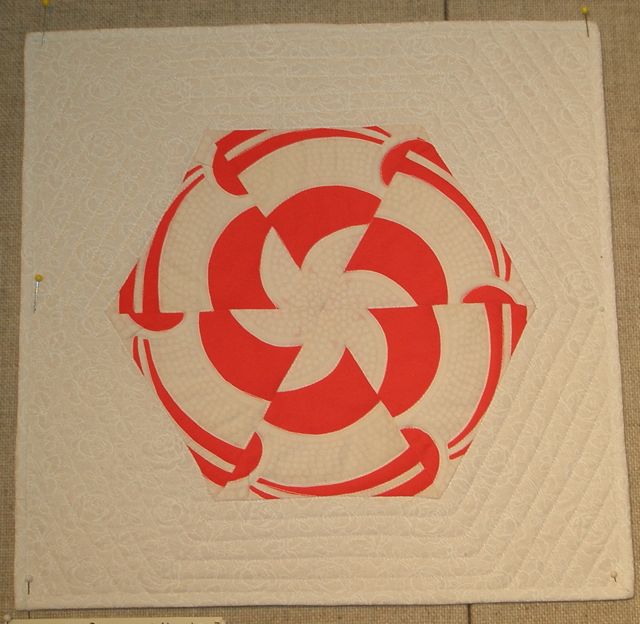
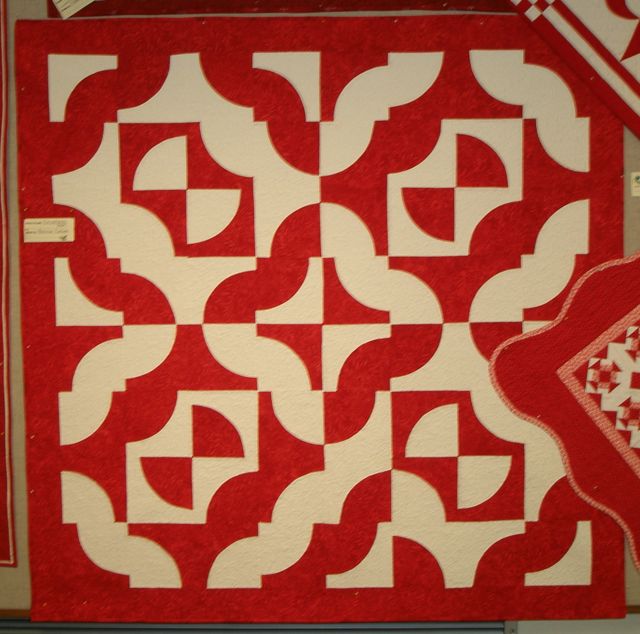
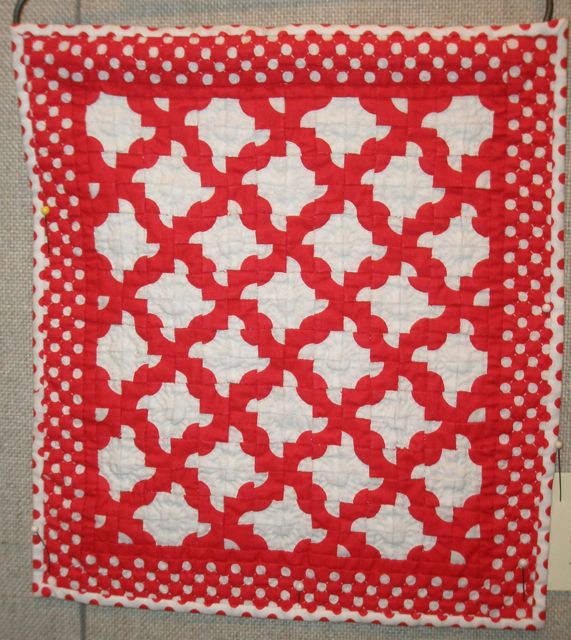
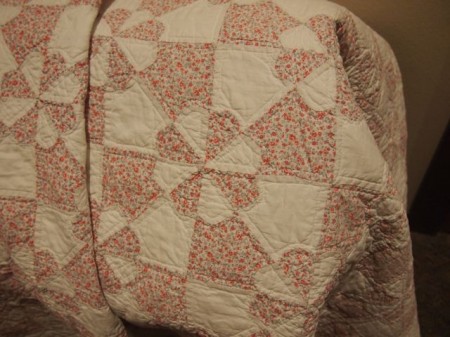
    This last pattern is called Hearts and Gizzards!

    Thank you, Melinda, for sharing with us!


  • 06Oct
    Categories: quilting Comments: 5


    Another great quilt retreat is over!  54 of us gathered at Falls Creek Retreat Center once again.  We had plenty of room to spread out and work on our own projects.

    There were also plenty of demonstrations, like this one by Karen J. on making perfect circles…

    …and this one by Sarah M. on creating design boards.  That’s one thing I love about getting together with other quilters—I always learn something!

    I did a little one-on-one, when necessary.

    And everyone made a coffee cozy!

    We’ve never had nicer weather at a retreat than this year.  It was perfect for a walk to the falls.

    There’s nothing like crisp, fall days!

    It’s been a very dry few months for us, so the water flow in the falls was quite low.

    That did give us an opportunity to see some geology we hadn’t seen before, though.

    Of course, besides being able to sew ’til your heart’s content, the best thing about retreat is seeing what everyone else has been doing!  This is a baby quilt Robin made with some of her famous 2″ squares.

    Sue brought a great sampler quilt for show-and-tell.

    Heather was putting together blocks for this stunning log cabin variation.

    She also brought this quilt for show-and-tell night.

    Stephanie made this quilt top from one of my mystery kits.  No, I can’t tell you which one.  Then it wouldn’t be a mystery!

    Here she is modeling an apron she made.

    Bonnie B. made this wonderful quilt with crazy blocks.

    Patti’s French Roses quilt is soooo sweet.

    That’s Eileen peeking out from behind her monochromatic gray quilt top.

    I love Phyllis’ use of lime in this black, white and lime quilt.

    Denise gives us her best “Vanna” and shows off her pretty flower blocks.

    Carol made this patriotic quilt for the Quilts of Valor program.

    Newcomer Kay made this stunner.

    This very modern quilt was made by Kristy.

    BJ created this beautiful rose with fabric and thread work.

    BJ and nine others each made a section of this quilt from a photograph–and the only part of the photo they had was the part they were to recreate in fabric.  Incredible!

    I’m in love with this Grandmother’s Flower Garden created by Laura.

    She also made this tessellating cross quilt from my book, Fat Quarter Fun.  It just so happens that we’re doing this very block on A-Quilt-Block-A-Day!

    Curved piecing is always impressive, and this Drunkard’s Path from Sue F. is no exception.

    This Spider Web from Sue reminds me I need to do something with those Halloween fat quarters I’ve been collecting!

    This is just the start!  I have more show-and-tell to share with you in the coming days.


    Tags:
  • 31Jul
    Categories: quilting Comments: 2

    We have a winner in the Name The Quilt Contest!

    The winning suggestion was Pretty Maids All In A Row.  It was suggested several times, but Linda was the first—so she wins a kit to make her own Pretty Maids quilt.

    I also used a random number generator to pick a second winner.  There were 138 entries.  The number generator chose #86, so a second quilt kit will go to Emilee in England!  Congratulations to both winners and thanks to all of you who left comments.  To order a kit of your own, CLICK HERE!

  • 21Jul
    Categories: quilting Comments: 140

    You know how it is when a co-worker’s great-nephew’s girlfriend is having a baby, and your co-worker comes to you because she “…knows you just LOVE to make quilts and it wouldn’t be too much trouble, would it, to make something for the little expected bundle of joy???”  So you’re looking for something quick, really quick, but not something that looks like you didn’t care.  That’s why I put together kits to make this super fast but super cute quilt.

    As an experienced quilter, you know it’s just a matter of zipping those strips together.  The end result, though, is a very adorable (if I do say so myself!) quilt made with my Dolly Dear fabric collection.  I’m ready to add the kits to my web catalog, but I need a name for the quilt.  I want something that represents how easy this quilt is, and my pea brain keeps spitting out “Stripping With the Dollies.”  Yeah, I know, there’s just something wrong with that!  After all, they’re already in their underwear!

    So, I’m turning to you for suggestions.  What would you name this quilt?  I’m going to give away two kits–one to the person that comes up with the winning name, and another one to a random commenter.  Here’s your chance to win!  Leave me a comment with your suggestion.  This should be fun!

    Added July 31—Thanks to all who played along.  The contest is now over!  CLICK HERE to see a post about the winners.

  • 22Jun

    Got scraps????  I’ve got the perfect block for you, then–STRINGS!

    These things are like potato chips–I bet you can’t make just one!  They’re a great way to use up strips and scraps from old projects.

    I keep a bin (well, two) on the bookshelf behind my cutting table.  Every time I need to straighten the edge of a bolt of fabric (or a hunk of fabric), I toss the resulting strip into the bin.  If I’ve been using strips for a project and have leftovers, into the bin they go.  And what about those 2 or 3 or 4 inches of fabric left after cutting out the pieces of a project.  ZIP!  Into a strip and into a bin!

    I like to use a fabric foundation when I do string blocks.  You can use paper, but I hate to tear away paper if I don’t have to!  So, if you’re ready to begin, follow along.  Layer four pieces of your foundation fabric–anything goes!

    Cut into 10″ squares.  I like 10″ because you get the best use of your fabric.  You could do any size.

    String pieced blocks are simple, easy, forgiving even!

    Grab a handful of strings.  I like mine to be between 1″ and 3″.  I like the look of narrower strings in my blocks, but the wider ones come in handy for corners.  More on that below.  The don’t have to be straight.  In fact, some slight angles make the blocks look better!

    Take a string of fabric and place it right side up, diagonally, on one square.

    Now place a second string, right side down, on top of the first string, aligning the right edges, then stitch down that right side with a 1/4″ seam allowance–or not!  It doesn’t really matter!

    Press the top strip over–and repeat until you have covered up your square!

    You don’t have to use white fabric, and you don’t have to use yardage.  Do you have some “ugly” fabric that you are never, ever, ever going to use in a quilt?  It’s perfect for the foundation for your string blocks.  When I do this, I use the back, as it’s usually a bit lighter.  Here’s and example.  This is the back of a red print fabric.  The red was just a bit “off” and didn’t seem to work with other reds in my stash.

    I did my string piecing on it, just like I did on the white foundation.

    When you’re piecing these blocks, it works great just to feed a whole stack of them through your machine, one after another.

    When you’re finished, they’ll look like this!  Notice that I used wider strips on the ends.  You don’t want to end up with a teeny tiny strip at the end.  It makes it bulky when you’re putting your blocks together.

    Just take them to your cutting mat and lay them upside down.

    You can either use your foundation square as a guide for trimming, or measure and trim.  If you use your foundation square as a guide, your blocks may be a little smaller that the 10″ you started with, as the stitching tends to draw the fabric up a bit.  No matter, just make them all the same size.

    There’s a lot you can do with string pieced squares.  Here are a couple of great examples.  This is a vintage quilt I saw on Ebay.

    Here’s one from Em’s Scrapbag.

    But my favorites look like they have sashing like this one from Quilting Board.  Guess, what?  They don’t!  It’s faux sashing!

    Here’s how it’s done.  On your foundation block, mark a diagonal guide that’s 1-1/2″ – 2″ wide, centering it with the points on your square.

    You aren’t going to sew on these lines, you’re going to line your fabric up with them.  If you marked line is 1-12″ wide, your “sashing” will be 1″ wide.

    Lay your first string down along the edge of the line and stitch.

    Press your string over…

    …and keep going!

    Arrange your squares and, magically, you have sashing!

    It’s fun to play around with your squares, arranging them in different ways.

    You can get creative, like this quilt I found from Blue Ridge Girl on Flickr.

    And, oh!  Your  ”squares” don’t have to be square.  They could be rectangles, like this one from Leedle Deedle Quilts.

    And your sashing doesn’t have to be white!  Check out the controlled color palette and black “sashing” in this example from Angelina79.

    So, are you ready to try string piecing?  I hope you do.  And I hope you’ll join my Facebook page, A Quilt Block A Day, and share your photos.