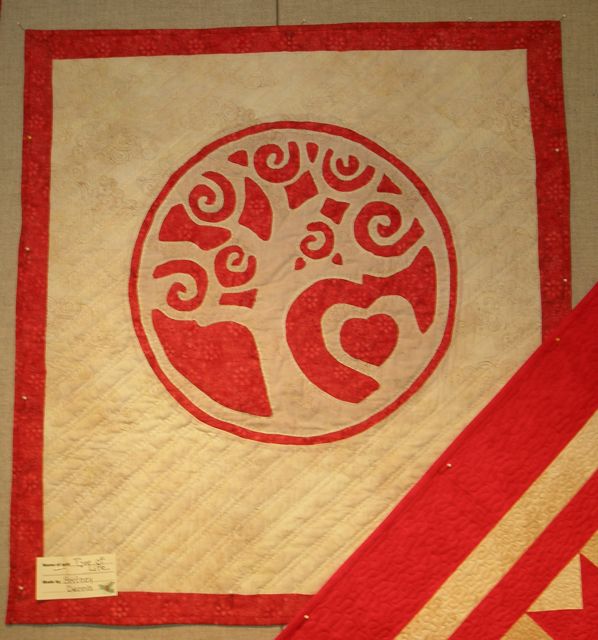
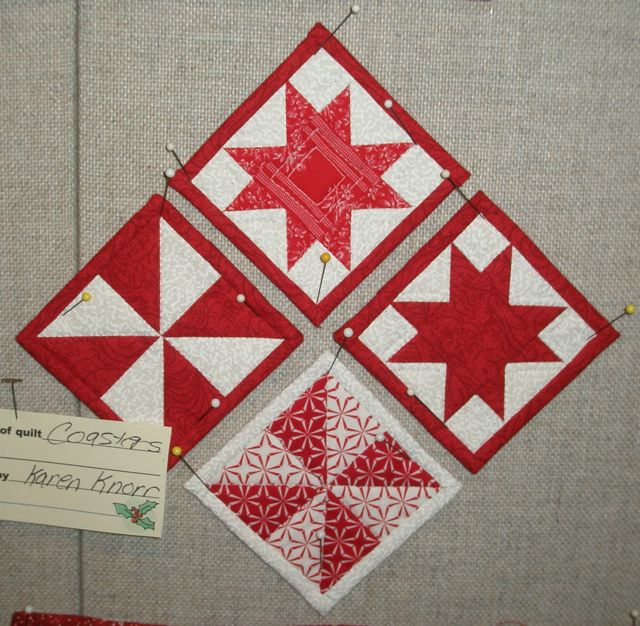
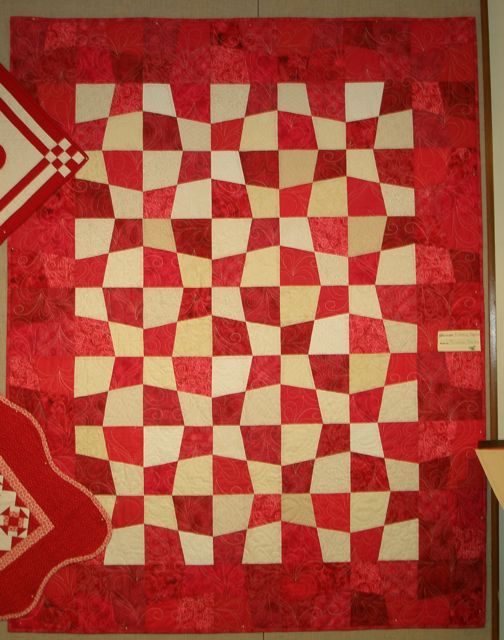
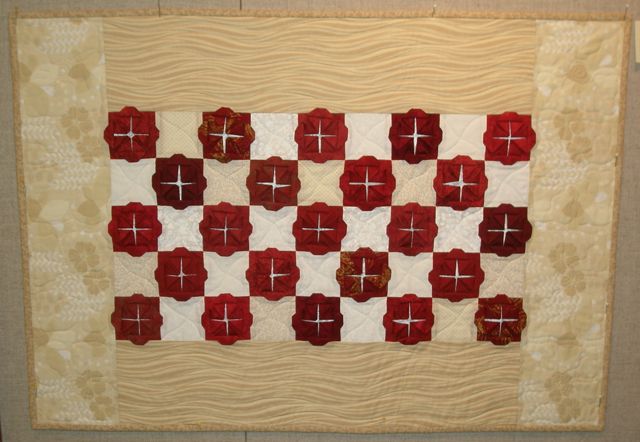
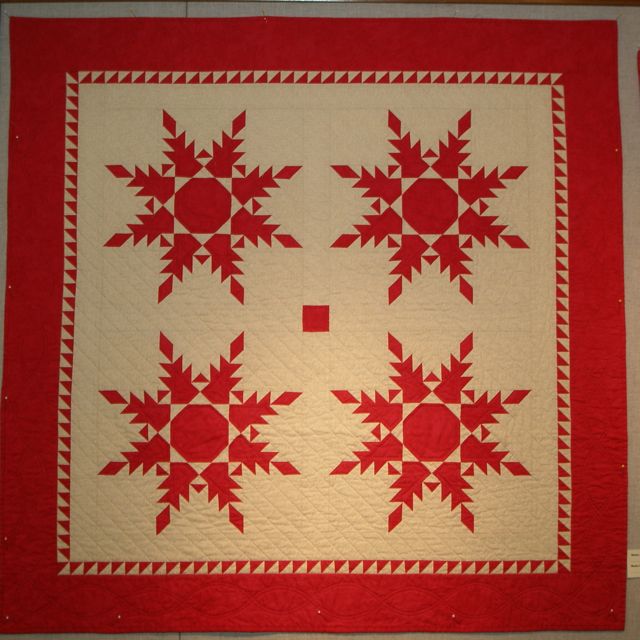
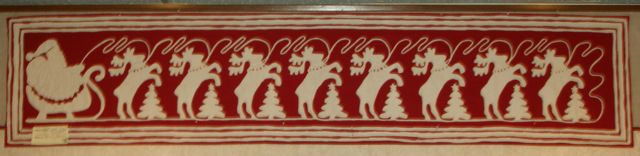
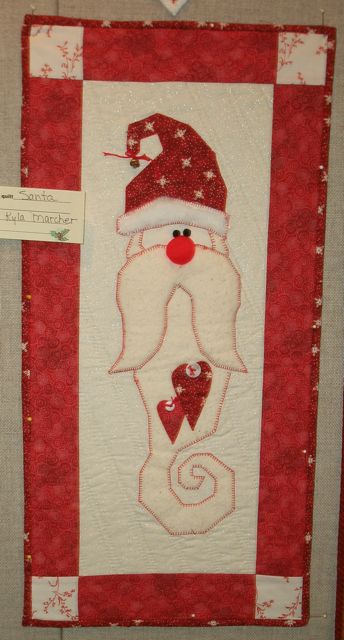
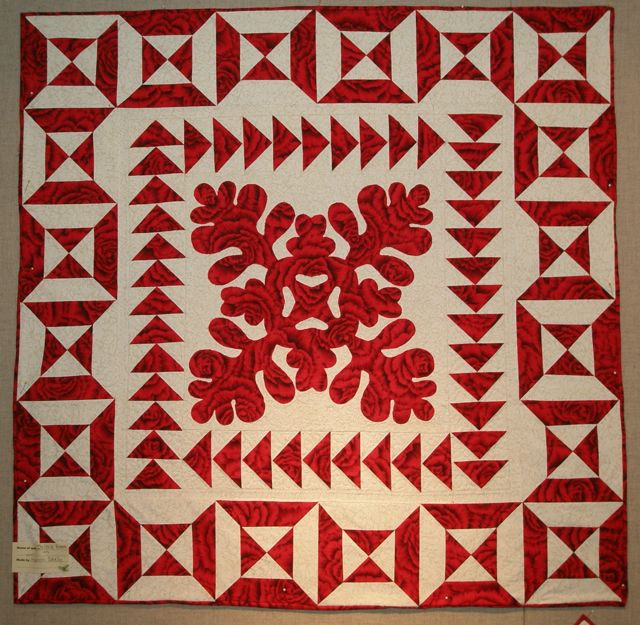
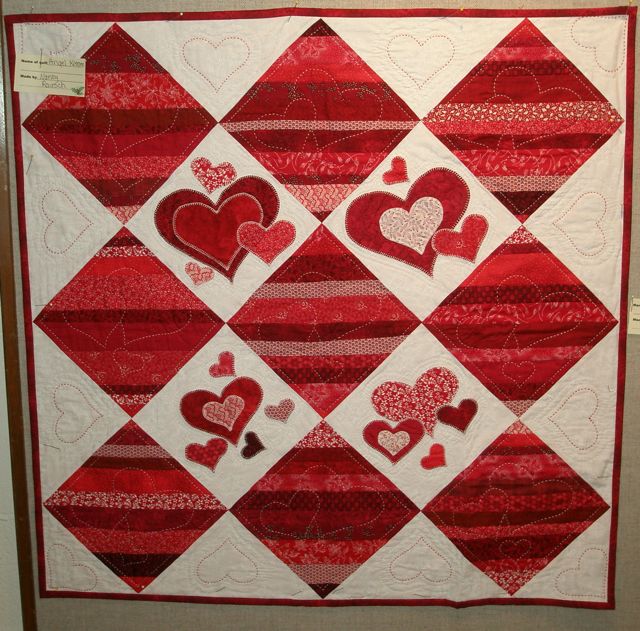
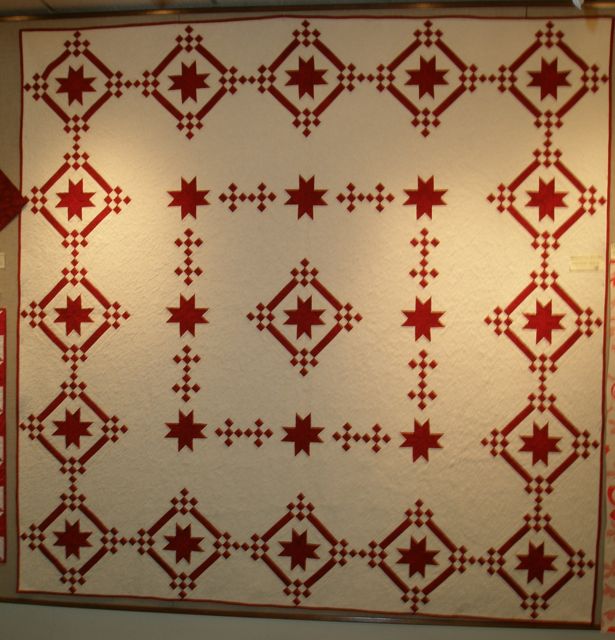
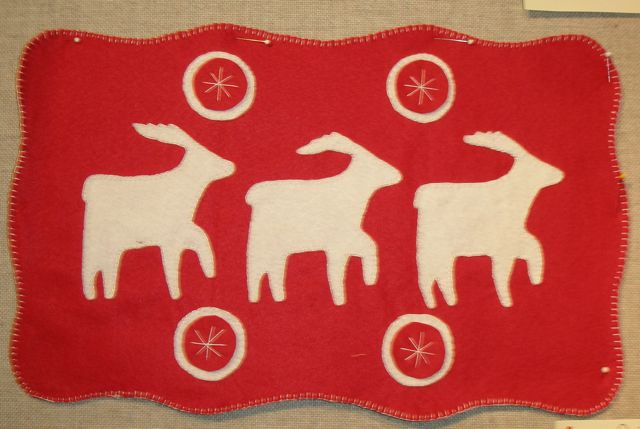
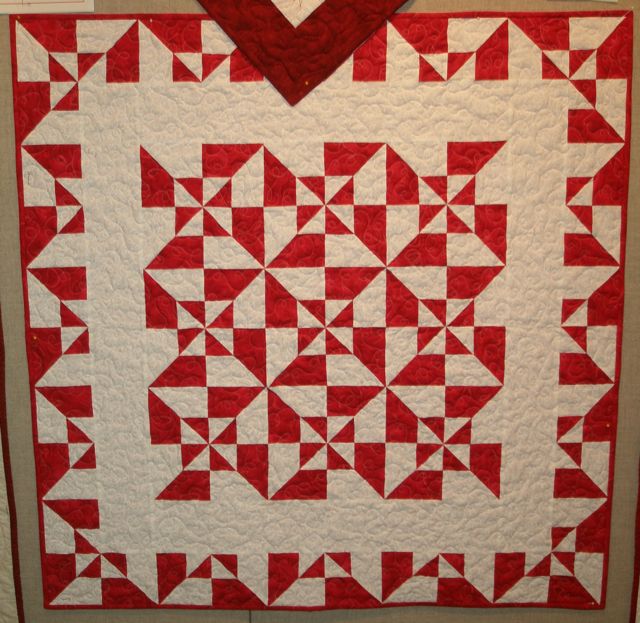
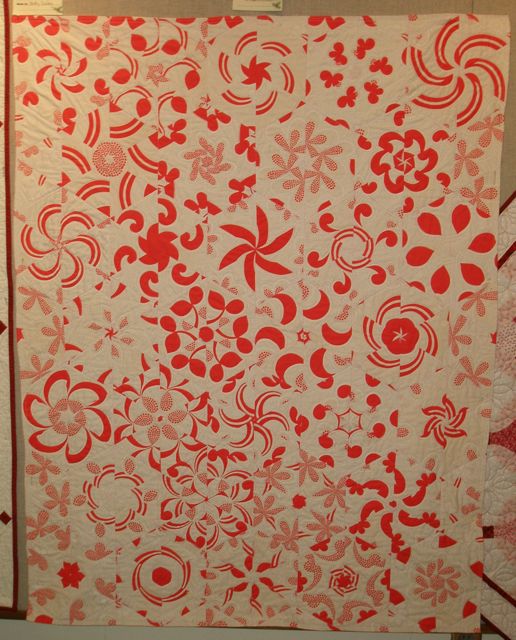
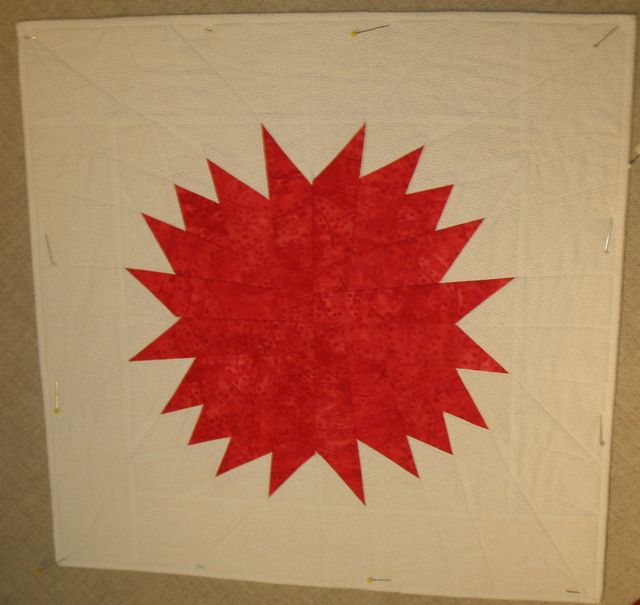
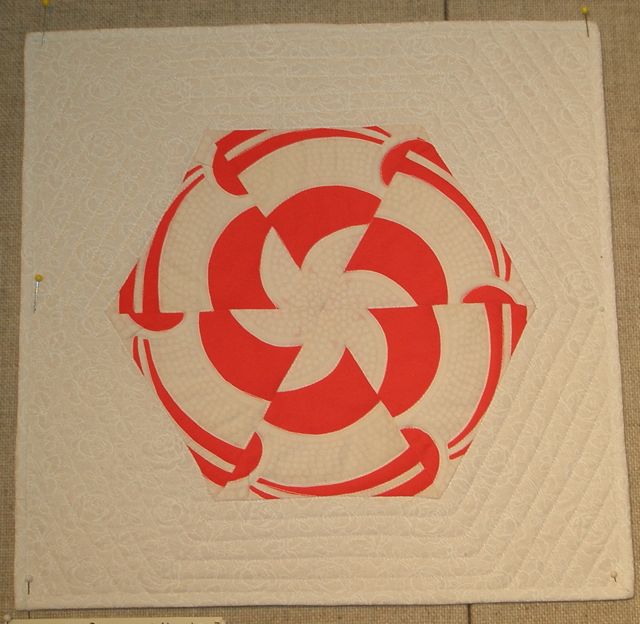
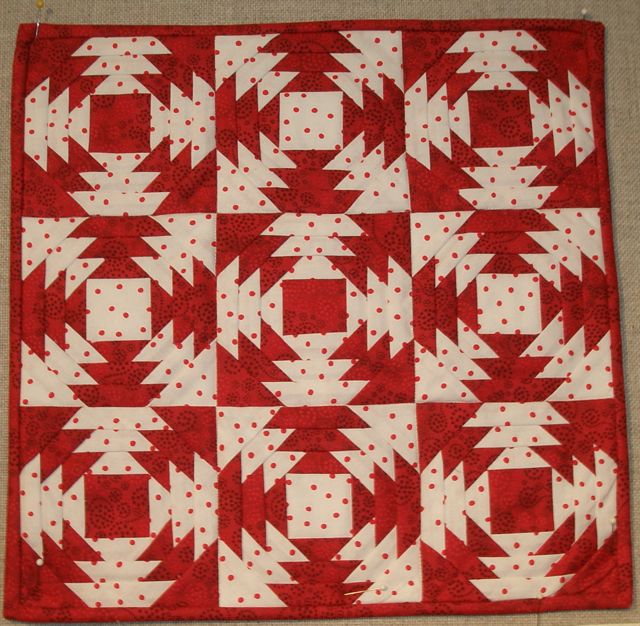
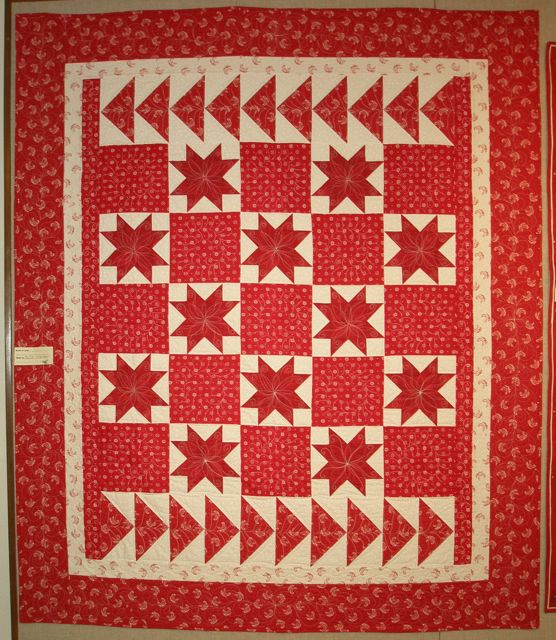
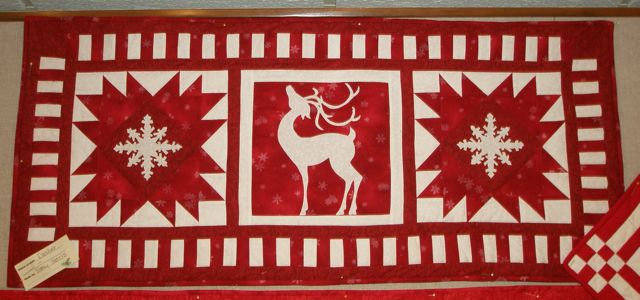
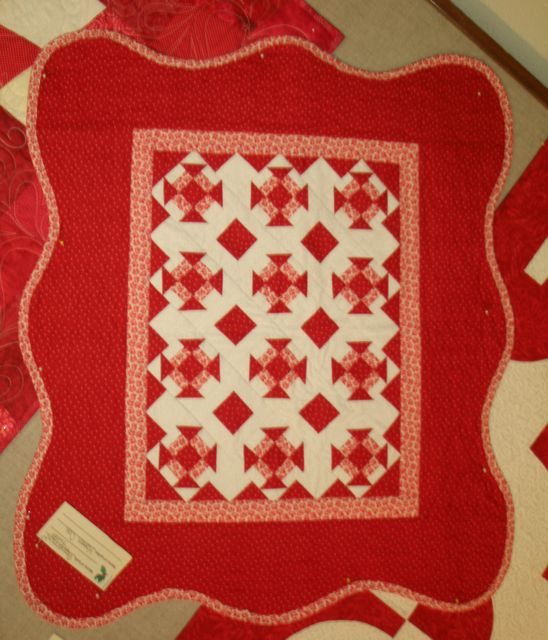
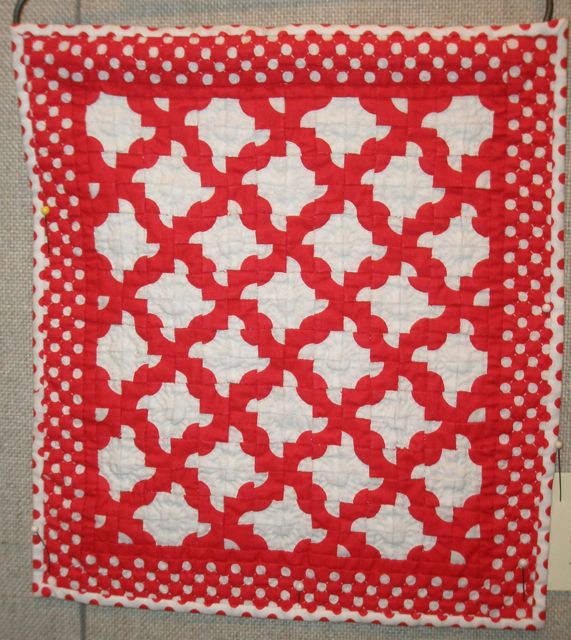
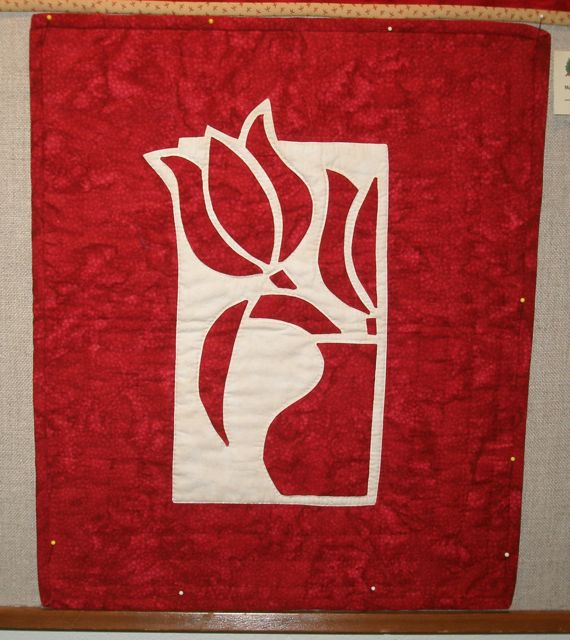
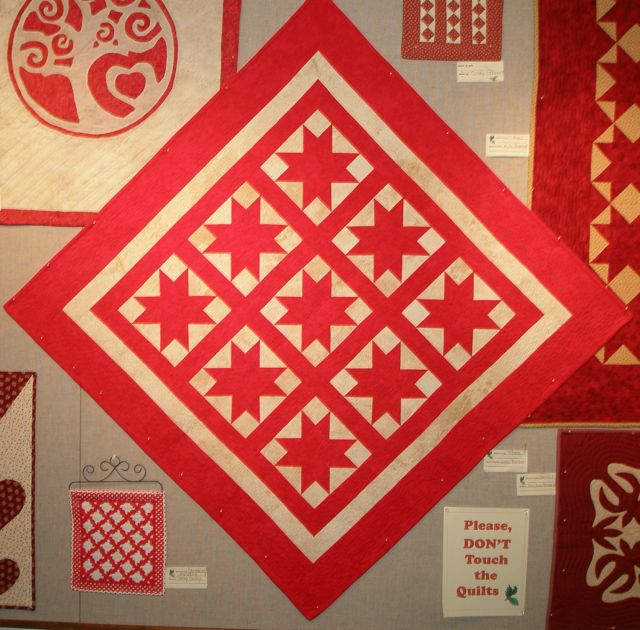
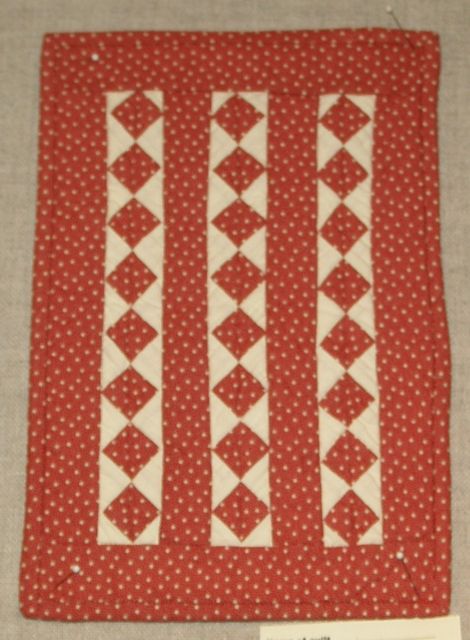
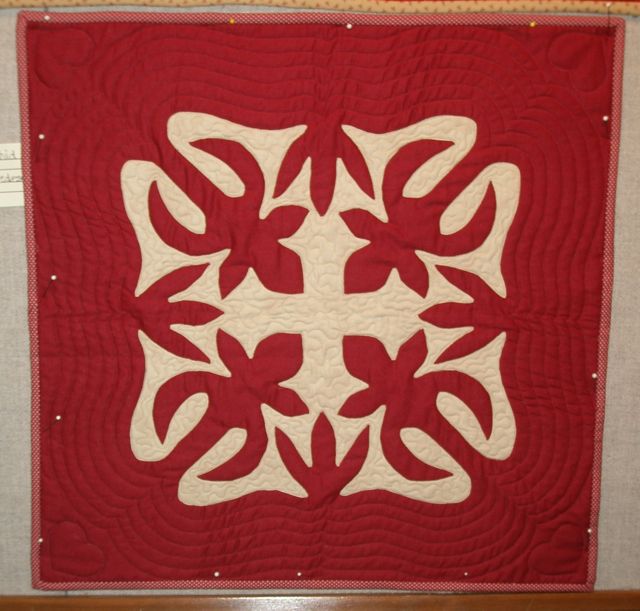
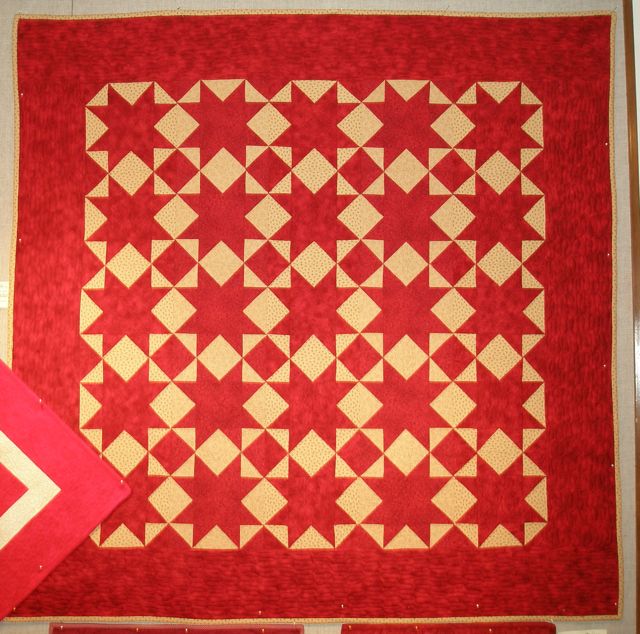
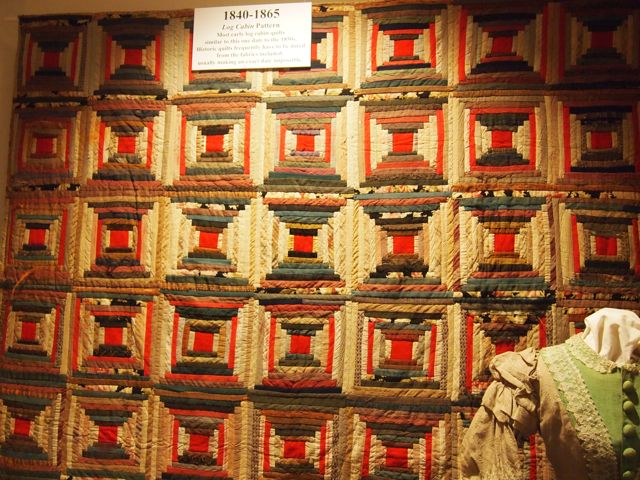
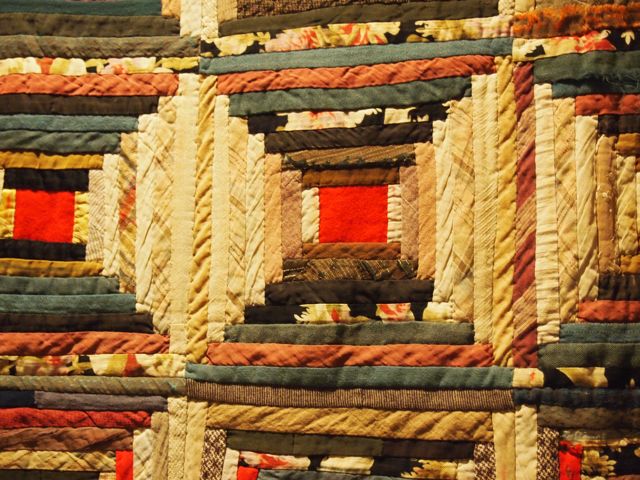
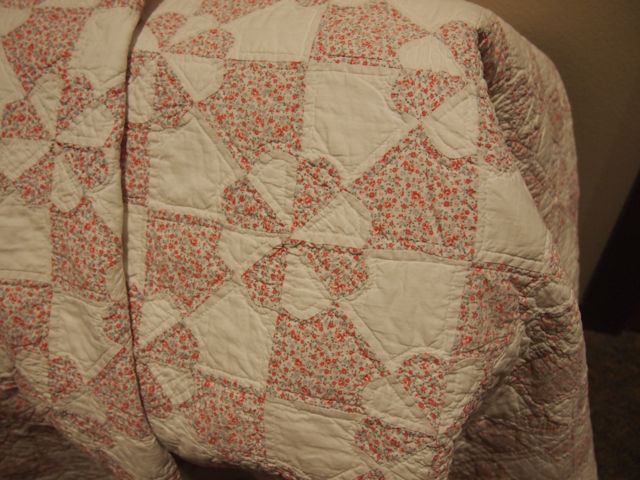
Last month the Longview, Washington library had a red and white quilt show.
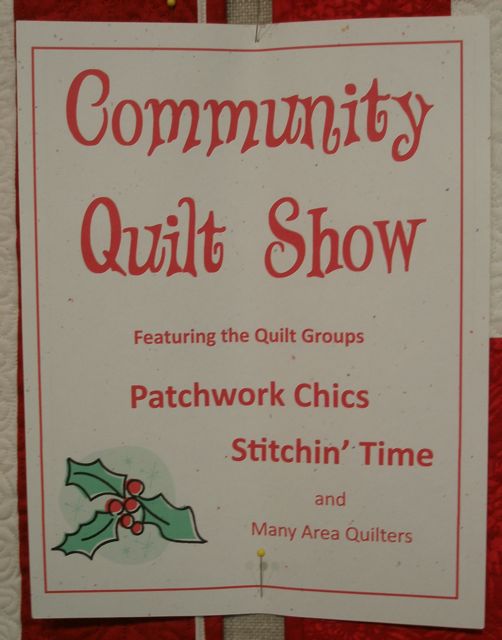
It meant a snowy, 150 mile round trip drive from here, but I’m so glad we went.
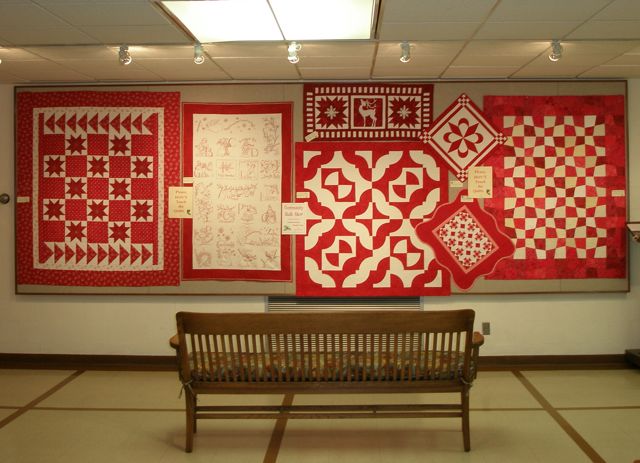
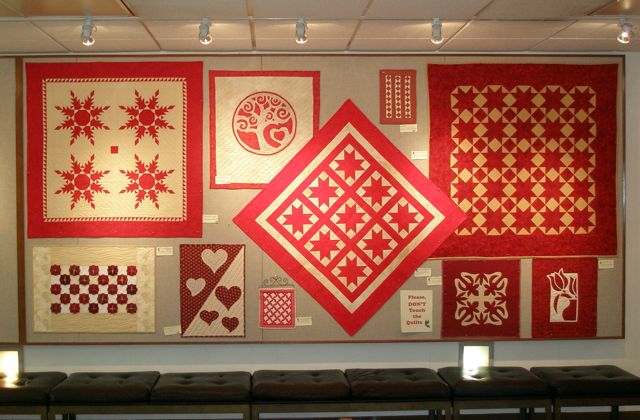

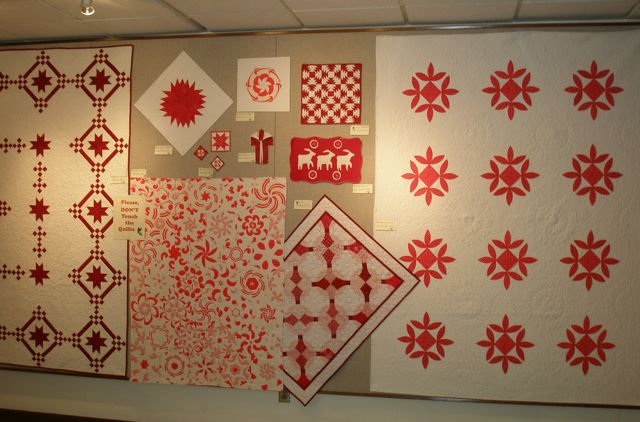
I’ll just be quiet and let you enjoy the show!
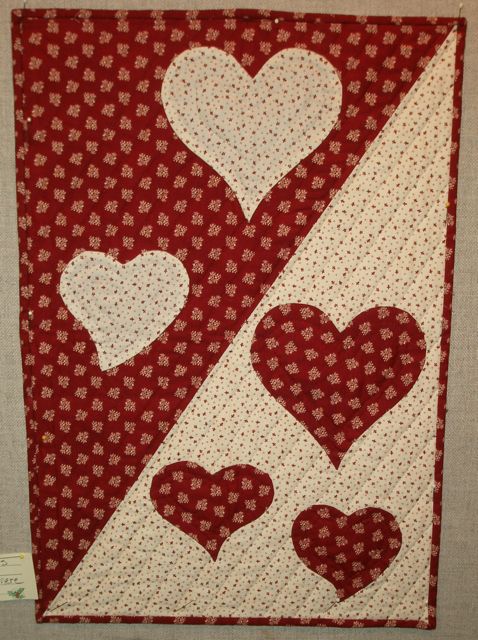
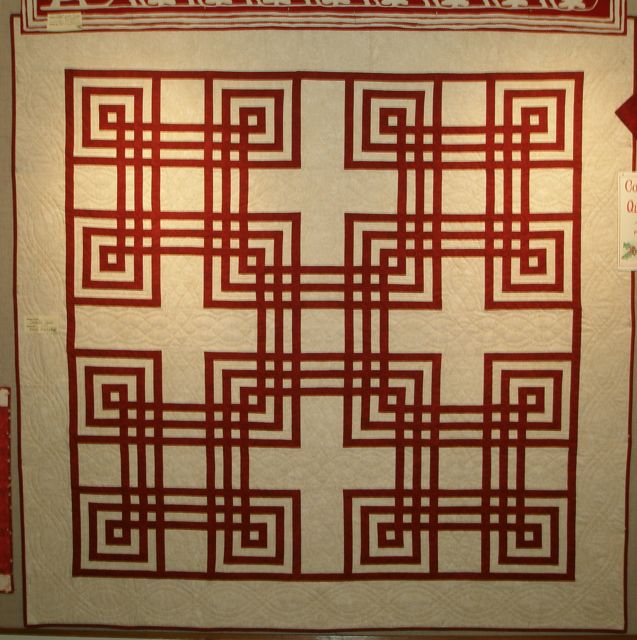
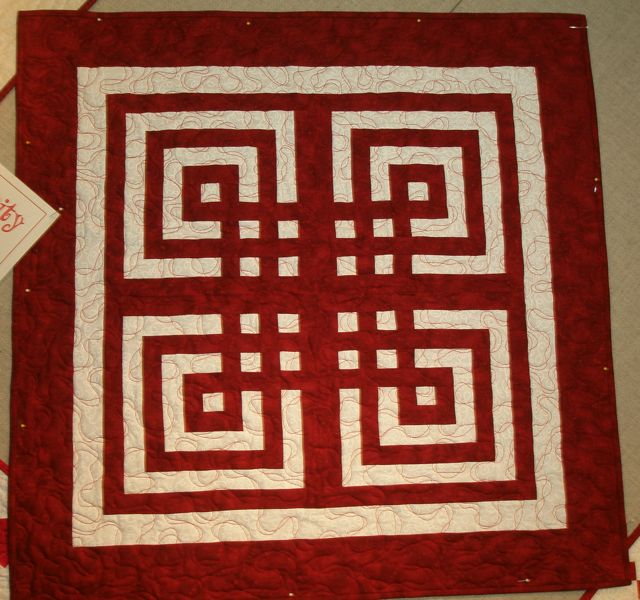
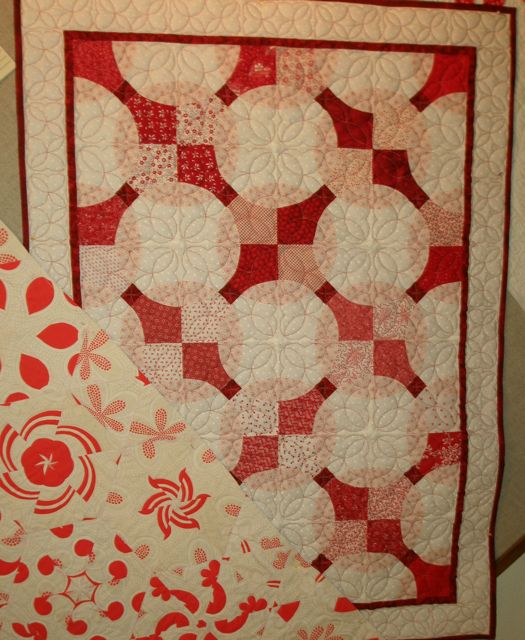
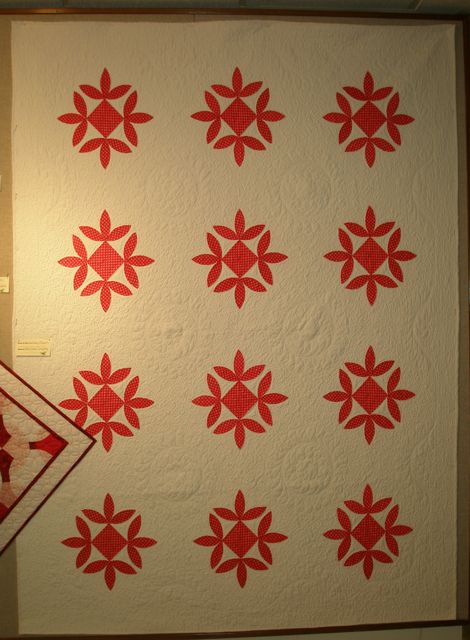

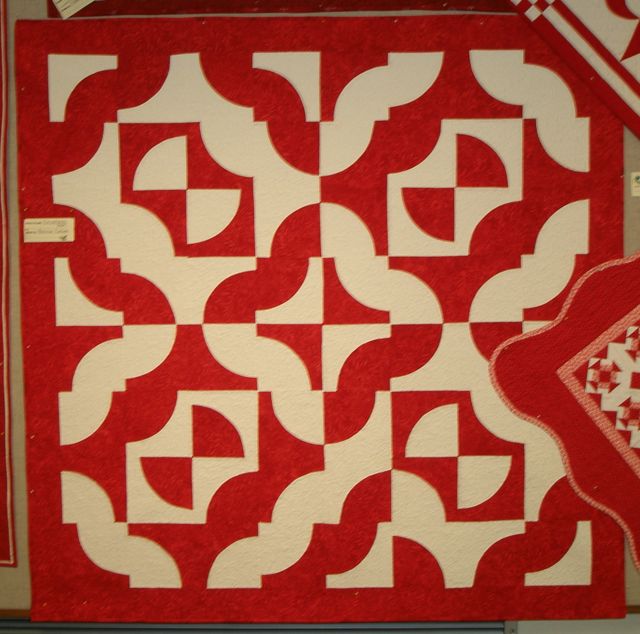

Last month the Longview, Washington library had a red and white quilt show.
It meant a snowy, 150 mile round trip drive from here, but I’m so glad we went.
I’ll just be quiet and let you enjoy the show!
It’s time for another Quilt Block A Month. You can join the fun by ‘liking” the page on Facebook.
The block for this quarter is the Spool Block. It offers a lot of options and is quick and easy to piece. If you do just one block a day, you’ll have a 78 blocks finished before the first day of spring!
This is a great way to use your scraps. All you need is: 2) 2-1/2″ x 7-1/2″ brown rectangles, 4) 1-1/2″ light squares, 2) 1-1/2″ x 5-1/2″ light rectangles and a 5-1/2″ center square—either plain or pieced. I like using a stripe because it looks like thread wrapped around the spool.
Some people like to mark their squares with a diagonal pencil line when doing sew-and-flip corners, but I just finger press them–quick and easy!
Add a square to opposite ends of the brown rectangle.
Stitch, trim and press. Note: I didn’t trim the background fabric away. It makes it a bit bulky, but I also think it stabilizes it. Your choice! Do this with both brown rectangles.
Add the white rectangles to the sides of the 5-1/2″ square.
Now add the brown rectangles to the top and bottom, making sure the light areas match up. Voila! You have a spool block! The unfinished block is 7-1/2″ x 9-1/2″.
Now, here’s where the fun comes in. You can do all kinds of things with the center square. You could sew 5) 1-1/2″ x 5-1/2″ strips together to make it look like thread wrapped around your spool.
How about using random width strips on an angle to represent the thread? I foundation pieced this.
Do you save selvedges? This is a great place to use them!
Here are the four sample blocks I made. I’ll play with setting possibilities when I have more finished.
They do make an interesting design when set next to each other. You get some secondary action going on!
I hope you’ll join us!
Thank you all for your input on the layout for my String Pieced blocks. It was so interesting to read all of your comments. We’re a diverse group! I’ve decided to go with the Offset Diamonds.
There were 116 comments. I used a Random Number Generator. The winning number was…………
Susan will be getting a package with 100 “strings” to start her on her own String Pieced Quilt!
Thank you all for your comments.
In June I posted a tutorial for String Piecing for A Quilt Block A Day.
Finally, I’ve finished 100 blocks. Now I just have to decide how to put them together!
My first thought was to set them in a Chevron pattern.
It didn’t look as good on the design wall as it did in my mind, so I went more traditional, with X’s and O’s.
Hmmm……I’m liking that, but I just had to try one more setting. I call this Exploding Diamonds.
Oh, wait! Just one more……. How about if I do Offset Diamonds!?!
Oh, too many decisions. What do you think? Leave me a comment and let me know your favorite setting. I’ll enter your name in a drawing to be held November 28. The winner will win 100 fabric strips to get you started on your own string pieced quilt!
My friend, Melinda, was just over in Walla Walla and went to the quilt show at the museum there. Today she shared slides from the show, and I just had to post them.
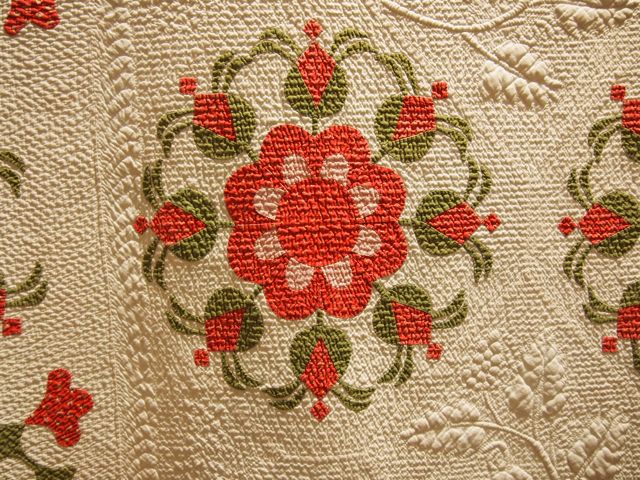
This Whig Rose was definitely the star of the show. Amazingly, they have the provenance of the quilt. It was made in 1854 by Mary K. Clark.
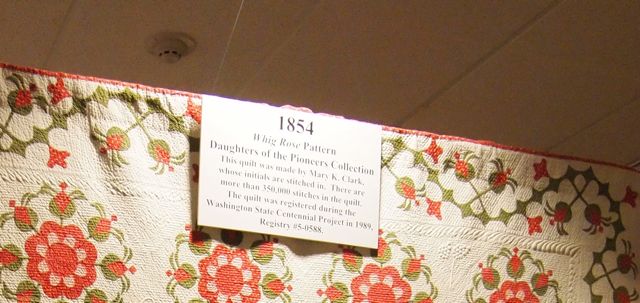
The quilting is incredible. There are over 350,000 stitches in it!
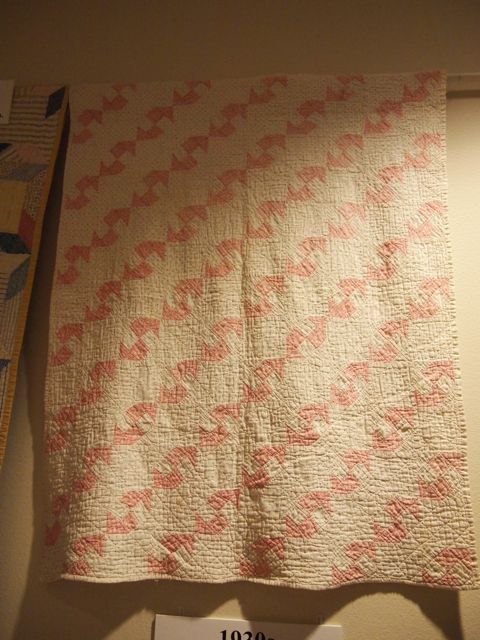
This Enhanced Four Patch is a sweet quilt. It’s not a design you see very often. From the 1930′s.
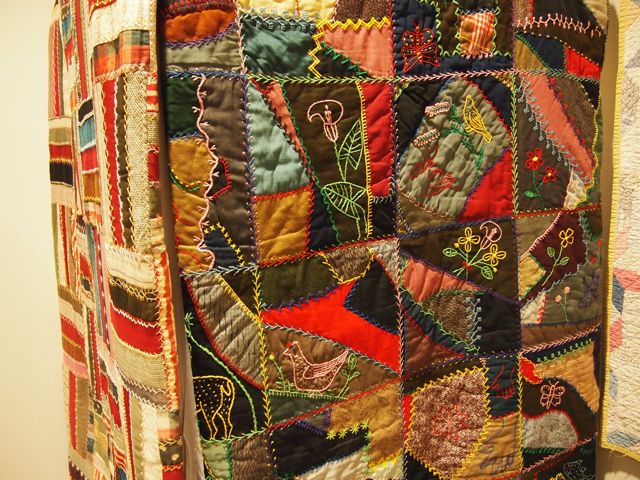
This is a really fine example of a Victorian era Crazy Quilt. It has an amazing variety of stitches!
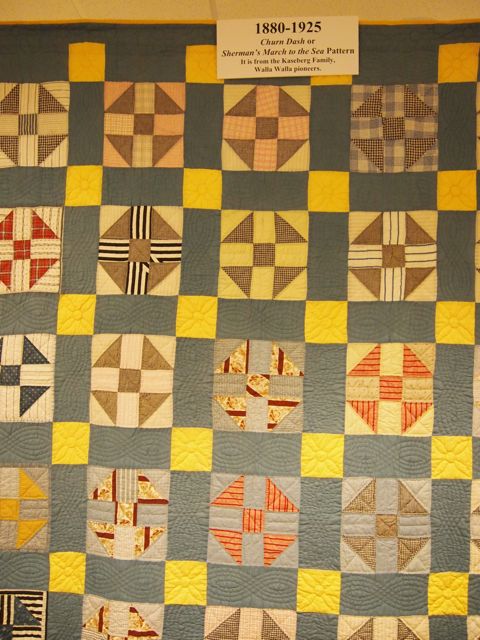
Here’s a Churn Dash. I see the label also refers to this pattern as Sherman’s March To The Sea. I hadn’t heard that reference before, but I love it! Quilt names say a lot about the what was happening in people’s lives.
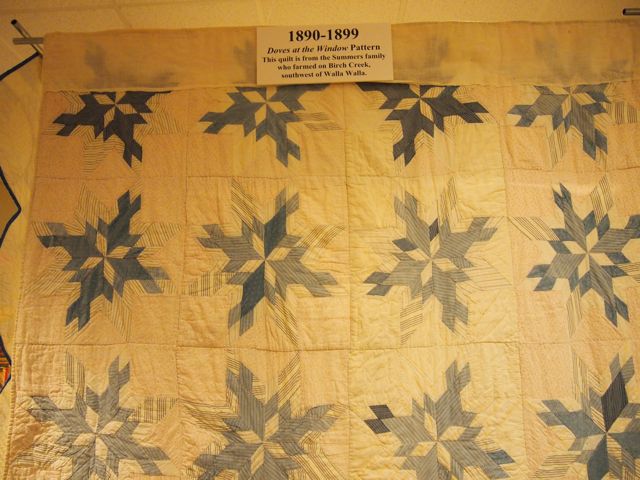
Doves at the Window is a very difficult pattern to piece. Do you see the four doves in each block? Isn’t it interesting that quilters were doing “abstract” designs over 150 years ago?
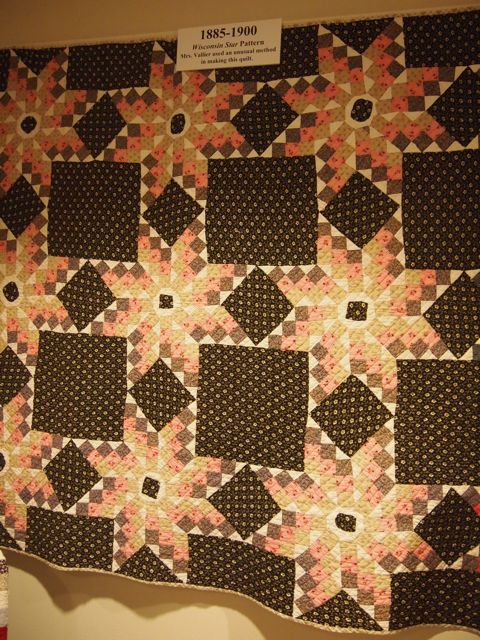
I’m not at all familiar with this pattern, called Wisconsin Star. It’s quite interesting the way it is pieced.
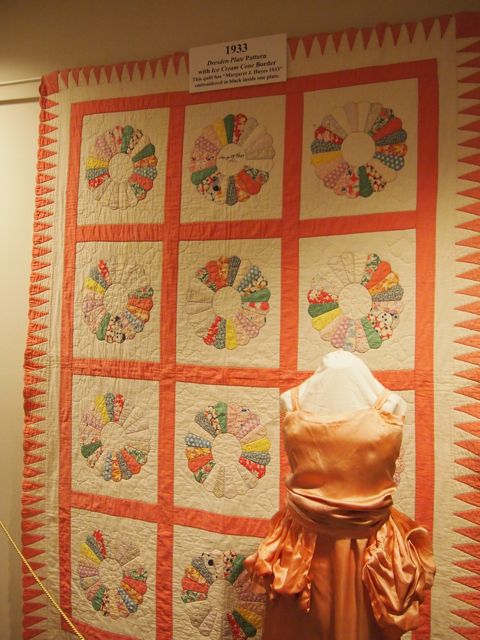
Here’s a very traditional Dresden Plate. Melinda thinks it may be from a Ruby McKim pattern entitled Friendship Ring–and I agree. It has 20 petals in the plates and the ice cream cone border.
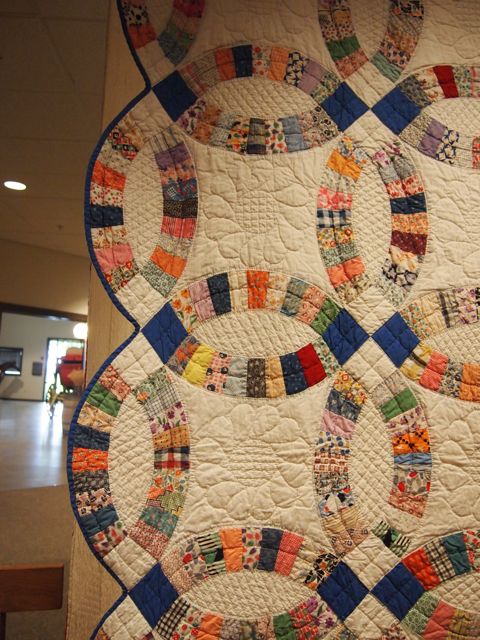
The Double Wedding Ring pattern is probably one of the most recognizable quilt patterns—even among non-quilters. The quilting on this one is lovely.
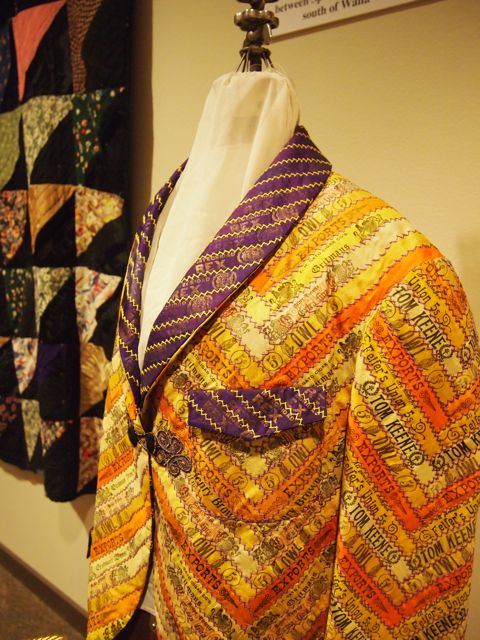
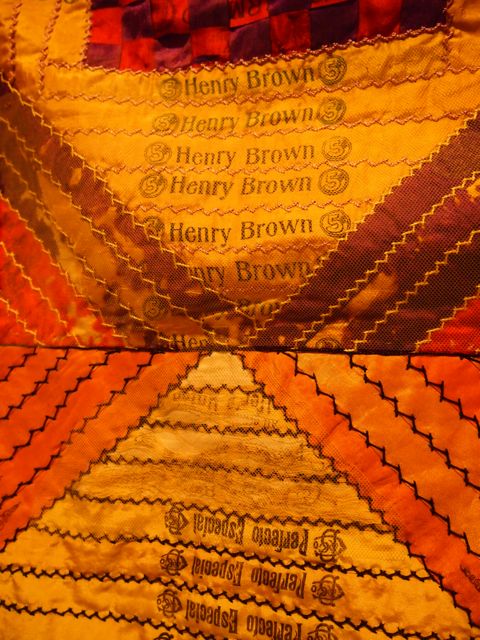
Now this is incredible! Small silk bands were wrapped around cigars to identify the manufacturer. Never ones to waste bits of fabric (and undoubtedly attracted by their bright colors), women began to collect and save cigar silks. They were most often yellow. The maker of this jacket certainly had a huge collection of silks, and the purple ones are the perfect choice for the collar and cuffs.
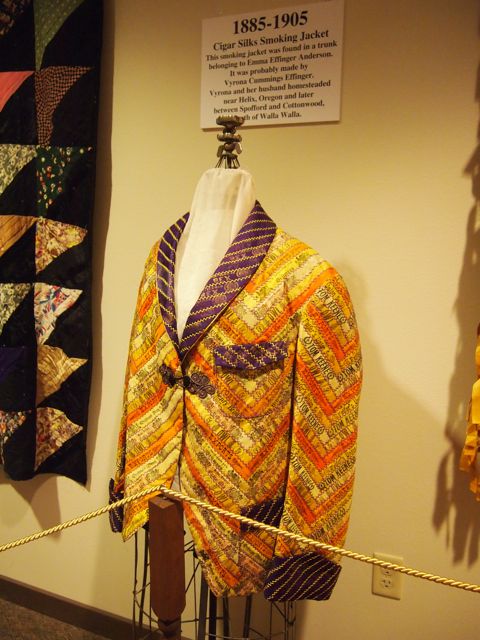
Her chevron design is perfectly pieced. And once the piecing was done, she did a feather stitch—by hand, of course—along the edge of each band!
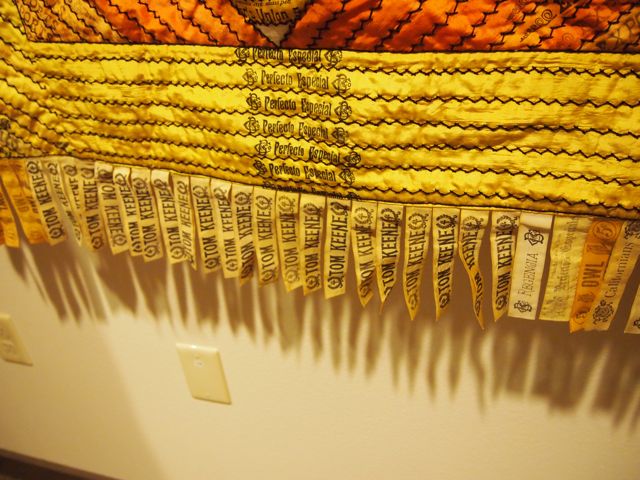
This cigar silk quilt was found in the same trunk as the jacket.
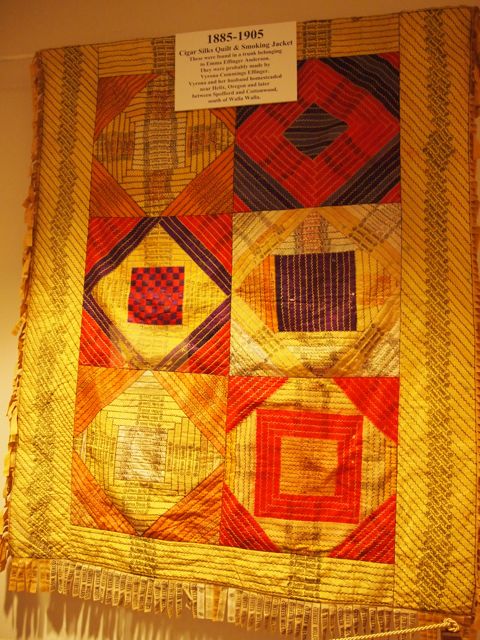
Again, beautifully sewn and feather stitched.
And don’t you love the “fringed” border?
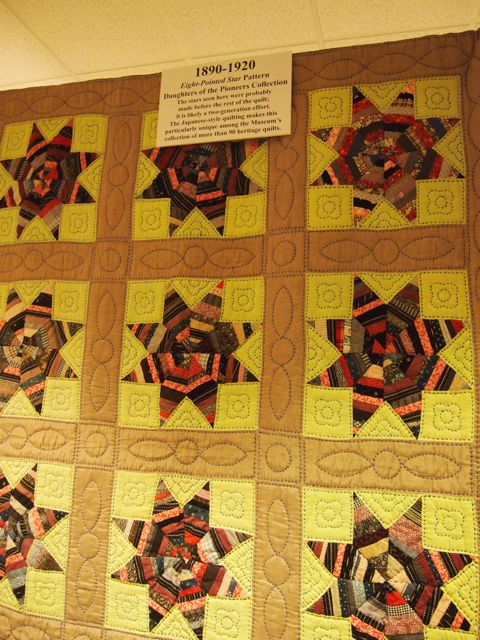
An Eight Pointed Star. The label refers to “Japanese” quilting. Perhaps it’s reminiscent of Sashiko.
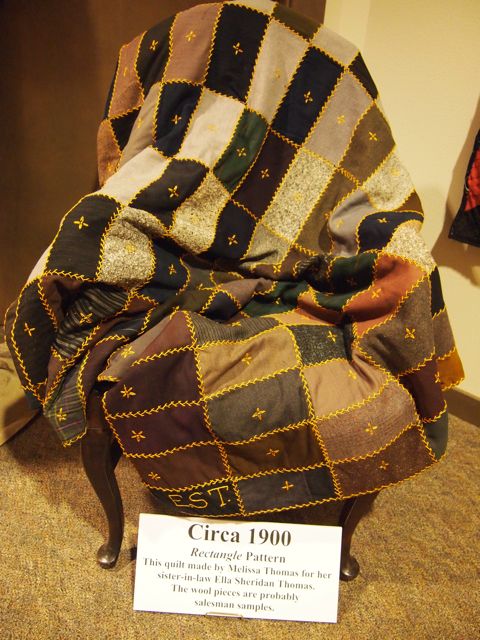
This wool quilt was probably made from suiting samples from a tailor’s sample book. My husband’s grandfather and great-grandfather were both tailors and we have some quilts similar to this.
This is a very old Courthouse Steps quilt.
I suspect it’s foundation pieced.
Even utilitarian quilts are pleasing to the eye.

This last pattern is called Hearts and Gizzards!
Thank you, Melinda, for sharing with us!
While Bob and I no longer own a cranberry farm, he does work each harvest season for another grower. I, however, just show up on a sunny day with my camera!
It’s time again for a new round of quilts at A Quilt Block A Day. That is the Facebook page I have where a group of us does a block a day for three months, four times a year! We change blocks with the seasons, and, since tomorrow is the first day of fall, it’s time for a new block!
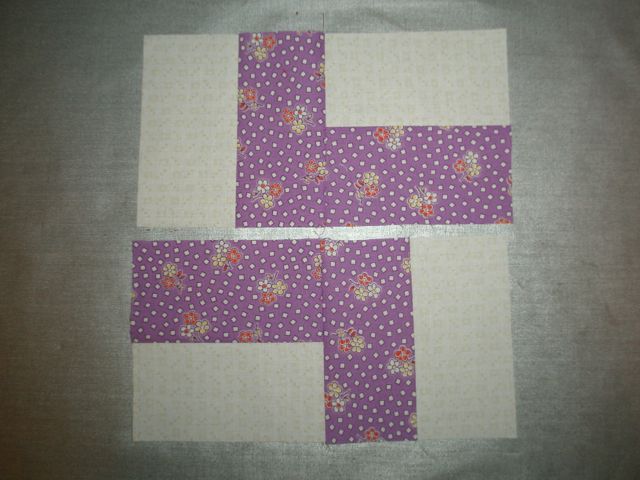
This is an easy block with a lot of impact—the Tessellating Cross. This is one I made for my book Fat Quarter Fun.
In this quilt you have the same design in the light and dark areas. In other words, you have light crosses, the white, and dark crosses—the black in the sample above and the red in the sample below.
I’ve chosen to use a bunch of my lavender scraps for my quilt. Here’s how I did it. I grabbed my bin of lavender scraps. I pulled out several hunks that were still full width, i.e. from selvedge to selvedge. From each of those I cut a 2-1/2″ strip. Then I cut 2-1/2″ strips of a cream-on-white print. (*See below if you don’t want to use strips.)
Stitch the two strips together along the long sides. Set the seam with your iron.
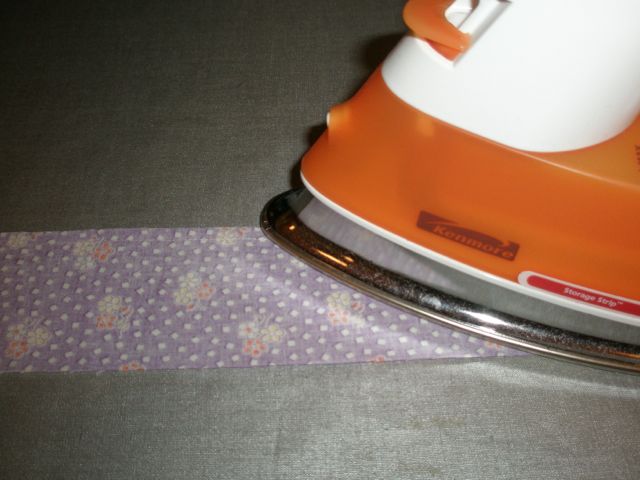
Fold back the dark strip and press. Do you know that if you have your dark fabric on top, when you lift and press it, the seam below will always be pressed toward the darker fabric?
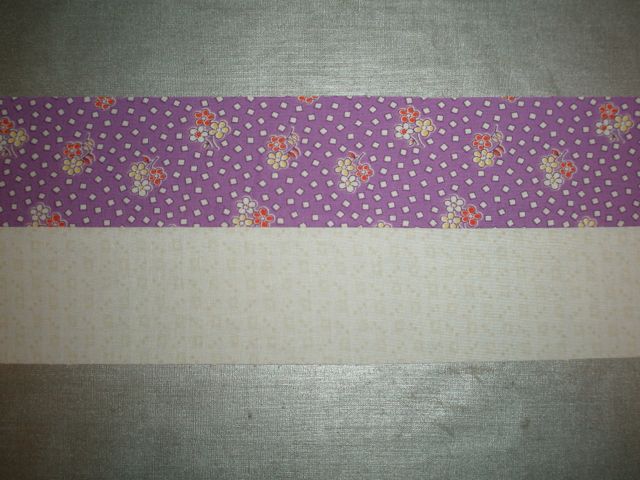
From your strip, cut eight 4-1/2″ segments. This is enough for two blocks.
You should have a little more left, so cut two 2-1/2″ segments. You can use these later in the border, if you want, or use them to make four-patches for another project.
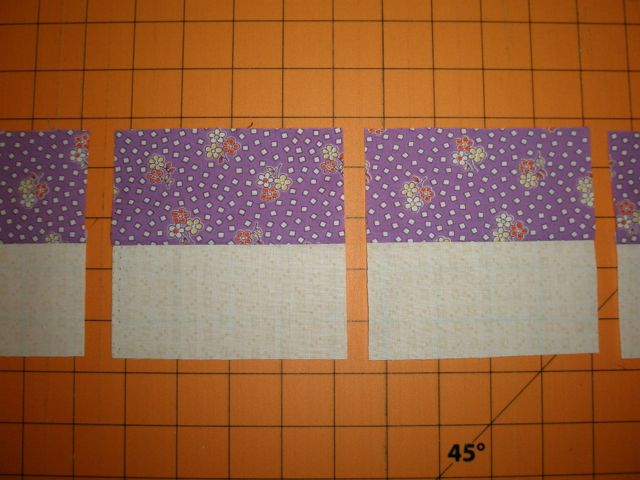
Take your 4-1/2″ segments and lay them out as shown below.

Stitch the top half, then the bottom half. Press toward the long dark strip and stitch the two halves together.
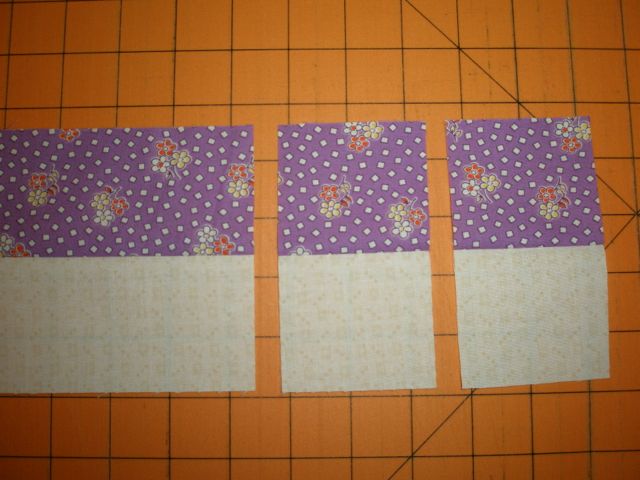
From the back, you can see that I pressed that last seam in two different directions. On the left, I pressed it up (toward the lavender print) and on the right, I pressed it down (toward the lavender print). To do this, you have to wiggle the seam in the middle a bit. It will open up and everything will lay nice and flat!
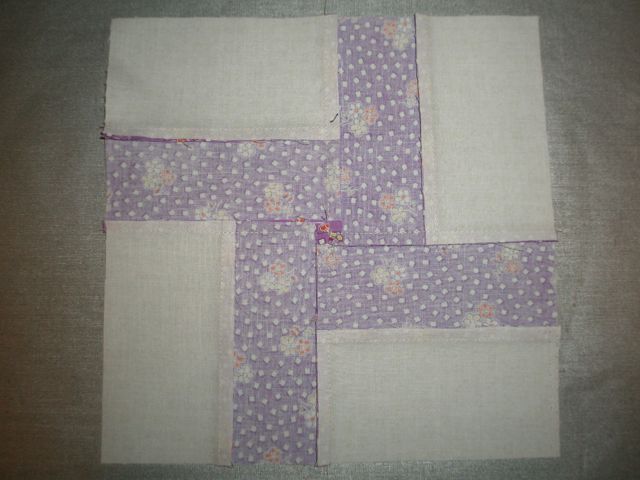
The finished block! There are only four seams here—three if you strip pieced the first part!

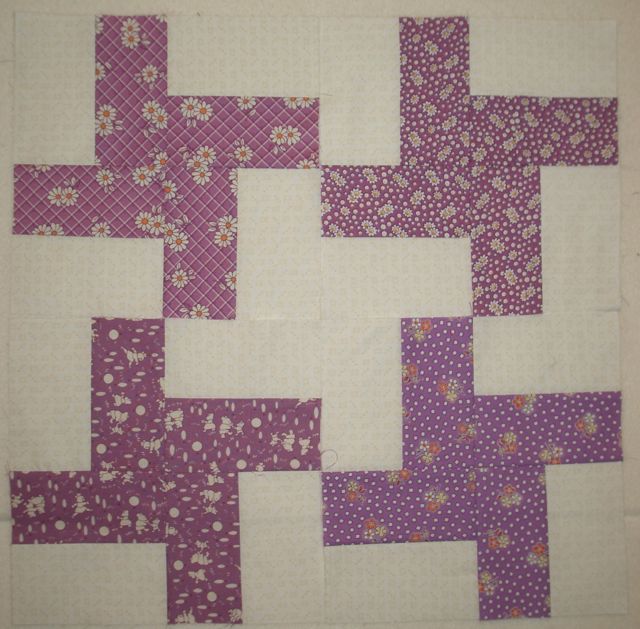
When I put four of them up on the design wall, you can see the white cross in the center!
So, won’t you come on over the A Quilt Block A Day, click “Like” and enjoy the progress of the rest of the group? If you make just one block a day (three seams!), you’ll have 90 blocks by the time winter rolls around!
You can CLICK HERE for the tutorials for previous A Quilt Block A Day tutorials.
*If you don’t want to use strips, you can use scraps for your blocks. You will need four 2-1/2″ x 4-1/2″ of light and the same of dark fabric for each block.
Of course you can’t visit Scotland without visiting castles!
This is Culzean Castle.
It had a fabulous clock tower.
It’s on the coast near Ayr.
The view up the coast was incredible!
I was fascinated by the erosion of some of the sandstone!
Probably the most famous castle in Scotland is Edinburgh Castle. It totally dominates the city and you can see what a strategic vantage point it had.
Our first evening in Edinburgh we took this sunset shot. It had been raining and the sun peeked through for just a few minutes and lit up the castle!
This is Cawdor Castle, still occupied by the Dowager Duchess of Cawdor, but she opens it in the summer for tours.
We spent more time touring the fabulous gardens than we did the castle!
This is the remains of Urquart Castle.
It was such a beautiful setting.
It was spread out over a very large area.
We climbed the tower and peeked through the windows.
I loved this tiny round one!
Stirling Castle. Do you see a trend with the weather while we were in Scotland? We were there for two weeks and saw very little blue sky!
This was a cool little ruin. It must have been a tiny castle–just perfect for a princess!
Here’s a castle we snapped from the bus.
Those castle builders really knew how to pick the best real estate!
Bob and I went to Scotland this summer. We wanted to see the town that his grandfather and great grandfather emigrated from. The town is Kilwinning. It is home to Kilwinning Abbey and the first Masonic Lodge, known as The Mother Lodge.
It was founded in 1140! Bob’s ancestors were members here.
We knocked on the door and stated our reason for being there and were given a very warm welcome and a tour of the lodge.
But most exciting was that they were having a parade the day we were there!
It was called an Orange Walk or Orange March.
I had never heard of the Orange Order, but it’s a fraternal organization.
There were lodges represented from all over Scotland and Ireland.
Their name comes from Prince William of Orange.
Each lodge carried a big banner.
It was so interesting to see the way the different groups were dressed.
Some just marched, some had drums and some had fifes.
And a few had drum majors like this guy, who was very good!
I think there were about 75 units in the parade.
It lasted over an hour.
There were a few women’s groups, and I loved their hats!
The most dominant feature of the town is the ruins of the Abbey.
You see it from everywhere.
After the parade, we wandered over to the Abbey.
We were delighted to find that the tower was open and you could go up with a guide. While we were stopped on the bell level, the bells chimed! I just about jumped out of my skin!
The view was fantastic!
On the way down, I told the guide that Bob’s great-grandfather had been provost of Kilwinning (that’s like the mayor). She said, “You know that we have the robe he would have worn when he presided at meetings.” Well, we didn’t know, but what a thrill to see it and imagine all the times Bob’s great-grandfather donned it.
She told us there was even a street named for him…
…so we had to check it out, of course!
I’m obsessed with Swedish doors!

They’re all different….

…but somewhat the same.

They seem to be made of planks. Some are horizontal like the first four, but they’re not the most common.

These chevron designs seem to be quite common.

I love the nail head detail on this one.

This is a very old door.

Here’s a combo of chevrons and horizontal planks.

A variation on the chevron theme is the diamond design.

This is probably the most common.

Blue is a popular color,

as is gray.

Often a natural stone is used as a step.

Great detail around this double door.

An interesting combination.

I love the little diamond windows.

Another very old door.

I love the stairs in front of this one.


Another fancy surround.

I thought the arched top of this door was interesting.

The following are all at least a century old.

I think these very old ones may actually be carved.

Amazing paint.

What a cheerful way to be greeted when visiting someone!


When we built a Swedish cabin in our woods, it had to have a Swedish door, too!
