When Sally, Kathleen and Kasi were here last weekend, we took a trip to Chez Monica. It is a quilter’s paradise. You could be in there for hours just soaking up mental image after mental image because everywhere you look there’s something to feed your soul. Photos will never do it justice, but here are a few snaps to share for your enjoyment.
P.S. I’ve added more photos to the weekend post, courtesy of Kasi, so even if you’ve read it, you may want to go back. Her photos are amazing!
I’m so excited about our upcoming retreat. There are six spaces left, so if you could use a little uninterrupted time to work on your projects (as in Christmas is coming!), won’t you join us?
Days – You have the option of a three or four day retreat. The four day retreat is an additional $75.00–but think of what you can get done! THREE Day Retreat – Friday, November 6-Sunday, November 8. FOUR Day Retreat – Thursday, November 5 – Sunday, November 8.
Place – The retreat will be at the Falls Creek Retreat Center. The Retreat Center is 35 miles west of Chehalis on Highway 6. I taught there a few months ago, and it’s a lovely facility. We will be sewing in the gymnasium, so we’ll have plenty of room to spread out.
People – There will be 64 of us, including three “staff” members. Staff members are Robin Anderson, Monica Solorio-Snow and me!
Meals – The 3 day retreat includes 5 meals–dinner on Friday night, three meals on Saturday and brunch on Sunday. The 4 day retreat includes 8 meals–dinner on Thursday, three meals on Friday and Saturday and brunch on Sunday.
Accommodations – We will be split between the Creekside Lodge and Cedar Lodge. Each lodge has a lovely sitting room as well as the bedrooms. Everyone will have their own bed. Bedrooms have between 2 and 5 beds. Each bedroom has its own bath.
Structure – You are free to do your own thing at the retreat–work on UFO’s, start a new project–whatever you desire. The only thing we ask is that you not bring embroidery machines and have them running continually. I will also be offering a mystery class to those who would like to participate. Email me if you’d like details on that. The Anna Lena Staff will be there to offer assistance with your projects. These often lead to impromptu demonstrations.
Cost – THREE Day Retreat – Friday, November 6-Sunday, November 8 – $199.00
FOUR Day Retreat – Thursday, November 5 – Sunday, November 8 – $274.00
Click here to sign up. We’re going to have a blast!
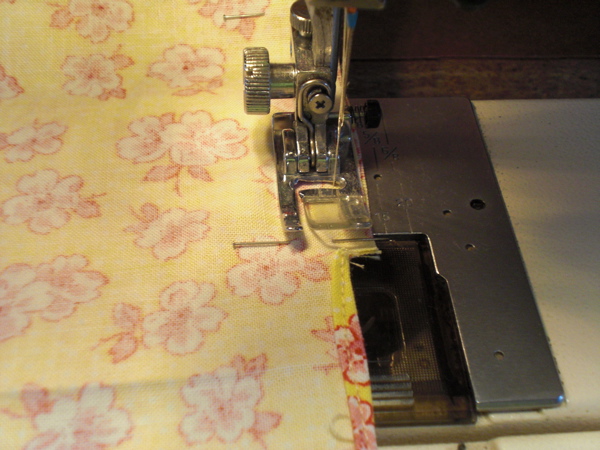
I had so much fun a few nights ago–I sewed something just for myself! I made a Lilly Apron.
This pattern was designed by my friend Michelle at Busy Bee Quilt Designs. I bought the pattern back last May at Quilt Market, and have been meaning to make one for myself ever since. Good intentions, you know. Well, I thought it would be fun to have an apron to wear when working my booth at Northwest Quilting Expo, so finally got my fanny in gear and sewed. This is the result.
Michelle’s directions were great. I think if I hadn’t decided to make it reversible, I would have been finished in about two hours. As it was, it seemed like a good idea to make it reversible. From start to finish, I spent no more than three hours on this.
I liked it so much, I didn’t take it off for two days. Bob thought I was crazy, but, hey, it’s important that I keep up my image! I want to make one out of each of my fabrics. Wow! That would be one big stack of aprons!
P.S. I just found this photo of Michelle at Market, wearing the original Lilly apron. Isn’t she adorable???
Time for a Give-Away. I’ve written four quilting books, and I’d like to give away all four of them to one lucky winner.
Besides blogging, I also send a weekly newsletter. If you leave a comment, I’ll add you to the newsletter list and put you in the drawing for the books.
Isn’t this little bag just adorable? My friend Robin, who stitched up the Sweet Pea Jumper for me, thought any little girl who had such a cute jumper would want a little purse, too, so she just whipped this up! Amazing, huh? And she took lots of photos during the process so I could post this tutorial. If you’d like to make it, here’s how she did it.
Purse Tutorial
Fabric Requirements
2) 8″ squares of Sweet Pea Doll Panel
8″ x 21″ lining fabric
2″ x 8″ bottom fabric
2) 1″ x 24″ strips for drawstrings
Instructions
Insert the 2″ x 8″ piece between the 8″ dress panels. The bottom of each dress should be facing the inserted piece. Press seams open.
Place this piece right sides together with the lining, matching one end. Stitch. Press seam open. Now match the other short ends. Stitch. Press seam open. The lining piece is longer than the panel piece. Find the center of the insert and the lining. Pin together. Press outer edges.
Make a 1/4″ clip at the seam line of the lining where it lines up with the insert. Repeat on both sides.
Turn under area from clip to make a narrow hem from clip to seam. Stitch.
Pin the side seams.
Sew up sides of lining and panels, leaving hemmed area unsewn.
Mark a diagonal line 1″ in from each corner.
Stitch across market line to form a gusset.
Turn right sides out through hemmed opening. Top stitch both sides where the lining meets the panel.
Make drawstrings by folding long sides of 1″ x 24″ strips toward center. Press. Fold in half and topstitch.
Insert one drawstring left side, bringing it all the way around. Knot ends together. Insert the second drawstring into the right side, bringing it all the way around. Knot ends together. Fill with special treasures for your special little friend!
Recently my friend Robin gave a presentation at our Guild about block exchanges.
You see, she belongs to a group called The Ruthless Quilters (Ruth moved to Idaho!) and every year they do a block exchange. Robin picks a block and everybody makes a specific number of blocks. Then they trade blocks so that everyone has blocks made by everyone else. Now each person has exactly the same blocks, but how they put them together is up to them.
This was my favorite of the exchange quilts that Robin brought for show and tell. No, I don’t think the color orange influenced me one bit! Isn’t it amazing what different people did with their blocks?!?
We interrupt this Ohio adventure for a quilt kit give-away!
This Red and White Delight quilt is featured on the cover of Quilts and More–and it uses my fabric! The quilt was designed by Maebeth Oxenreider, and the folks at Q&M were nice enough to let me offer kits for the quilt on my web site. One cool thing that Q&M does is show fabric requirements and cutting instructions for lap, twin, queen and king sizes. There’s even a pillowcase kit! Here’s the queen size – photo courtesy of Meredith Corp.
So, I thought it would be fun to give away a kit for a lap sized quilt. It finishes 42″ x 52.” I’ll include the magazine, of course, so you’ll have the pattern. This give away is worth $46.98. All you have to do is leave a comment and on June 8, I’ll use a random number generator to pick a winner. Oh, and if you want a bigger size, you can apply the $$ toward a bigger one. Hope you win!
Well, it’s my name, anyway. I can’t tell you how exciting it was the first time I saw my name on the selvage edge of a bolt of fabric. That was a BIG day for me! When my first fabric line came, my bbf Monica made a Market sample for me, and she very carefully trimmed the selvages and put them in a little bag for me. I might not have thought of the on my own. Thank you, Monica.
About a year ago at Market, Kris from Cozy Cottage spotted something new at Market that she thought was hot–plastic cups with a piece of batting between the inside and outside layer. The idea was that you’d make a mini quilt and personalize your cup. I LOVED it. I bought them for my girl gang–and I’d found the perfect thing to do with my selvages.
But now, I have two more bins full of selvages. I need to make something else. I’ve been visiting Karen Griska’s blog. She’s written a book about selvage quilts and has lots of inspirational photos on her blog.
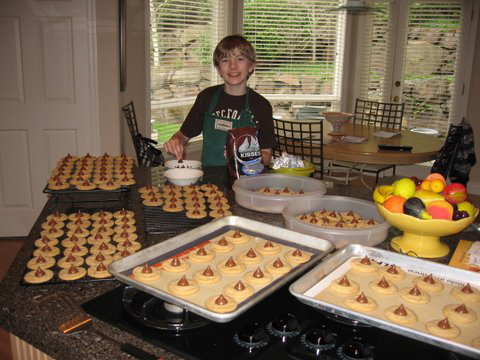
Last night my sister sent me these photos. She and my nephew, Cole, were on a cookie baking roll yesterday. The reason? Cole plans to have a concession stand at Sally’s upcoming garage sale! He will offer three kinds of cookies and beverages. Don’t you love it? I’m so happy to see that the entrepreneurial spirit lives on in the family. I’m sure we have my dad to thank for that!
Here’s the young chef.
The cookies in progress.
They made three double batches of these cookies, called Benny’s Peanut Butter Peaks. I emailed Sally and asked her if we knew who Benny was. Here’s her reply:
Benny is a character in the Boxcar Children book series. Cole fell in love with those books when he was little. Sid and Robin (my brother and sister-in-law) gave him the Boxcar Children cookbook one year for Christmas, and this recipe was in there. Benny was the youngest child, and he loved peanut butter, so you know he’d love these cookies. I think most people call them by a more-generic name, but Benny has stuck in our house.
I phoned Cole this morning and he tells me he’s planning to bag the cookies–two to a bag–and sell them for fifty cents a bag. And, he’s planning to make two other kinds of cookies! I just may have to go to that garage sale myself!
BENNY’S PEANUT BUTTER PEAKS – DOUBLE BATCH
2 cubes (1 cup) softened butter
1 cup peanut butter
1 cup sugar
1 cup brown sugar
2 eggs
2-1/2 cups flour
1-1/2 teaspoons baking soda
1 teaspoon baking powder
6 tablespoons more sugar
72 chocolate kisses, unwrapped
Put butter, peanut butter, 1 cup sugar, brown sugar and eggs into mixing bowl.Beat with electric mixer on medium until smooth and creamy.
Mix in flour, baking soda and baking powder.Cover and chill for at least one hour or overnight.
Shape the dough into balls.Shake three balls at a time in a plastic bag with 6T sugar.Place the balls two inches apart on a cookie sheet.
Bake at 350 for 8 minutes.Put a chocolate kiss in the center of each cookie and press down gently.Continue baking 2-4 minutes or until chocolate has melted down a little.
Remove cookies with pancake turner and cool on cooling rack.
For more than ten years now I have belonged to a Redwork Club. It started when I had the shop, and we continue to meet each month. It’s really become more than a Redwork Club. We do all kinds of embroidery and while we often have a projects, we love to share show-and-tell of anything needlework that we’re doing. This is some of what was shared at our meeting.
Linda W. has taken the Through My Window panel and added her own special touches to it! Not only is she embroidering the whole design, for each month she is adding a little something extra–black eyes on the snowmen, satin stitched hearts for February, a green shamrock for St Paddy’s Day and a purple Easter egg. Don’t you just love them!
Ethel K. has completed our last years project–Playmates. She made it for her great-granddaughter, Ellie.


