It’s the beginning of a new season and that means a new block for my Facebook page A Quilt Block A Day! The page is fun to follow. The idea is that even if you’re too busy to make a new quilt, you should be able to find time to make at least one quilt block a day. At the end of the quarter, you’ll have about 90 quilt blocks! Not everyone makes a block a day. Some do seven a week, or a handful when they find the time, but it’s still fun. I always do a tutorial for the new block and during the quarter I post lots of inspiration—and so do those who follow the page. So, click on over to the Facebook page and click “Like” so you can follow all the fun, too!
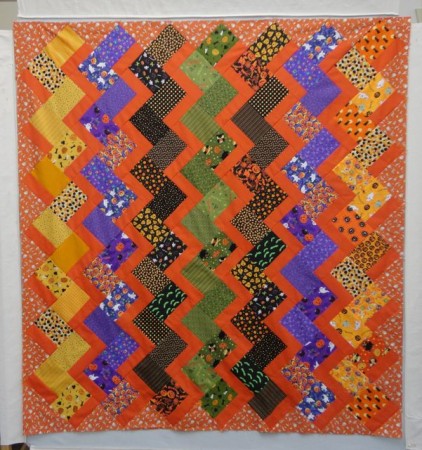
This time, the block is the Chevron. There are many ways to make a chevron quilt. You can do it with triangles or rectangles, it can be scrappy or planned, the rows can be the same width or different widths. This is my favorite way–with a skinnier accent row and triangles, and it couldn’t be easier! It’s easy to do with scraps or yardage. I had a lot of Halloween fat quarters that I’ve collected over the years, so that’s what I’ve used here, and that’s how the tutorial is written. At the bottom, I’ll give additional instructions for scraps.
You will need an assortment of fat quarters and an accent fabric.
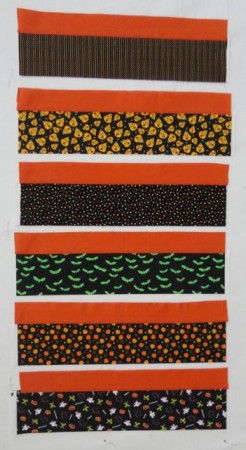
From the fat quarter, cut a 4-1/2″ x 22″ strip.
From the accent fabric, cut a few 2-1/2″ x 44″ strips. Cut them in half to match your fat quarters.
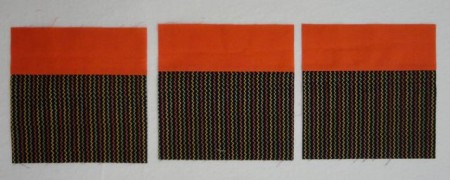
Stitch them together with a 1/4″ seam. Press.
Cut into 6-1/2″ segments.
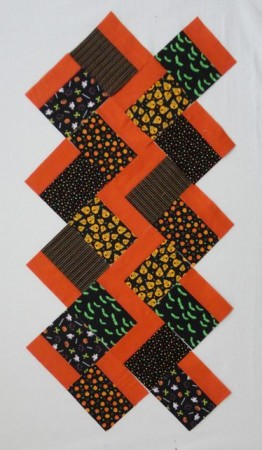
Lay your blocks out so they form a zigzag design. That’s it! I told you it was easy!
Since these blocks are set on point, you’ll eventually need side-setting and corner triangles. This can be the same as the accent fabric or a different fabric.
For the side setting triangles, cut squares 9-3/4″ and cut them in half twice diagonally.
For the corner triangles, cut squares 5-1/4″ and cut them in half once diagonally.
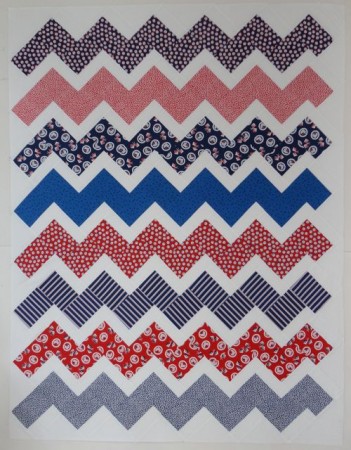
You can make your zigzags vertical, like I did in my Halloween quilt, or horizontal, like the quilt below that I did for our local Loyalty Day celebration. You’ll also notice that the Halloween quilt is “controlled scrappy,” meaning I used many different prints, but kept the colors the same in each row. The Loyalty Day quilt uses the same fabric in each row. Oh, the possibilities!
I hope you’ll try this, join the Facebook group and post pictures of your progress!
If you’re not using fat quarters, cut your accent pieces 2-1/2″ x 6-1/2″ inches and your main fabrics 4-1/2″ x 6-1/2″.
For the Loyalty Day quilt, I used two 4-1/2″ x 42″ strips for each row.
4 Responses
March 22nd, 2013 at 10:35 pm
I have plenty of scraps but, alas, my next project is to finish my grandmother’s quilt. : }
March 23rd, 2013 at 2:15 am
Do you have a link where all your previous Quilt Block A Day projects reside?
March 25th, 2013 at 10:44 am
I really like this version of yours with the accent zigzag between instead of full width !
Did you notice yet that you turned 4 of your Halloween blocks the wrong way on the left side of that layout? Just thought you’d want to know and put a corrected picture, because I’m sure that people will want to use this great tutorial !
Thank you for taking the time to prepare this for us.
May 8th, 2013 at 8:47 pm
This looks like a fun project, I’m going to play along!