A good friend of my sister’s lost her husband a few years ago. She still had three of his Hawaiian shirts in her closet, and when she saw a quilt made out of old shirts, she knew she wanted to use the Hawaiian shirts for quilts for her three children. Since she’s not a quilter, Sally put the SOS out to me. The timing was perfect, as we were going to a retreat at The Wild Rose.
Sally brought along the shirts and I started unstitching them.
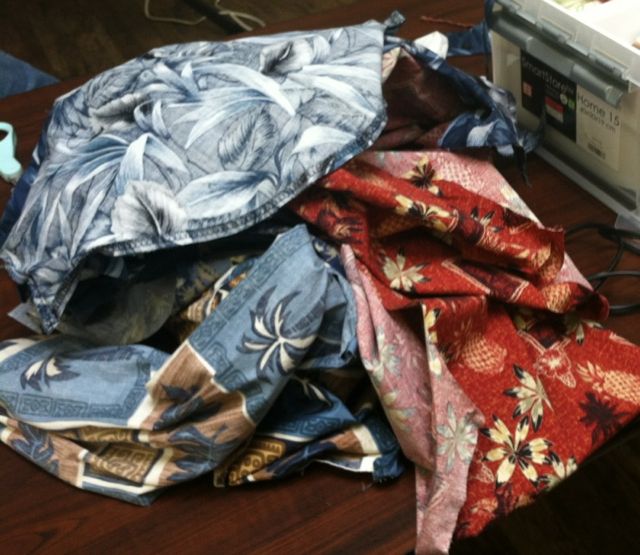
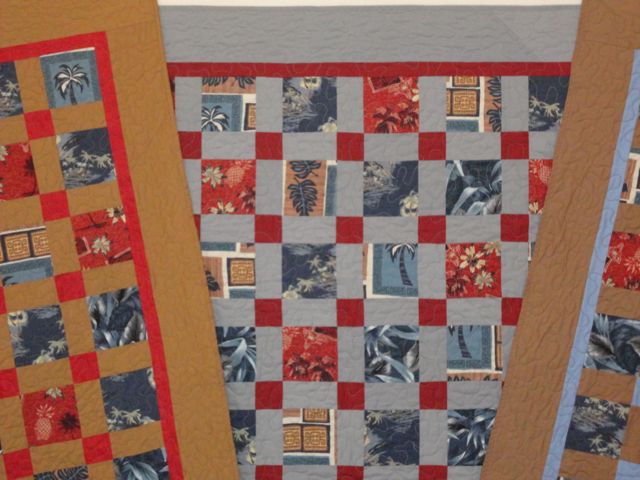
It was really a bigger job than I thought, but I wanted to make the most of the fabric. I ended up cutting the shirts into 4-1/2″ squares. I divided them in thirds and put one stack up on the design wall to balance out the colors.
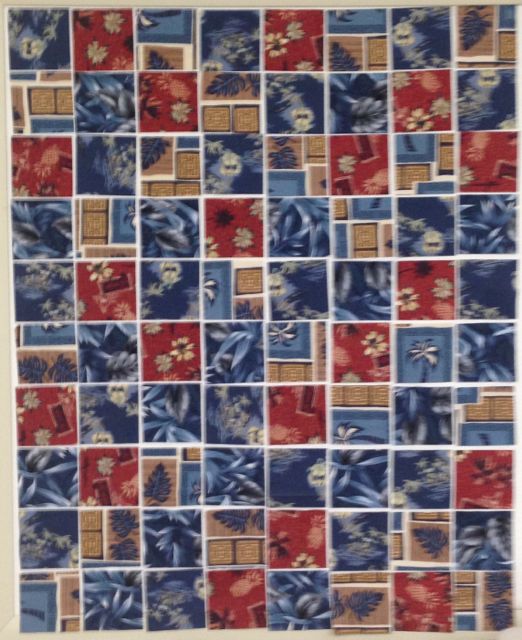
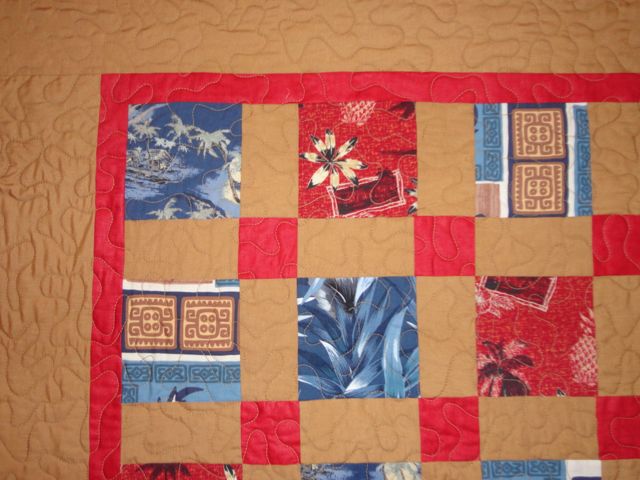
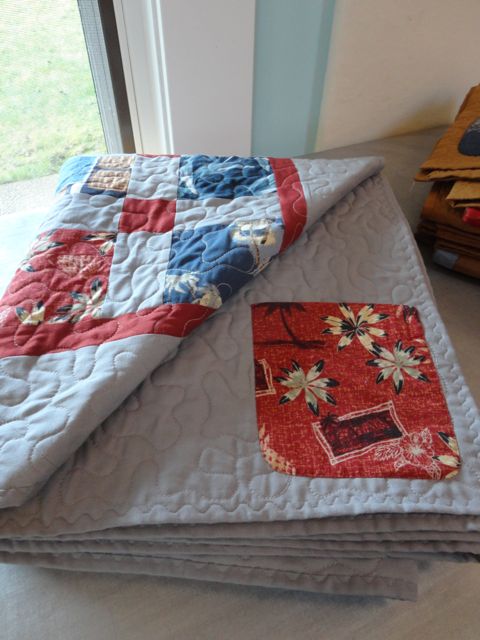
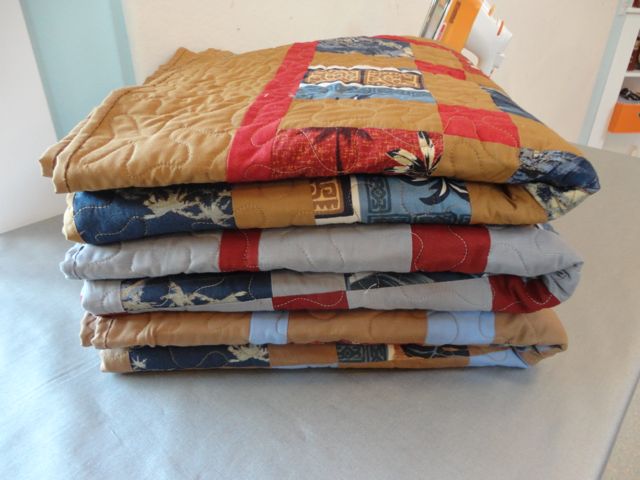
I wanted the quilts to be similar, but still different, and I wanted the prints to be the “stars” of the show. So I decided I would use solids and set the blocks together with sashing and cornerstones.

It’s a very simple setting, but I think it served its purpose.
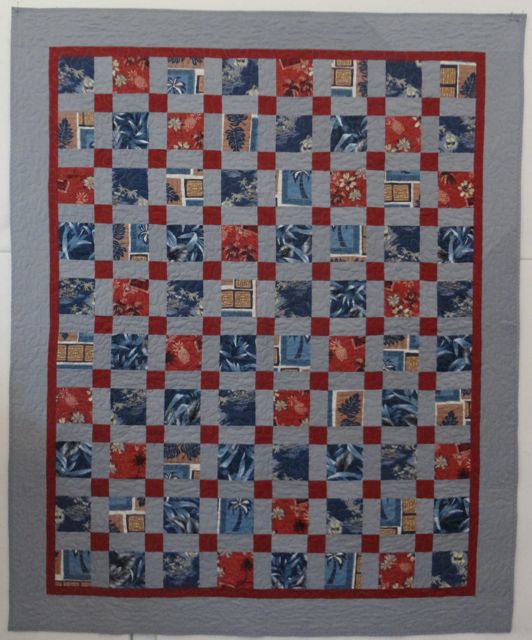

I finished them off with a simple stipple.
Each shirt had a pocket, so I stitched one to the back of each quilt.
I was pleased with the way they turned out.
I’m sure the kids will treasure them.
If you want the fabric requirements to make one of your own, they’re below. This is also a great way to show off fussy cut, novelty prints or even photo transfer blocks.
Hawaiian Shirt Quilt
Materials
1 Hawaiian shirt (I got enough squares from each shirt to do one quilt, but I mixed them up for interest)
7/8 yard cornerstones and inner border fabric
2-1/4 yards sashing and outer border
4 yards backing
From the Hawaiian shirts cut 80) 4-1/2″ squares
From the cornerstone/inner border fabric, cut 10) 2-1/2″ strips. Cut four strips into 2-1/2″ squares for cornerstones. Use remaining squares for inner border.
From the sashing/outer border fabric cut 18) 2-1/2″ strips; crosscut into 142) 4-1/2″ x 2-1/2″ rectangles for the sashing. Then cut 7) 4-1/2″ strips for the border
Cut the backing into two equal pieces.
I pulled the backing around to the front of the quilts and machine stitched for the binding.
7 Responses
December 5th, 2013 at 5:08 pm
Wow, you really made good use of that fabric. They look good!!! I can’t believe you got that much fabric out of only 3 shirts….you were very thrifty!!!
December 5th, 2013 at 6:26 pm
They will treasure these gifts! You did a fabulous job, as usual!!
Next…quilts for Sweden??
xo
December 5th, 2013 at 7:38 pm
what a wonderful way to preserve a memory!
December 5th, 2013 at 11:31 pm
Wow! So talented and a good friend!
February 20th, 2014 at 12:50 pm
I might have to make one of these for my Uncle!
October 16th, 2014 at 11:22 pm
HI, I have a few vintage hawaiian shirts that I was lookin’ to find someone who would make a quilt for me. Do you have any information on people that may have the time to do this? Thanx… Darryl
October 25th, 2014 at 8:52 am
I don’t. You might pop into your local quilt shop and see if they know anyone.