• 26Dec
    Categories: Everything! Comments: 9

    I’m lucky enough to live very close to my mom, and we go out to lunch almost everyday.

    mom1

    But Bob and I are heading to our Swedish house for almost a month, and Mom’s worried she’s going to really, really miss us.  And when you’re 90, it can be hard to remember just when we’re coming back.  So, I decided a little visual reminder might be good!

    adv1

    I got some adorable little bags and stickers at Scrapuccino’s.

    adv4

    I did the countdown and Bob punched holes.

    adv2

    I added a few notes here and there.

    adv3

    And then it was candy time!

    adv5

    I filled each bag with a piece of candy.

    adv6

    Then I added a little pink ribbon—Mom’s favorite color.

    adv6

    Luckily, I had an empty box from Christmas…

    adv7

    …and they fit perfectly!

    adv8

    I hope it helps the days go by a little faster.

    Tags:
  • 18Dec
    Categories: musings Comments Off on Seven Kinds of Cookies – Date Pinwheels

    Here’s another favorite from Bob’s side of the family.  His mom made them every Christmas.  They have a brown sugar dough and a filling of dates and walnuts.  Yum!

    dp1


    Date Pinwheels

    Ingredients for Cookies:

    4 cups flour
    1/2 teaspoon salt
    1/2 teaspoon baking soda
    4 sticks butter
    2 cups brown sugar
    3 eggs, beaten

    Ingredients for Filling:

    2-1/4 cups chopped dates
    1 cup sugar
    1 cup finely chopped walnuts
    1 cup water

    Put first three ingredients in a bowl.  Stir with a whisk to combine.

    In a stand mixer fitted with a paddle, cream butter and brown sugar about 2 minutes.  Add the eggs and mix until well blended.

    Add the dry ingredients in three or four parts to butter mixture.  Mix until a nice ball comes together.

    Divide the dough into three equal balls.  Wrap in plastic wrap and refrigerate at least one hour.

    While dough is chilling, prepare filling by combining dates, sugar, walnuts and water in a saucepan.  Bring to a simmer and cook for 10 minutes.  Remove from heat and cool.

    On a lightly floured board, roll out one ball of cookie doing into a 12″ x 8″ rectangle.

    Spread a third of the date filling evenly on the dough.

    Beginning with the long side, roll the dough up jelly roll style.

    Wrap in plastic wrap and refrigerate overnight.  Repeat with the other two balls of dough.

    With a sharp, thin knife, slice rolls into 1/4″ thick slices.

    Place 1″ apart on a cookie sheet.

    Bake at 375 degrees for 8 – 10 minutes.

    Yield – 144 delicious cookies!

  • 12Dec

    Today we leave Sweden and travel to Scotland for out latest cookie — Scottish Shortbread.

    shy1

    While not Swedish, they are a perfect, buttery cookie to go along with our others.  And, besides, they’re a tradition in Bob’s family.  This is his Scottish grandmother’s recipe and has been passed down through his dad.  And, now, I’m happy to say, his boys are sharing it with their kids, too!

    This simple cookie has only three ingredients — butter, sugar and flour!  The final product can take on many shapes, but this year, we did “coins.”  Start by dividing the dough into fourths and rolling out a log 1-1/2″ to 2″ in diameter.

    sht1

    We like to roll these in colored sugar.

    sht2

    Just sprinkle some on a piece of waxed paper…

    sht3

    …and roll!

    sht4

    You can use lots of different colors.

    sht5

    Roll each log up in waxed paper and refrigerate for a few hours or overnight.  Then, slice them with a sharp knife into little coins.

    sht6

    Bake until they just start to brown.  I overcooked some of mine.  ;-(

    But, we still plan to eat them!

    sht7

    Scottish Shortbread

    Ingredients:
    4 sticks butter
    1 cup sugar
    4 cups flour

    In a stand mixer fitted with a paddle, cream butter and sugar about 2 minutes.

    Add flour in three or four parts to butter mixture.  Mix until a nice ball comes together.

    Knead lightly and divide into four pieces.  Roll each piece into a log approximately 1-1/2″ to 2″ in diameter.

    Roll in colored sugar, wrap in waxed paper and refrigerate two hours or overnight.

    Slice into “coins” and bake at 350 degrees for 10 – 12 minutes.

    Yields 100 cookies.

  • 10Dec
    Categories: musings Comments Off on Seven Kinds of Cookies – Swedish Spritz

    It’s Day Two of Seven Kinds of Cookies–the traditional number of cookies served with coffee in Sweden.  So, what’s more appropriate than Swedish Spritz.

    tea2

    These cookies require a special press or gun.

    spr08

    I got mine in 1974!  Can you tell by the avocado green and big daisy?

    spr09

    It’s a basic, shortbread dough that’s pressed through the gun onto your cookie sheet.  BIG TIP!  Sometimes they don’t want to stick to the cookie sheet.  The best way to improve this is to refrigerate you cookie sheets!  Then, it will work like a dream.

    spr06

    Sprinkle your cookies with colored sugar and bake.

    spr07

    That’s all there is to it.  Enjoy!

    tea3


    Swedish Spritz

    Ingredients:
    4 sticks butter
    1 cup sugar
    2 tsp vanilla or almond extract
    2 eggs
    4-1/2 cups flour
    1 tsp salt

    In a stand mixer fitted with a paddle, cream butter and sugar about 2 minutes.  Add the extract and eggs.  Mix until well blended.

    In a separate bowl, combine flour and salt.  Whisk together to mix, then add in three or four parts to butter mixture.  Mix until a nice ball comes together.

    Fill your cookie press and press out onto a chilled cookie sheet.

    Sprinkle with colored sugar.

    Bake 6-8 minutes in a 400 degree oven.

    Enjoy!

    Yield–a lot!

    tea1

  • 09Dec
    Categories: Everything! Comments: 4

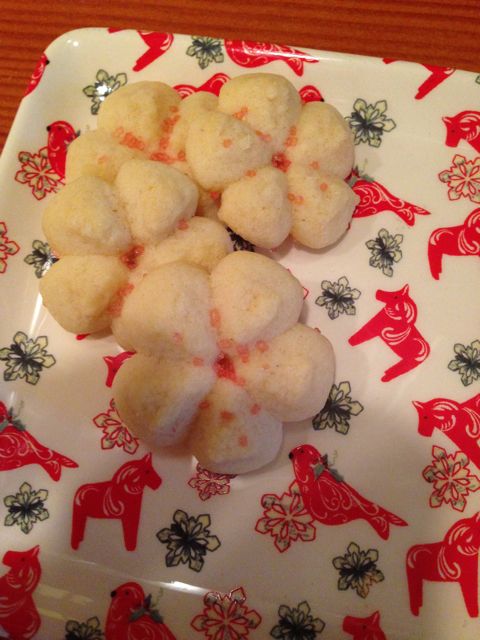
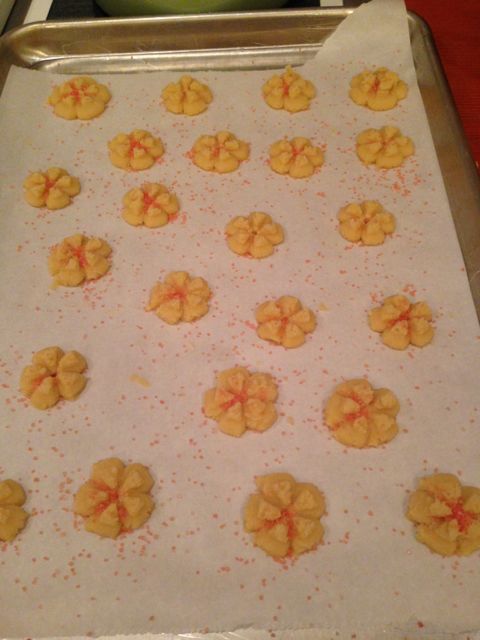
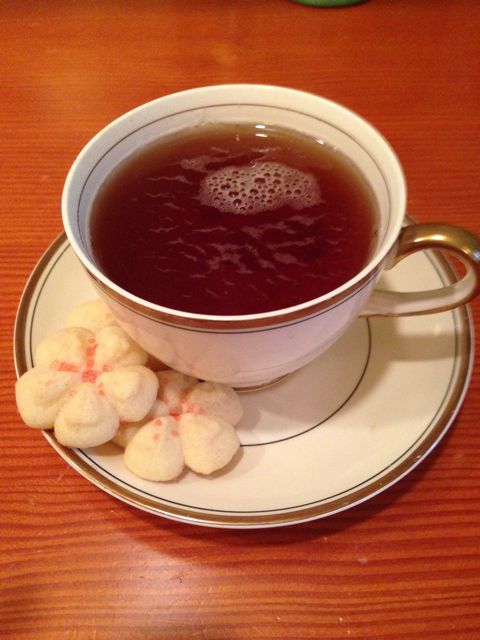
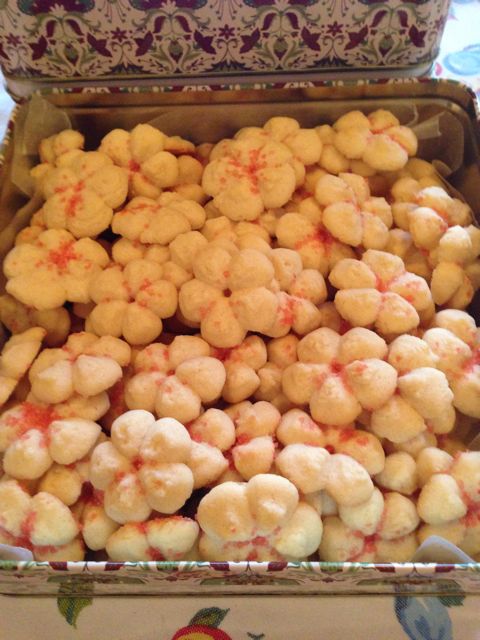
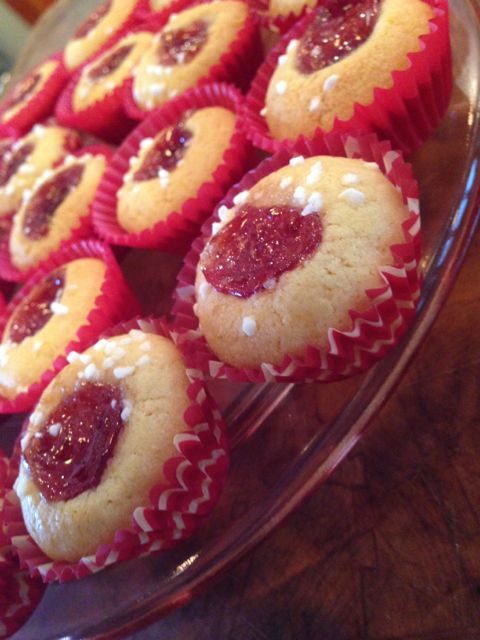
    It is the tradition in Sweden that you offer your guests seven kinds of cookies when you have them over for coffee.  Now that Christmas is coming, cookie baking is in full swing for me, so I thought I would share my seven favorite cookie recipes with you.  First is Hallongrotor – Raspberry Caves.  This is the first year I have made them, and they are my new favorite!

    hal7

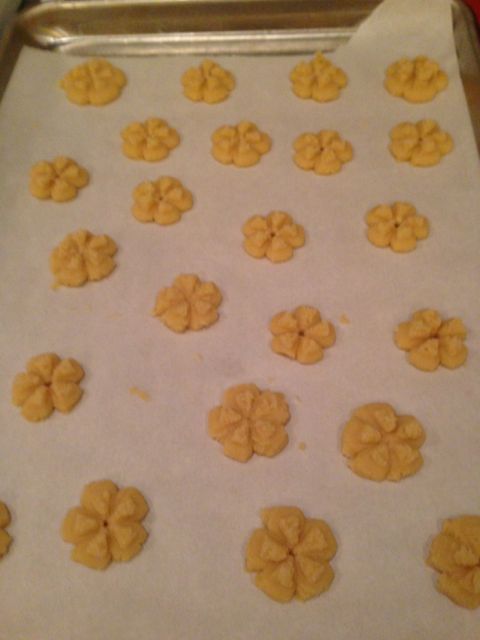
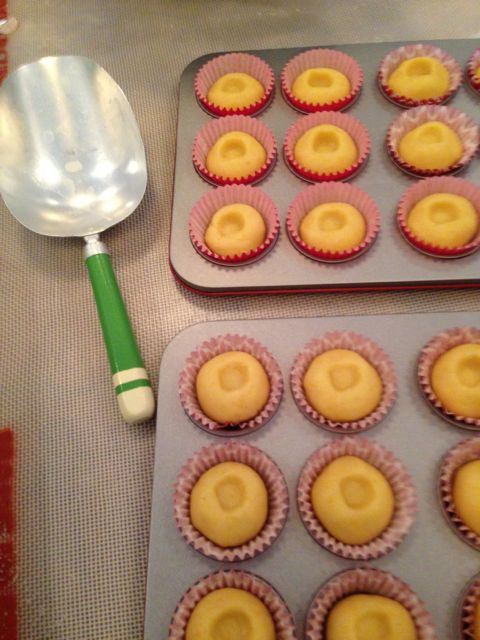
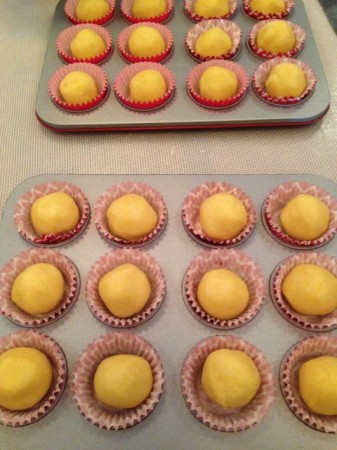
    Once you make the dough, which has fresh orange rind in it, you roll them into little balls and put them into lined mini-muffin tins.

    hal2

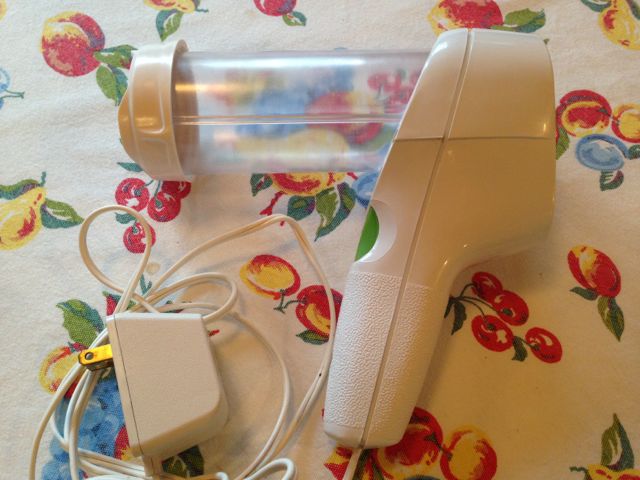
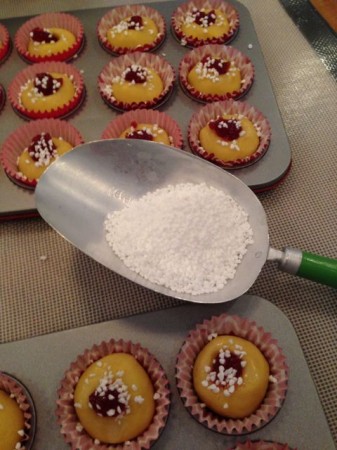
    You need to make a “cave” for the jam.  You could use your finger, but I found the end of this scoop worked great for me.

    hal3

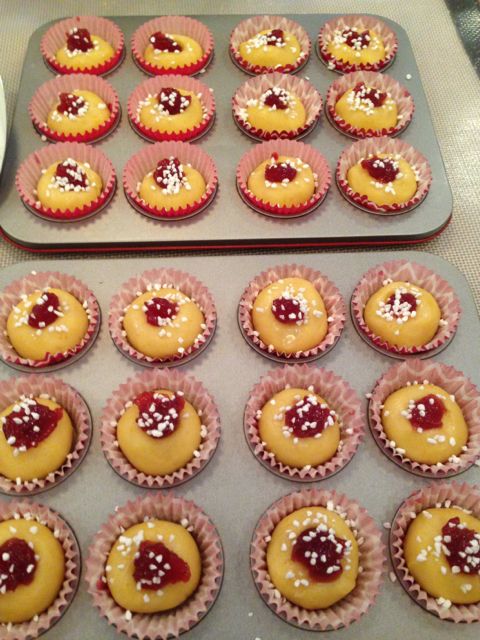
    Then it’s time to add a bit of jam.  Raspberry is traditional, but I suppose you could use whatever you like.  Before you put the jam in, brush the tops with a bit of water.  Then, add the jam and sprinkle with pearl sugar.

    hal4

    I used to bring pearl sugar home from Sweden with me, but now you can find it at Ikea!

    hal5

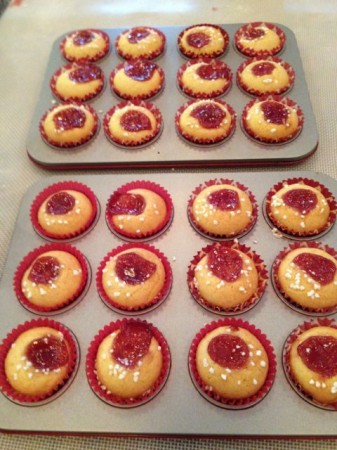
    The jam bubbles up a bit during baking.
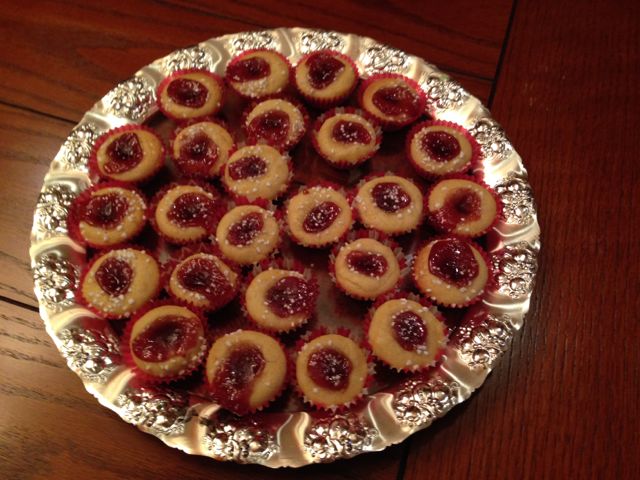
    hal6

    Enjoy!

    hal1

    Hallongrottor – Raspberry Caves

    Ingredients:
    2 sticks butter
    1 cup sugar
    zest of 1 orange
    2 tsp vanilla extract
    1 egg plus 1 egg yolk
    2-1/2 cups flour
    1 tsp baking powder
    1/2 tsp salt
    Pearl sugar
    3/4 cup raspberry jam

    In a stand mixer fitted with a paddle, cream butter and sugar about 2 minutes.  Add orange zest, vanilla, egg and yolk.  Mix until well blended.

    In a separate bowl, combine flour, baking powder and salt.  Whisk together to mix, then add in three or four parts to butter mixture.  Mix until a nice ball comes together.

    Using you hands, shape pieces of dough into balls, about the size of a walnut, and place in lined mini-muffin tins.

    Make an “cave” in the top with your finger or the end of a kitchen utensil, like the scoop I used.

    Brush the top of the cookies with a little water.  I did one pan at a time.

    Fill caves with raspberry jam and sprinkle with pearl sugar.

    Bake 15 minutes at 350 degrees.

    Yield 48


  • 05Dec

    A good friend of my sister’s lost her husband a few years ago.  She still had three of his Hawaiian shirts in her closet, and when she saw a quilt made out of old shirts, she knew she wanted to use the Hawaiian shirts for quilts for her three children.  Since she’s not a quilter, Sally put the SOS out to me.  The timing was perfect, as we were going to a retreat at The Wild Rose.

    Sally brought along the shirts and I started unstitching them.

    haw02

    It was really a bigger job than I thought, but I wanted to make the most of the fabric.  I ended up cutting the shirts into 4-1/2″ squares.  I divided them in thirds and put one stack up on the design wall to balance out the colors.

    haw01

    I wanted the quilts to be similar, but still different, and I wanted the prints to be the “stars” of the show.  So I decided I would use solids and set the blocks together with sashing and cornerstones.

    haw03


    It’s a very simple setting, but I think it served its purpose.

    haw06


    haw05


    I finished them off with a simple stipple.

    haw04

    Each shirt had a pocket, so I stitched one to the back of each quilt.

    haw09

    I was pleased with the way they turned out.

    haw07

    I’m sure the kids will treasure them.

    haw10


    If you want the fabric requirements to make one of your own, they’re below.  This is also a great way to show off fussy cut, novelty prints or even photo transfer blocks.

    Hawaiian Shirt Quilt

    Materials

    1 Hawaiian shirt (I got enough squares from each shirt to do one quilt, but I mixed them up for interest)

    7/8 yard cornerstones and inner border fabric

    2-1/4 yards sashing and outer border

    4 yards backing

    From the Hawaiian shirts cut 80) 4-1/2″ squares

    From the cornerstone/inner border fabric, cut 10) 2-1/2″ strips.  Cut four strips into 2-1/2″ squares for cornerstones. Use remaining squares for inner border.

    From the sashing/outer border fabric cut 18) 2-1/2″ strips; crosscut into 142) 4-1/2″ x 2-1/2″ rectangles for the sashing.  Then cut 7) 4-1/2″ strips for the border

    Cut the backing into two equal pieces.

    I pulled the backing around to the front of the quilts and machine stitched for the binding.